Evening All,
My thanks to all of you who have dropped by and left kind and encouraging comments - I really appreciate them all.
I have started on the fun bit, ie. putting in some of the struts ready to mount the top wing. I learned a long time ago that trying to fit upper wings on to multiple struts requires a bit of planning, and that the wrong way to do it is to try to fix all of the struts into one wing and then attach the other: that is the direct road to a mess or worse. Instead I try to attach the outermost pairs of struts on the wings and if the wing is big, (as in this case), one or two inner ones. This way the individual struts can be easily aligned to fit their respective holes if necessary, and sufficient support is provided to make a strong structure which can be gently handled while the remaining struts are inserted one at a time. It also reduces mess, (ie glue all over wing surfaces), damaged paintwork, bad language and the risk of high blood pressure. In other words it works with few, if any, problems....
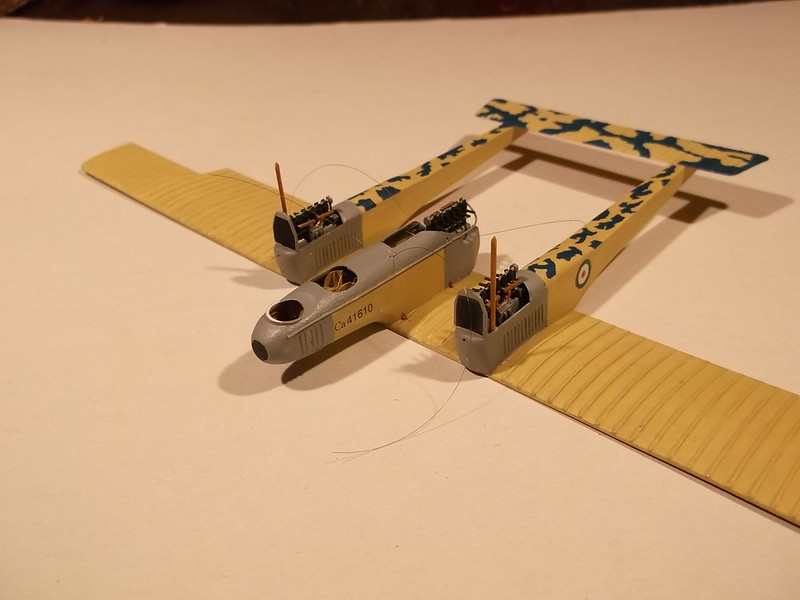
I am going to rig this monster with clear thread because there are too many attachment points in difficult places for the rigging for me to be able to use rolled copper wire. Thread will also have the advantage of strengthening the completed structure. However before I started to add the struts I put on the pipe from the nacelle engine to the nose radiator on the port (left) side of the fuselage: this was a piece of 30 thou rod bent to shape and attached to the top rear of the engine block. Now I could drill out the holes in the fuselage and insert the threads for the rigging of the cabane struts and the inner wing bays. Next I dry fitted the forward innermost bay struts which were inserted within the engine boom just behind the radiators:


Having decided that they were in the correct position a dab of glue on one end and a rapid insertion into place followed. Next the four outermost wing struts were glued to the lower wing and the assembly inverted and gently lowered on to the underside of the top wing. A rapid assembly jig ensured that the two wings were correctly aligned and the model supported while the struts dried out overnight:


In the morning the jig could be carefully dismantled and the assembly turned back to a normal upright position ready for the addition of the remaining struts. That procedure will follow in due course and the results shown on a later post, but for now this is how the model stands:


If you have been, thanks for looking.
Stephen.