Hi Bo,
forgive me if you have answered elsewhere: with your excellent renders, such as the D.V's undercarriage, how do you get the texturing/patina to look so great?
Is it based on photo's of your models or just another awesome skill of yours??
Thanks in advance,
Andrew
Hey Andrew!
An awesome skill... or merely something I know how to do, depending on your perspective

I'm afraid this gets into how the sausage is made... have a seat.
The model starts out as a mesh:

We can view it with shading and apply colors to the individual parts in the modeling tool, but the magic happens later:

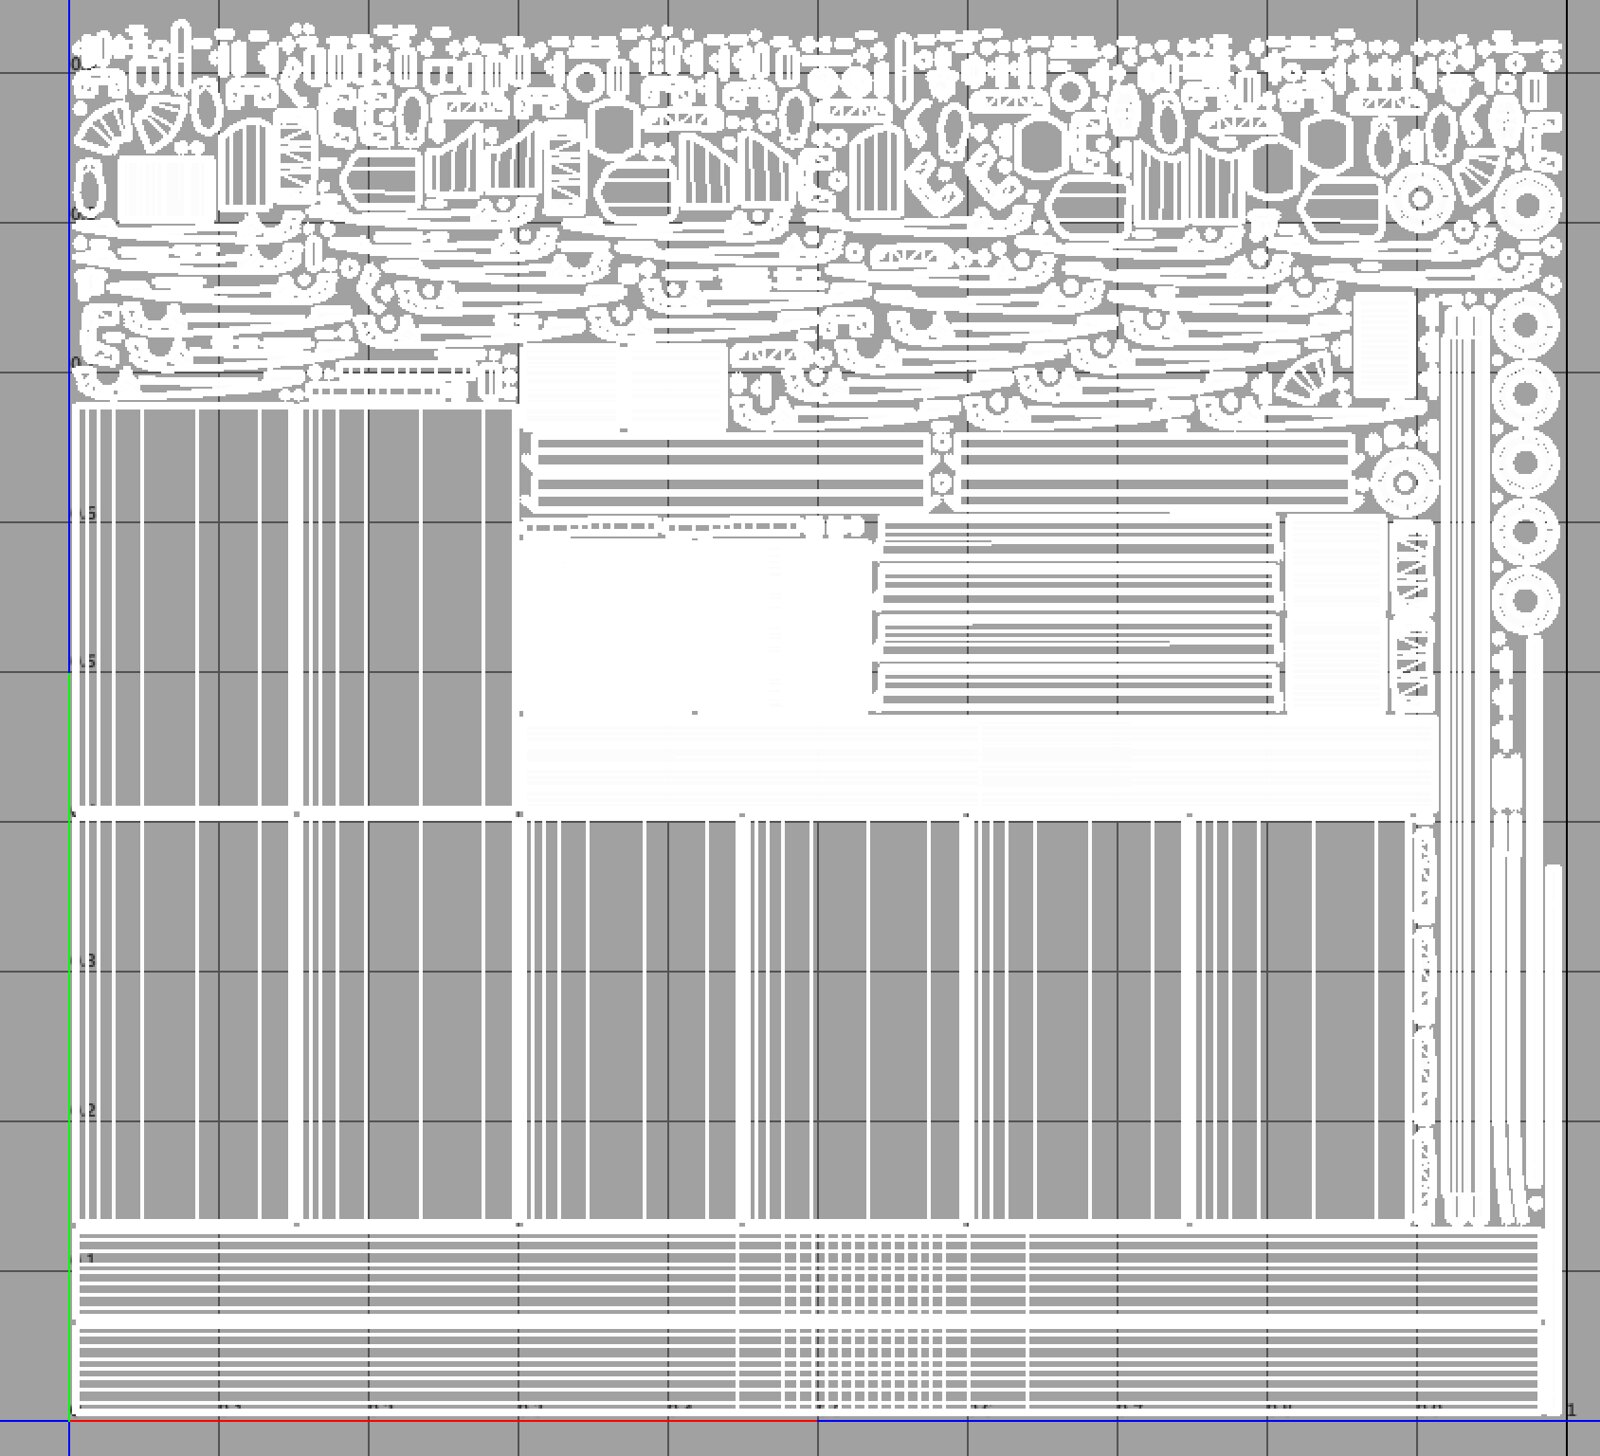
First, we have to map out all the faces of the mesh onto a flat "texture space." This is called "UV mapping." This is the least fun step, but also highly critical to get nice results. This is a map of everything in the model pictured above, minus the wheels and tires, which were done separately:
Now we import the model into a tool called Substance Painter. This is where the magic happens. One of the first steps is generating Ambient Occlusion -- the shadows that occur in nooks and crannies. Think of it as akin to a pin wash in 'real' modeling. With this step it's already starting to look convincing...

Next, we apply a "steel" texture to the entire model. This is a recipe that comes out of a bottle, so to speak. The recipe is made up of several layers that work to together to make a convincing looking metallic material.

Now comes the "albatros paint" layer. This is a recipe that I've come up with, based on stuff that others before me have created -- it's a multi layer concoction that starts with a uniform color base layer, and adds various layers of imperfections, grunge and chipping, all generated based on the geometry of the model. In short, it's kind of magic:

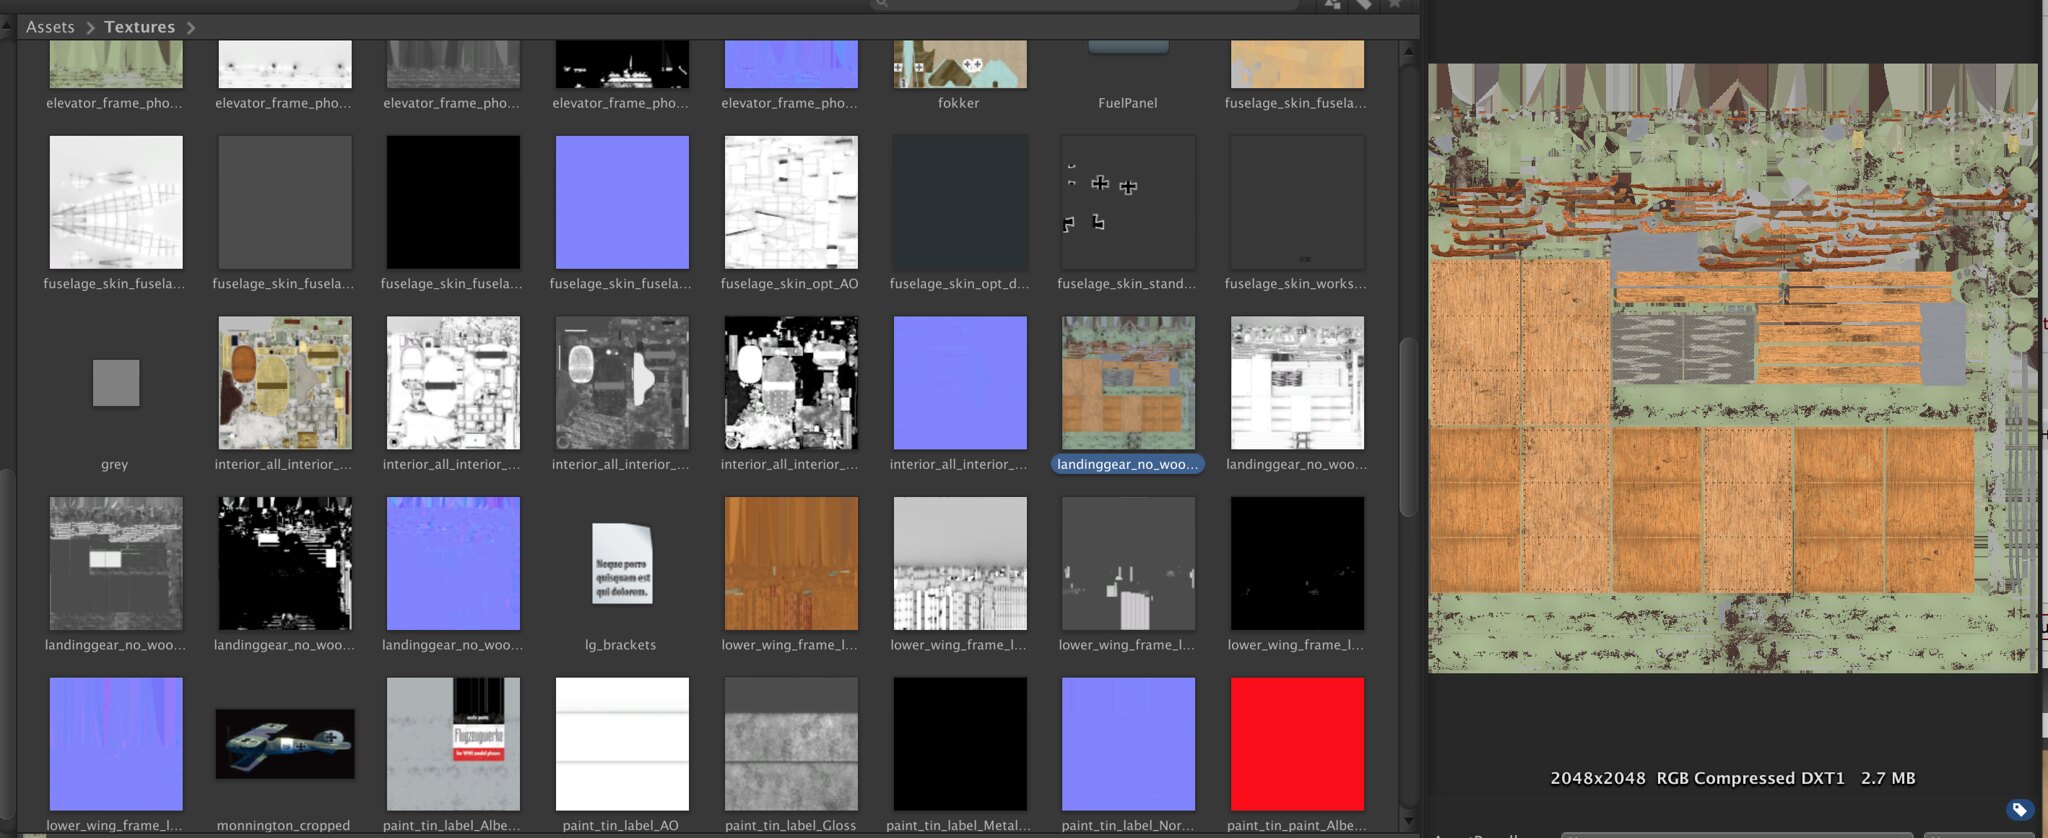
Wood and other materials are created in a similar way. When it's all done, Substance spits out a bunch of "maps" -- 2D image files -- with different properties of the materials each going into a separate map all laid out according to the UV map created earlier. For instance, there is a map for "glossiness" which is a black and white image, with black standing for full-on shiny gloss, and white completely matte, with all the shades of grey representing the continuum in between. These maps are imported into the project in the game engine, where the model will ultimately be rendered in real time. This picture shows a bunch of maps of all kinds in the game engine, with the "albedo" map -- the "base color" if you like, enlarged in the inset. The blue maps are "normal" maps -- these affect the apparent geometry and make things like paint bubbles and scratches appear to have real depth by altering the way light bounces off the model at that particular point. The gray scale maps are things like glossiness, metallic, and ambient occlusion...:
All these maps are recombined into a "material" in the game engine. When the resulting materialis applied to the sample sphere, it looks like nonsense:

but when it's applied to the actual subject... viola!


