Author Topic: Junkers D.1 + Aviattic Trailer + Diorama  (Read 12470 times)

Offline Gisbod

  • Hero Member
  • *****
  • Posts: 2438
Junkers D.1 + Aviattic Trailer + Diorama
« on: June 24, 2018, 08:06:37 PM »
Junkers D.1


Hi all,

Apologies for the lack of posting lately, but I have been looking in on everyone’s lovely work.

I had, perhaps, over dosed on Wingnuts, but having completed a couple of other builds, I was drawn back to the lovely new Junkers...

It has morphed from what was to be a quick build into, with the detached wings option, the idea of having it mounted onto the back of a trailer. From there the idea of a modest diorama spawned. It will be written up (hopefully) for ‘Scale Aviation Modeller’.

Remembering the lovely RFC trailer release from Aviattic, I contacted Richard and have acquired the said trailer along with a box of Aviattic ‘odds and ends’ to contribute towards the litter of a captured German airfield at the end of the war. There’s a couple of fuselages, fuel cart, propellers, engine parts to add to the mix. I still don’t have a defined vision of the finished article yet, but will have a play with what I’ve got when it arrives and see where it takes me...

This is pretty ambitious for me! Usually, the minute I finish a kit, it gets relegated to a box in the garage never to be seen again. But I think having the trailer as a separate kit should push me along with some enthusiasm.

Figures may be an option, depends if they’re painted well enough. I think figure painting is a different skill set to modelling and I don’t want to spoil the effect if they’re not up to scratch! But I’ll give it a go regardless.

So my basic plan at the moment is to have a backdrop of aircraft parts, perhaps a hangar wall if I can source/ make one and the Junkers dissected and piled onto the trailer. Both wings will be off, the tail cut off and be, generally, stripped back. I think I may do the Junkers in an aluminium, bare metal finish, maybe not even with markings.

So that’s the mission!

To help me I’ve got a couple of sets of engine aftermarket from Taurus - D3218 Bosch spark plugs and D3209 Valves, lifters and timing gear.

And from the ever amazing products from Gaspatch - a set of the new to market Palmer spoked wheels (there’s a photo of one in a hangar with spoked wheels and bare rims... I may try and replicate this). I’m hoping I can incorporate these despite being rather English! And the jaw droppingly excellent set of resin Spandau MGs 08/15s. I haven’t decided yet if they are to be mounted on the aircraft or alongside on the trailer.

Many thanks to Richard from Aviattic who’s helping me and given me a great deal of inspiration already!

I just hope I can do it justice.

I have, however, made a start and, it goes without saying nowadays, the kit is beyond beautifully moulded and presented. The one thing you do notice is the lower parts count to a ‘normal’ Wingnuts model. I think this kit is aimed at getting non WW1 modellers to take a dip into Wingnut’s World without the fear of rigging and a top wing to glue on with struts poking everywhere! In fact you can make it without any wings at all!

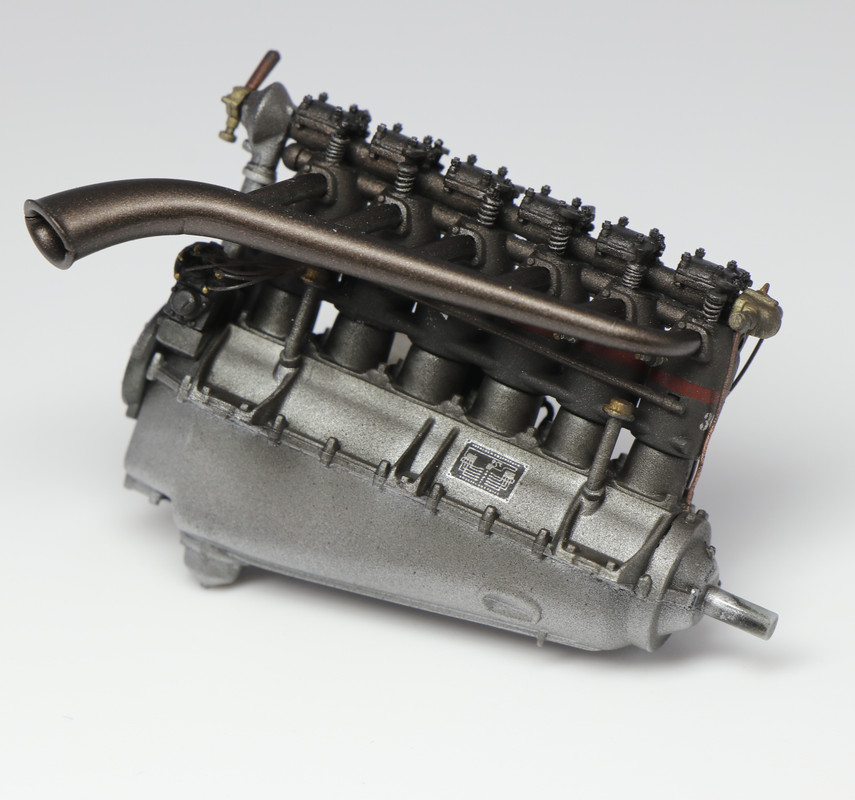
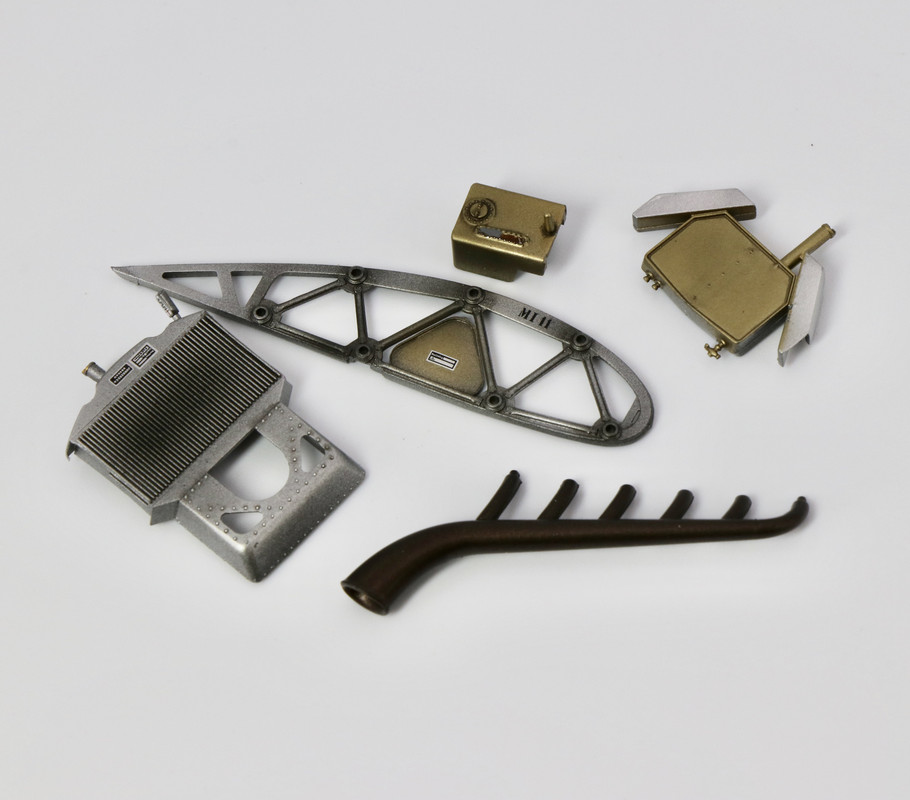
I’ve made the engine and replaced the said parts with Taurus, added some ignition wiring and a few extra copper pipes from photographs of a Mercedes D.IIIa. The parts were sprayed with MRP fine black primer (new to me and sprays beautifully!) and after a quick burst of red (which was then masked) to represent the rings - decal option here if you’d rather, painted with a mix of Alclad metallic paints, ending up with a brown, oily filter to blend it all together. The cowlings will be off so all of this will be on display.

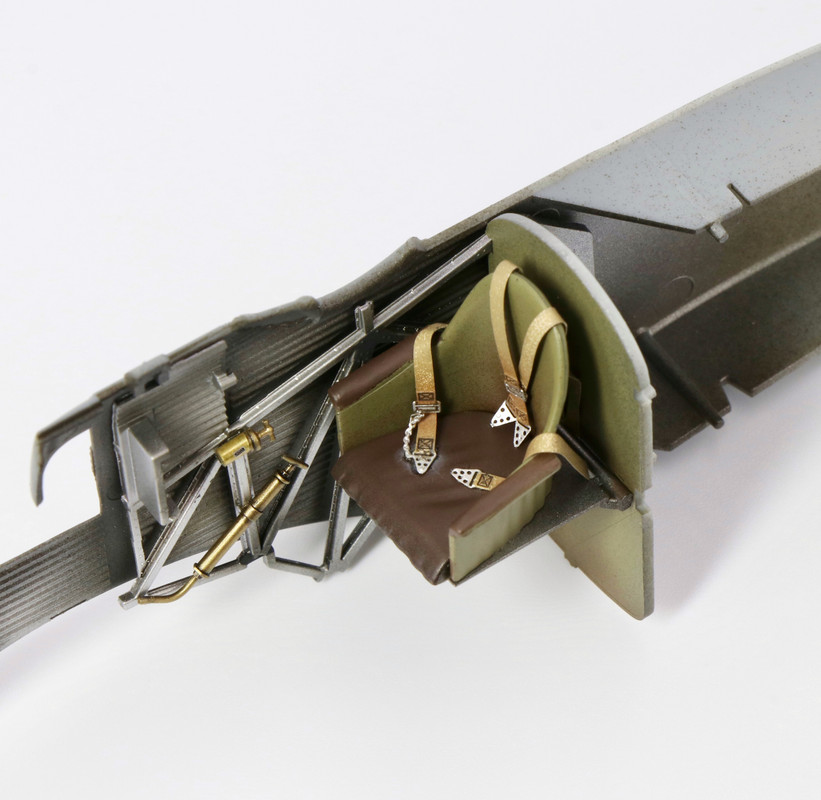
The cockpit is a Gem! Very cleverly represented framework which all clicks together. I would, however, exercise caution here as the engine bearers arrangement takes a bit to of positioning to get right. A few dry runs here is time well spent! I opted to use the kit seat belts which scrub up nicely under a lick of Vallejo ‘Hemp’ and a quick wash into the detail to bring out the stitching. I also used the kit decals for the instruments followed up by my usual method of a blob of clear epoxy over the dials to ‘glaze’ them. Wingnuts provide the photo etch handles on the instrument panel, and these give a very satisfying 3D look to the office.

I’d be very grateful and interested in any feedback/ suggestions for the overall build/ plan! I’m most certainly not a diorama specialist, in fact I’ve never really done one! So I may need some help & pointers in that direction.


Many thanks for looking in.


Guy


A few pictures to be going on with:


.
“Oh! I have slipped the surly bonds of Earth -
Put out my hand, and touched the face of God.”

P.O. John Gillespie Magee 1941

Offline Juan

  • Hero Member
  • *****
  • Posts: 2457
  • All gave some, some gave all.
Re: Junkers D.1 + Aviattic Trailer + Diorama
« Reply #1 on: June 24, 2018, 08:42:43 PM »
Great start Guy, looking forward to your progress.

Offline GazzaS

  • Hero Member
  • *****
  • Posts: 1193
Re: Junkers D.1 + Aviattic Trailer + Diorama
« Reply #2 on: June 24, 2018, 08:51:56 PM »
Nice!  Can't wait to see more.

Gaz
There are only two states to be in:  Queensland and blotto.

Offline aliluke

  • Hero Member
  • *****
  • Posts: 510
Re: Junkers D.1 + Aviattic Trailer + Diorama
« Reply #3 on: June 24, 2018, 09:06:36 PM »
I'm blown away by how good that looks to date. I've no idea how you do what you do - but it looks totally amazing.

Sorry - please don't put it on a trailer - this thing has to fly!  ::)

Cheers
Alistair
It ain't a hobby if you have to hurry.

Offline xmald

  • Hero Member
  • *****
  • Posts: 1093
Re: Junkers D.1 + Aviattic Trailer + Diorama
« Reply #4 on: June 24, 2018, 10:57:19 PM »
It looks superb! I can`t wait to start mine. Keep the updates coming mate!
Best regards
Filip

Offline lcarroll

  • Administrator
  • Hero Member
  • ******
  • Posts: 8565
Re: Junkers D.1 + Aviattic Trailer + Diorama
« Reply #5 on: June 24, 2018, 11:21:28 PM »
Guy,
    What superb detail work, and so incredibly clean! This is a very impressive start to what promises to be an absolutely stunning Build, and I'll be following closely.
    I've only done one Diorama, a very simple display of an HB.12 on a base in a maintenance setting and had no idea where I was going with it until I started developing a scene and just kept adding to it as it developed. I think your hangar wall idea will provide the "seed" you need and you will start to populate and build into the scene from there. I found that an assortment of tools and components incorporated into the scene added a lot of atmosphere to the setting, and there's plenty of after market sources for such items. Your Aviattic trailer and the various additions such as removed Spandaus and wire spoked wheels will all enforce the overall theme or "message" of the display.
     Good luck, an inspired project that I'll enjoy following as you bring it all together!
Cheers,
Lance

Offline gbrivio

  • Hero Member
  • *****
  • Posts: 1682
Re: Junkers D.1 + Aviattic Trailer + Diorama
« Reply #6 on: June 25, 2018, 01:53:41 AM »
Excellent start to your project. Wish you good luck and follow.
Ciao
Giuseppe

Offline krow113

  • Sr. Member
  • ****
  • Posts: 458
Re: Junkers D.1 + Aviattic Trailer + Diorama
« Reply #7 on: June 25, 2018, 02:24:58 AM »
Very nice.
Engine work is stellar.

Offline Gisbod

  • Hero Member
  • *****
  • Posts: 2438
Re: Junkers D.1 + Aviattic Trailer + Diorama
« Reply #8 on: June 25, 2018, 04:42:30 AM »
Thanks chaps!

Lance... yep, I’m just concerned with it looking like a pile of unconnected bits!

I want some definite composition- that tells a story perhaps?

Guy

Ps any ready made hangar walls/ wooden perhaps? Maybe a window or two?
“Oh! I have slipped the surly bonds of Earth -
Put out my hand, and touched the face of God.”

P.O. John Gillespie Magee 1941

Offline RAGIII

  • Hero Member
  • *****
  • Posts: 18944
Re: Junkers D.1 + Aviattic Trailer + Diorama
« Reply #9 on: June 25, 2018, 05:53:56 AM »
As the others have said, crisp, clean, and beautifully detailed! I am looking forward to seeing your Diorama develop !!
RAGIII
"A man has to know his limitations": Harry Callahan

"Don't slop it on" Lynda Geisler

Offline Manni

  • Hero Member
  • *****
  • Posts: 1768
    • Der Militärmodellbauer
Re: Junkers D.1 + Aviattic Trailer + Diorama
« Reply #10 on: June 25, 2018, 03:42:25 PM »
Yes! That is a really good start. Lots of promising additions and ideas. I know this will be great.
Bye,
Manni
"Ich hab' da mal was vorbereitet.": Jean Pütz
"Warum noch mehr Bausätze?!?": meine Frau

Offline Dave in Dubai

  • Hero Member
  • *****
  • Posts: 520
  • Beyond the blue horizon
Re: Junkers D.1 + Aviattic Trailer + Diorama
« Reply #11 on: June 25, 2018, 11:17:59 PM »
Hi Guy,

Nice work there....you can maybe source some wndows and odds and ends from the miniart series of building kits?

For hanger walls probably not too difficult to scratch build as per the Michael Scarborough school of modelling.

FWIW why not do the diorama of the machine in the hanger with the tyreless spoked wheels and the wings propped up behind as shown in the instruction booklet?

Was toying with the same idea myself.

Enjoy the build.

Dave

Offline Gisbod

  • Hero Member
  • *****
  • Posts: 2438
Re: Junkers D.1 + Aviattic Trailer + Diorama
« Reply #12 on: June 25, 2018, 11:33:24 PM »
Thanks again  :)

Dave, yep, the mini art is a good idea! I’ll have a look there.

I just like the idea of it packed onto the trailer.

Another question I meant to ask was about the tie down straps you see in the period photos? Not rope - but straps. Any thoughts on what I could use there?

Guy
“Oh! I have slipped the surly bonds of Earth -
Put out my hand, and touched the face of God.”

P.O. John Gillespie Magee 1941

Offline Gisbod

  • Hero Member
  • *****
  • Posts: 2438
Re: Junkers D.1 + Aviattic Trailer + Diorama
« Reply #13 on: June 26, 2018, 03:47:49 AM »

Evening/ morning etc,

So onto the fuselage. As per usual, the Wingnut kits have such a perfect fit that there is absolutely no tolerance of paint, or anything else for that matter, on the mating surfaces... And yes, I had a slight gap on the lower fuselage join. Totally self induced. Designed by robots, built by ham fisted Modeller! There are just a lot of points of contact with the framework and the inner fuselage, and I would take more care to make sure everything was lined up and in place and suitably sanded of any offending imperfections if I was doing it again. No harm done though, I can’t really see it with a sliver of putty and under a coat of paint.

Painting wise, it couldn’t be easier, a base layer of the already tested MRP fine black primer then an overall coat of Alclad Aluminium. Followed up by some shading here and there with some differing shades. I’m going for a fairly dilapidated look.

I think I will leave off any decalling as I rather think the factory look will enhance the diorama scene envisaged.

What do you reckon?

Guy


Ps I can’t believe how quickly this has come together - what with a simple paint scheme, no decals, no rigging... it’s a breeze of a build!

Pps I might make the wing roots a bit more complex? They look a bit ‘simple’ up against the fuselage join?


“Oh! I have slipped the surly bonds of Earth -
Put out my hand, and touched the face of God.”

P.O. John Gillespie Magee 1941

Bughunter

  • Guest
Re: Junkers D.1 + Aviattic Trailer + Diorama
« Reply #14 on: June 26, 2018, 06:32:32 AM »
Wow - such a clean build together with nice pictures shows a real plane here! It looks so realistic :o
This seems to be a fantastic kit too.

Cheers,
Frank