Dear fellows, dear Gregory, here is my latest news from the Italian front... Gregory, you'll find also my preparation steps for the "chin" replacement...
:-)
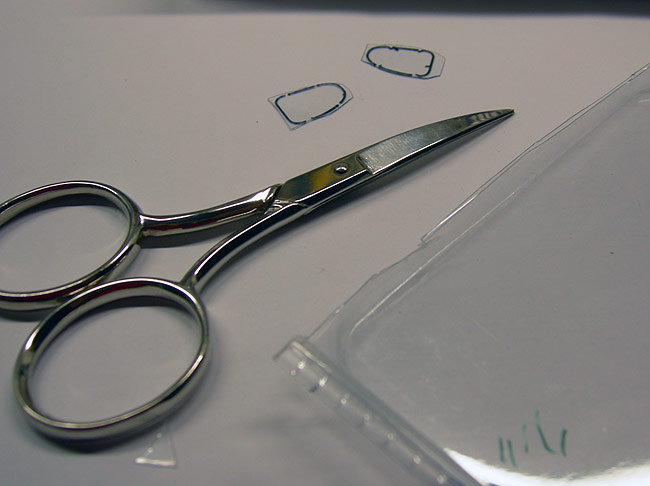
First of all I marked the limits of the areas to remove... not to go beyond and make the holes too big
then I used a conic milling tool so that the hole walls will slope inwards and the brass sheet will have some material supprting it.
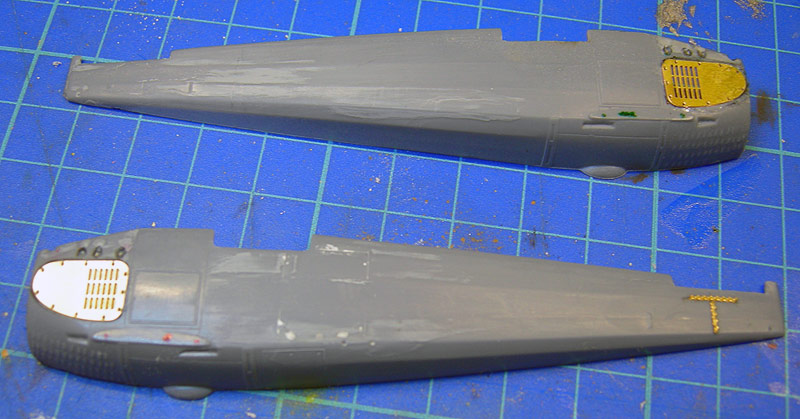
Here are the two little fishes with their golden cheeks...
I painted the inside
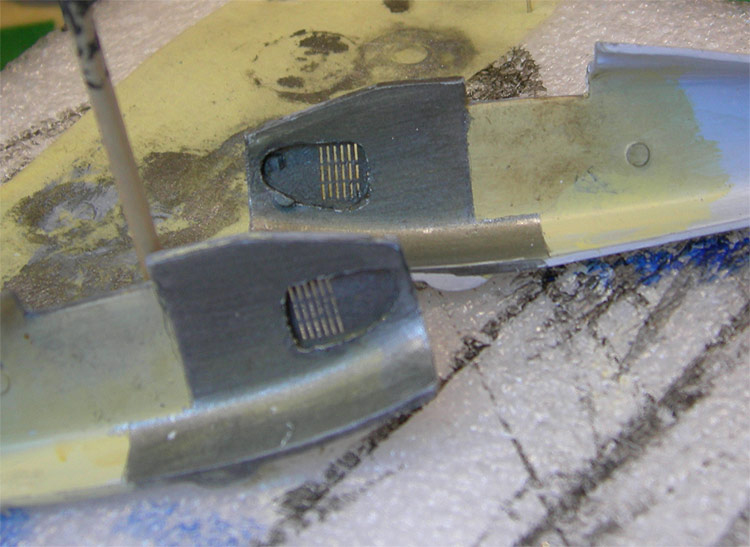
Then I closed the fuselage with paper tape and looked through the vents, I could see through to the other side, as if there was nothing in the engine cowling...
I didn't like that, therefore I imagined even to build from scratch a Hispano Suiza 180, I also looked for one in 48th on the web, then I recovered my senses and decided to proceed in a different way:
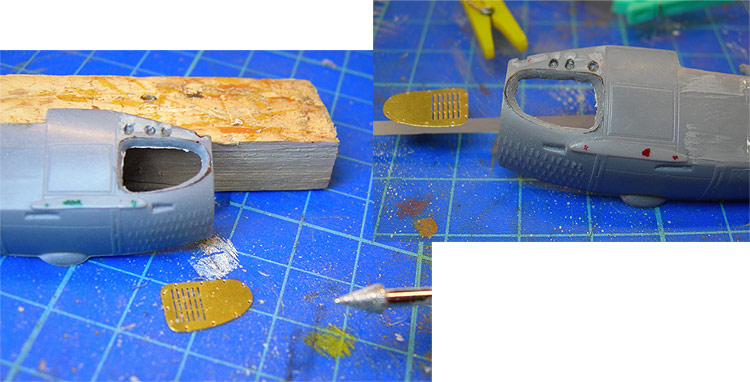
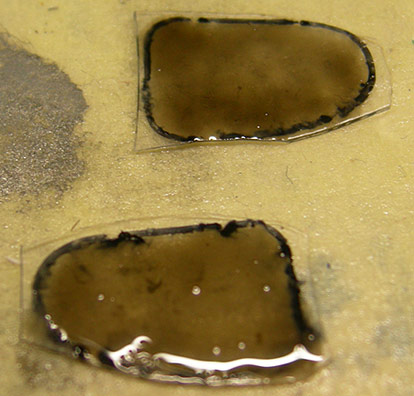
I traced on an acetate sheet the shape of the panels and roughly cut them
Then I painted them with a thick coat of Tamiya Smoke, and here are my SPAD's Bausch-&-Lomb
I glued the sunglasses inside the cheeks
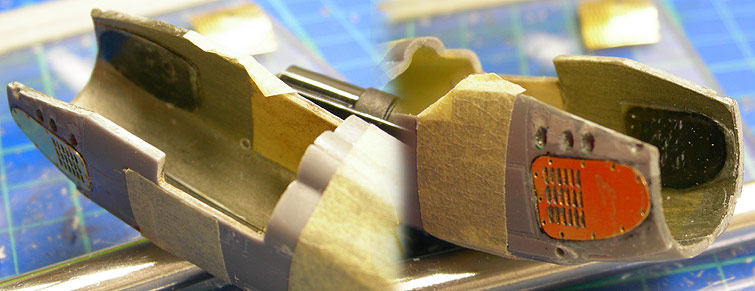
At the end I realized that probably I had to glue these shades after spraying the primer... The white paint could whiten the black lenses of her Ray-Bans
:-O
As I will remove the shaded lenses there is the possibility for a different solution, does someone have any alternative better idea about how to avoid that sensation of "empty" ?
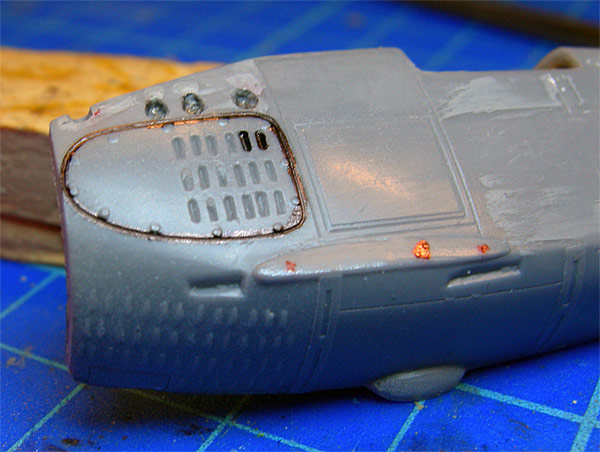
Now the most difficult part of the intervention: our patient's chin.
After cutting and curving the brass piece I mark the part to work on.
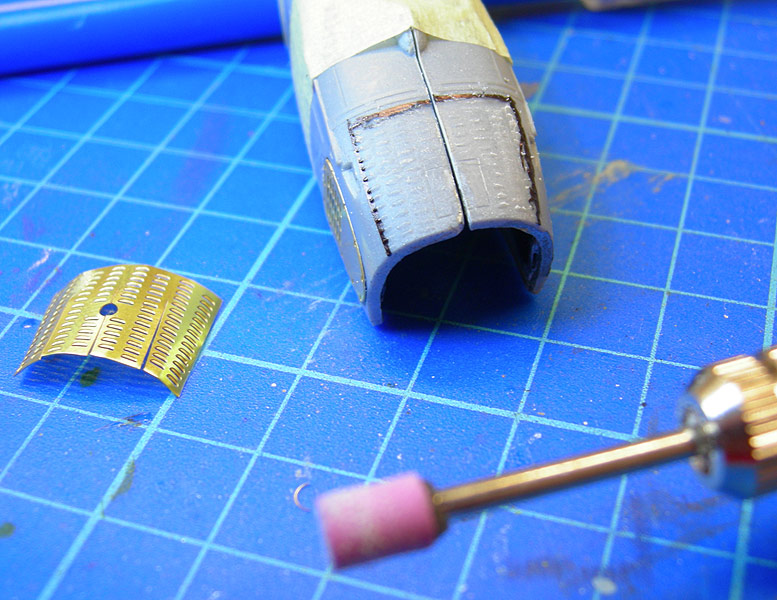
You can see in the foreground one of the 3 milling tools I used so far for this operation, which is not yet completed...
My idea is to plane the horrible protuberances and so dig a place for the panel without removing completely the plastic
This is the result so far:
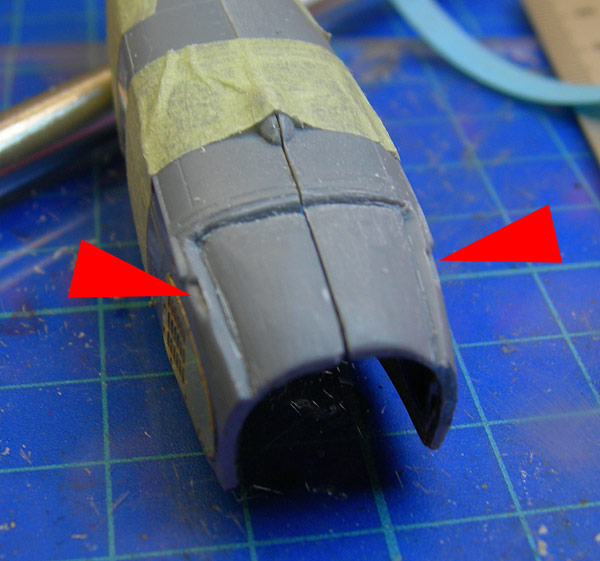
The red arrows point the holes where the undercarriage struts will be fixed, so I cannot cut any further, but the brass piece does not fit.
I also trimmed the brass piece dangerously near to the louvres and still it does not fit.
I need to think to a solution...
Any idea dear surgeon colleagues???
Waiting for some good thought I suspended the interventione and worked on something easier:
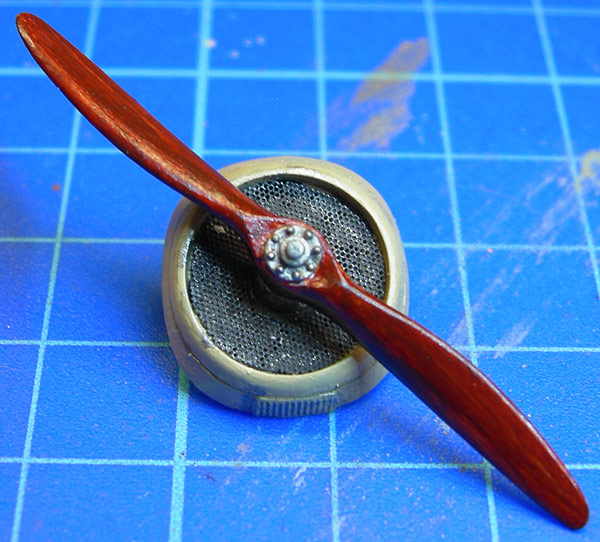
Propeller: before painting it I smoothen a bit the tips which were too "pointed" for an Eclair.
I also reproduced the Eclair logo to eventually put it on the blades (the file is in vectorial format and it's available for anyone can be interested)
The original logo is transparent where you see the brown areas, the problem is that the propeller is white and the writings are yhellow (gold for precision's sake) therefore impossible to print on a transparent decal paper sheet, I am not sure I will use it.
Next step is to drill a couple of holes into each of the lower wings to insert copper rods that will fix them to the fuselage.
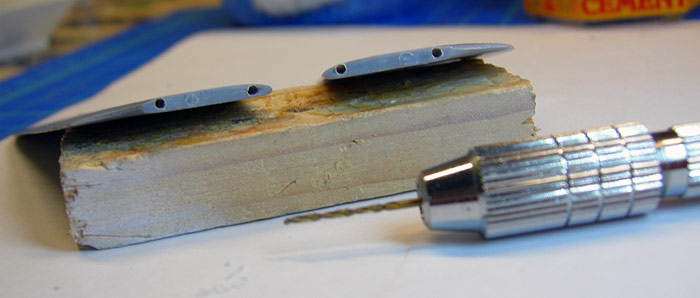
I also drilled the corresponding holes in the fuselage.
Now I have some day off from work and will try to get farther off on this work!
Ciao
Antonio

