Junkers D.1
Hi all,
Apologies for the lack of posting lately, but I have been looking in on everyones lovely work.
I had, perhaps, over dosed on Wingnuts, but having completed a couple of other builds, I was drawn back to the lovely new Junkers...
It has morphed from what was to be a quick build into, with the detached wings option, the idea of having it mounted onto the back of a trailer. From there the idea of a modest diorama spawned. It will be written up (hopefully) for Scale Aviation Modeller.
Remembering the lovely RFC trailer release from Aviattic, I contacted Richard and have acquired the said trailer along with a box of Aviattic odds and ends to contribute towards the litter of a captured German airfield at the end of the war. Theres a couple of fuselages, fuel cart, propellers, engine parts to add to the mix. I still dont have a defined vision of the finished article yet, but will have a play with what Ive got when it arrives and see where it takes me...
This is pretty ambitious for me! Usually, the minute I finish a kit, it gets relegated to a box in the garage never to be seen again. But I think having the trailer as a separate kit should push me along with some enthusiasm.
Figures may be an option, depends if theyre painted well enough. I think figure painting is a different skill set to modelling and I dont want to spoil the effect if theyre not up to scratch! But Ill give it a go regardless.
So my basic plan at the moment is to have a backdrop of aircraft parts, perhaps a hangar wall if I can source/ make one and the Junkers dissected and piled onto the trailer. Both wings will be off, the tail cut off and be, generally, stripped back. I think I may do the Junkers in an aluminium, bare metal finish, maybe not even with markings.
So thats the mission!
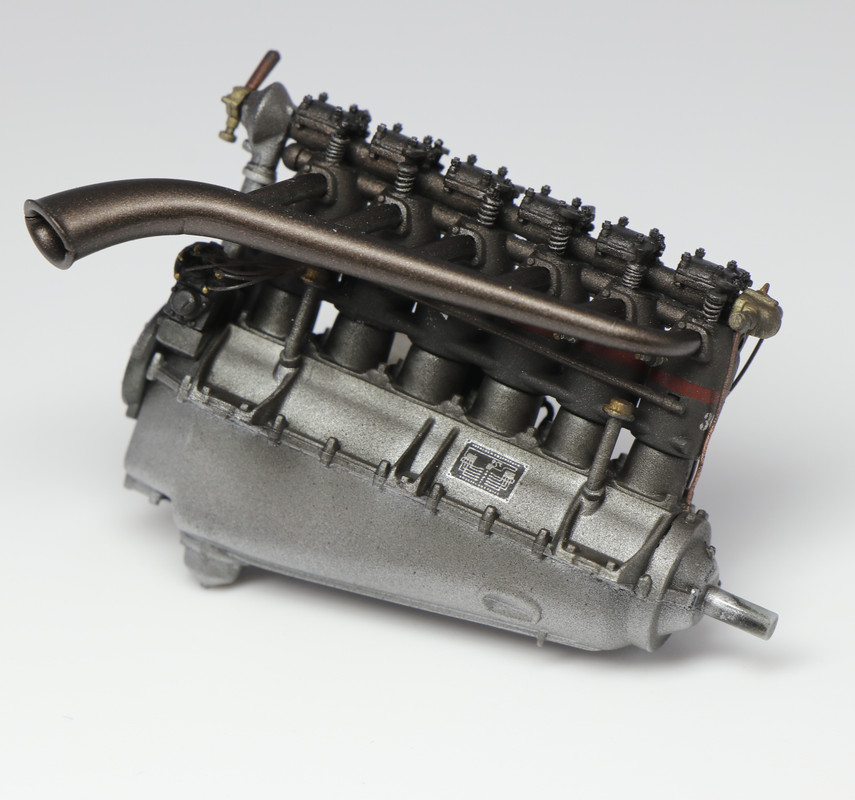
To help me Ive got a couple of sets of engine aftermarket from Taurus - D3218 Bosch spark plugs and D3209 Valves, lifters and timing gear.
And from the ever amazing products from Gaspatch - a set of the new to market Palmer spoked wheels (theres a photo of one in a hangar with spoked wheels and bare rims... I may try and replicate this). Im hoping I can incorporate these despite being rather English! And the jaw droppingly excellent set of resin Spandau MGs 08/15s. I havent decided yet if they are to be mounted on the aircraft or alongside on the trailer.
Many thanks to Richard from Aviattic whos helping me and given me a great deal of inspiration already!
I just hope I can do it justice.
I have, however, made a start and, it goes without saying nowadays, the kit is beyond beautifully moulded and presented. The one thing you do notice is the lower parts count to a normal Wingnuts model. I think this kit is aimed at getting non WW1 modellers to take a dip into Wingnuts World without the fear of rigging and a top wing to glue on with struts poking everywhere! In fact you can make it without any wings at all!
Ive made the engine and replaced the said parts with Taurus, added some ignition wiring and a few extra copper pipes from photographs of a Mercedes D.IIIa. The parts were sprayed with MRP fine black primer (new to me and sprays beautifully!) and after a quick burst of red (which was then masked) to represent the rings - decal option here if youd rather, painted with a mix of Alclad metallic paints, ending up with a brown, oily filter to blend it all together. The cowlings will be off so all of this will be on display.
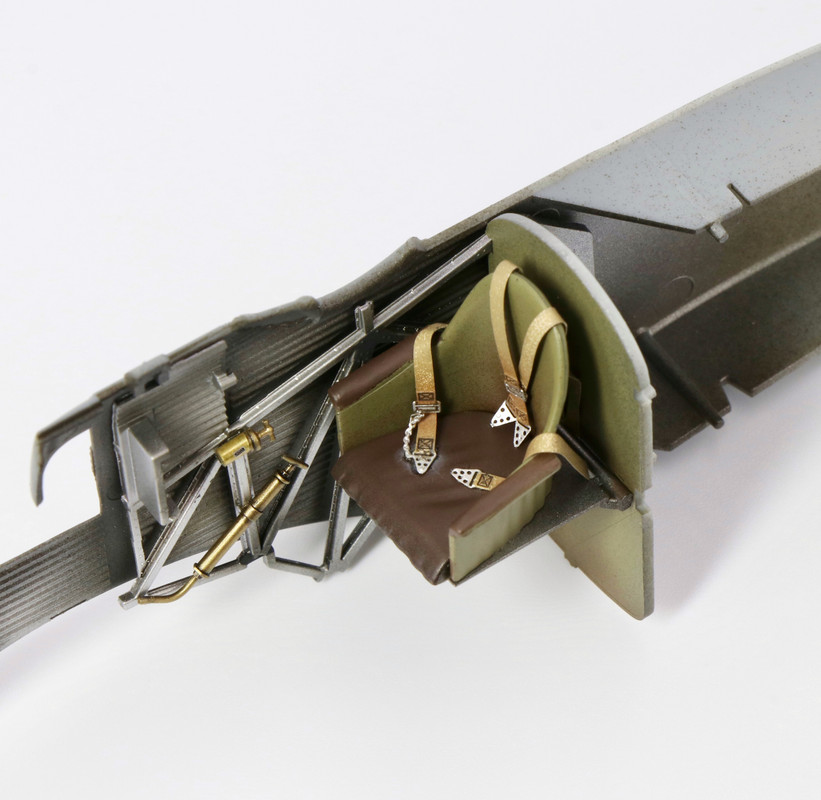
The cockpit is a Gem! Very cleverly represented framework which all clicks together. I would, however, exercise caution here as the engine bearers arrangement takes a bit to of positioning to get right. A few dry runs here is time well spent! I opted to use the kit seat belts which scrub up nicely under a lick of Vallejo Hemp and a quick wash into the detail to bring out the stitching. I also used the kit decals for the instruments followed up by my usual method of a blob of clear epoxy over the dials to glaze them. Wingnuts provide the photo etch handles on the instrument panel, and these give a very satisfying 3D look to the office.
Id be very grateful and interested in any feedback/ suggestions for the overall build/ plan! Im most certainly not a diorama specialist, in fact Ive never really done one! So I may need some help & pointers in that direction.
Many thanks for looking in.
Guy
A few pictures to be going on with:


.

