Author Topic: Scratch build partial stripdown Vickers FB 5 Gunbus 1/32 scale: a tribute to Des  (Read 28055 times)

Offline Ryan

  • Hero Member
  • *****
  • Posts: 615
Re: Scratch build partial stripdown Vickers FB 5 Gunbus 1/32 scale
« Reply #75 on: February 14, 2019, 04:29:19 AM »
Very exciting project Stephen, some day I would like to take on a scratch project, though not as ambitious as this one!

Ryan
In Progress: 1/32 Albatross DV (Richthofen); 1/32 Morane Saulnier Type N; 1/32 Sopwith Pup
Upcoming: Not sure!

Online RAGIII

  • Hero Member
  • *****
  • Posts: 18794
Re: Scratch build partial stripdown Vickers FB 5 Gunbus 1/32 scale
« Reply #76 on: February 14, 2019, 12:46:50 PM »
I am so impressed by this one that I can't really come up with the proper Superlative!!!!! Perhaps it is enough to say Des would have absolutely loved this build! Too bad it can't be in the GB!!
RAGIII
"A man has to know his limitations": Harry Callahan

"Don't slop it on" Lynda Geisler

Offline lcarroll

  • Administrator
  • Hero Member
  • ******
  • Posts: 8547
Re: Scratch build partial stripdown Vickers FB 5 Gunbus 1/32 scale
« Reply #77 on: February 15, 2019, 12:44:38 AM »
Stephen,
    I just now looked in on this since about 10 days ago, what great progress and impressive results! As usual your Jig solution is a tremendous success; it's amazing what can be done with just basic household material. This looks spectacular at this stage, it's going to be a real showpiece!
Cheers,
Lance

Offline lone modeller

  • Hero Member
  • *****
  • Posts: 5300
Re: Scratch build partial stripdown Vickers FB 5 Gunbus 1/32 scale
« Reply #78 on: February 15, 2019, 04:31:39 AM »
I am so impressed by this one that I can't really come up with the proper Superlative!!!!! Perhaps it is enough to say Des would have absolutely loved this build! Too bad it can't be in the GB!!
RAGIII

Rick,

Thanks for the comment about the GB in memory of Des. I had intended to add a note in the last update to the effect that I too would have liked this to have been in the GB but because it is started I am unable to enter it. However it had always been my intention to dedicate this model to Des' memory when it is finished - the GB has overtaken me in that respect. So, like Lance, I have added a note to the header to indicate my intention. It is the best that I can do at the moment: if I finish this in time i will enter a smaller project to the GB in the hope that I will have time to finish that one.

Stephen.

Offline lone modeller

  • Hero Member
  • *****
  • Posts: 5300
Thanks Ryan, Rick and Lance for your very kind comments which are much appreciated.

Ryan: do give a scratch build a try - they look difficult at first but in reality if you can cut a piece of card straight, bend some plastic rod, drill a few holes and file some struts the you can build one. You can always use aftermarket parts for the more difficult parts such as seats, engines and wheels, etc and it is great fun because what you make is really yours and you can choose subjects which are not available as kits.

Lance: I was trying to see if the methods that I have used in God's Own Scale would work in the Brobdignagian Scale because I have restrictions on space and budget when it comes to model making. I also want to demonstrate what can be done with minimal tools and equipment to encourage others to give scratch building a try. In this case it worked (just), after quite a lot of trial and error, so I have lived up to your monica for me: von Jigmeister - now all I have to do is complete the model and rig it! If I can do so I will at least have something different, even if it is not going to be anywhere near WNW standard!

Stephen.
« Last Edit: February 24, 2019, 10:13:16 PM by lone modeller »

Offline lcarroll

  • Administrator
  • Hero Member
  • ******
  • Posts: 8547
Stephen,
   
     "even if it is not going to be anywhere near WNW standard!"

    Quite the opposite, Sir! That last series of photos showing the model out of the Jig and partially rigged puts it in a standard of it's own, and every bit as good or better then that of the very best of "boxed" Kits!
   Lovely work!
Cheers,
Lance


Offline gbrivio

  • Hero Member
  • *****
  • Posts: 1681
Beautiful update, put together the structure looks impressive. The transparency on reverse of flying surfaces and controls replicates perfectly the real thing.
Ciao
Giuseppe

Offline GAJouette

  • Hero Member
  • *****
  • Posts: 3579
  • " Beware of the Spanish Inquisition"
 Stephen,
Absolutely awesome work my old friend. The true work of a Master Modeler!
Highest Regards,
Gregory Jouette
" What Me Worry"

Offline Borsos

  • Hero Member
  • *****
  • Posts: 3315
Stephen,
what an impressive amount of work and what a great piece of modelling. I am deeply impressed by this wonderful model you are making. That’s a great inspiration and true modeling. I am keen on seeing it getting finished.
Best regards
Andreas
"Deux armées aux prises, c'est une grande armée qui se suicide."
Barbusse.
"Ein Berg in Deutschland kann doch einen Berg in Frankreich nicht beleidigen. Oder ein Fluß oder ein Wald oder ein Weizenfeld."
Remarque.

Offline Juan

  • Hero Member
  • *****
  • Posts: 2455
  • All gave some, some gave all.
You stated to Lance that "not going to be anywhere near WNW standard!", the folks at WNW would be proud to produce a kit this nice (not knocking WNW, yours has so much more detail)

Offline lone modeller

  • Hero Member
  • *****
  • Posts: 5300
Evening All,

Many thanks again Lance, Guiseppe, Gregory, Andreas and Juan for the very generous and complimentary comments which you have left. I am truly honoured to read them, coming as they do from modellers who regularly demonstrate that they are at the very top of their respective games.

With reference to WNW and this model: I suspect that they have one of these lined up in their planning system even as I am making mine - and will announce a release date shortly after I finish it! Such is scratch building....!

Stephen.

Offline lone modeller

  • Hero Member
  • *****
  • Posts: 5300
Evening All,

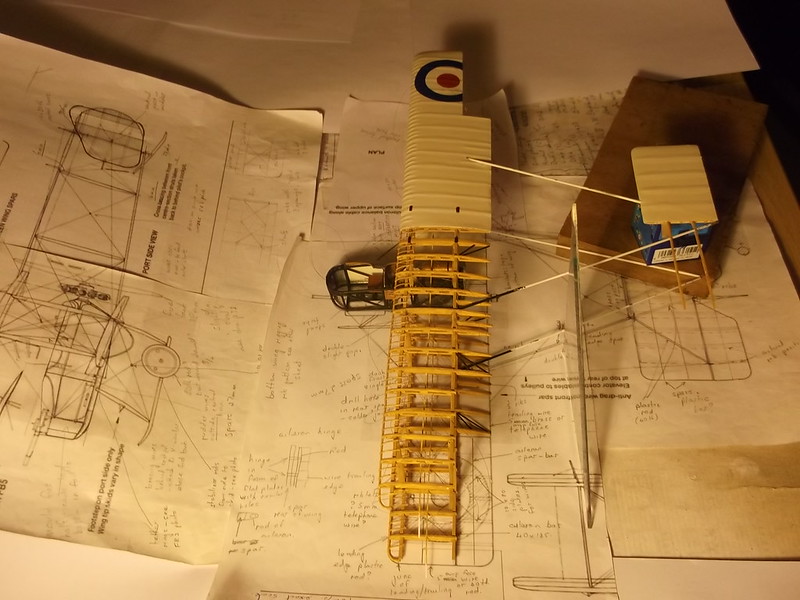
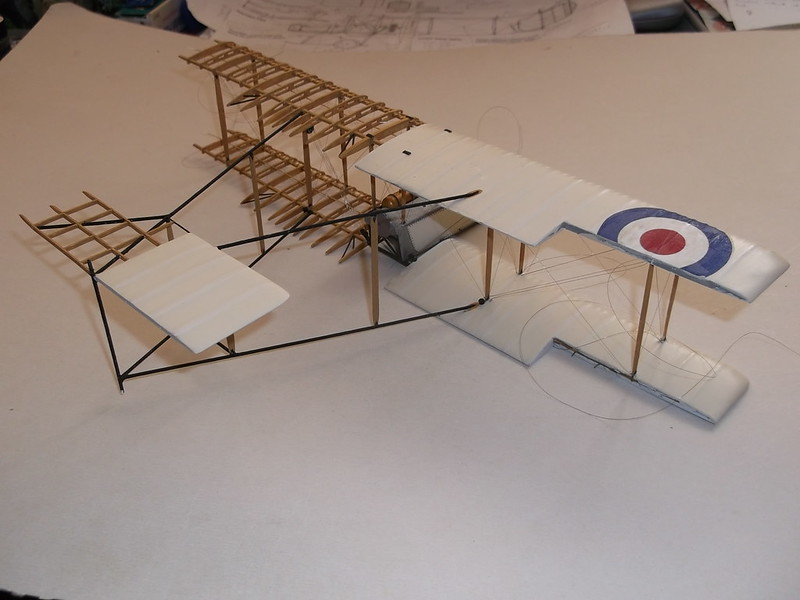
The first thing to do after the top wing was in place was to add the cabane struts and sort out the rigging - I had many lengths of monofilament thread hanging from the starboard (right) top wing and parts of the fuselage nacelle and these were constantly getting in the way. The double rigging wires were difficult because some of the threads would not pass through the lower wing - the brass spars were in the way. Also attaching the cabane strut wires into the underside of the top wing was a problem because I could not drill holes all the way through the hollow wing and be sure that the ends of the thread would pass through. Well all of that got sorted out eventually, (after a delay caused by a back problem which meant no modelling for nearly a week), and I riggied the port (left) wing at the same time. Now I just have the anti-drag bracing wires which run from the forward outer wing struts rearwards - they are currently wound around the wing tips. The elevator control wires ran parallel with and outside the lift wires at the rear of the inner bay of the wings - effectively this meant that I had to add the pulleys over which the wires passed. These were fixed to plates at the wing root and at the top of the inner rear struts: ading the extra control wires to run parallel to the lift wires was fun....! The rigging took three evenings by the time I had corrected various mistakes on the way. I have learned several things from this exercise for future reference if i ever choose to build another 1/32 model.

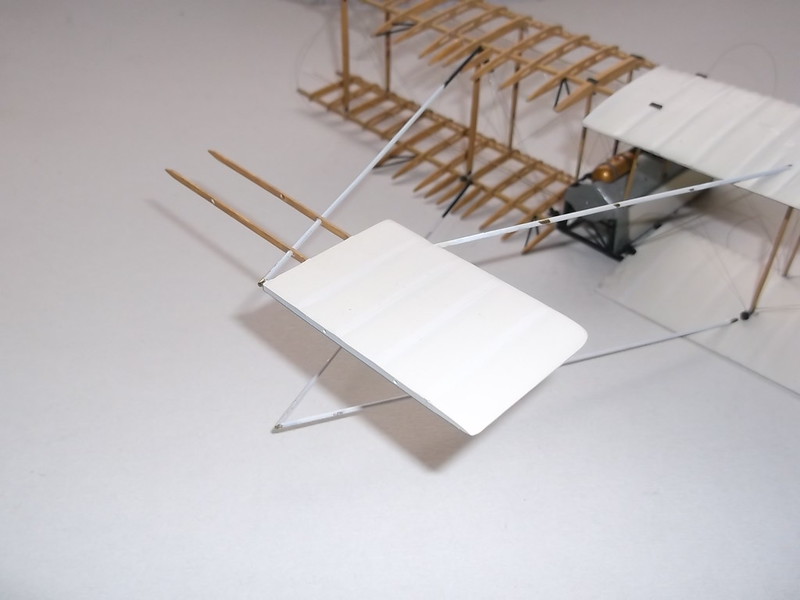
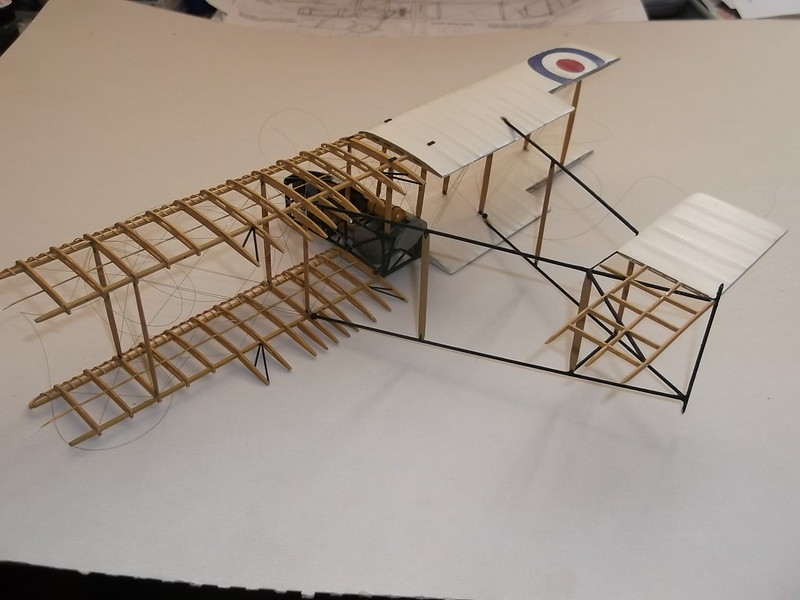
Now I could add the other booms and the horizontal tail surface that I had constructed some time ago. This was a simple procedure when compared to the rigging and a good deal quicker. I had already drilled holes in the rear of the starboard wings to insert the ends of the booms, so a mixture of 2-part epoxy provided the sticky bit to hold them in place and in they went. The upper boom needed support because of the weight of the horizontal stabilizer: to stop it from drooping and make sure that it was properly aligned with the rest of the structure I used a modified mk 1 jig and left the assembly to cure. A dob of CA at the V of the upper booms also helped to hold that part in place:


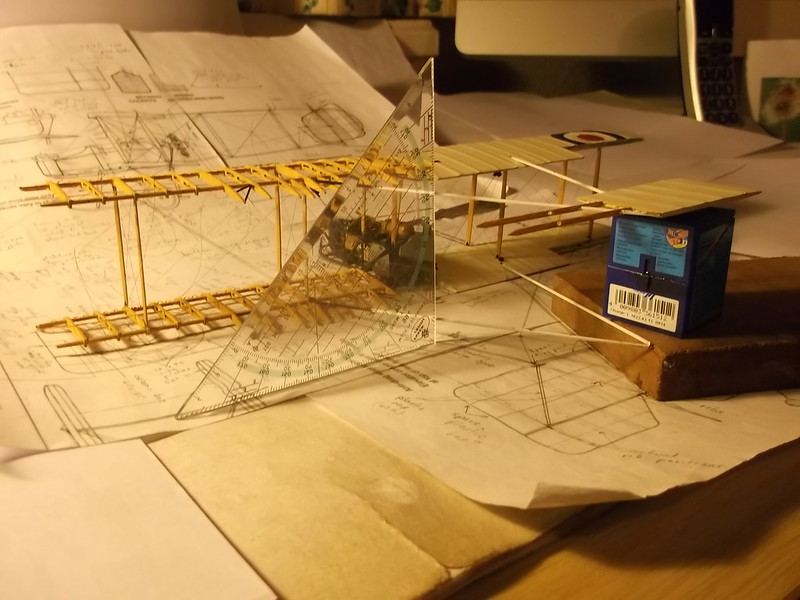
The set square to the left of the model is there to check that the booms and rudder post were vertical: they are and the upper and lower booms are directly in line. I was relieved that they structure has set like this - I have repeatedly been checking these alignments because if any of them is ever so slightly wrong the whole model would be a fiasco. I can live with errors of 1mm but I seem to have been able to reduce them to less than this. Yippee!!!!

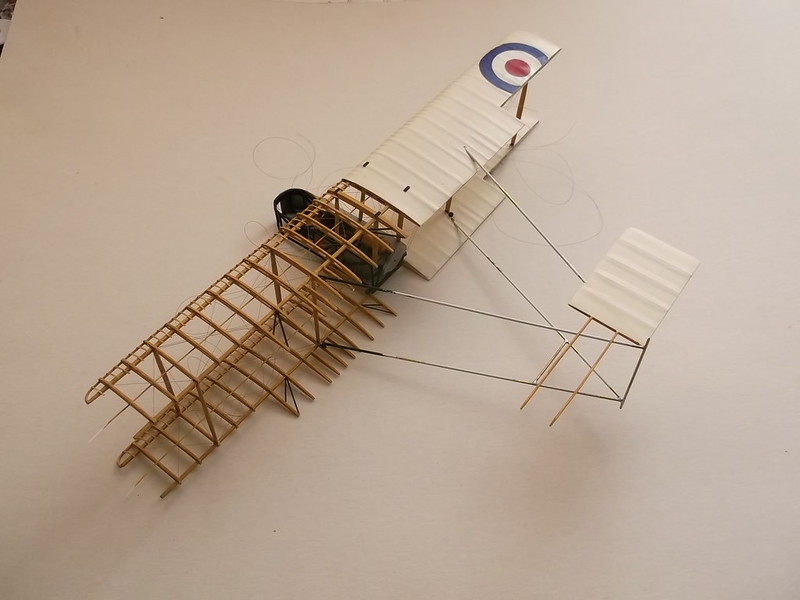
The resultant structre was stronger than I had anticipated and allowed me to move it about freely ready for the next steps: adding the rudder post and lower boom cross bracing.


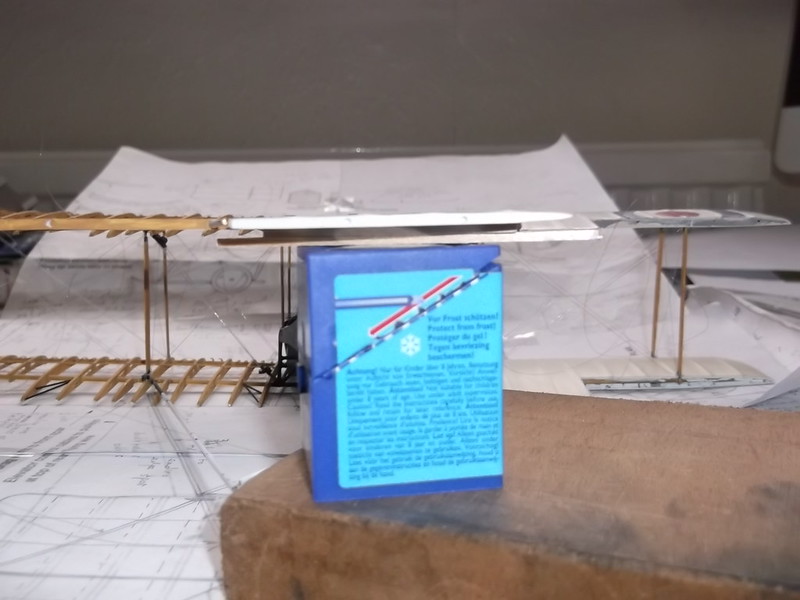
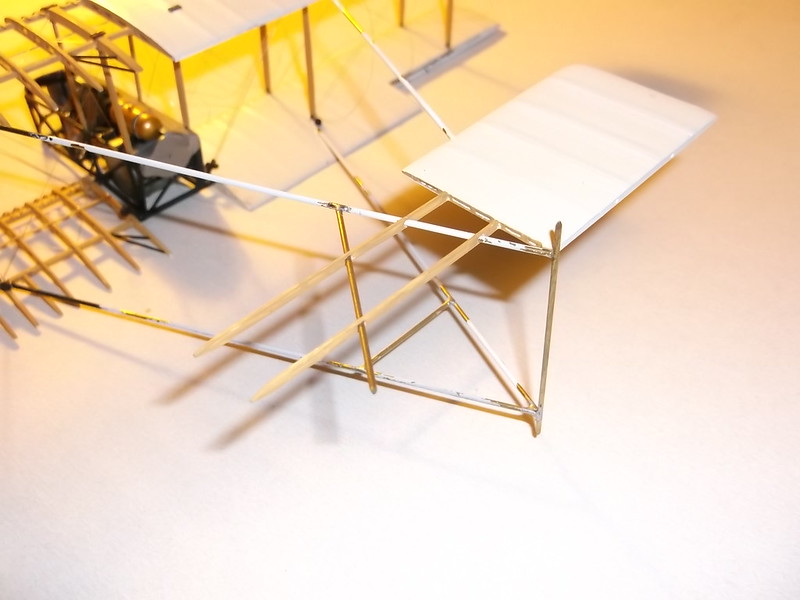
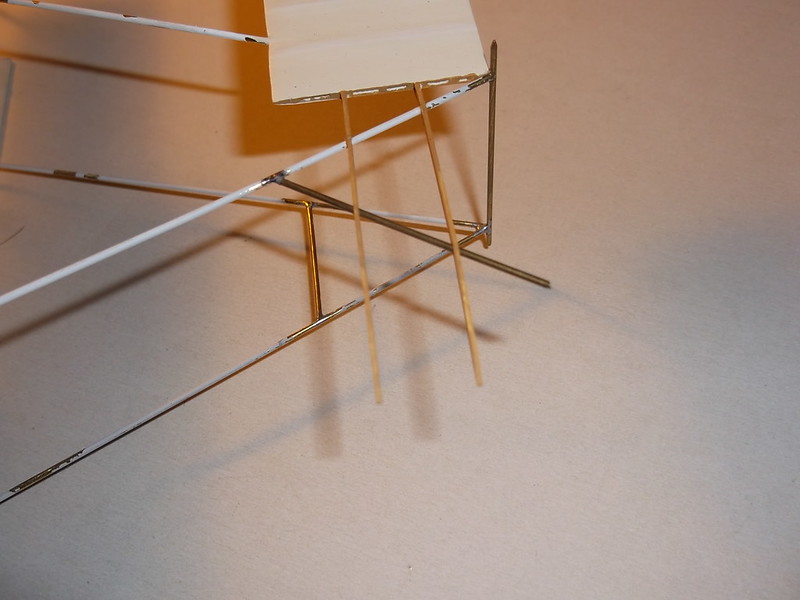
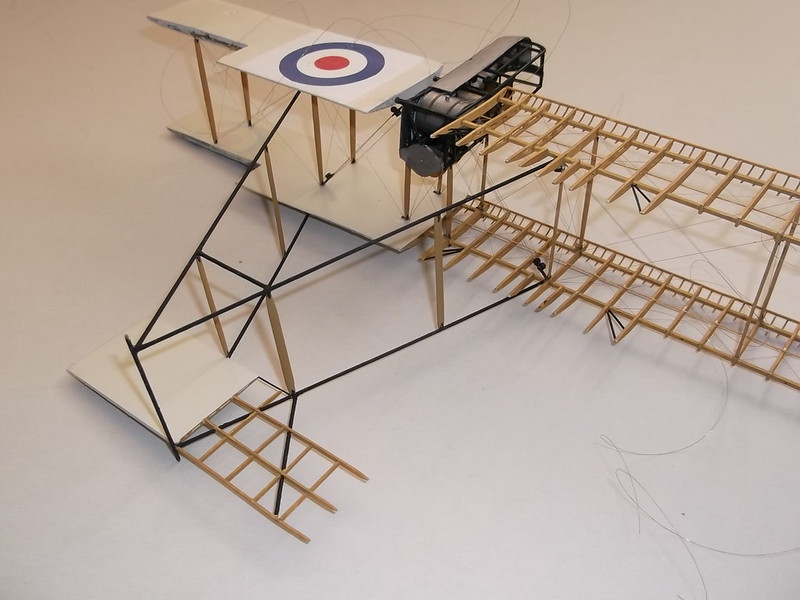
The rudder post is brass rod. I used CA to fix it to the upper boom because the presence of plastic precludes any idea of using solder. The addtional advantage was that the rudder post was held in place so that when I soldered the lower joint I did not need any extra support. The cross bracing between the lower booms was also brass rod - I held that in place using two pieces of blue-tack on a wood block:


Finally I added the horizontal bracing strut in the port horizontal surface from brass rod and soldered one end to the boom:


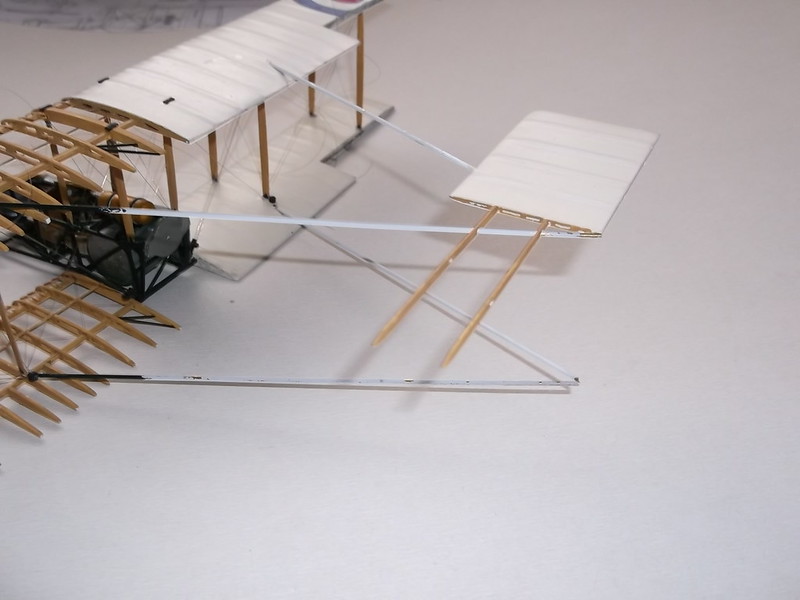
This structure is strong: there was no danger of anything beoming distorted by an accidental knock. To finish the boom structure I could add the struts - these were carved from thin basswood sheet like the other struts, sealed with talcum powder and dope mixture and painted. The horizontal tail surface structure was made up from 20 x 30 thou strip and the leading edge wire between the boom and starboard side was from a piece of telephone cable wire. I have not completed thie remainder yet as it is rather exposed and liable to damage while I still work on other parts of the model. I have however painted the booms and wood structures:


Now as is usual with scratch builds, I have to make up and finish some more parts including the fin and rudder, undercarriage, etc. I am also trying to work out how much of the boom I should rig before proceeding to much further with construction. In addition I have to be away from home again for an uncertain period so the next update will probably have to wait for a time until I can do more on the model and have something to report on.

In the meantime, thanks for looking.

Stephen.

Offline Juan

  • Hero Member
  • *****
  • Posts: 2455
  • All gave some, some gave all.
Fantastic artistry being demonstrated Stephen.  Looking forward to your next update.

Offline coyotemagic

  • Hero Member
  • *****
  • Posts: 7710
  • "Here's to not buggering it up." -Winston Chuchill
    • My Models
Stephen, this is the most magnificent display of master modeling that I've had the pleasure of observing.  Thank you for this.
Cheers,
Bud
"All men dream: but not equally. Those who dream in the dark recesses of the night awake in the day to find all was vanity. But the dreamers of day are dangerous men, for they may act their dreams with open eyes, and make it possible." -T. E. Lawrence

Bughunter

  • Guest
Stephen, even it is in the wrong scale  ;D ;D ;D I like this build very much!
Real wood, brass, soldering ... a dream  :-*

What are you doing with the "talcum powder" on real wood? This I haven't understand :-[

Cheers,
Frank