Evening All,
Thank you Ian. Des, Bo, Malaula, Juan, Bud and Manni for dropping by and leaving supportive comments - I am going to need them in the near future.
Sometimes things happen in modelling - at least they do to me. Often we run into minor mishaps but usually I do not bother to post them because they are not significant and are easily and quickly remedied. Not so this time. Just as I thought that I was getting on well with this model……………………………. catastrophe.
I had glued the rear fuselage assembly to the top wing using a tab of card because this would otherwise be a butt joint and would be far too weak. Having allowed the cement to set I proceeded happily on my way to glue the sides of the central fuselage section to the underside of the top wing. This was so that the sides had something to hold them square and they would be rigid enough to take another sheet of 30 thou card across the bottom to make the underside of the fuselage. Here I hit what I mistakenly thought was a small problem - the fuselage sides were too high - the rear assembly did not fit properly. So I merrily trimmed the fuselage a bit until the rear section did fit, and afterwardsI glued the bottom plate into place. I then added a small extra piece of 20 thou card to the bottom to get the correct depth and filed the edges and added some filler etc and all was going well ….. Holes were drilled in the bottom of the fuselage sides to take the two pins (made from a paper clip), which would go into the wing roots and strengthen those joints later. I added some cross bracing to make this area stronger and made and painted an interior floor plate to cover it all up.
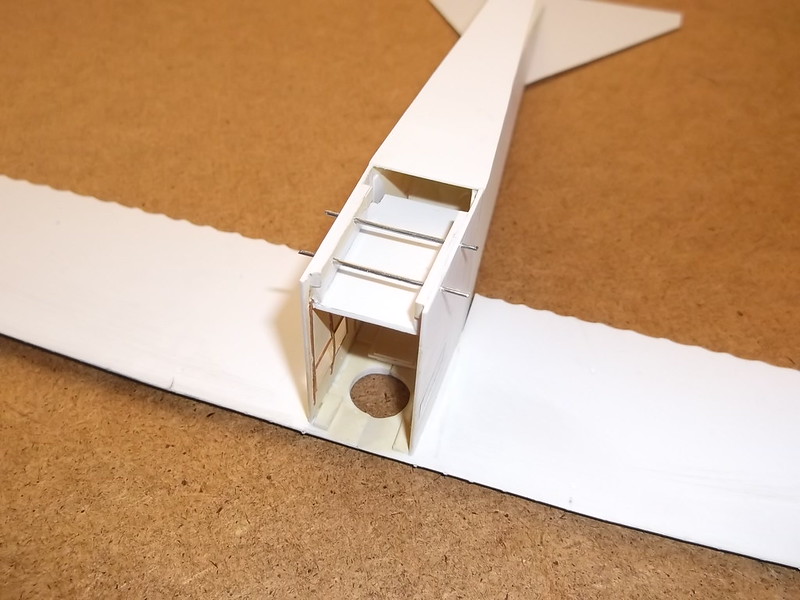
The upper gunners cylindrical position was made from 20 thou card wrapped around a thick piece of dowel and held with a piece of clear selotape - this will not be seen on the completed model and it holds the unit in shape - otherwise the joint will spring apart. This was glued into the top wing. Finally I added the nose sub-assembly to the front end of the fuselage and cleaned up all of the joints.
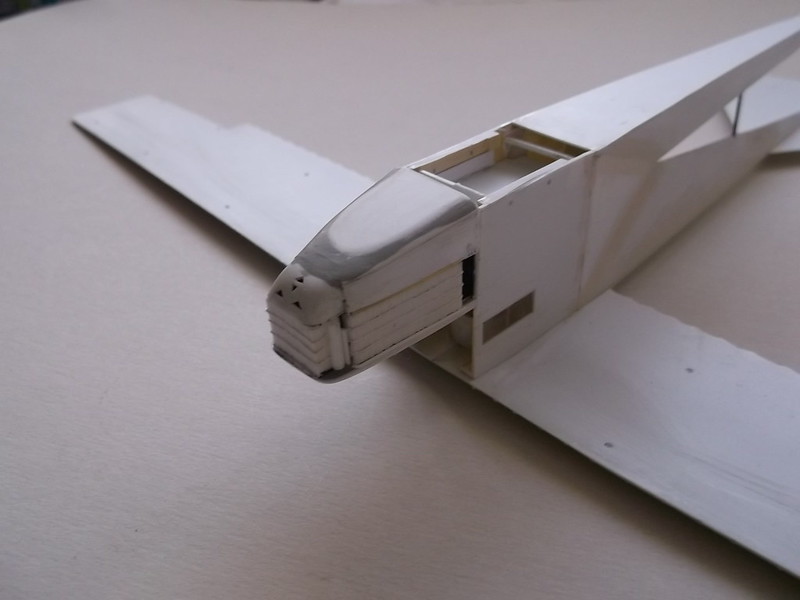
Now I was ready to start making the mould for the windscreen and canopy over the cockpit and I noticed something was not quite right but I could not see what it was…….. I carefully measured the drawings and the the model….. and found that the gap between the top of the nose in front of the cockpit and the top of the upper wing was 7mm TOO SMALLl!!!!
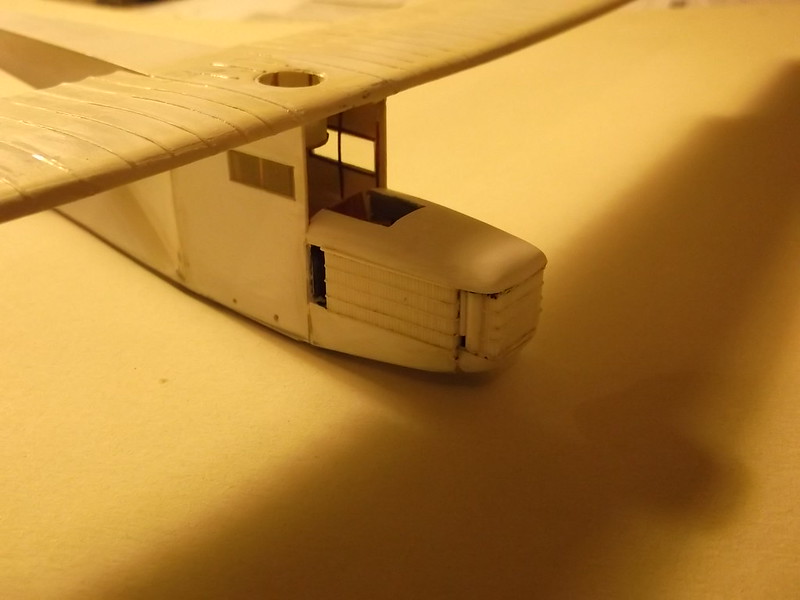
Aaaaaaaaaarrrrrrrrrrgggggggggghhhhhhhh******!!!***!!!******* (The rest has been censored to save the administrator a job!)
What to do? I sat for a full hour trying to work out what had gone wrong. At first I thought that it was the drawings - it was in part: they do not match in cross section and side elevation - there is a 2mm discrepancy, but that was not the entire problem. Somehow I had lost 7mm - I had cut off about 3-4mm from the sides as described above but even that was not sufficient to explain what had happened. The only answer that I could think of was that the side elevation drawings were not accurate because the triangular sides of the rear fuselage slope inwards and therefore using these as templates was not going to work. In the end I cut paper templates to try to determine out what the dimensions of the triangular fillet immediately behind the vertical fuselage sides would be. According to the side elevation in the drawings in the DatatFile, at point B they should be 24mm. From the cross section drawing this section should be 26mm but the sides are shown as flat when it is clear from photos (including those in the DataFile), that they were not: they had three faces with a slight angle between them. If 2mm does not seem much I can assure you that it translates into a significant difference in the length of the side of the triangle that joins the flat fuselage section. After cutting out paper templates of 24mm and 26mm I found that neither matched the vertical side of the central part of the fuselage. The actual size was 25mm according to my experiments, allowing for the angles of the faces, but I am still not sure whether that is going to fit when I assemble this thing again.
One of the advantages of scratch building is that you can always start again, so I dismantled the assembly to retrieve the top wing and the nose section. I have totally discarded the rear and central fuselage assembly and will make new ones. I think that I can restore the top of the nose which was slightly damaged but I may have to mould a new one of those too.
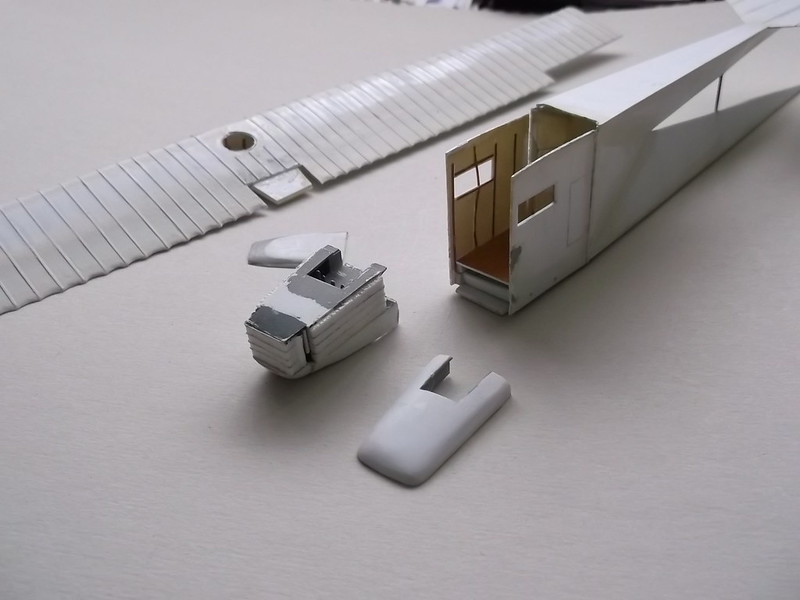
I will now rewrite the instructions to try to ensure that all of the parts fit properly. I have worked out that the dimensions of the upper and lower triangular sections of the rear fuselage are correct but that the triangular side panels between them and the flat fuselage sides will have to be cut to fit after the rear has been attached. I will also ensure that the junction between the top wing and the upper triangular rear fuselage section is at the correct angle - that is where the missing 2-3mm went on the first attempt. So the assembly sequence will need to be completely different and I will need to make a panel to fit into the rear of the flat fuselage section to hold the sides rigid as I will start construction from the bottom rather than the top. All will be revealed in the next post…..or not!
This time round I should be successful - the only problem is that I am having to go on one of my regular journeys this week so you may have to wait for a while to find out. More to follow.
Thanks for looking (and on this occasion at least, praying).
Stephen.

