Author Topic: Wingnut Wings Hansa-Brandenburg W.12 1183 Oblt.z.S. Christiansen  (Read 36794 times)

Offline lcarroll

  • Administrator
  • Hero Member
  • ******
  • Posts: 8547
Re: Wingnut Wings Hansa-Brandenburg W.12 1183 Oblt.z.S. Christiansen
« Reply #30 on: December 23, 2016, 05:17:00 AM »
   A quick and frankly uninspiring pre-Holiday Break update. The upper wing is molded in 3 separate sections with the center portion having optional large or small cutouts above the cockpit. The resulting seams need filling as there are no corresponding seams on the real aircraft. As I've had a few seams on previous Builds reappear after several weeks/months using the standard putty fillers I decided to try Prze's method of using thick CA as a gap filler.
    Here's the top and then bottom seams filled with Medium viscosity CA. Not a pretty sight at this stage.........


    I used masking tape to control the scraping and sanding footprints and to protect the rib tapes, it worked out quite well.


   Each seam was leveled with a #9 Swann-Morton Blade (Thank You James K.!) and then descending grades of Wet & Dry Sand Paper. I did add the smallest amount of Tamiya Grey Surface Primer to a few shallow sink marks after the second coat of CA. I'm quite pleased with the results and anxious to see if the finished seams withstand the test of time.


Now I can get back to building the Benz III. I'll be travelling away tomorrow to spend Christmas with family, hope to be back, settled in, and getting some good quality time at the work bench well before New Years.
Cheers,
Lance 


Offline Juan

  • Hero Member
  • *****
  • Posts: 2455
  • All gave some, some gave all.
Re: Wingnut Wings Hansa-Brandenburg W.12 1183 Oblt.z.S. Christiansen
« Reply #31 on: December 23, 2016, 06:07:12 AM »
Hi Lance, have a safe trip and enjoy Christmas.  Look forward to your progress.

Offline lcarroll

  • Administrator
  • Hero Member
  • ******
  • Posts: 8547
Re: Wingnut Wings Hansa-Brandenburg W.12 1183 Oblt.z.S. Christiansen
« Reply #32 on: December 23, 2016, 07:00:45 AM »
Thanks Juan!
Cheers,
Lance

Offline boggie

  • Sr. Member
  • ****
  • Posts: 420
Re: Wingnut Wings Hansa-Brandenburg W.12 1183 Oblt.z.S. Christiansen
« Reply #33 on: December 23, 2016, 09:27:42 AM »
Great progress Lance. And very informative too, thank you.
Your seam removal looks really good.

Wishing you a happy and safe holiday.
But please don't stay away too long, following your builds is becoming addictive.  ;D

Cheers   :)

Offline uncletony

  • Hero Member
  • *****
  • Posts: 4349
    • Aircraft In Pixels
Re: Wingnut Wings Hansa-Brandenburg W.12 1183 Oblt.z.S. Christiansen
« Reply #34 on: December 24, 2016, 12:16:31 AM »
Why not use "supafilla"? (CA mixed with talcum powder)

Quote
Try this, and you'll chuck all your other putty in the trash: mix medium viscosity CA approx 50/50 with talcum powder, 'til you get the consistency of runny toothpaste ( I pour the talc on a vinyl-type coffee can/margarine tub lid, drop the CA into it, and mix the talc into the CA letting the CA be my "limiting factor" on how much filler is produced at one time). Apply the composite to your seam, ejector pin mark, gap, smooth it, wait 15 min, and start sanding! Apply it sparingly, however, as it doesn't shrink like other putty. You can also wait 15 days to sand, as it doesn't get harder the longer it cures, and it works on resin as well as plastic. It doesn't soften thin (vac) plastic like petroleum based putty does, and actually adds structural integrity, so you don't have to back large gaps with plastic . Evidently the "Car Guys" have been using this for years to do major bodywork alterations on their models. To see how well "Supafilla" (my name for it) works, carve/gouge a dime-sized hole in some 40 thou plastic sheet, fill the hole w/ Supafilla, and sand both sides. When you're done I think you'll be pleasantly suprised. Regards, Rob

http://www.armorama.com/modules.php?op=modload&name=SquawkBox&file=index&req=viewtopic&topic_id=13610&page=1


« Last Edit: December 24, 2016, 12:23:10 AM by Bo »

Offline lcarroll

  • Administrator
  • Hero Member
  • ******
  • Posts: 8547
Re: Wingnut Wings Hansa-Brandenburg W.12 1183 Oblt.z.S. Christiansen
« Reply #35 on: December 24, 2016, 12:23:35 AM »
   Thanks for the comments, Gents.
Justin, the thicker (Labelled "Medium Viscosity") doesn't appear to shrink at all, but the thin requires several applications when I try it for this.
Bo, first time I've heard of this trick, any special instructions?
Boggie, I hope to be back in a week, leaving here for a 6 hour drive in an hour or so.
Cheers,
Lance

Offline uncletony

  • Hero Member
  • *****
  • Posts: 4349
    • Aircraft In Pixels
Re: Wingnut Wings Hansa-Brandenburg W.12 1183 Oblt.z.S. Christiansen
« Reply #36 on: December 24, 2016, 12:26:36 AM »
Lance, see amended post above -- everything you need to know about Supafilla

I'll add a bonus hint: CA does not stick to Delrin ;)

Offline lcarroll

  • Administrator
  • Hero Member
  • ******
  • Posts: 8547
Re: Wingnut Wings Hansa-Brandenburg W.12 1183 Oblt.z.S. Christiansen
« Reply #37 on: January 08, 2017, 03:34:57 AM »
    Firstly Thanks, Bo, for the Supafilla info, I'll have to try it on my next project, or even perhaps on this one when I "close it up".
    Next, another update, the Holiday Season is past and I've finally got a few hours in on the work bench.
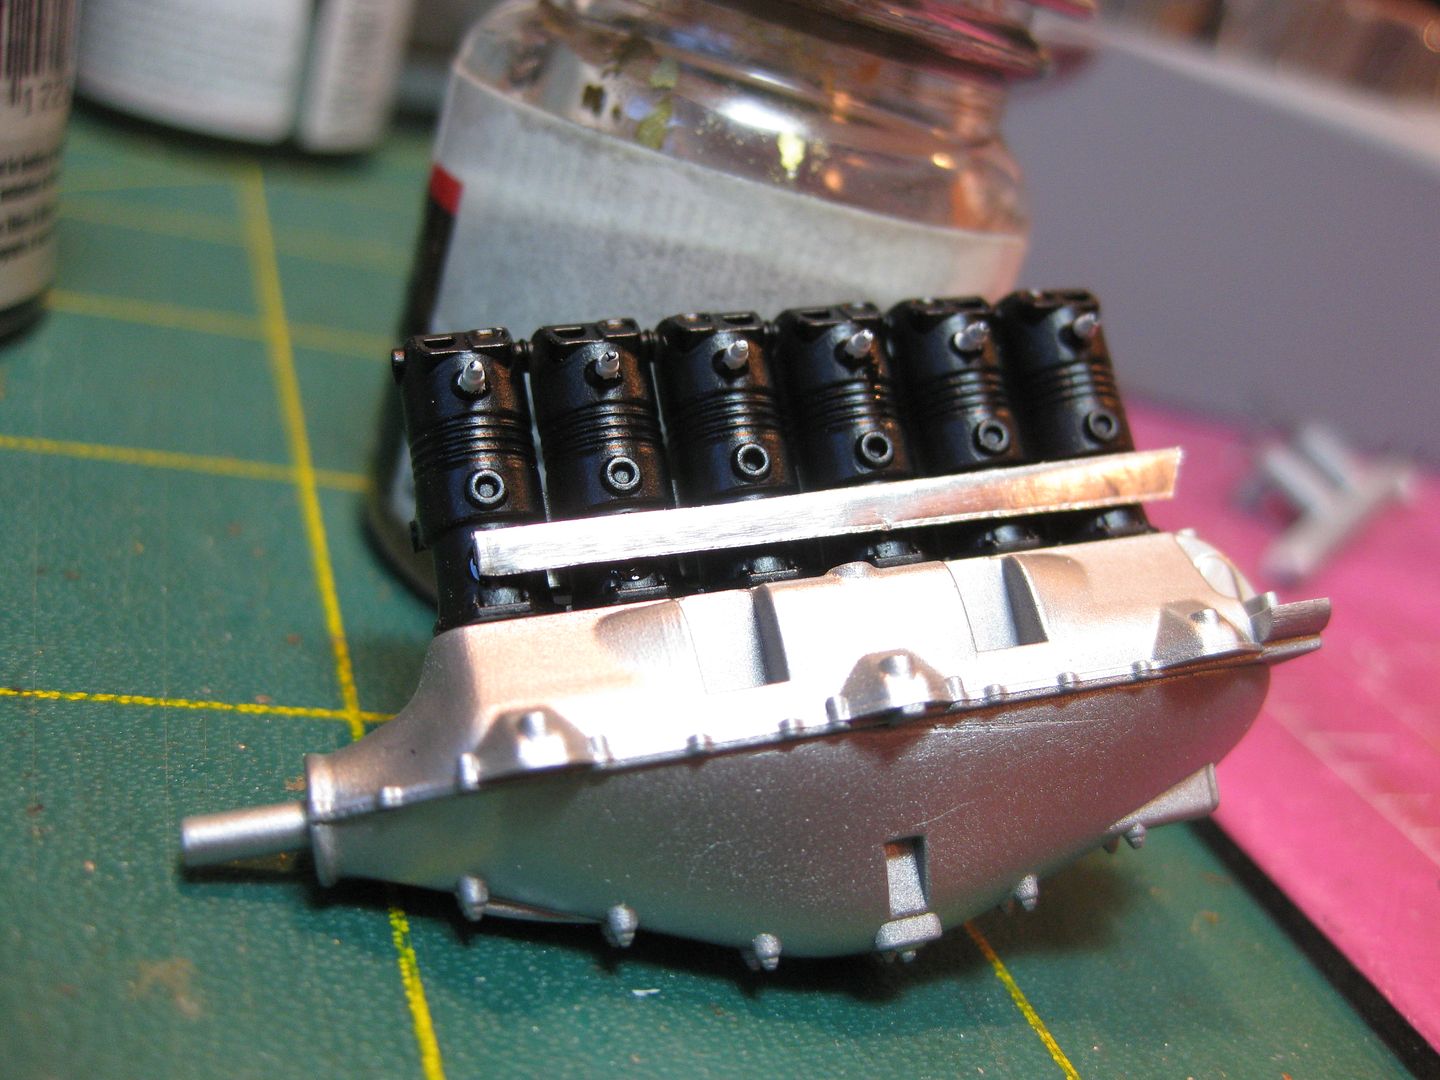
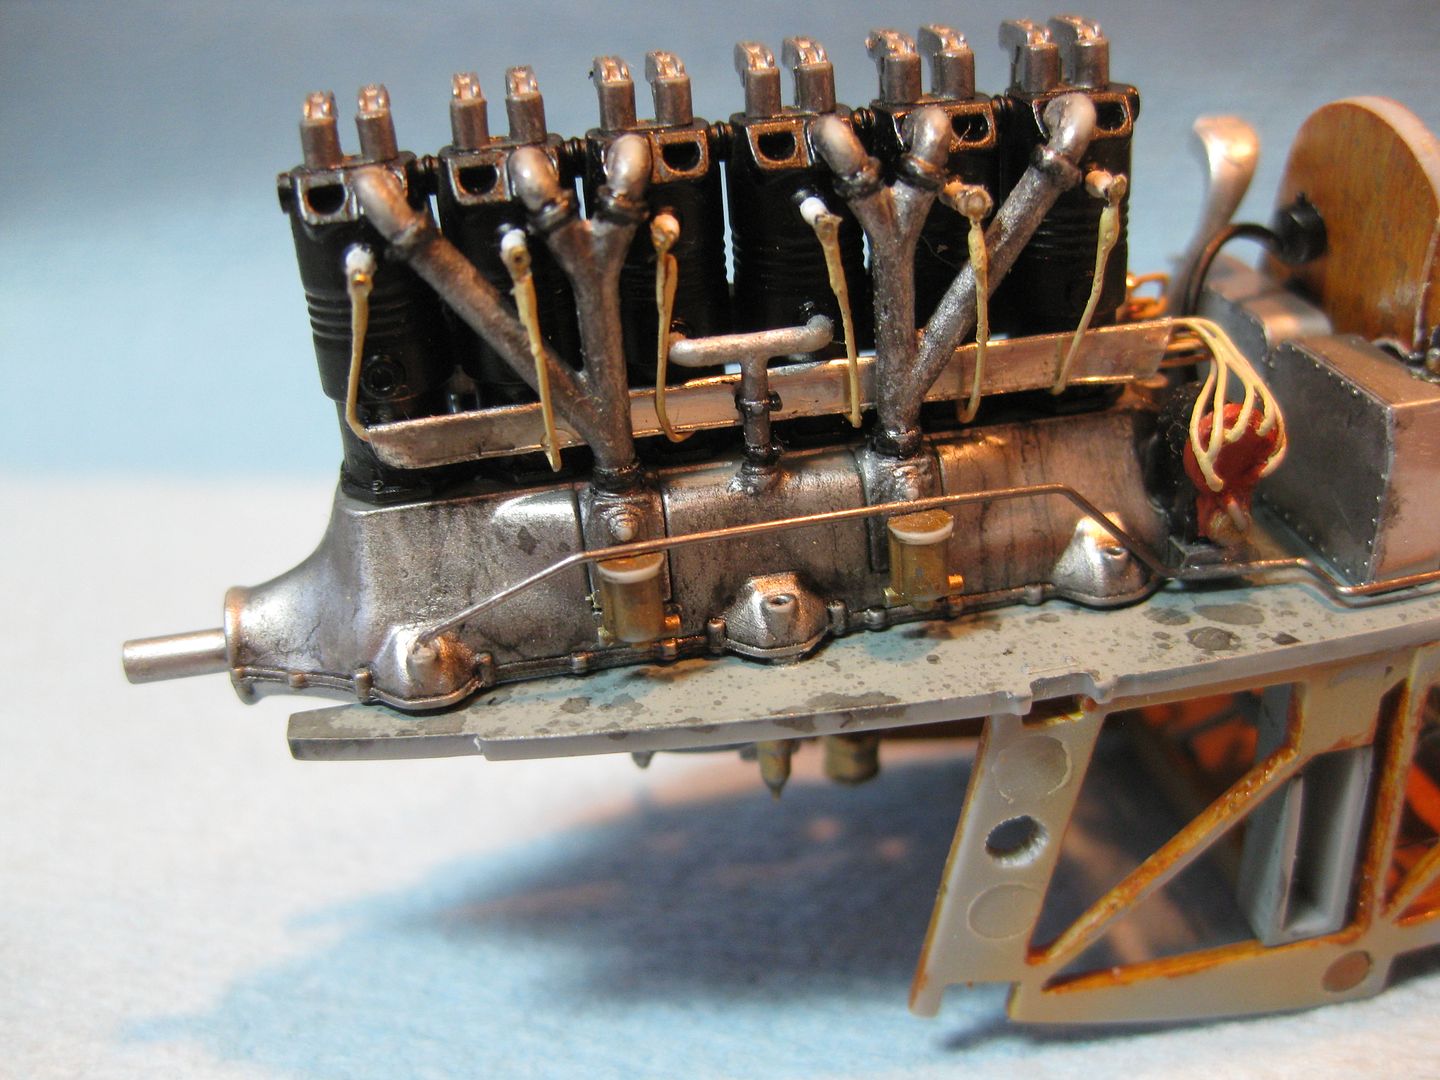
    I completed the Benz III engine electing to use the optional Part E7 for the right side of the cylinder bank and add my own stainless push/lifter rods. Other additions are the ignition wires, the sheet conduits that route them from the distributers to their respective plugs, and the throttle linkage on the port side.
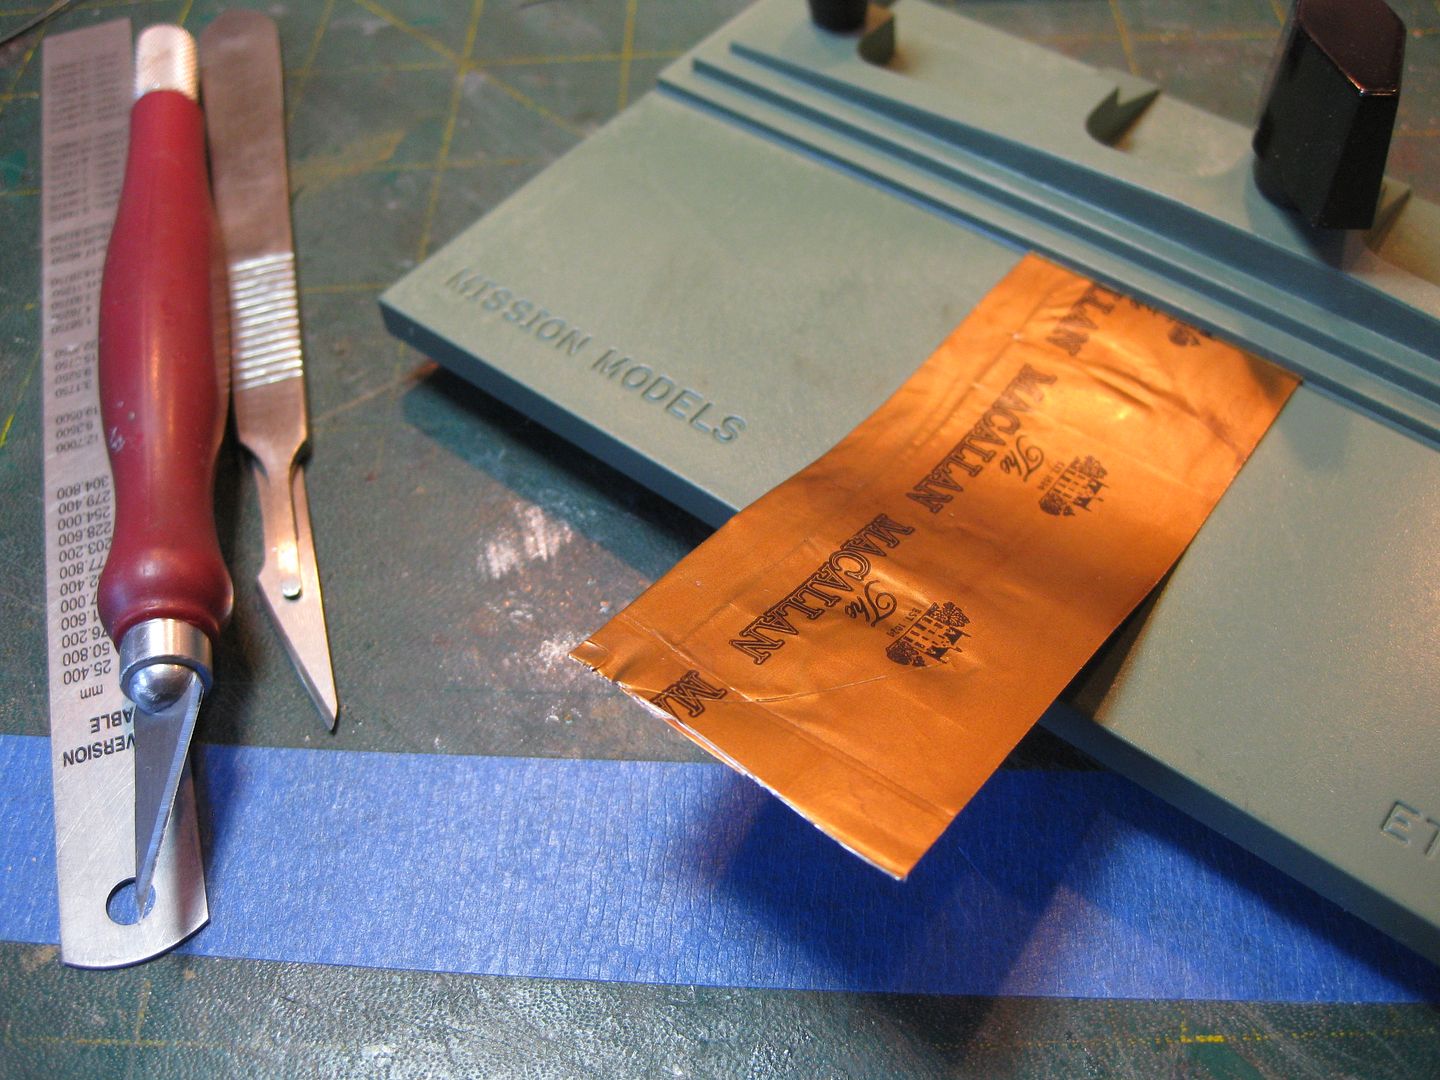
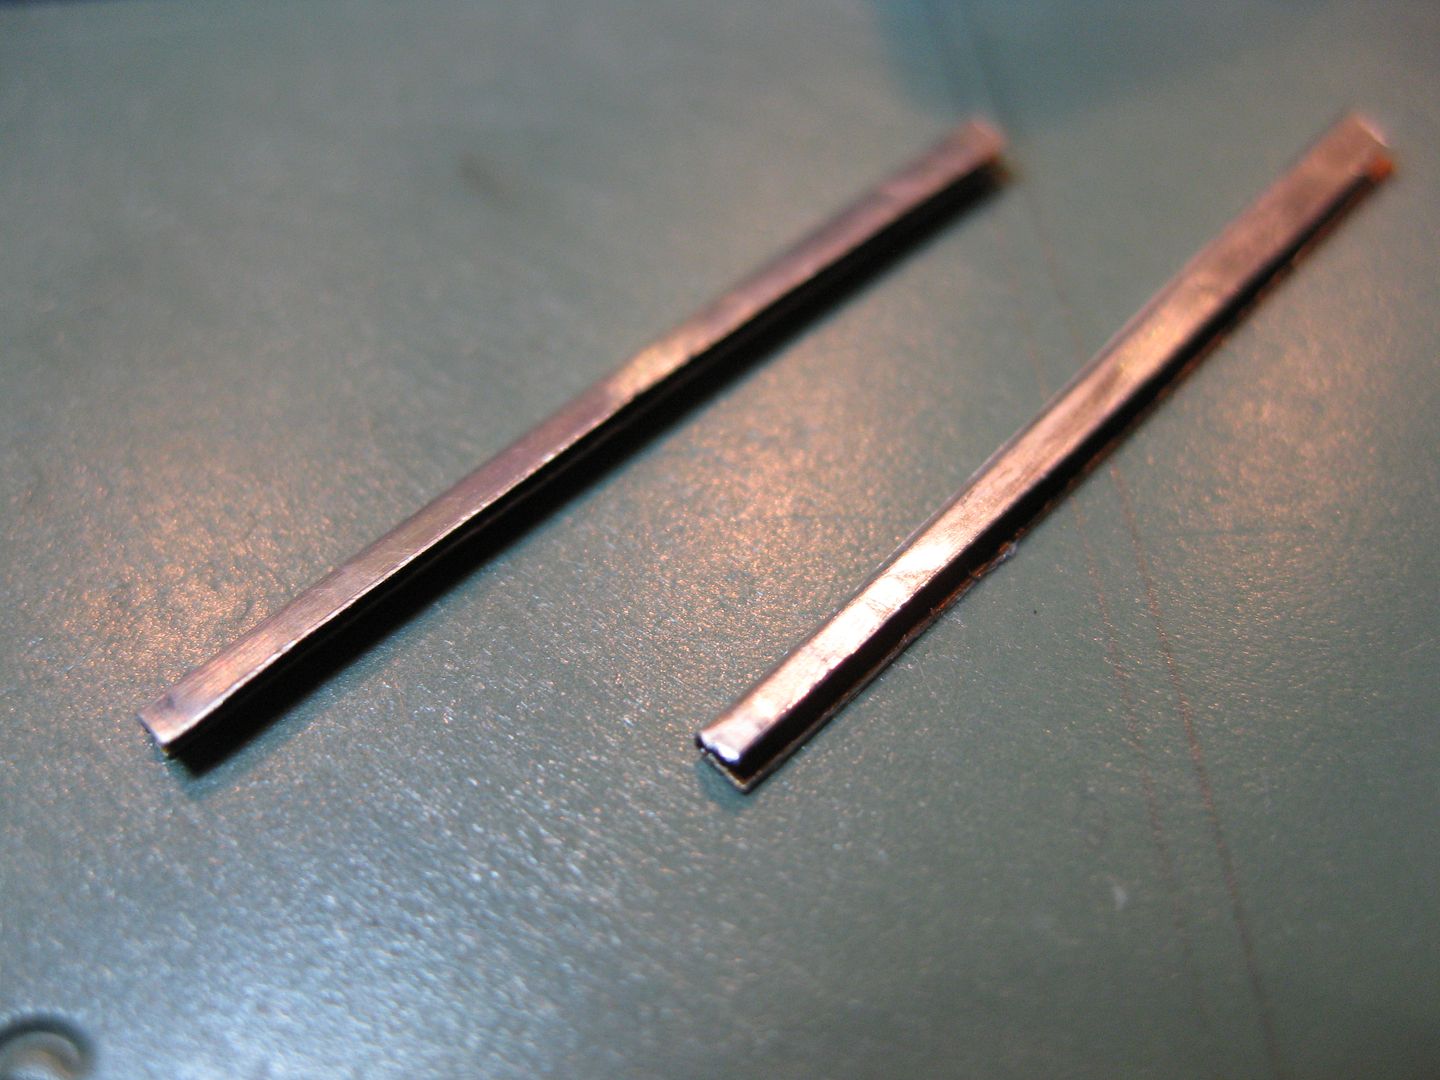
    The wire supports/conduits were completed first from lead shrink seal from a Scotch Whiskey bottle, it's a toss up as to whether emptying the bottle or doing the prefabricating is more enjoyable! I used my Mission Models Etchmate with the guide reversed to do the bends.


The finished products, and then installed.


The intake manifolds were then added and the weathering of the engine started.
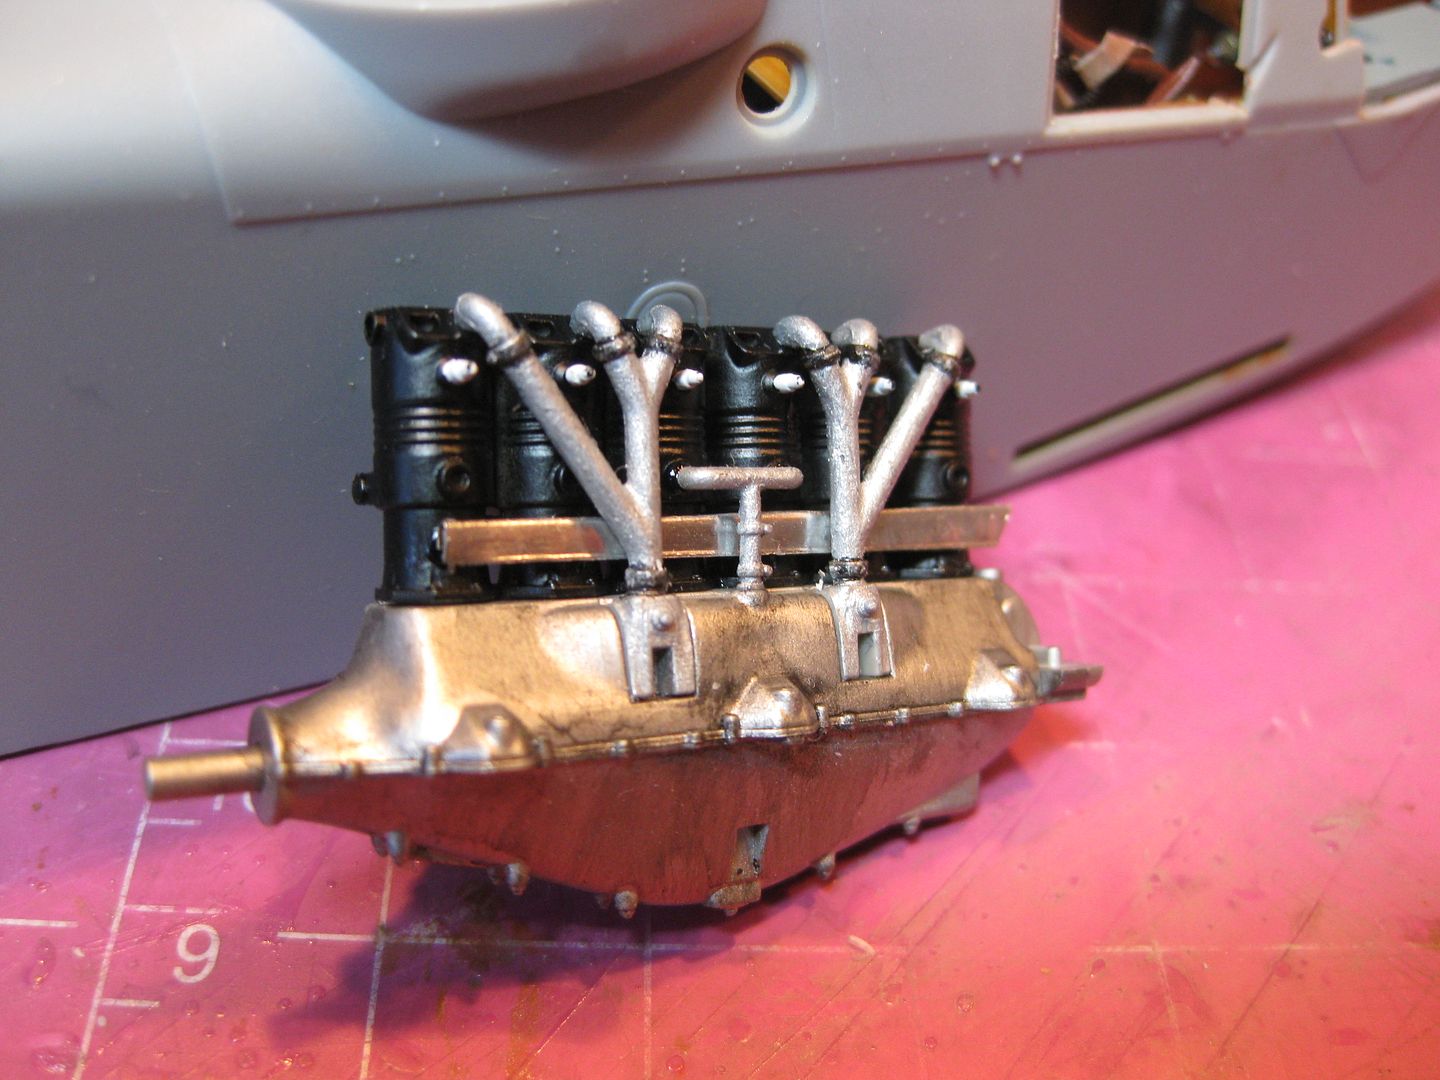


    Next the ignition harness was added using salvaged copper wire and some scrap PE for plug connectors. The connectors are a little "rough" however they are mainly out of sight with the engine cowling panels in place. The Camera Machro setting reveals a few touchups required to the "plumbing".
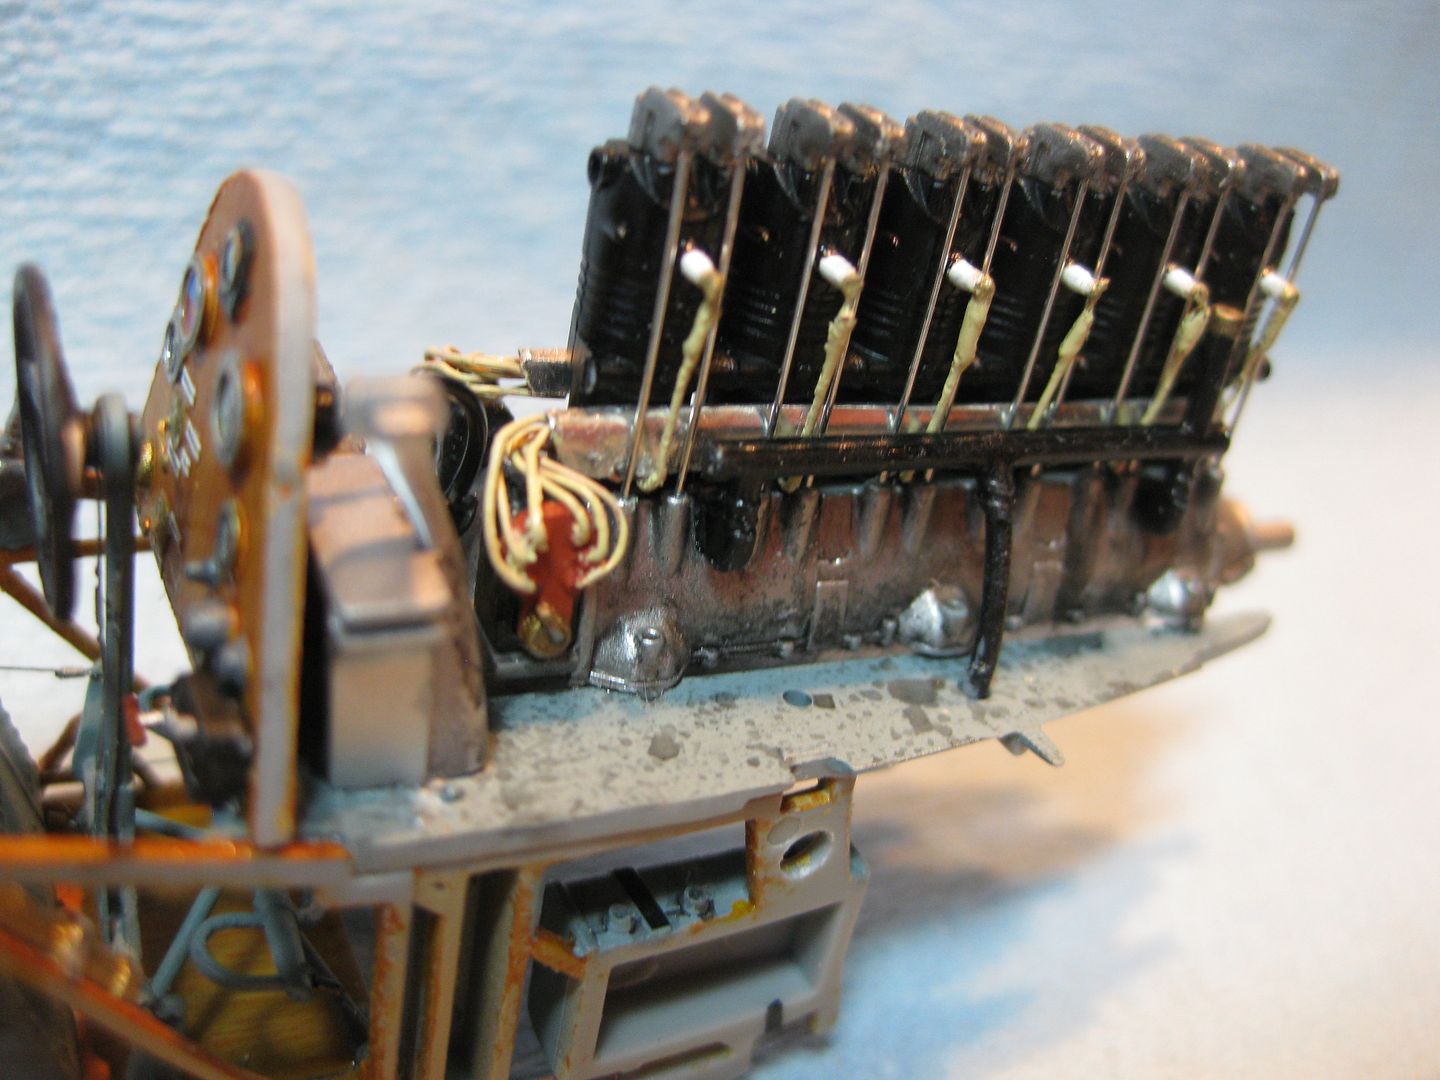


The weathering of the engine is complete using several applications of thin black and brown oil washes. Some "oil" was also added to the engine bearer panels.
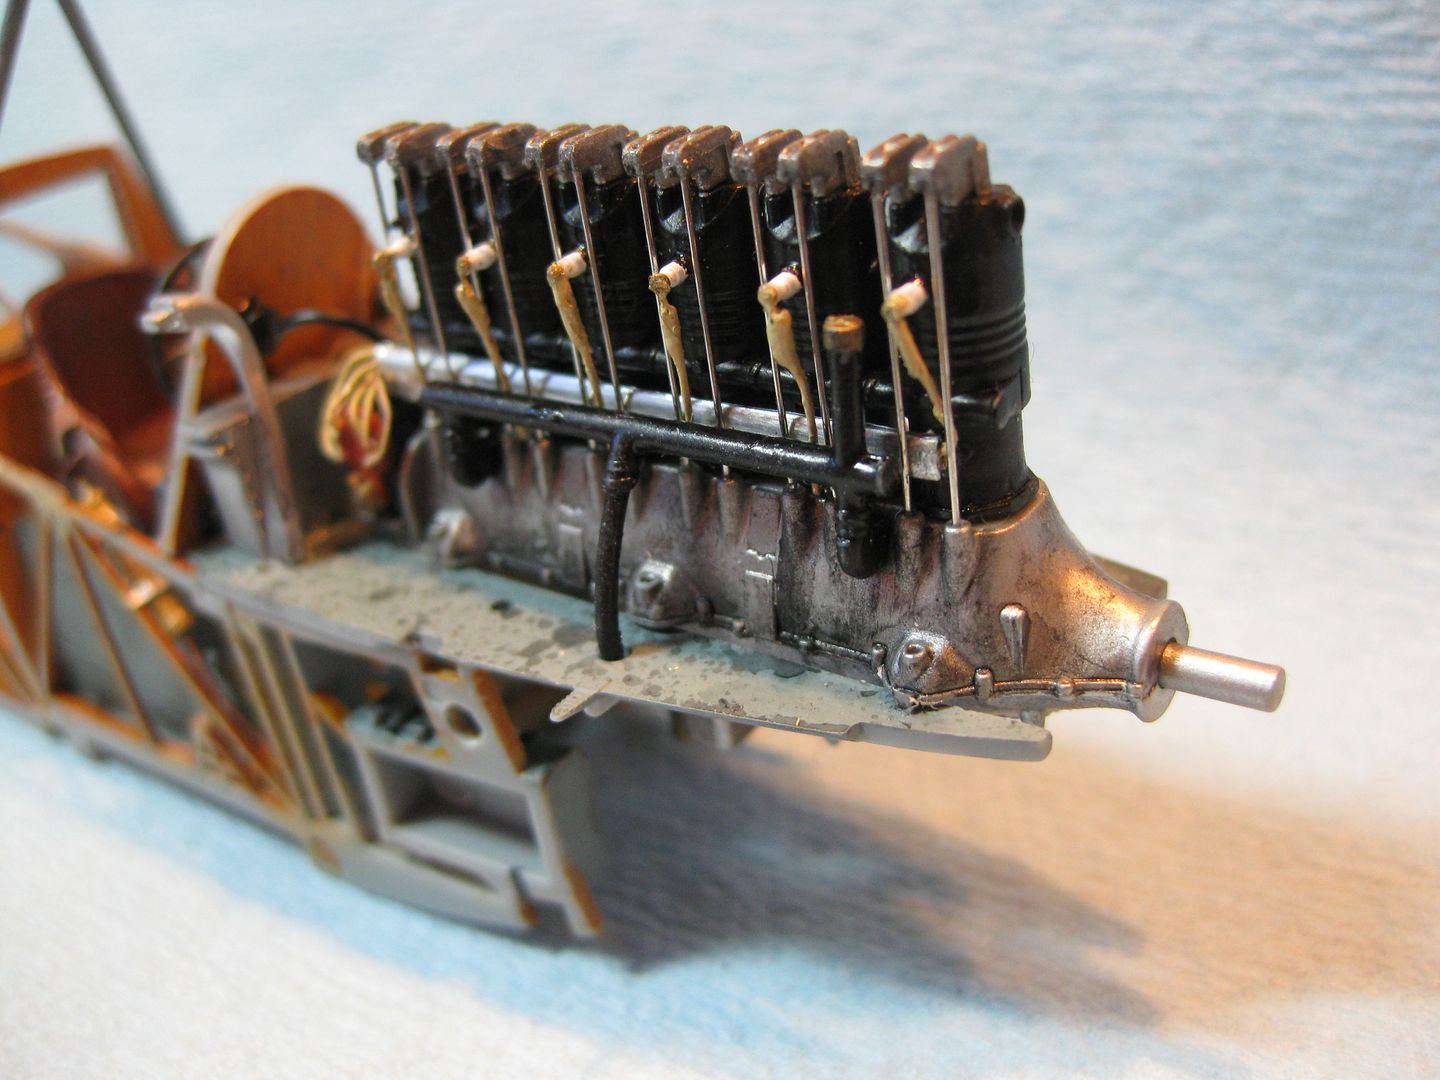


..... and finally the completed left side with the steel throttle linkage assembly added. This is an unashamed direct copy of the one Prze added in his build as I couldn't find any photos of the real thing. The Machro Mode is, as always, humbling regarding paint quality........and the bit of dog fuzz by Cylinder #5 has been removed!


       I've got the floats together and will be working on the completion of the fuselage next.
Cheers,
Lance


Offline gedmundson

  • Hero Member
  • *****
  • Posts: 1535
Re: Wingnut Wings Hansa-Brandenburg W.12 1183 Oblt.z.S. Christiansen
« Reply #38 on: January 08, 2017, 04:12:49 AM »
Beautiful work on your project Lance - I just came across this! Wonderfully detailed in all regards.
Cheers,
Gary

Offline coyotemagic

  • Hero Member
  • *****
  • Posts: 7710
  • "Here's to not buggering it up." -Winston Chuchill
    • My Models
Re: Wingnut Wings Hansa-Brandenburg W.12 1183 Oblt.z.S. Christiansen
« Reply #39 on: January 08, 2017, 08:48:16 AM »
Awesome work on the engine, Lance!  Great idea for the wiring harness.
Cheers,
Bud
"All men dream: but not equally. Those who dream in the dark recesses of the night awake in the day to find all was vanity. But the dreamers of day are dangerous men, for they may act their dreams with open eyes, and make it possible." -T. E. Lawrence

Offline boggie

  • Sr. Member
  • ****
  • Posts: 420
Re: Wingnut Wings Hansa-Brandenburg W.12 1183 Oblt.z.S. Christiansen
« Reply #40 on: January 08, 2017, 08:50:28 AM »
Nice Lance!

I reckon if I saw that little beastie on a cracker on a platter of hors d'oeuvres I'd choose it first.

It looks that good.  ;D

cheers  :)

Offline lcarroll

  • Administrator
  • Hero Member
  • ******
  • Posts: 8547
Re: Wingnut Wings Hansa-Brandenburg W.12 1183 Oblt.z.S. Christiansen
« Reply #41 on: January 08, 2017, 09:01:31 AM »
   Thanks for looking in and for your generous comments Gary, Bud, and Boggie. I really appreciate the votes of confidence!
Cheers,
Lance

Offline Manni

  • Hero Member
  • *****
  • Posts: 1768
    • Der Militärmodellbauer
Re: Wingnut Wings Hansa-Brandenburg W.12 1183 Oblt.z.S. Christiansen
« Reply #42 on: January 09, 2017, 09:59:07 PM »
Great engine, I think the pilots also liked a glas of MacAllan.
Manni
"Ich hab' da mal was vorbereitet.": Jean Pütz
"Warum noch mehr Bausätze?!?": meine Frau

Offline lcarroll

  • Administrator
  • Hero Member
  • ******
  • Posts: 8547
Re: Wingnut Wings Hansa-Brandenburg W.12 1183 Oblt.z.S. Christiansen
« Reply #43 on: January 10, 2017, 12:36:18 AM »
    Thanks Manni. Things haven't changed much with time, 100 years later this old Pilot enjoys a glass of The Macallan as well! ;)
    I closed up the fuselage yesterday, should have another update real soon.
Cheers,
Lance

Offline Juan

  • Hero Member
  • *****
  • Posts: 2455
  • All gave some, some gave all.
Re: Wingnut Wings Hansa-Brandenburg W.12 1183 Oblt.z.S. Christiansen
« Reply #44 on: January 10, 2017, 01:20:44 AM »
Love the detail you are putting into your build.