Author Topic: Blue Max 1:48 Sopwith Dolphin  (Read 18194 times)

Offline Trackpad

  • Hero Member
  • *****
  • Posts: 1306
Re: Blue Max 1:48 Sopwith Dolphin
« Reply #105 on: July 07, 2016, 10:03:41 PM »
Des, Bud and Filip, thanks for visiting!

Bud, actually I lucked out by locating the Citadel paints that matched Rowan's decal colours. I'm not sure who originally found them, but the older names of the paints are included in the instruction booklet of one of Rowan's sheets. The new names for those who'd like to try them are: "Evil Sunz Scarlet" (Red), and "Kantor Blue" (Blue). They must be thinned down quite a bit as they are rather thick paints. I've found the best way to do that is to put a dollop of paint into a small mixing cup and slowly add acrylic thinner until the mix "looks right." The "how fast does the mix run down the inside of the cup?" test works well for me. The "get it to the consistency of milk" method might also work well for those using it.

So I didn't really "match" the colours and therefore I can't claim the credit for doing so. But it's nice to know that you think I'm actually that talented! Thanks! (Just kiddin'!) ;D
Cheers!
Gary

"It was an adventure, a great adventure. And, like all great adventures, we never knew where it would lead or how it would end."

Offline Trackpad

  • Hero Member
  • *****
  • Posts: 1306
Re: Blue Max 1:48 Sopwith Dolphin
« Reply #106 on: July 16, 2016, 09:59:19 AM »
Here's a little bit of an update. The first photo shows the fuselage and wing parts dry-fitted in Rowan's jig to see whether or not I'm actually in the ballpark. Seems all right: the thin white interwing thingie is a length of plastic rod cut to the length of the struts.It seems to be sitting nicely in place, no distortion to the wing orientation and with a not too shabby backward stagger:


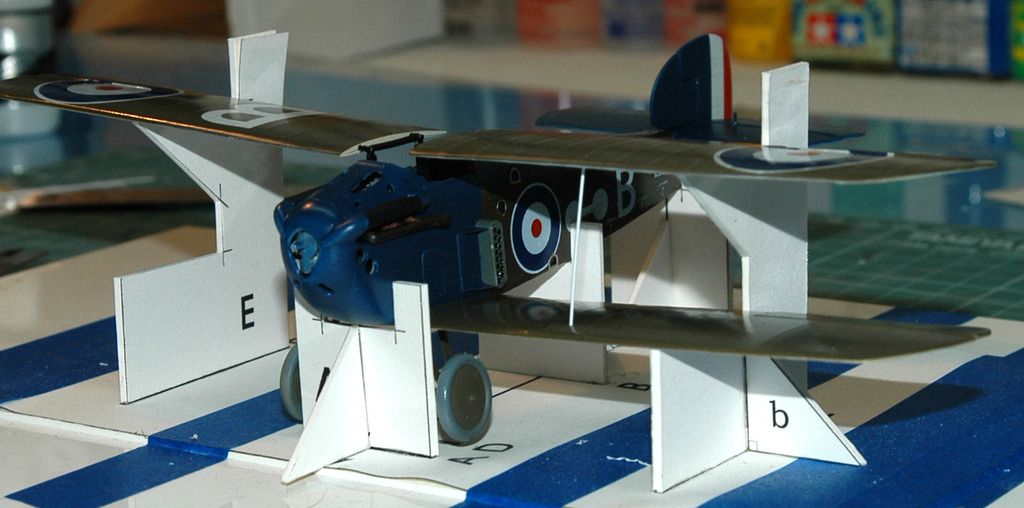
So we move on to the next stage: here is the lower wing formally fitted in place today courtesy of thin brass rod (two pins at the  spar locations) and a generous film of 5-minute epoxy on the inside edge of the wing parts:


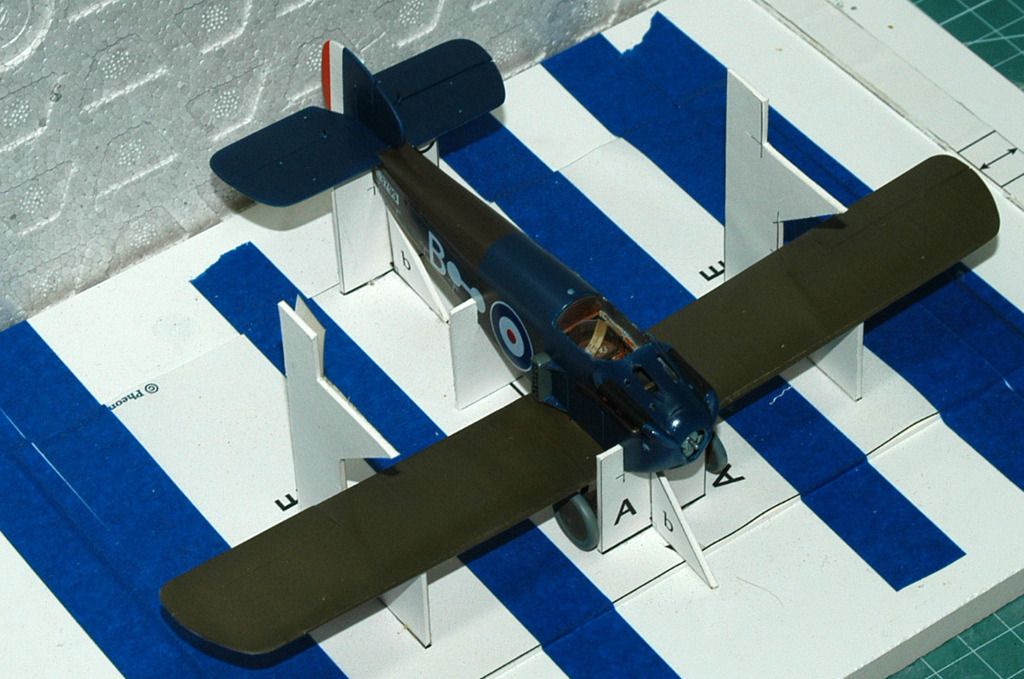
Now, I was going to post a photo showing the fuselage and lower wing standing clear of the jig. But I can't get Dolph out of the jig without removing part "A," which holds the nose of the a/c. So it looks as if Dolph will stay where he is while the upper wing surgery gets performed. Once that's done, I'll essentially cut him free. ;D

So my next task is to cut the struts out, paint and finish them, attach them to the upper wing, inner struts first (metal), then fit the upper wing, then spring the outer struts (plastic) into place.

Thanks for visiting!  8)

« Last Edit: July 16, 2016, 10:11:01 AM by Trackpad »
Cheers!
Gary

"It was an adventure, a great adventure. And, like all great adventures, we never knew where it would lead or how it would end."

Offline Monty

  • Hero Member
  • *****
  • Posts: 1682
Re: Blue Max 1:48 Sopwith Dolphin
« Reply #107 on: July 16, 2016, 11:15:04 PM »
Stunning progress! A great looking model! I must get one...
ATB,
Marc

Offline Trackpad

  • Hero Member
  • *****
  • Posts: 1306
Re: Blue Max 1:48 Sopwith Dolphin
« Reply #108 on: July 16, 2016, 11:23:23 PM »
Stunning progress! A great looking model! I must get one...
ATB,
Marc

Marc, many thanks for visiting and for your support. :)

But trust me on this: get the recent CSM Dolphin. Much easier to build than this Blue Max offering. It has been a real wrestling match for me to get it this far, and I think that CSM is the way to go now, especially with its one-piece upper wing structure!  ;)

As and when you get one, I send you best wishes for a successful build!  8)
Cheers!
Gary

"It was an adventure, a great adventure. And, like all great adventures, we never knew where it would lead or how it would end."