Thanks for the kind words, Cajun.
I have a small, but much overdue update. I have been on vacation with my family for the majority of the last 2 weeks, so between travel and the absolutely stunning weather we have been enjoying, time at the bench has been minimal (for both this aircraft and the D.VII I am planning for the group build!) That said, I did squeeze in a bit of modeling time, most of which has gone towards moving the cockpit to completion:
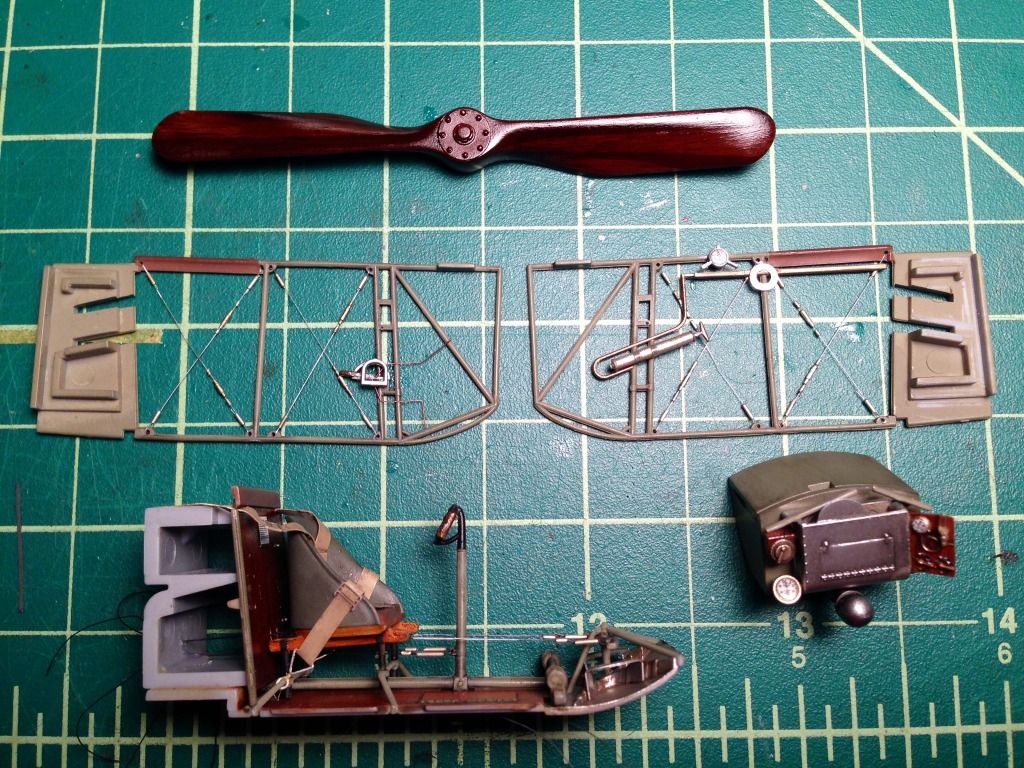
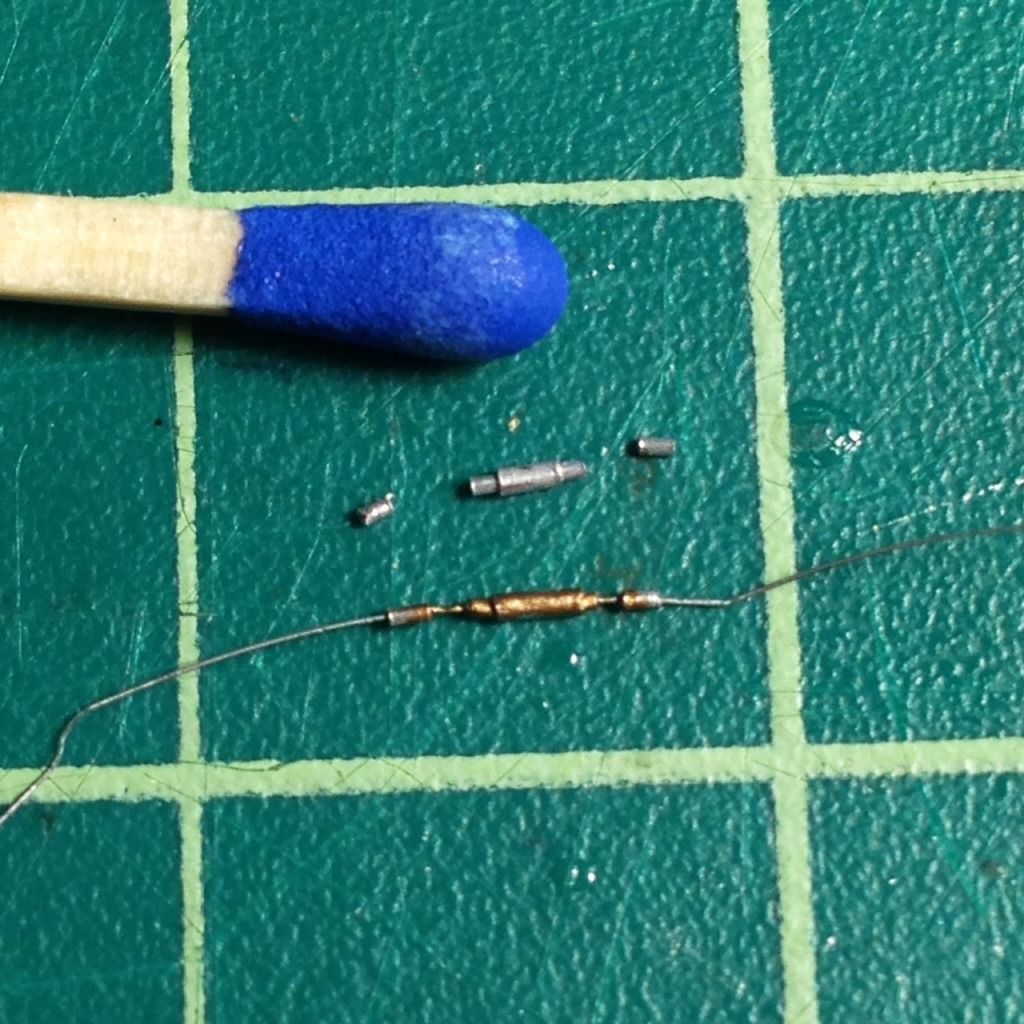
The side bracing is monofilament, and the turnbuckles are fashioned from slide fit aluminum tubing which I colored with a gold Sharpie. I had originally strung a version with Gaspatch turnbuckles (1:32), but my results looked too cramped on those small spans, so I decided to try to simplify a bit. I cut small pieces (not really small enough to be scale) to represent the eyelets at either end, and pair of slide fit tubes to represent the body:
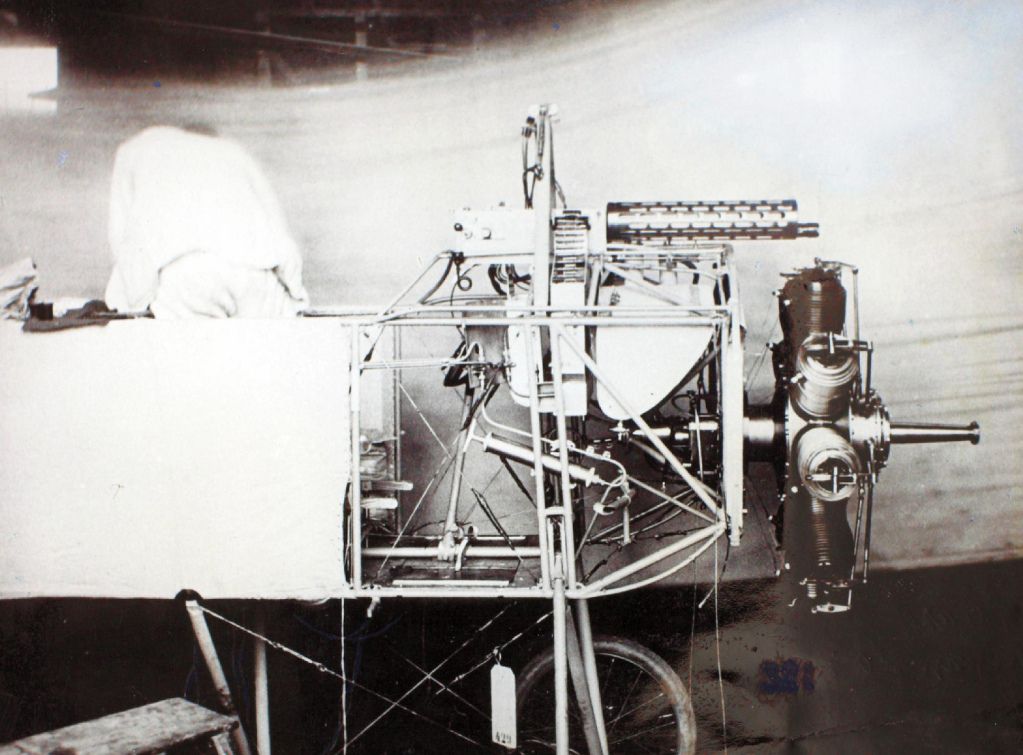
After I had worked all of this out and completed the rigging, I realized that the nagging feeling I had was caused by the fact that a majority of the reference photos I have seen seem to show some kind of protective covering over the turnbuckles, which would probably argue for a different representation. For example (from the San Diego Air & Space Museum Archives):
Oh well, perhaps for my next Eindecker build.
The control line rigging is fine EZ Line Sharpied silver, with the exception of the wing warping lines running from the small pivoting arms beneath the pilot's chair, which are monofilament.. I have not fully envisioned how they are utilized in the final build, and I am leery of having them hanging off of my fuselage during the painting process. I plan on using just enough of them to attach to turnbuckles which will then, in turn, connect to the actual wing rigging, but left them long to, hopefully, make it easier to accomplish this. Any advice here from the Eindecker builders would be welcome.
Pressing the structure together for a few pictures looks like this:
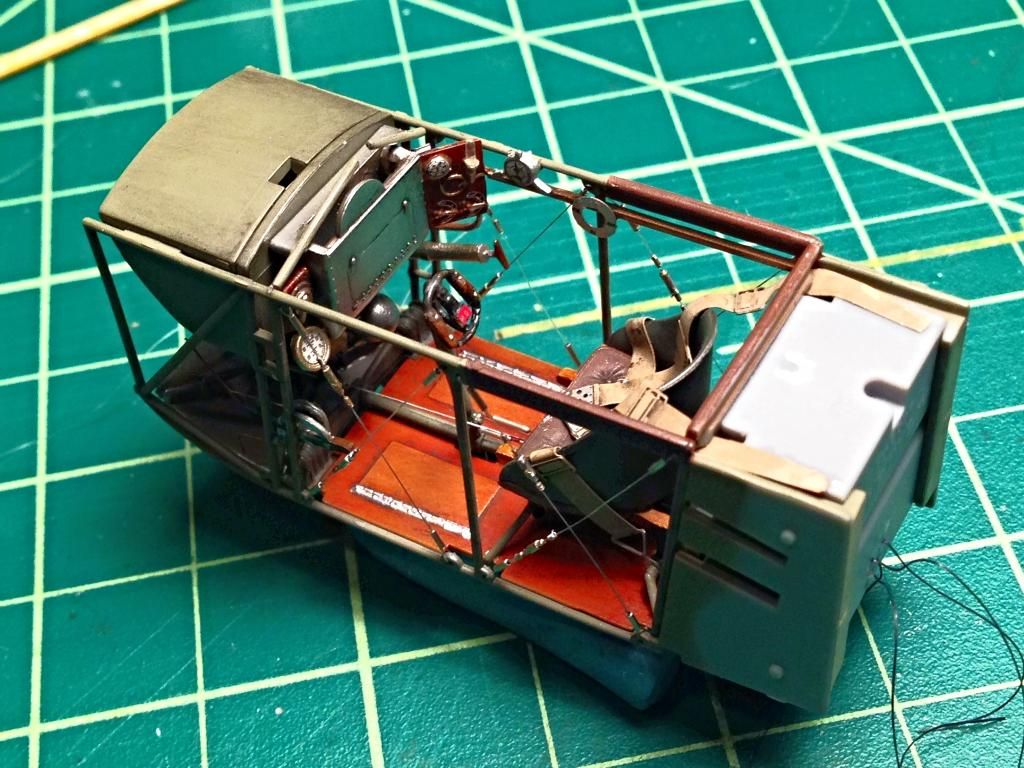
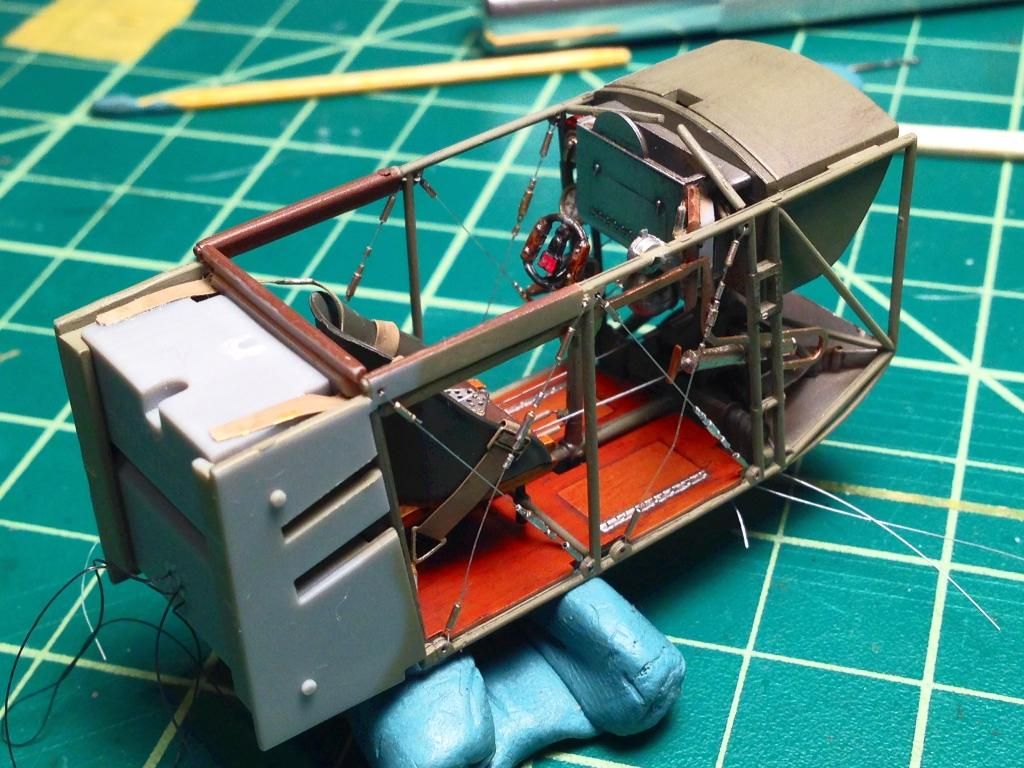
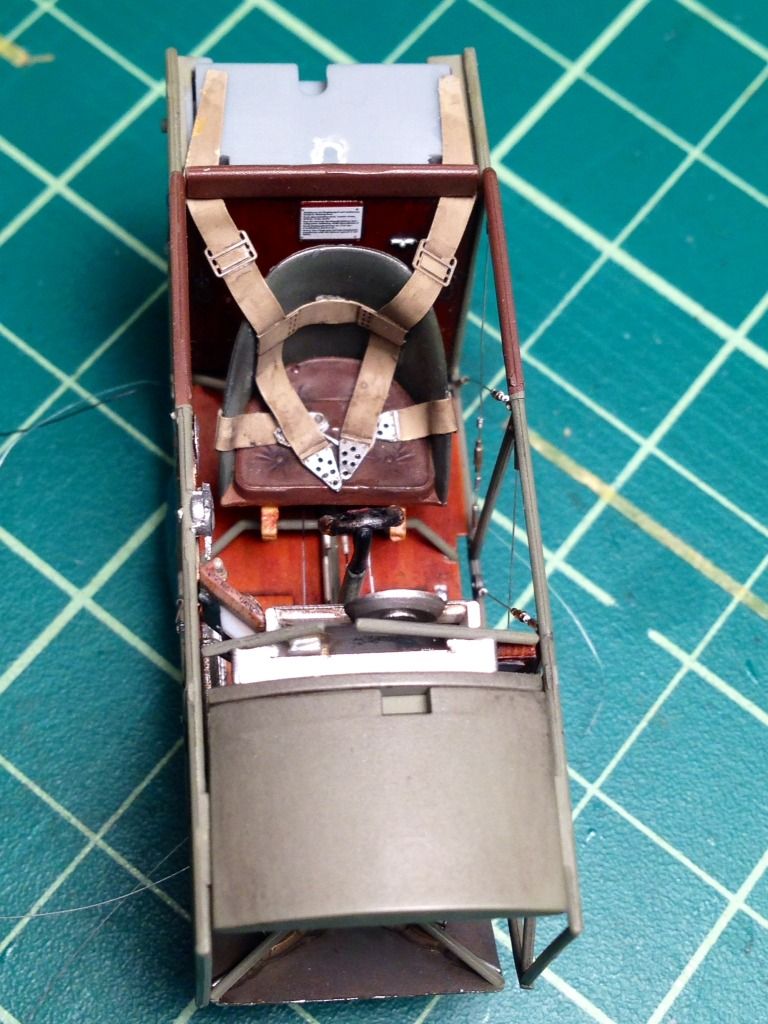
I can see that a bit of flex in the plastic framing means that I will have to tighten up one or two of the monofilament bracing lines. I can also see that the wrestling process of getting the photo-etch belts has marred the paint on the back of the seat, despite my annealing and pre-forming the belts prior to painting anything. I may be ready to spend the extra money on fabric belts.
I didn't execute the turned finish on the aluminum of the front flooring or the ammunition box. I am using the reference photo on page 3 of the instruction book to justify my decision, but must say I like how it looks on those of your builds where you took the extra steps required.
I have drilled a pair of holes in the middle cross bars on the framing just ahead of the control panel which I will use for the cross bracing at the pilot's feet once the cockpit is assembled. I have also drilled the connection point at the base of the control stick for the elevator lines. I am planning on adding a bit of EZ Line to represent the cable the runs from the machine gun to the trigger on the stick, but will wait until after I have removed any masking post fuselage painting so as to avoid damage.
Finally, as can be seen in the first picture, I gave the propellor a few coats of clear "varnish" once the oil paints had dried. The first coat was a mix of clear yellow & red, and a second coat was a clear brown that I mixed from clear red, yellow and blue. As a side note, I am thrilled that Bertl gave a more detailed explanation of his colored pencil technique, as I am still looking for a better way to represent the laminations.
I should have the cockpit finished this evening, and then will have to stop procrastinating on figuring out my technique for the turned aluminum so I can button up the fuselage. If anyone notices any important rigging steps I shouldn't miss prior to that step, please let me know. Any other suggestions, comments and critiques are welcome.
Thanks for stopping by, and thanks for making it through this post,
Chris