Author Topic: WNW D.Va with a side order of AMS  (Read 11035 times)

Offline kornbeef

  • Hero Member
  • *****
  • Posts: 961
  • U.K. Carpet monster genocide squad leader.
WNW D.Va with a side order of AMS
« on: May 22, 2012, 04:46:12 AM »
Here I go again.  I blame Jamo...... I have to blame someone.  I love the Albatros and until WNW think of releasing a DIII with correct interior and all those wonderful WNWish bits I’ll sate my craving with a D.V or two. It’s an early Birthday pressie SWMBO must have thought I deserved it... or she has something in the pipeline she has sweetened me up nicely to announce.  So I decided to let AMS free it’s been a while since I have. And in my style I started every part of the kit at once.  Chaos ensues. Though I try to concentrate on one area for a short while at a time.
So seeing as I’m starting the blog earlyish for me I’ll try to show what I change and explain why.  Now I don’t wish anyone to take this as a WNW bashing exercise as it’s not, not at all.

Reference used is....
The two new Albatros at war datafiles, the old Albatros Fighters Special  datafile, WNW’s own website, Tval’s website, info gleaned over the years from the members on  Aeroscale’s  Early aviation forum and other great sites, some now not so great.
 So on with the boring diatribe...lol
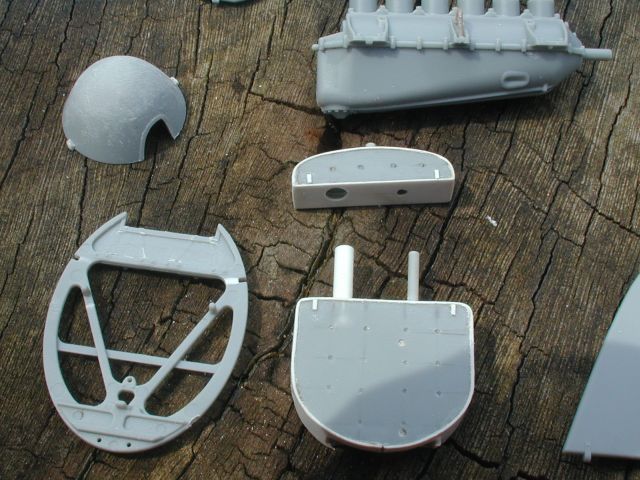

Fuel tank
Going by reference and TVAL’s pictures it would seem the tank is slightly wider than it should be. Not a problem for most builds of course when its tucked out of sight.
Using TVAL pics I rebuilt it shaving about 1.25mm off each side, the bottom is different but will be out of sight. I sanded all detail off, cut the two tanks apart and redid the seam/lip with thin plasticard wrapped around the basic tanks.  To get the look right I drilled clear through the reserve tank to show the two pipes that come up through it, adding the filler pipe to this at the same time. I started the mountings and pipework connections.

Former/bulkhead
I’ve removed the forward gun mounts for 3 reasons-  1.  AMS   2. Ejection pin marks   3. There’s detail to add behind them. Hopefully the half built D.Va I have will be enough to realign the rebuilt parts when needed.

Spinner
Trying to reprofile the kit spinner as it seems too pronounced, if it doesn’t look okay I’m considering grafting a spare Roden one I have.
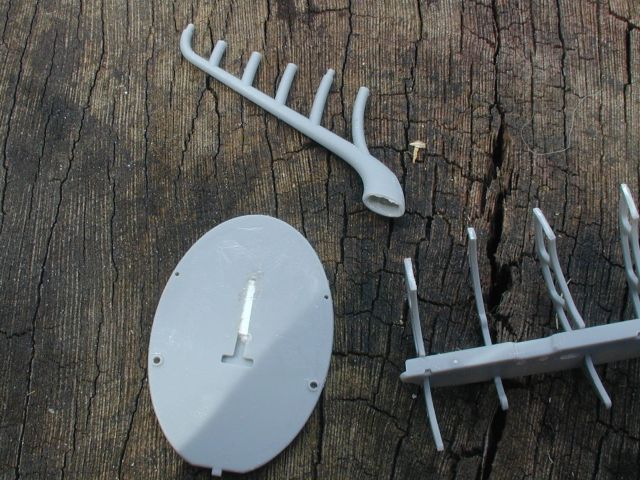
 

Exhaust
I managed to open out the exhaust without trashing it. Welds will be added from milliput  and or stretched sprue.
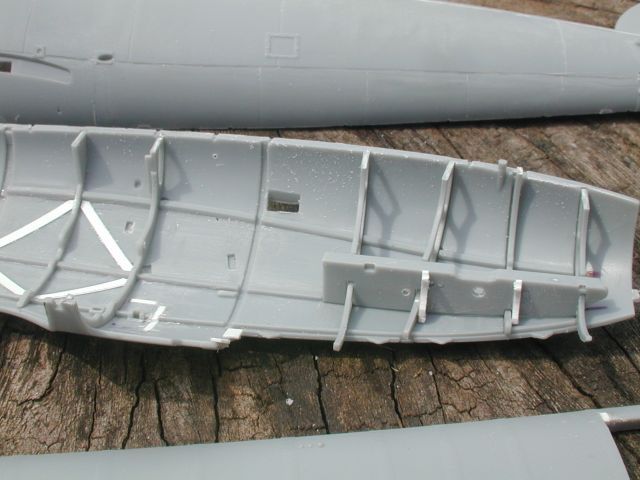

Engine bearers
Big step away from the program here... To facilitate the extra details I intend to put in assembling the fuselage in halves will make most far easier.  So I cut the formers in half assembled each in their corresponding fuselage halves to set off after adding some details (oil tank mountings) and some basic amendments. Once these are filled tidied and readied they’ll be assembled into the fuselage for detailing proper.

Cockpit sides
I felt the thin diagonal strips were a bit too wide, I had considered stripping the internal detail and sanding the interior thinner (I’ve done that before!) but decided removing some detail and remaking it would be easier and just as effective.  I intend to build up the coaming padding and remake the two panels that brace the gun mount to the fuselage former  (flat with half moon cut outs.  These are poorly presented by the kit I thought.  The two wooden rails/handles beside the seat are to be remade and the formers need packing in places.  To my odd mind this method of construction seems the most practical way to achieve this, of course there’s going to be major hiccups when it comes to fitting the pulley assembly’s seat etc but I’m confident (gulps) on over coming these.
The fuel control panel. I believe its too far back. So I filled the slots.
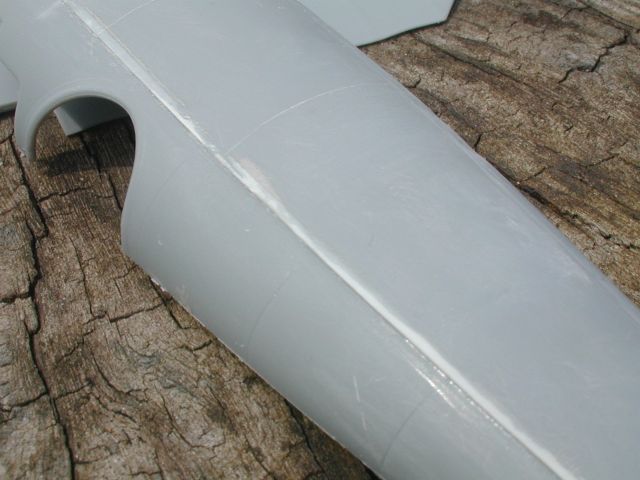

External fuselsage.
Fun time. Making the planking effect... close examination of pics show the panels lay over each other in places. I overlapped the side over the underside and upperside spine panels over the side ones using a clear pic of an OAW D.Va only to realise when researching which to build that on the D.V the side panel appears to overlap both, hence the white plastic strip sanded into shape (DOH!) .  Cowling fastener mountings are to be thickened and sanded to achieve the right profile again. Cable slots are opened up awaiting final detailing.  I’ve also tried to replicate the rippling effect seen on many period pictures where the skin seems to have gone out of shape in places, how this has worked it’s hard to tell till the paint starts being laid on and that’s weeks away I think.

Upper wing
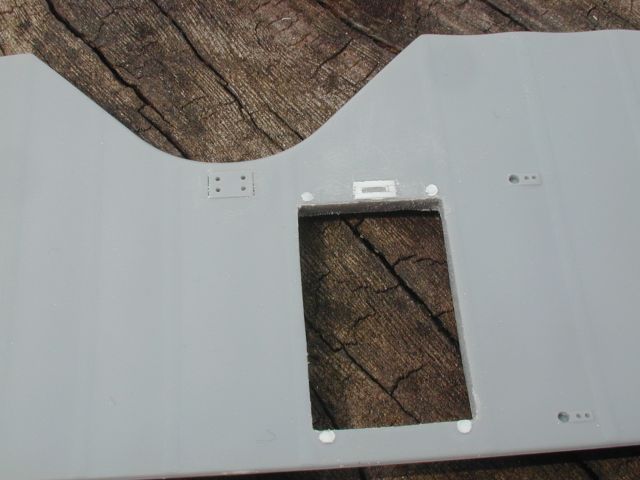
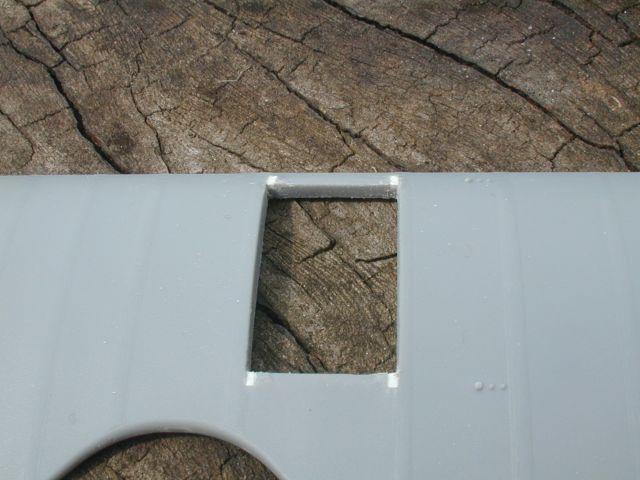
I filled the 4 slots for the rad mounting then in a fit of insanity found myself removing the plastic in the opening, whey?  To build the rad as a unit and make detailing the mountings better. Using the TVAL pics again I made slight profile differences to the surface and added the spar inspection window.  Opening out the shrouds for the actuating cables for the ailerons too while I was on and filling the rather obvious gap around them.  I drilled the wing ready for pinning the ailerons whilst I was on.

Lower wings
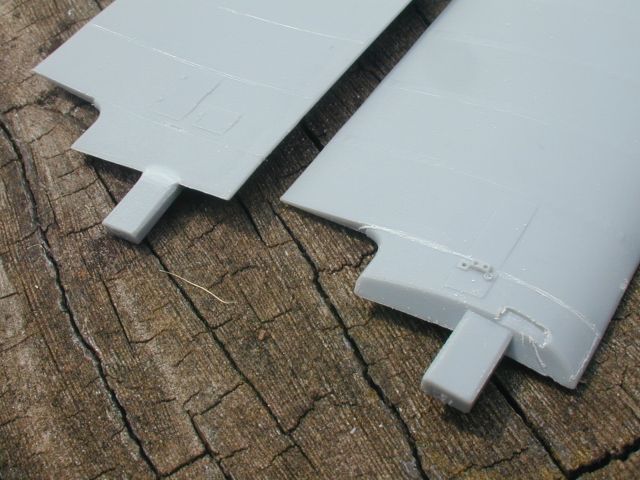
I added the slot near the upper front of each wing, and am on scoring the join between wood and fabric, there some extra details bolt heads etc to add and I need to scrutinise just how the rigging attaches.  I chamfered the edges of the wingroots, and the slot in the fuselage dryfitting to try to ensure she doesn’t have that unwanted wing sag once that stage of building comes.

So far so good, and not a drop of kornbeef blood shed, or tears YET.


Cheers Keith


 ;)
Never too old to learn sumfink noo

Offline GAJouette

  • Hero Member
  • *****
  • Posts: 3579
  • " Beware of the Spanish Inquisition"
Re: WNW D.Va with a side order of AMS
« Reply #1 on: May 22, 2012, 05:23:37 AM »
  Keith,
Outstanding first progress my friend. Oh I think another masterpiece is in the works here. Always a joy to follow your threads here and elsewhere.
Highest Regards,
Gregory Jouette
" What Me Worry"

Offline coyotemagic

  • Hero Member
  • *****
  • Posts: 7710
  • "Here's to not buggering it up." -Winston Chuchill
    • My Models
Re: WNW D.Va with a side order of AMS
« Reply #2 on: May 22, 2012, 05:46:30 AM »
You're off to a fantastic start, Keith.  I'm looking forward  to watching this one progress.
Cheers,
Bud
"All men dream: but not equally. Those who dream in the dark recesses of the night awake in the day to find all was vanity. But the dreamers of day are dangerous men, for they may act their dreams with open eyes, and make it possible." -T. E. Lawrence

Offline kornbeef

  • Hero Member
  • *****
  • Posts: 961
  • U.K. Carpet monster genocide squad leader.
Re: WNW D.Va with a side order of AMS
« Reply #3 on: May 22, 2012, 08:11:27 AM »
Thanks guys, One major Faux Pas though... its a D.V not a D.Va  these old eyes and brain... aint what they used to be  ::)
Never too old to learn sumfink noo

Offline Pete Nottingham

  • Hero Member
  • *****
  • Posts: 906
  • I chose the wrong week to stop sniffing glue
Re: WNW D.Va with a side order of AMS
« Reply #4 on: May 22, 2012, 09:20:14 AM »
This one looks a goody Keith, great first progress.

Cheers

Pete.

Offline pepperman42

  • Hero Member
  • *****
  • Posts: 4443
  • Sergeant, my brown pants.......
Re: WNW D.Va with a side order of AMS
« Reply #5 on: May 22, 2012, 09:31:50 AM »
This is taking an outstanding kit to the next level. Im watching this one closely!!!!

Steve

Offline Whiteknuckles

  • Hero Member
  • *****
  • Posts: 1334
Re: WNW D.Va with a side order of AMS
« Reply #6 on: May 22, 2012, 11:36:16 AM »
I'm amazed at the amount of work you guys put in, pretty damn awesome!!
Looking great Keith ;)

Andrew
Eternal Apprentice

Offline lcarroll

  • Administrator
  • Hero Member
  • ******
  • Posts: 8558
Re: WNW D.Va with a side order of AMS
« Reply #7 on: May 22, 2012, 12:04:36 PM »
Thanks guys, One major Faux Pas though... its a D.V not a D.Va  these old eyes and brain... aint what they used to be  ::)

Good Lord Keith,
    I actually thought for a moment you might be doing both!!
As earlier, I'll be watching carefully and learning from this one for sure.
Cheers,
Lance

Offline phs Paddy

  • Sr. Member
  • ****
  • Posts: 325
Re: WNW D.Va with a side order of AMS
« Reply #8 on: May 23, 2012, 12:45:31 AM »
I join the group in following along Keith and watching your machine come to life.    

Many thanks for describing your approach to adding and fixing details. All good stuff that I hope sticks to the old gray matter here.  :)

Paddy
In mathematics you don't understand things, you just get use to them. Johann von Neumann 1903-1957

Offline keith_christie

  • Jr. Member
  • **
  • Posts: 82
Re: WNW D.Va with a side order of AMS
« Reply #9 on: May 23, 2012, 06:31:04 PM »
Very nice progress Keith, I'll be following along to pick up some tips if I may.

Best Regards

Keith.

Offline Des

  • Administrator
  • Hero Member
  • ******
  • Posts: 9325
    • ww1aircraftmodels.com
Re: WNW D.Va with a side order of AMS
« Reply #10 on: May 23, 2012, 08:36:58 PM »
Excellent start Keith, this will be a "must watch" build.

Des.
Late Founder of ww1aircraftmodels.com and forum.ww1aircraftmodels.com

Offline bobs_buckles

  • Hero Member
  • *****
  • Posts: 3734
  • Freedom isn't free.
    • Bobs Buckles
Re: WNW D.Va with a side order of AMS
« Reply #11 on: May 23, 2012, 09:51:25 PM »
Looking forward to more updates.
Great work thus far!

 ;)BVB :)


https://www.bobsbuckles.co.uk/

Last Minute Man Of Faith

Offline uncletony

  • Hero Member
  • *****
  • Posts: 4349
    • Aircraft In Pixels
Re: WNW D.Va with a side order of AMS
« Reply #12 on: May 23, 2012, 10:34:54 PM »
Wow, awesome. Also following along with great interest!

Offline kornbeef

  • Hero Member
  • *****
  • Posts: 961
  • U.K. Carpet monster genocide squad leader.
Re: WNW D.Va with a side order of AMS
« Reply #13 on: June 10, 2012, 01:29:38 AM »
Hey all sorry it's been a while but life bites sometimes.
So, back with the next instalment. Lots of hours spent and not looking awfully different. Probably because I’ve been hopping from assembly to assembly willynilly. 
So Elevator and rudder, I added *subtle* stitching and taping. I know that the control surfaces weren’t taped like the main flying surfaces but close inspection shows stitching and taping, so I added these using a method I tried on the DII.


Fuselage.   so far, I’ve added some former strengtheners, bracketry and the supports for the gun mounts and refined/added some structure. The edges of the engine bay have been brought closer to how they appear in the TVal pix Jamo provided. Engine bearer halves have been fixed in place cabane strut  bracketry is in the throes of being done. Extra wood has been added to the formers that protrude above the bodywork, after all the scale thickness of a sheet of alloy isn’t about 0.5mm.
Some external details have been lost/shaved off and wil be replaced with PE. I’m attempting to replicate the rippled surfaces some Albies seemed to have to some success though it hardly shows in pics.
I’ve built up the coaming padding roughly using rod, shaved to suit and bent fixed by cyano and fitted some of the internal fittings making the bracket for the fuel guage out of a scrap of etch instead of a blob of plastic. The dynamo charger will be done similarly.


Engine.   Built as an early 160, I replaced the kit ignition harness tubes, they seem underscale and added all the mountings from tape strip and grandtline nuts. Extra hose connections, wiring and some detailing to magneto’s carb and base and drilling out the rocker boxes of the cylinder top assembly is finished with the making of the what I call C-nuts around the manifold to cylinders is underway.


Seat.    Cushioning and padding added from Milliput. I cut the base out the side to do this, the buttons are rod pushed through holes drilled through the base and all reassembled once I was happy with the component parts. Lower seat belts will be added before painting and fitting I think, probably out of  lead sheet,  even though I have PofP and Eduard etch and HGWs fabric ones utilising the buckles and such from the above.


Bits and bobs, I spent an age doing the fuel tanks, I was but after looking at the pics am now not so happy with the angled pipework coming out the top and may redo it a little smaller. I fitted rigging points to the rear axle bar instead of the kit suggested points on the UC legs and scribed the dividing line between the two halves of the fairing.  The oiltank took some puzzling before I realised it was a bit short compared to the Tval build, as I worked out where the mountings were on the engine bearer.  Ive done lots in all areas not pictured too including detailing the control column and adding the exhaust flanges, detailing the carb body and such.


So lots done with little to see for it. Lots more yet to do before real progress looks done (paint)

Thats all for now folks, back to the bench

;) Keith
Never too old to learn sumfink noo

Offline Chris Johnson

  • Hero Member
  • *****
  • Posts: 1959
Re: WNW D.Va with a side order of AMS
« Reply #14 on: June 10, 2012, 02:04:24 AM »
Great attention to detail. You just have to give us a rundown on how you did your seat cushion. It looks superb!

Cheers,

Chris
You can have it good; You can have it fast; you can have it cheap. Pick any two, but all three are impossible.