Author Topic: 1/32 albatros D:III roden  (Read 69590 times)

Offline uncletony

  • Hero Member
  • *****
  • Posts: 4384
    • Aircraft In Pixels
Re: 1/32 albatros D:III roden
« Reply #120 on: June 23, 2013, 10:20:33 PM »
Paolo beware: The clear orange and / or yellow will only make it darker still!

Offline mc65

  • Full Member
  • ***
  • Posts: 216
Re: 1/32 albatros D:III roden
« Reply #121 on: June 23, 2013, 10:51:34 PM »
moan und groan.... so no hope to restore it?  :-[

I think I'll go ahead with it as is, and then decide if strip it down to bare plastic skin, or accept it..

Offline mc65

  • Full Member
  • ***
  • Posts: 216
Re: 1/32 albatros D:III roden
« Reply #122 on: June 24, 2013, 11:01:40 AM »
jellyfish.
tons of jellyfish. if this is not bad luck ... for once I try to take a bath! :o


got home, I put hand to the fuselage. we say that step one of the first attempt is complete,
4840

also in white on the wood.
4843

I now have to decide whether to keep it that way or do it again, all more light and yellowish ...in your opinion?
greetings, p. ;)

Offline uncletony

  • Hero Member
  • *****
  • Posts: 4384
    • Aircraft In Pixels
Re: 1/32 albatros D:III roden
« Reply #123 on: June 24, 2013, 11:18:08 AM »
It looks great, maybe slightly too dark (mine is too!), but so what. I say keep going.

-Sören-

  • Guest
Re: 1/32 albatros D:III roden
« Reply #124 on: June 24, 2013, 03:44:09 PM »
The wooden fuselage is a little bit too dark for Voss's plane in my opinion. I don't know if I would change it again. But lighter would be better for Voss's plane. In any case the tail is much too dark. It was white and not a shade of grey. I think there was't any woodgrain showing through the paint.

Offline mc65

  • Full Member
  • ***
  • Posts: 216
Re: 1/32 albatros D:III roden
« Reply #125 on: June 24, 2013, 06:21:15 PM »
mh-mh...
actually, it's dark especially to be the voss one.....

so, we have one of the three:
- I don't care, and keep going on this. (I don't like this kind of approach).
- I'll strip it down to plastic and restart. (I hate this sort of thinghs).
- I buy another roden kit, and use this one for another, dark, aircraft, all in all I have three camos, on the fcm sheet.... (sounds totally crazy).

dunno. but I'm far from the bench, so there is some time to think about....

-Sören-

  • Guest
Re: 1/32 albatros D:III roden
« Reply #126 on: June 24, 2013, 07:06:07 PM »
I prefer the last option. Your Albi looks very good but as I sayd to dark for Voss's Albatros. You should finish the kit as an other plane which was darker and if You want the Voss bird buy a new kit and restart. There are so many interesting color shemes. You can not have enough Albatros models.

Offline pepperman42

  • Hero Member
  • *****
  • Posts: 4503
  • Sergeant, my brown pants.......
Re: 1/32 albatros D:III roden
« Reply #127 on: June 25, 2013, 12:03:29 AM »
Keep going - I think this is a good looking model. You have evened out the contrast VERY well. Just do another bird. Do you really want to start ANOTHER one? ;)

Steve

Offline RAGIII

  • Hero Member
  • *****
  • Posts: 19684
Re: 1/32 albatros D:III roden
« Reply #128 on: June 25, 2013, 12:35:12 AM »
Keep going - I think this is a good looking model. You have evened out the contrast VERY well. Just do another bird. Do you really want to start ANOTHER one? ;)

Steve

I agree with Steve. To me the "Darker" shade isn't far off...
RAGIII
"A man has to know his limitations": Harry Callahan

"Don't slop it on" Lynda Geisler

Offline mc65

  • Full Member
  • ***
  • Posts: 216
Re: 1/32 albatros D:III roden
« Reply #129 on: June 25, 2013, 12:03:11 PM »
ok, voting ended, open the ballot box, we keep this ... especially the steve's question was enlightening to me: Do I really want to start another one?
NO.  ;D


thanks to an idea of a friend, I tried to use filters "aging" of the true earth. previously I used them (a little) on tanks, but I had not thought about the possibility of using them here.
since I never tried them with airbrush, I helped the mixing with some gums with thyme and honey... ;D
4856

first of all, since they are water-based and slip on the mirror surface of the wax, I gently sanded the fuselage.
4853

then I applied the first stage of filter with brush, to saturate the area.
4862

with the matte surface and with a solid base of filter, I went to the other tones with the airbrush.
4865

and that's it, I do not go over.
to avoid the risk of overdoing it, I started to glue the eduard PE.
4866


and then, after having adjusted the panel lines and the nails, I give a coat of wax.
I think that makes it better opaque, but we'll see after the insignia.
4871

I added details not provided, such as the drainage holes. and also made a mold for the eight vents in the engine compartment, tomorrow we'll see what it was.
4868

the next goal will be to find a white who marries the one already used in the fuselage ...
4873

to close, just arrived by the skilled hands of doug ....
4872
definitely wasted, for this model, but I could not resist! ;D ;D ;D

regards, p. ;)

Offline uncletony

  • Hero Member
  • *****
  • Posts: 4384
    • Aircraft In Pixels
Re: 1/32 albatros D:III roden
« Reply #130 on: June 25, 2013, 02:17:11 PM »
I like the drain holes :)

Offline mc65

  • Full Member
  • ***
  • Posts: 216
Re: 1/32 albatros D:III roden
« Reply #131 on: June 26, 2013, 12:18:59 PM »
thanks, bo!

today I'm almost satisfied about what I've done. maybe it's an effect of the too much focusing at, or the "cockroach syndrome"... let's have a look:

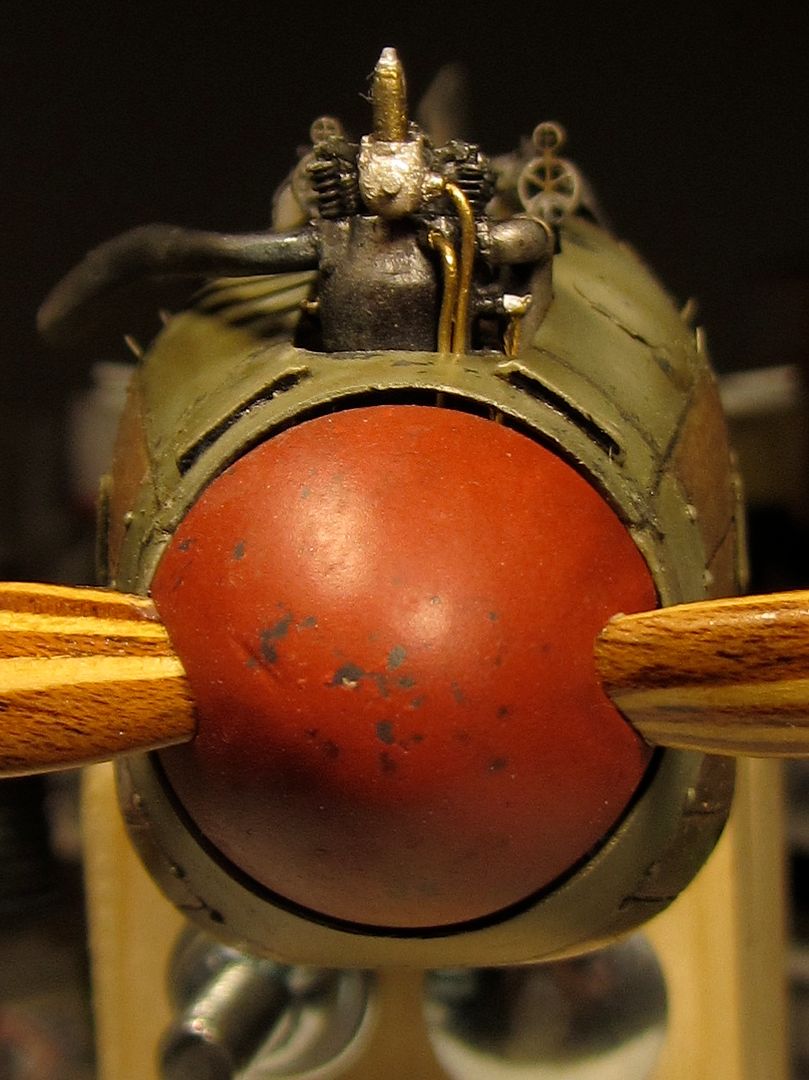
see the space between the spinner and fuselage?


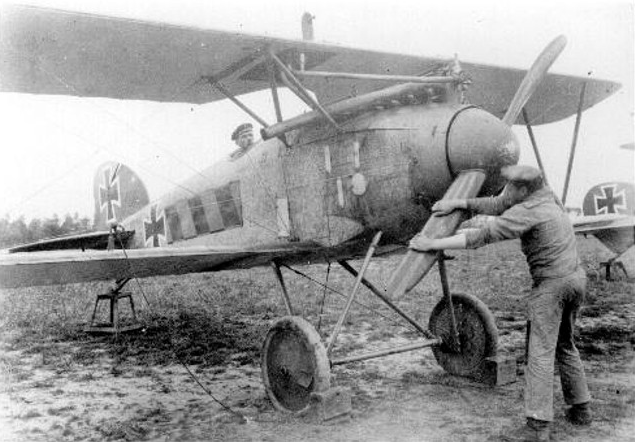
here, in fact. the model does not have it. indeed.
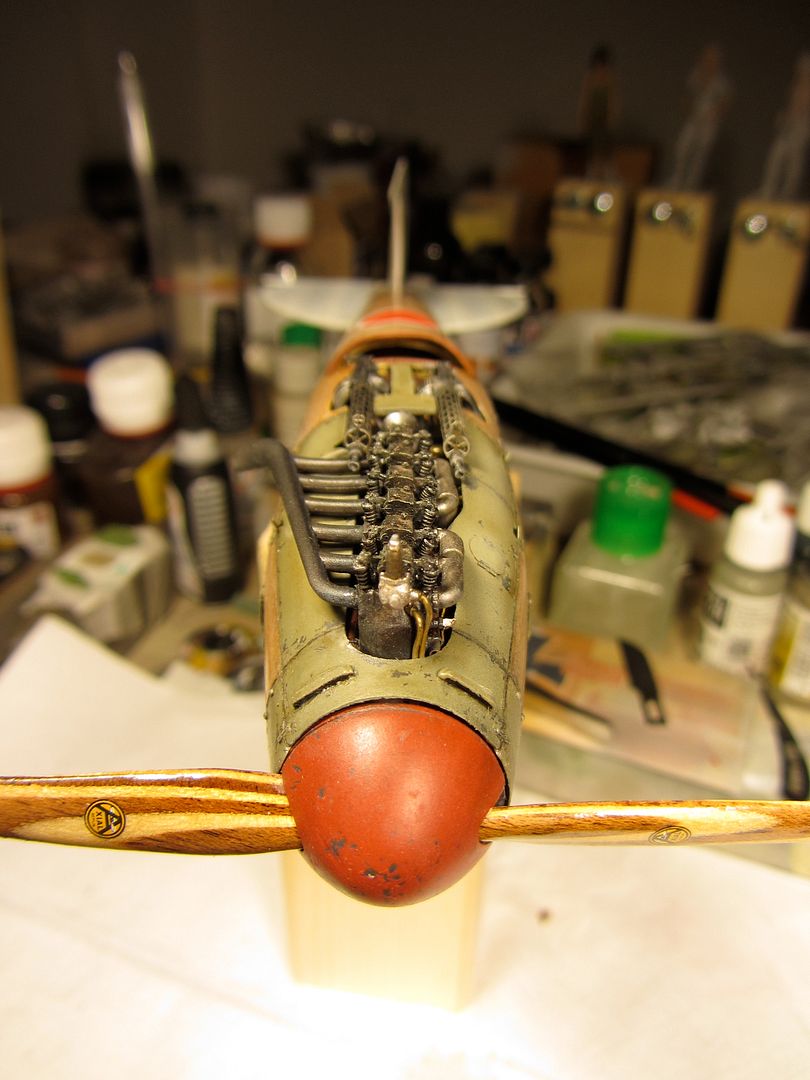
here I have a good amount of fuselage walls thinned out, but not enough, apparently. and it is also all wrong, damn...
4878

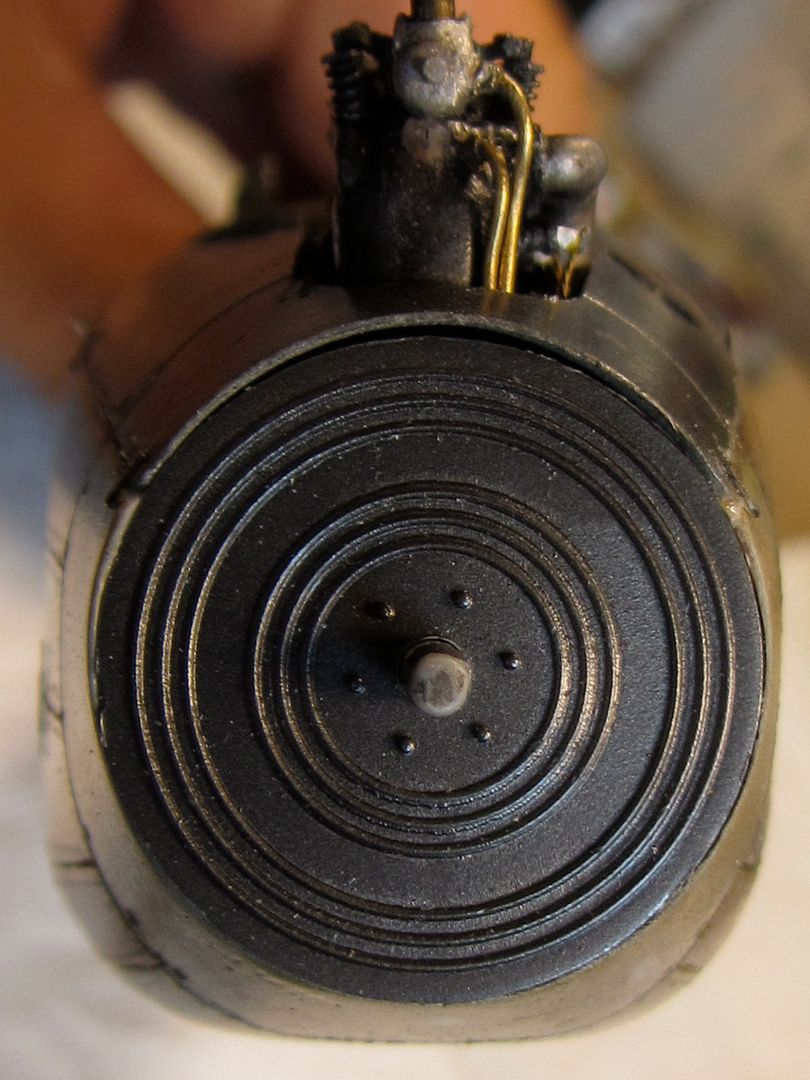
and then I've also reduced the spinner itself.
4880

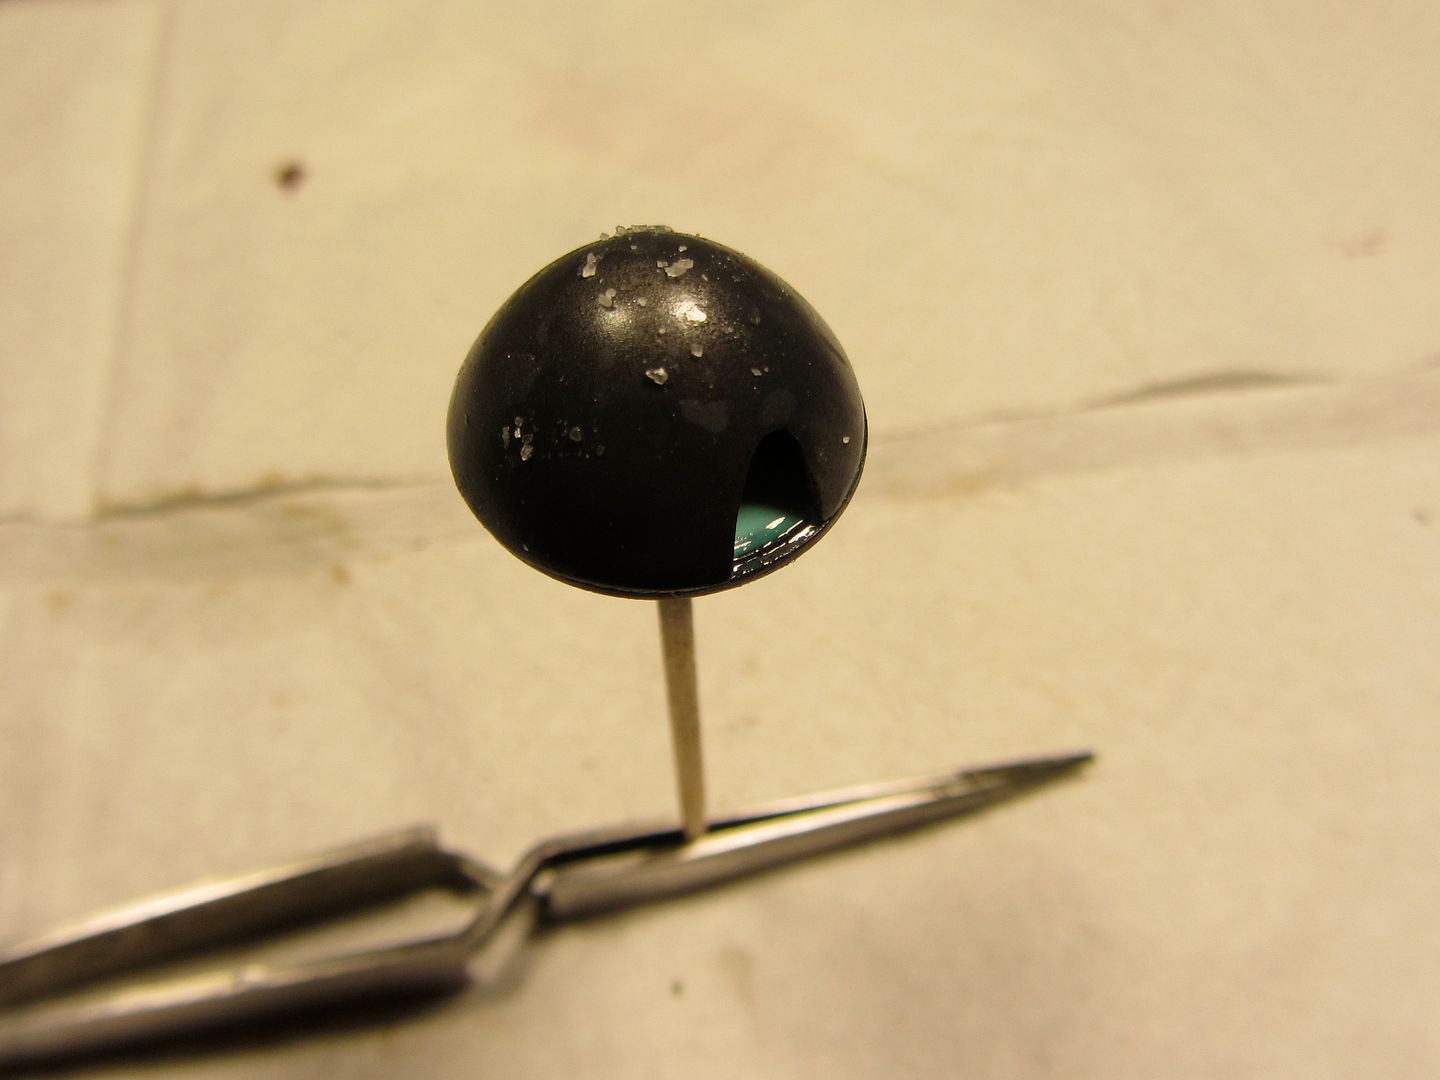
then giving it a coat of dark gray and hairspray and salt ... why?
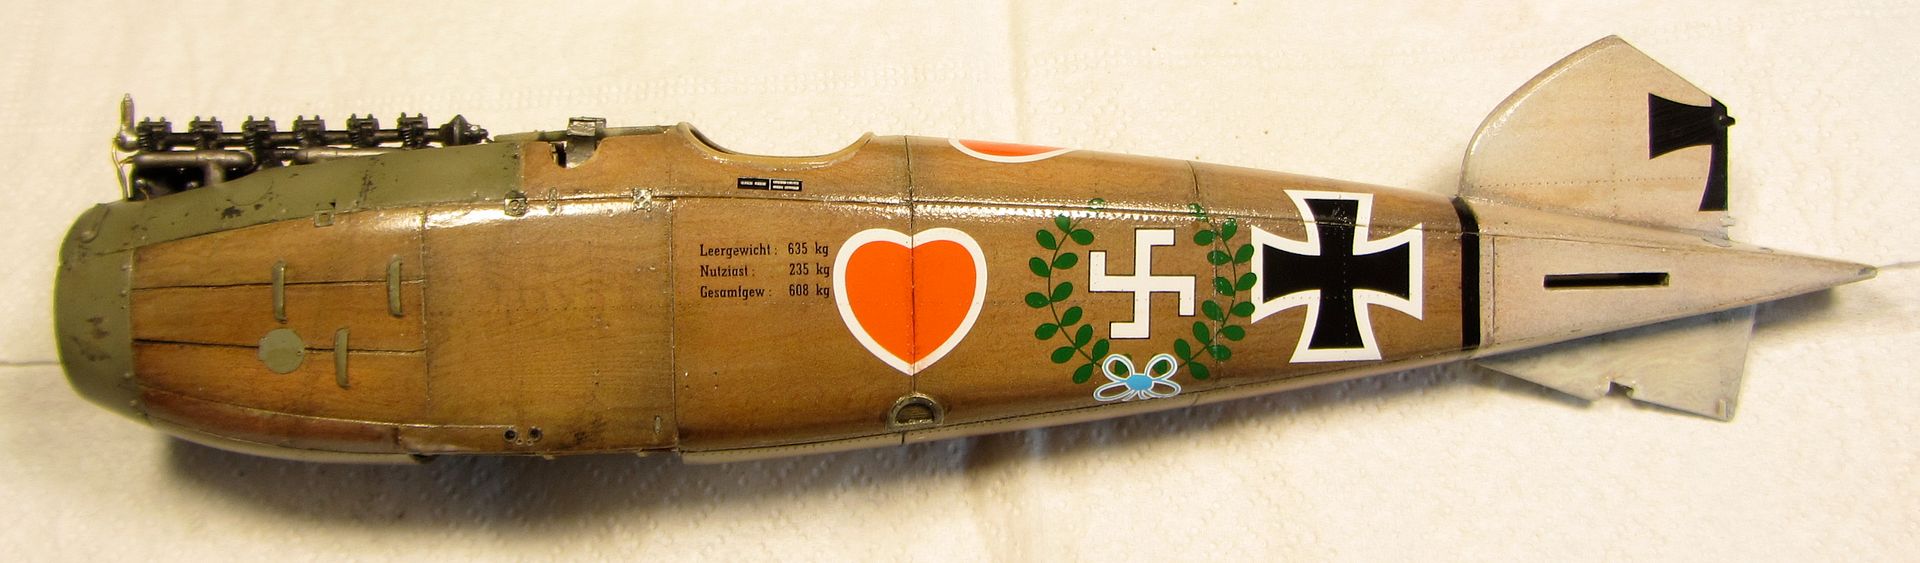
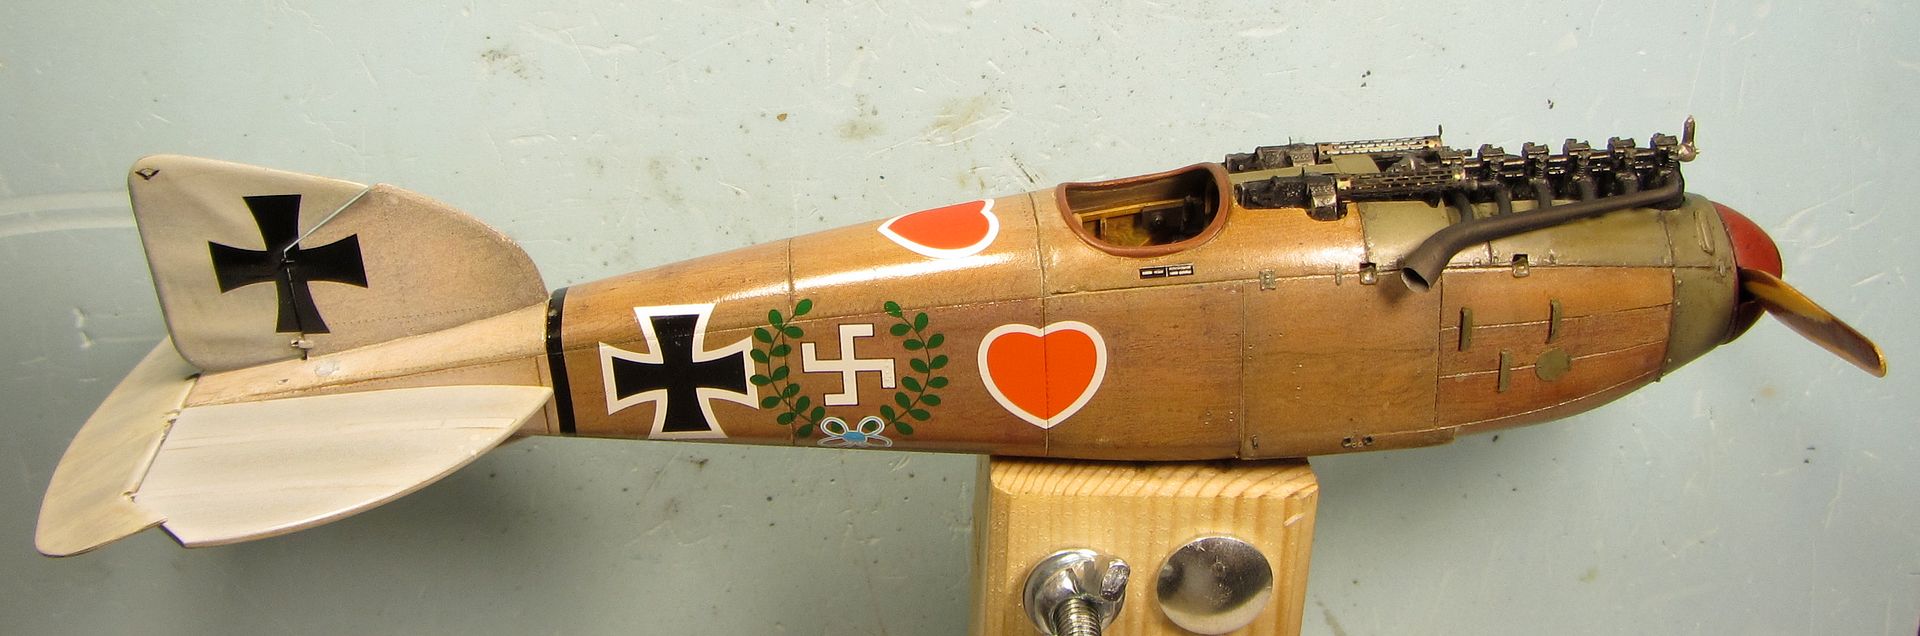
therefore. we know that before going to the richtofen's jasta, the voss's plane had the spinner black. changing group, it become red to conform to colour in use there. in the same period where added the heart on the back of the fuselage, and was issued a new upper wing, the one with the offset radiator.
all this to say that I wanted to make a red below the black, so well dark. and some hairspray and salt to achieve a well worn spinner, as I like it!
4893

waiting for the black and the salt dry, I put a little 'decals and other PE. we finally get to see something done!
4881

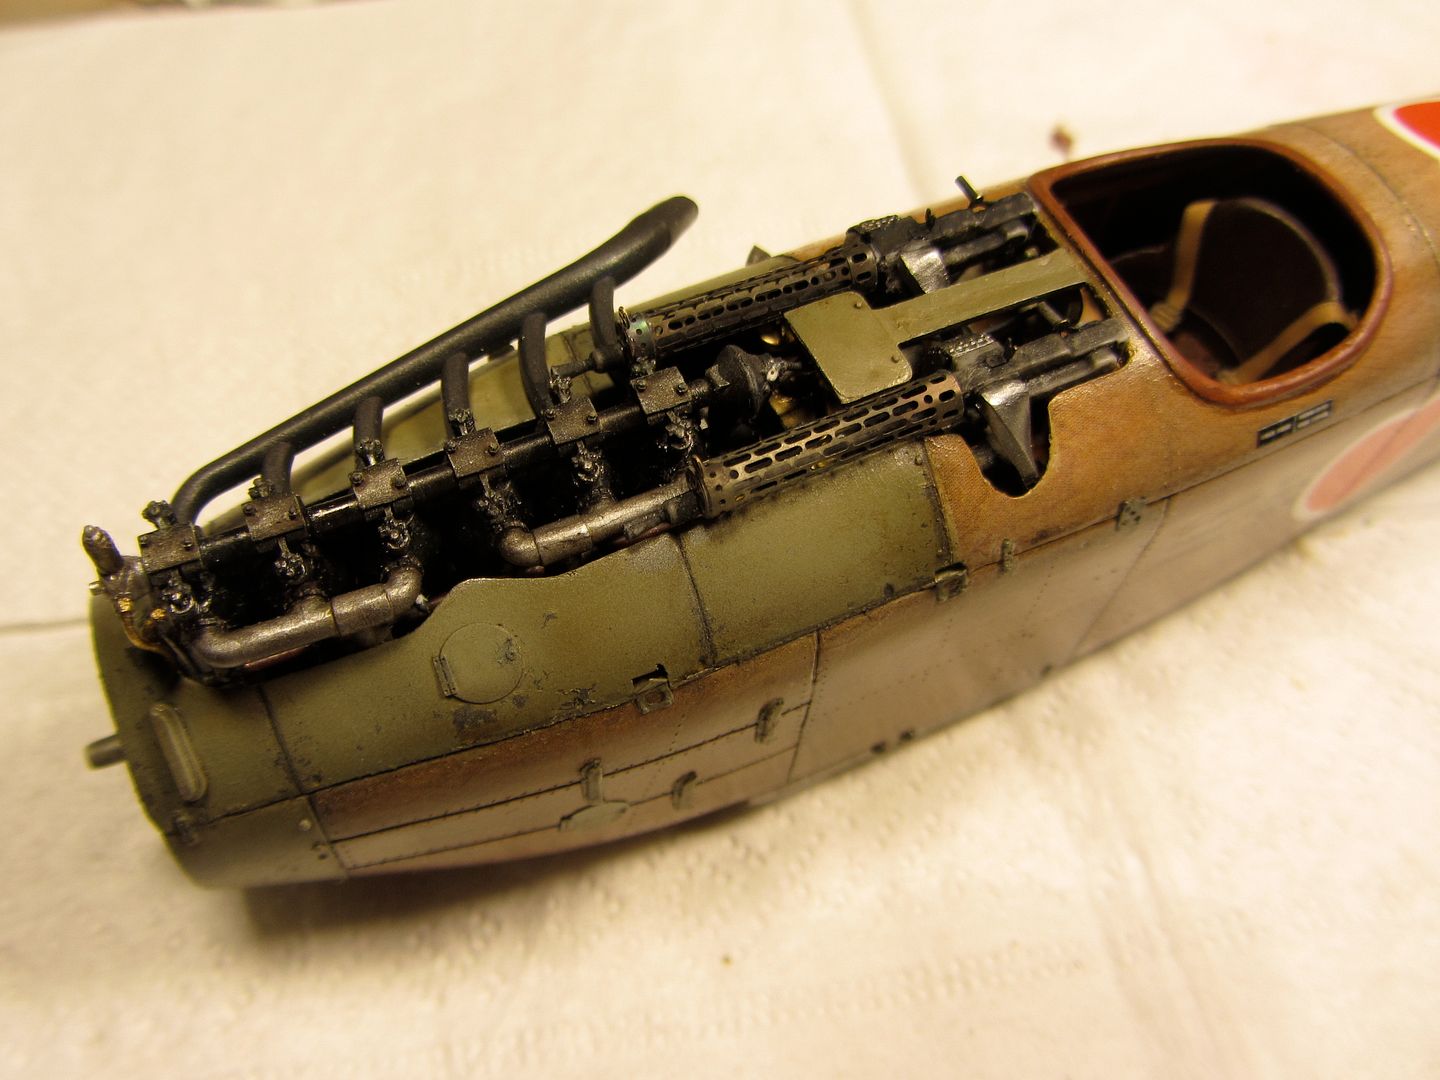
at the end, after too many tests, I used eduard's PE for the side air intakes,
4886

and two of the ones I had very carefully removed from the fuselage before rescribe the panels for the two on the canopy, as said some pages ago.
4885

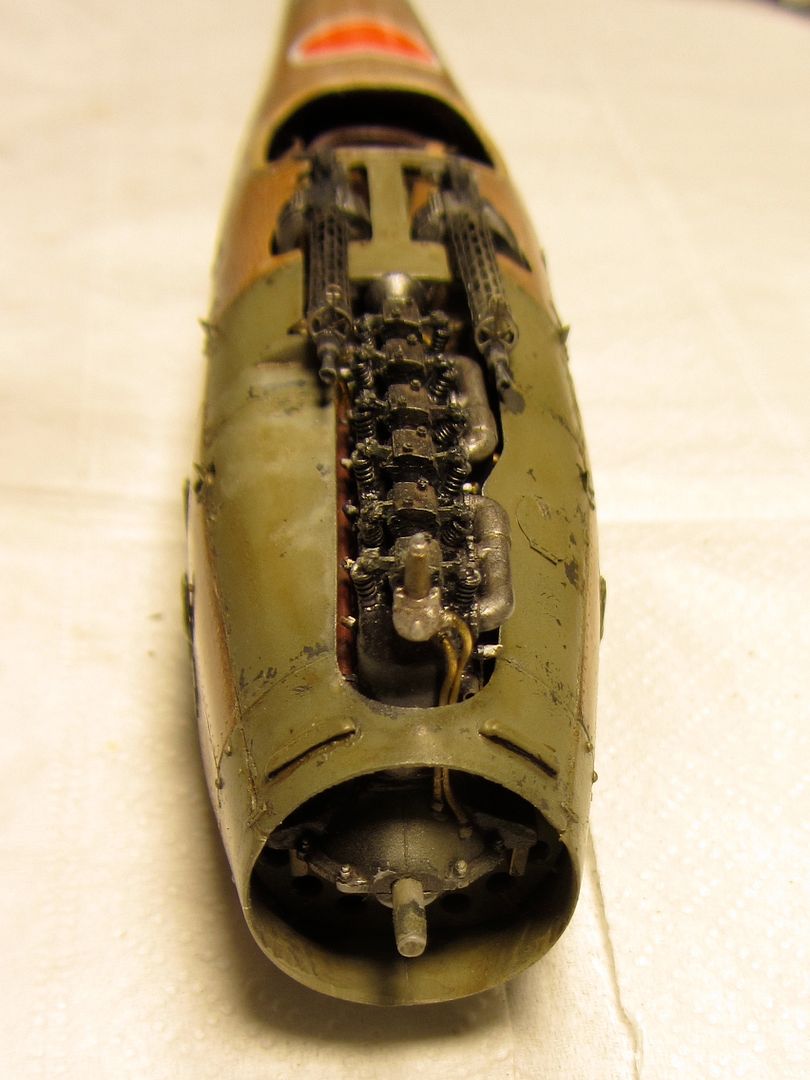
ah, well, yes, I also painted the engine cover and added the muffler ... and also practically the spandaus, even if they are not yet bonded.
4899

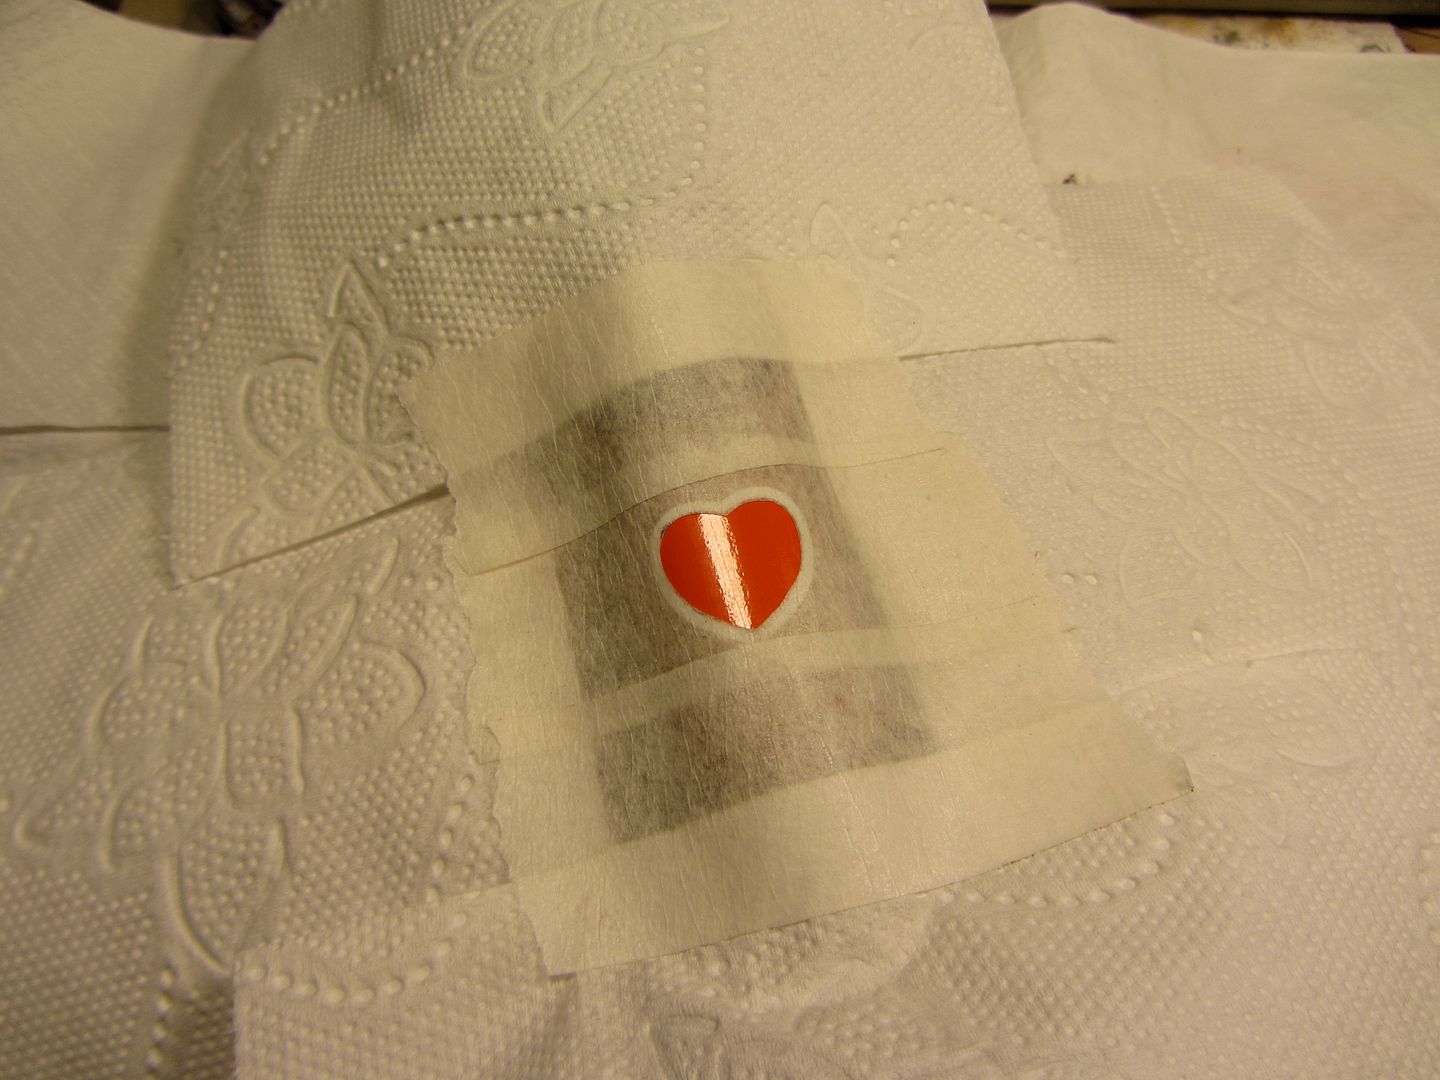
we were talking about the red ... I'm trying to make the third heart different from the two sides. by now I darkened the one on the back, then I'll try to lighten the sides ones. ready? anesthesia, air, color, action! ;D
4892

and here we are. the color balance (white behind, green and red front) seems to me to hold ... we will see with wings!
4903

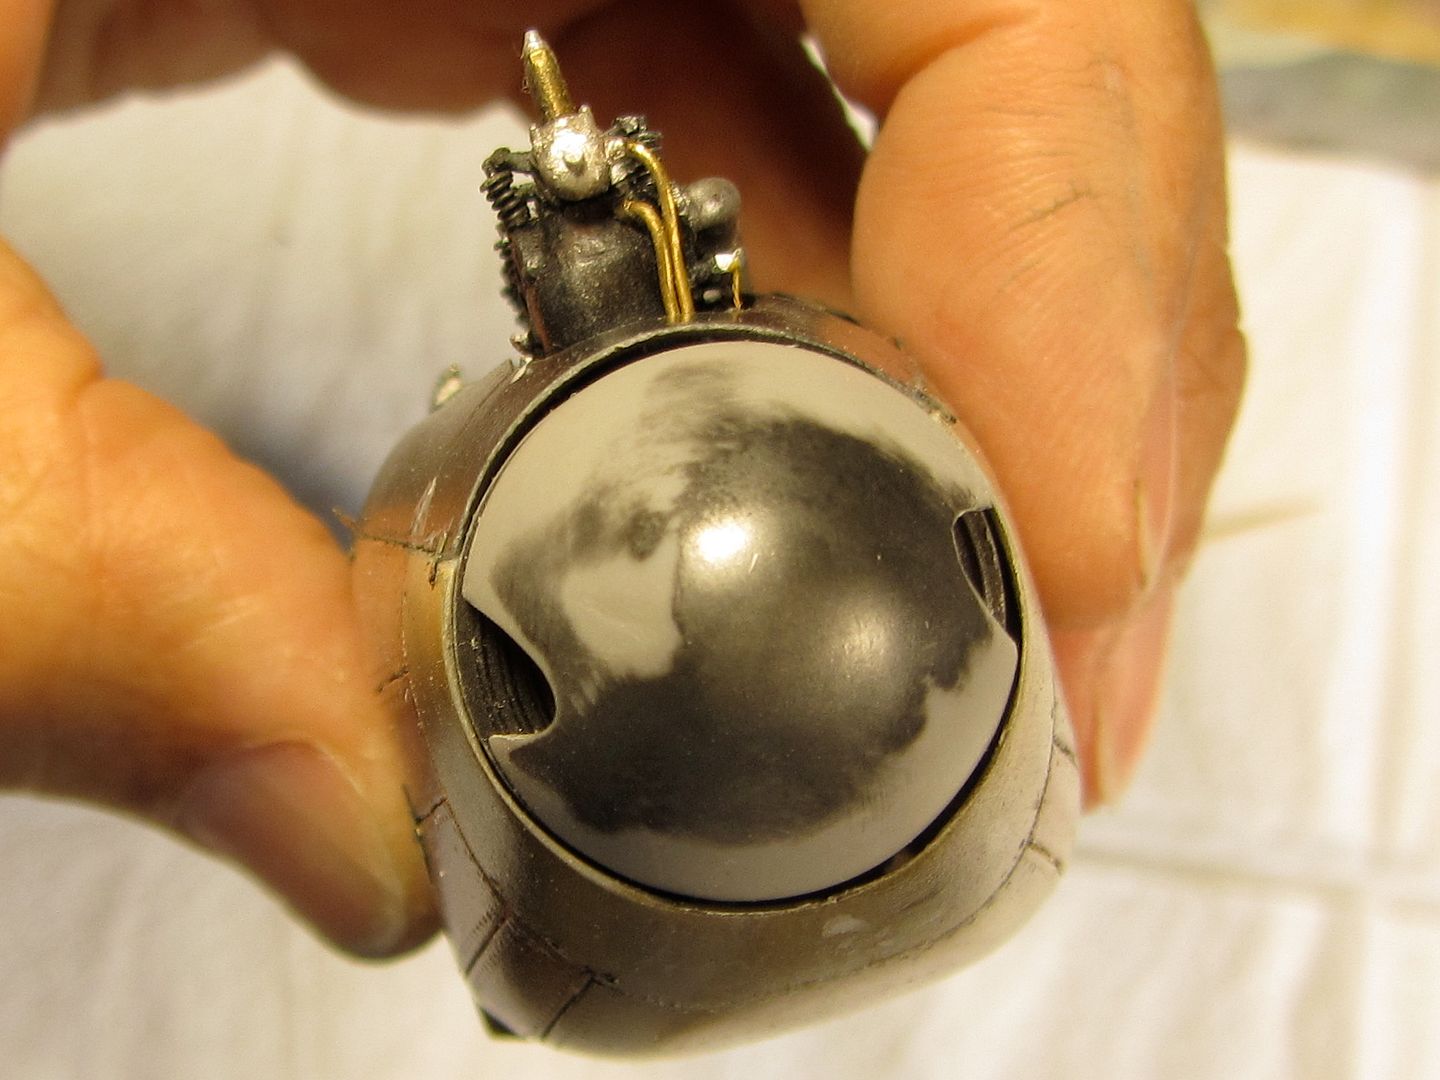
yes, but the gap fuselage-spinner? here it is:
4904

et voila. for once I'm satisfied with what has been done today. yes, it is dark, and the best is yet to come, but you know, every cockroach is beautiful, to the eyes of his mother! ;D ;D ;D
4906

bye, p. ;)

Offline Zabu

  • Hero Member
  • *****
  • Posts: 681
Re: 1/32 albatros D:III roden
« Reply #132 on: June 26, 2013, 01:10:36 PM »
I love the detail and your weathering.

Superf stuff... congrats. Can hardly wait to see it when it's done!

Cheers

Offline LindsayT

  • Hero Member
  • *****
  • Posts: 844
  • "Somehow it didn't seem like war at all..."
Re: 1/32 albatros D:III roden
« Reply #133 on: June 26, 2013, 01:51:47 PM »
Love the spinner, Paolo!

-Sören-

  • Guest
Re: 1/32 albatros D:III roden
« Reply #134 on: June 26, 2013, 04:39:47 PM »
Whow! Looks very good.
How is the fit of the lower wing on Your kit? I'm afraid that I have to putty these area on my Albatros. I think I would glue the wing first and then painting and decaling.
One question: Were the additional air vents on Voss's machine the same as on the nose sides?