Author Topic: Fokker E.II 69/15 Kurt von Crailsheim  (Read 29882 times)

Offline GAJouette

  • Hero Member
  • *****
  • Posts: 3579
  • " Beware of the Spanish Inquisition"
Re: Fokker E.II 69/15 Kurt von Crailsheim
« Reply #60 on: April 14, 2013, 10:18:42 AM »
  Dirk,
Wow that's some awesome detailling and painting my friend. Very impressive technique beyond doubt.
Highest Regards,
Gregory Jouette
" What Me Worry"

Offline dirk

  • Full Member
  • ***
  • Posts: 246
Re: Fokker E.II 69/15 Kurt von Crailsheim
« Reply #61 on: April 28, 2013, 07:47:49 AM »
Dear friens,

here is some update on the painting work of the fuselage and the wings. My plan was to use an underneath layer of XF-55 linnen that will be covered with dark yellow. Similar to my PC10 work on the Harry Tate and the FE2.b I wanted to sand down the paint to its base, the linnen. That was the plan.

So the first step was to add some basic paint by using XF-55. The coat was sealed with Vallejo Satin Varnish.


Next step was to mask the wing rips and the metal tubing frame under the linnen.


Some light preshading was followed by a brownish coat along the masks.


A very strong contrast between the masked structure and the shading can be seen here.


This contrast was not easy to be toned down and various steps of spraying light layers and sanding down the coat followed. While PC 10 has shown great saturation XF-60 wasn't that handsome  >:(...

Offline dirk

  • Full Member
  • ***
  • Posts: 246
Re: Fokker E.II 69/15 Kurt von Crailsheim
« Reply #62 on: April 28, 2013, 07:53:31 AM »
Here are some pics before the final layers.


The wings responded well to the final layers and a great but subtile variation of the coat was the result.


The effect on the steel frame is still looking overdone after various spray sessions...


Offline coyotemagic

  • Hero Member
  • *****
  • Posts: 7710
  • "Here's to not buggering it up." -Winston Chuchill
    • My Models
Re: Fokker E.II 69/15 Kurt von Crailsheim
« Reply #63 on: April 28, 2013, 08:40:44 AM »
Very convincing and realistic finish, Dirk.  A lot of work, but well worth the effort.
Cheers,
Bud
"All men dream: but not equally. Those who dream in the dark recesses of the night awake in the day to find all was vanity. But the dreamers of day are dangerous men, for they may act their dreams with open eyes, and make it possible." -T. E. Lawrence

Offline GAJouette

  • Hero Member
  • *****
  • Posts: 3579
  • " Beware of the Spanish Inquisition"
Re: Fokker E.II 69/15 Kurt von Crailsheim
« Reply #64 on: April 28, 2013, 09:02:42 AM »
 Dirk,
Excellent finish my friend.Looking forward t more.
Highest Regards,
Gregory Jouette
" What Me Worry"

Offline uncletony

  • Hero Member
  • *****
  • Posts: 4349
    • Aircraft In Pixels
Re: Fokker E.II 69/15 Kurt von Crailsheim
« Reply #65 on: April 28, 2013, 11:05:08 AM »
Dirk thanks for sharing your workflow, it's going to look amazing!!!

Offline dirk

  • Full Member
  • ***
  • Posts: 246
Re: Fokker E.II 69/15 Kurt von Crailsheim
« Reply #66 on: April 28, 2013, 07:50:35 PM »
Thanks Bud, Gregory and Bo for your comments.

On historic photos the fuselage seems to differ between shades of more or less lighter or darker regions, analog to canvas thats been painted with a monochrome colour and has then rubbed and scatched so that the underlying base coat come through. I decided to get that effect by using the "Sponge technique". I used a mixture of XF-55, white and XF-60, heavy diluted with water and applied it with a sponge.


Again the surface was sanded down with 5000 mesh to get a more homogeneous finish. So this is the fuselage before weathering.

The next step will be to add some brown to the colour and repeat the procedere near the engine and the cockpit. Then I will use Tamiya smoke for the grease on the base tubing of the cockpit shining through the linnen from inside...
« Last Edit: April 28, 2013, 07:59:21 PM by dirk »

Offline rhallinger

  • Hero Member
  • *****
  • Posts: 1976
Re: Fokker E.II 69/15 Kurt von Crailsheim
« Reply #67 on: April 28, 2013, 09:14:47 PM »
That's a marvelous effect Dirk.  Very realistic! ;D  I'm looking forward to seeing this one assembled.

Regards,

Bob

Offline miamiangler

  • Full Member
  • ***
  • Posts: 194
Re: Fokker E.II 69/15 Kurt von Crailsheim
« Reply #68 on: April 28, 2013, 09:32:29 PM »
Nice Dirk, Thanks for showing how it`s done , Maybe now I can finish my EIII :) .

                                                                                           Willi

Offline pepperman42

  • Hero Member
  • *****
  • Posts: 4436
  • Sergeant, my brown pants.......
Re: Fokker E.II 69/15 Kurt von Crailsheim
« Reply #69 on: April 28, 2013, 11:22:27 PM »
Amazing effect Dirk. You have got results that show both a tonal variation and a subtle fabric weave look to the fabric areas. Looking forward to the next steps.

Steve

Offline dirk

  • Full Member
  • ***
  • Posts: 246
Re: Fokker E.II 69/15 Kurt von Crailsheim
« Reply #70 on: April 28, 2013, 11:29:06 PM »
Dear friends,

happy moselling on this weekend while the weather is getting worse...

For the fuselage I added some brown to the colour that I mixed before and applied it with a sponge near the engine and the cockpit. A coat of high diluted "Fokker Beige" was sprayed to get the overall effect more subtle.

Tamiya smoke was extremly useful for the grease on the base tubing of the cockpit shining through the linnen from inside. Before spraying Tamiya Smoke, The structure of the frame was masked again. Finally the mask were pulkled away and another light coat of smoke was sprayed.


And the other side of the fuselage:


The technique was repeat on the wings, especially on the wing root section. Tamiya Smoke was used to simulate some smoke from the engine on the linnen und around the metal plates.

.

So I think that is quite a good base for starting more weathering by using pigments and oil-paints.

With greetings from Germany,

Dirk

Offline pepperman42

  • Hero Member
  • *****
  • Posts: 4436
  • Sergeant, my brown pants.......
Re: Fokker E.II 69/15 Kurt von Crailsheim
« Reply #71 on: April 28, 2013, 11:42:14 PM »
You're thinking this one out very well which is resulting in perfect effects!!

Steve

Offline rhallinger

  • Hero Member
  • *****
  • Posts: 1976
Re: Fokker E.II 69/15 Kurt von Crailsheim
« Reply #72 on: April 29, 2013, 12:01:41 AM »
Dirk, a person looking at just the photos would not believe there was plastic underneath!  It looks like dirty, weathered linen stretched over a tubular frame. Outstanding effect!  ;D  This just keeps getting better!

Regards.

Bob

Offline michael

  • Sr. Member
  • ****
  • Posts: 464
Re: Fokker E.II 69/15 Kurt von Crailsheim
« Reply #73 on: April 29, 2013, 12:10:04 AM »
As ever Dirk it's a masterclass from your bench- a great read.

thanks for sharing your work

michael
“An ounce of action is worth a ton of theory.”

Offline dirk

  • Full Member
  • ***
  • Posts: 246
Re: Fokker E.II 69/15 Kurt von Crailsheim
« Reply #74 on: May 02, 2013, 08:08:13 AM »
Dear friends,

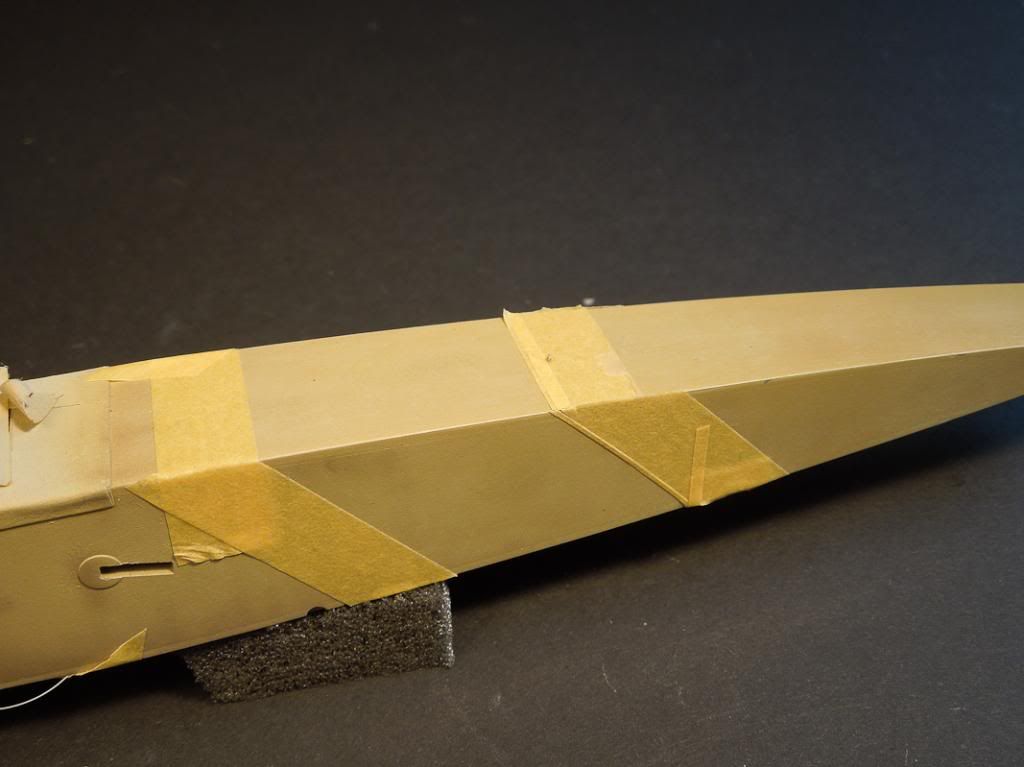
here is some update on painting the fuselage. I decided to spray instead of using the decals for the stripes #26, 28, 32 and 33 on my Fokker E.II 69/15. The reason was to get some control on slight variatons of the colour of the stripes and to add some weathering by sanding down the coat on the stripes. The other reason was to experiment with self-made masks  and to make some new experiences  :D

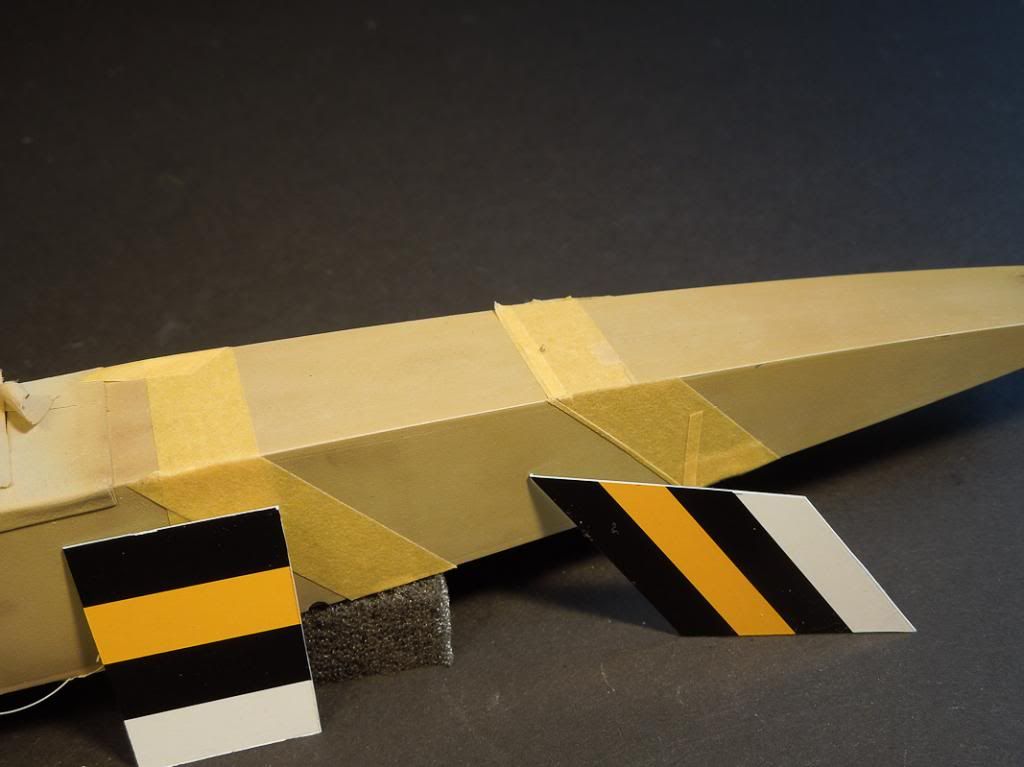
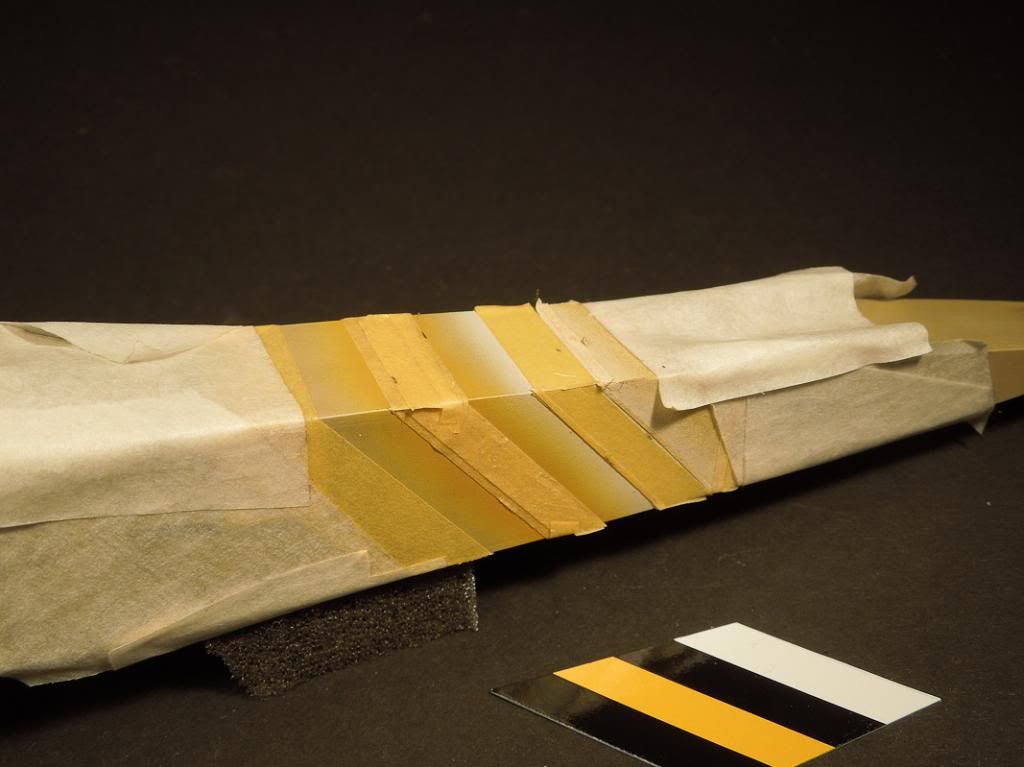
So the first step was to mask the overall region. I used the decals as templates and marked the places for the outer masks.


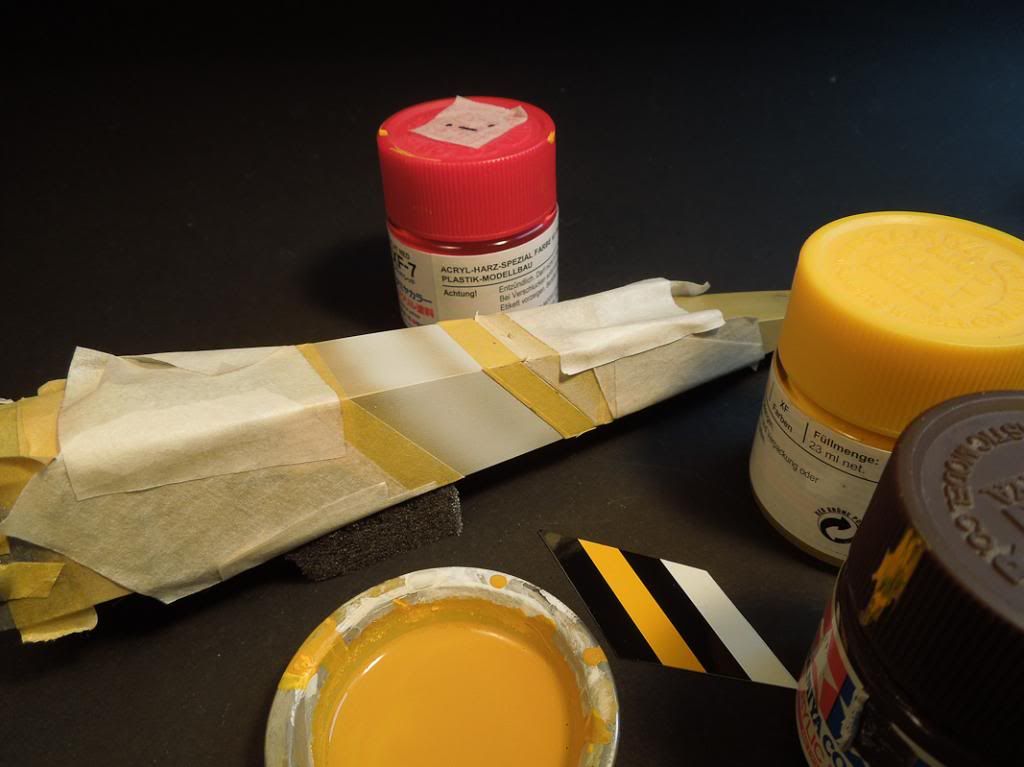
Tamiya XF-2 was sprayed to the white and yellow regions.  Afterwards the coat was sanded down and sealed with future on the region of the white stripe.


The next thing was to mix the propper colour for the yellow -beige stripe. I used a basic mix af Tamiya Flat yellow (XF-3) and Tamiya XF-10 Flat Brown. Small amounts of XF-7 Flat Red enriched the laquer towards a more warm tone.


The coat was sprayed in a varying intensity and the edges of the stripe got some Tamiya Smoke.


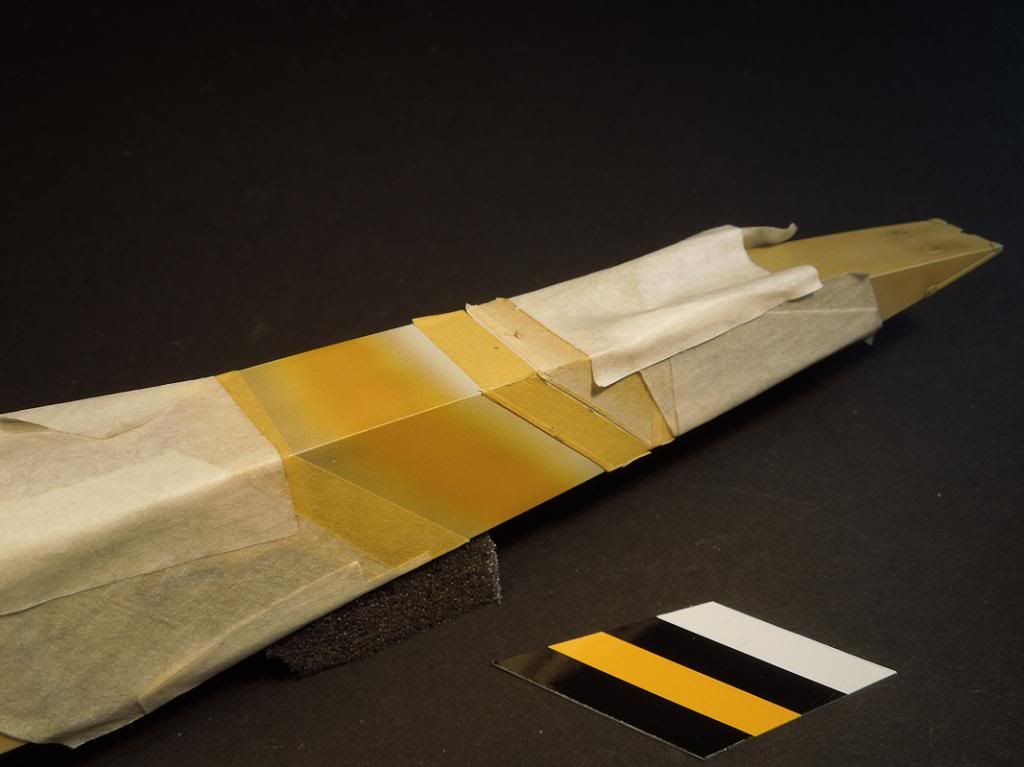
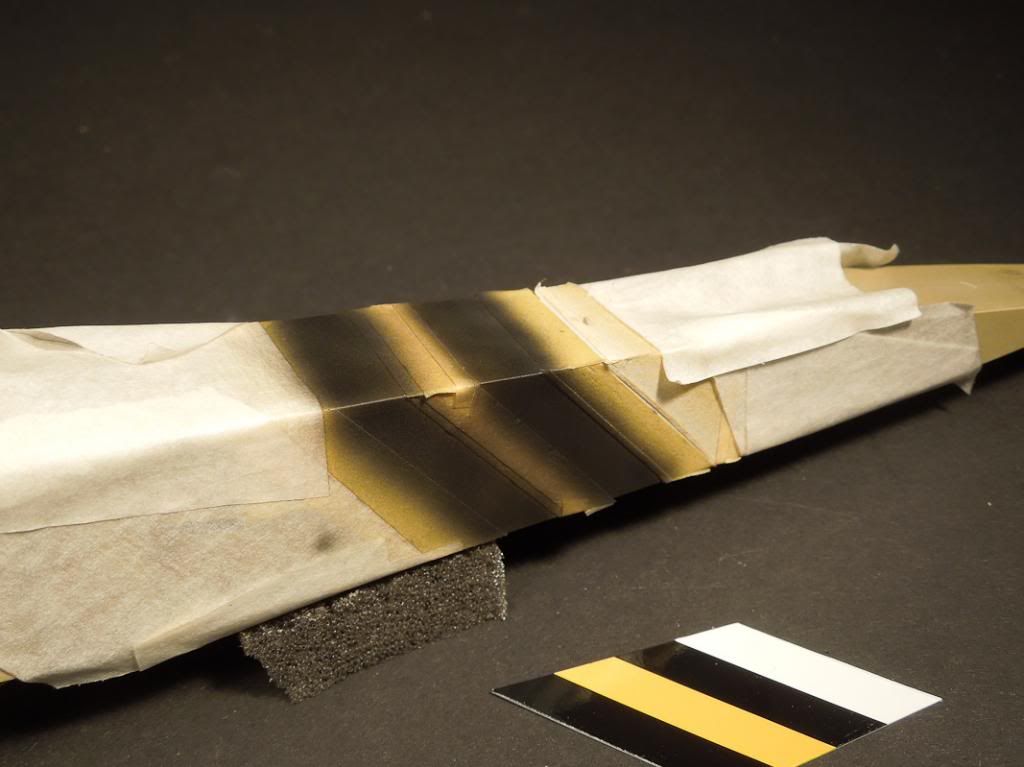
After a final coat of future and two hours of waiting, the yellow region was masked. Again I used the decals as templates and measured the varying widths of the upper, down and side decals.


A coat of Tamiya Flat Black was sprayed taking care that the saturation of the coat varies.


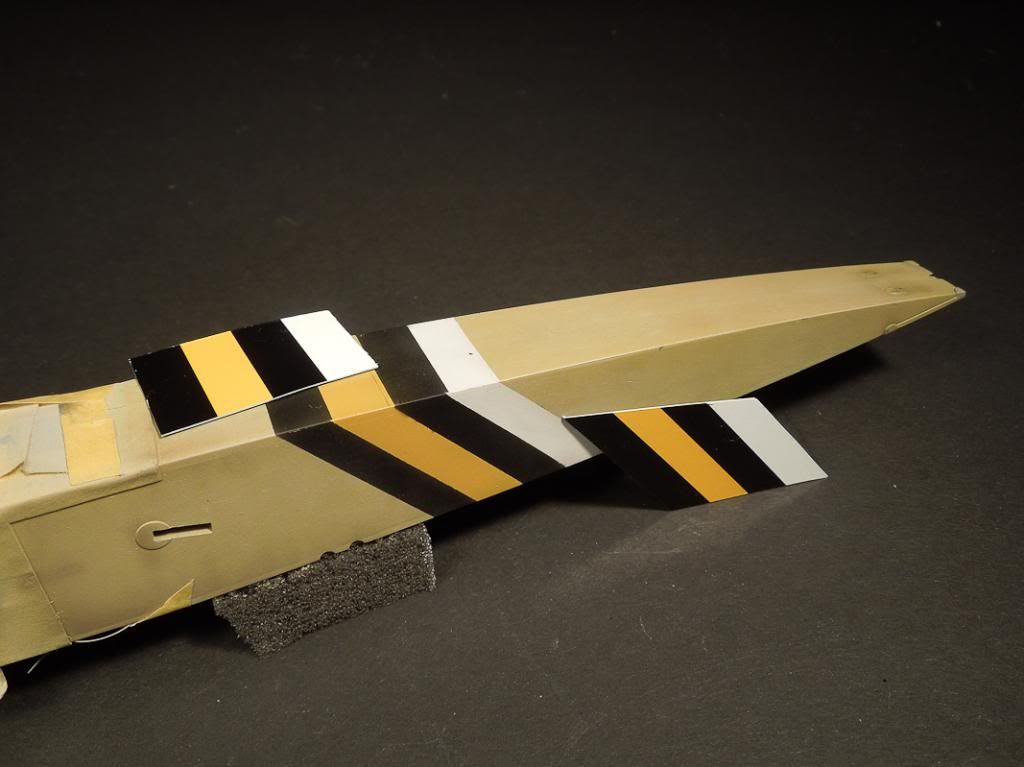
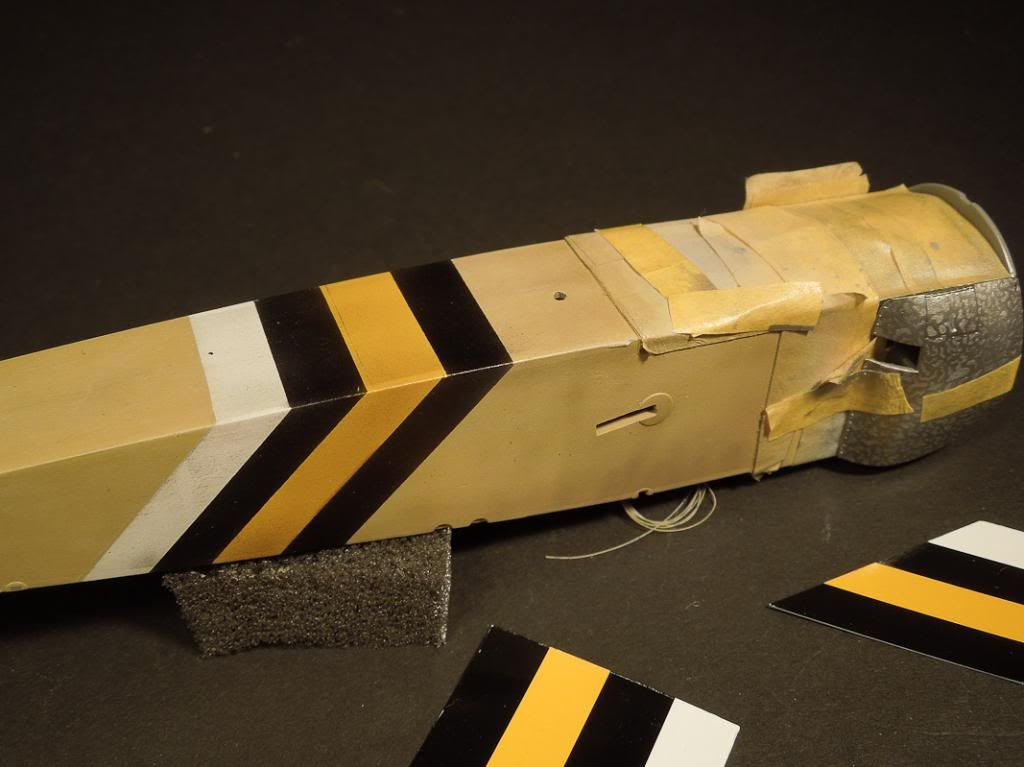
So after some sanding down and using Future as  varnish, this is the result:


Tomorrow I will try to spray the crosses on the wings.

Cheers, Dirk