Author Topic: 1:32nd scale Sopwith 1 1/2 'Strutter' (1.B2)  (Read 7462 times)

Offline NigelR

  • Hero Member
  • *****
  • Posts: 2703
Re: 1:32nd scale Sopwith 1 1/2 'Strutter' (1.B2)
« Reply #30 on: January 03, 2026, 06:59:00 PM »
That looks fabulous Mike, it's well worth having the control cables going into the rear of the fuselage as you can see quite a way into the rear. Sadly the front cockpit opening is largely hidden by the wing.....

Offline WD

  • Hero Member
  • *****
  • Posts: 1460
Re: 1:32nd scale Sopwith 1 1/2 'Strutter' (1.B2)
« Reply #31 on: January 06, 2026, 11:13:15 PM »
That is absolutely superb.

Warren D

Offline Mike Norris (UK)

  • Hero Member
  • *****
  • Posts: 2716
  • RAF Old and Bold
    • Mikes WW1 Aircraft Models
Re: 1:32nd scale Sopwith 1 1/2 'Strutter' (1.B2)
« Reply #32 on: January 07, 2026, 10:58:17 AM »
Hi all,
A few updates.
The underside of the fuselage with the rocking shaft and cover, bomb cassette panels and the airbrake control pulley with cable.
The airbrakes have been fitted.
The 'Proper Plane' Waring and Gillow propeller.
The observers Lewis and mounting with 'EZ' line for the pulley cords.
The wheels with 'Aviattic'' weave effect linen covering.
I've applied wood effect to the interplane and landing struts, but need to paint the metal fittings etc,

Mike


« Last Edit: January 08, 2026, 12:08:24 AM by Mike Norris (UK) »


Retired - 27 years RAF service then 20 years Military Aerospace Technical Author/editor.

Offline NigelR

  • Hero Member
  • *****
  • Posts: 2703
Re: 1:32nd scale Sopwith 1 1/2 'Strutter' (1.B2)
« Reply #33 on: January 07, 2026, 07:25:19 PM »
More lovely work Mike. Another question for you - how do you get the Aviattic decals so neatly fitted to the wheel covers? Do you cut out all the openings prior to fitting, or trim the decals when they are in place?

Offline Mike Norris (UK)

  • Hero Member
  • *****
  • Posts: 2716
  • RAF Old and Bold
    • Mikes WW1 Aircraft Models
Re: 1:32nd scale Sopwith 1 1/2 'Strutter' (1.B2)
« Reply #34 on: January 07, 2026, 09:15:26 PM »
Hi Nigel,
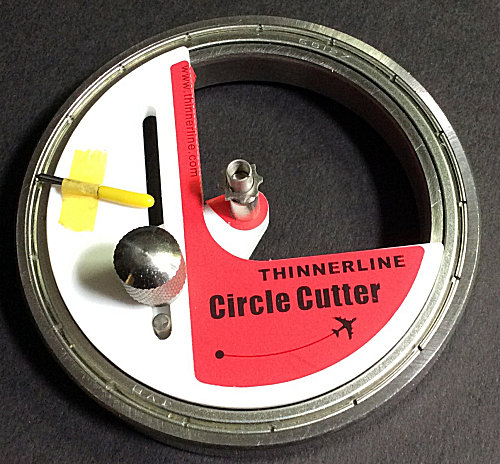
I use a ThinnerLine circle cutter.
Similar to that sold by others, such as DSPIAE.
I first cut a paper template to get the correct size.
Then cut the disc from the decal paper.
If the outer wheel covers have extended axle ends, I'll drill the the centre of the disc with an appropriate sized drill.
As most wheel covers have a conical shape, the decal needs to be slit across one side in a shallow wedge.
That allows the decal to conform to the shape and the cut faces to meet.
Then just apply the decal to the wheel cover.
Once set I cut into the opening for the wheel valve.
Then I apply a small amount of Tamiya X20A thinners into the hole and also around the axle ends.
This will melt the decal and conform it as required,

Mike


Retired - 27 years RAF service then 20 years Military Aerospace Technical Author/editor.

Offline Tim Mixon

  • Hero Member
  • *****
  • Posts: 1165
  • Main focus is 1/72 WWI
Re: 1:32nd scale Sopwith 1 1/2 'Strutter' (1.B2)
« Reply #35 on: January 08, 2026, 01:33:33 AM »
Wonderful work Mike. I really like the Lewis gun and ring.

Offline Mike Norris (UK)

  • Hero Member
  • *****
  • Posts: 2716
  • RAF Old and Bold
    • Mikes WW1 Aircraft Models
Re: 1:32nd scale Sopwith 1 1/2 'Strutter' (1.B2)
« Reply #36 on: January 08, 2026, 08:19:32 AM »
Hi all,
More updates.
The landing gear assembly is complete.
The interplane and fuselage cabane struts are done and have slightly larger diameter brass tubes fitted to the strut end locating pegs.
This was done as the locating holes in the wings are larger than the strut pegs.
The underside of the upper wing has been pre-rigged with 22 lines.
Lastly, the upper wing ailerons only have been pre-rigged.
This is for the rear interconnecting control line that will route between the wings and their ailerons.

Next is fitting of the upper wing,

Mike


Retired - 27 years RAF service then 20 years Military Aerospace Technical Author/editor.

Offline NigelR

  • Hero Member
  • *****
  • Posts: 2703
Re: 1:32nd scale Sopwith 1 1/2 'Strutter' (1.B2)
« Reply #37 on: January 08, 2026, 07:40:16 PM »
Then I apply a small amount of Tamiya X20A thinners into the hole and also around the axle ends.
This will melt the decal and conform it as required,

Thanks Mike, good info. I haven't tried X20A with Aviattic decals, I will do next time round.

Offline Mike Norris (UK)

  • Hero Member
  • *****
  • Posts: 2716
  • RAF Old and Bold
    • Mikes WW1 Aircraft Models
Re: 1:32nd scale Sopwith 1 1/2 'Strutter' (1.B2)
« Reply #38 on: January 08, 2026, 11:26:03 PM »
Hi all,
The engine has now been fitted with the Aviattic 3D printed engine cowl.
Many of the French aircraft had a single, larger cooling slot in the lower, front of the engine cowl.
As opposed to the British type, which had two cooling slots at the same location on the engine cowl.
Also, the modified Gaspatch Vickers machine gun was fitted.
Finally, I created a pilot's windscreen, which was off-set to the right of the breach block of the Vickers machine gun,

Mike


Retired - 27 years RAF service then 20 years Military Aerospace Technical Author/editor.

Offline Mike Norris (UK)

  • Hero Member
  • *****
  • Posts: 2716
  • RAF Old and Bold
    • Mikes WW1 Aircraft Models
Re: 1:32nd scale Sopwith 1 1/2 'Strutter' (1.B2)
« Reply #39 on: January 08, 2026, 11:28:11 PM »
Then I apply a small amount of Tamiya X20A thinners into the hole and also around the axle ends.
This will melt the decal and conform it as required,

Thanks Mike, good info. I haven't tried X20A with Aviattic decals, I will do next time round.
Hi Nigel,
Take care to not use too much thinners, otherwise it will spread and can damage the decal,

Mike


Retired - 27 years RAF service then 20 years Military Aerospace Technical Author/editor.

Offline WD

  • Hero Member
  • *****
  • Posts: 1460
Re: 1:32nd scale Sopwith 1 1/2 'Strutter' (1.B2)
« Reply #40 on: January 09, 2026, 12:31:19 AM »
Still more stunning work.

Warren D

Offline Mike Norris (UK)

  • Hero Member
  • *****
  • Posts: 2716
  • RAF Old and Bold
    • Mikes WW1 Aircraft Models
Re: 1:32nd scale Sopwith 1 1/2 'Strutter' (1.B2)
« Reply #41 on: January 09, 2026, 05:22:44 AM »
Hi all,
The upper wing has been fitted.
I found it best to fit the fuselage cabane struts first.
Those struts are rigid when fitted and take much of the load from the upper wing.
Once secured in position, the wings can be flexed slightly to locate and secure the interplane struts.

Now it's onto final rigging,

Mike


Retired - 27 years RAF service then 20 years Military Aerospace Technical Author/editor.

Offline NigelR

  • Hero Member
  • *****
  • Posts: 2703
Re: 1:32nd scale Sopwith 1 1/2 'Strutter' (1.B2)
« Reply #42 on: January 09, 2026, 07:49:59 PM »
This is looking fabulous Mike. It's a nice kit to build, the cabanes work well and make assembly pretty straightforward, providing you don't get them mixed up (Dave Hooper found this out!).

Offline Mike Norris (UK)

  • Hero Member
  • *****
  • Posts: 2716
  • RAF Old and Bold
    • Mikes WW1 Aircraft Models
Re: 1:32nd scale Sopwith 1 1/2 'Strutter' (1.B2)
« Reply #43 on: January 14, 2026, 07:08:17 AM »
Hi all,
The model is now complete and here is a quick shot.
I will of course post larger and detailed shots of the model once its in the display case.
I'm currently working on the figures to complete the model,

Mike


Retired - 27 years RAF service then 20 years Military Aerospace Technical Author/editor.

Offline WD

  • Hero Member
  • *****
  • Posts: 1460
Re: 1:32nd scale Sopwith 1 1/2 'Strutter' (1.B2)
« Reply #44 on: January 14, 2026, 07:14:38 AM »
Looks great Mike.

Warren D