Author Topic: Bristol M1.C  (Read 12297 times)

Offline andonio64

  • Hero Member
  • *****
  • Posts: 1789
  • There's no hurry
Re: Bristol M1.C
« Reply #15 on: February 18, 2013, 07:00:38 PM »
Superb workmanship Russell!  Your fabrication of small details is first rate. ;D  This will be a stunning model.  Thanks for sharing your techniques and this beautiful bird. :)

Regards,

Bob

DITTO!

I have the Blue Max kit (1/48) so your build will be of great inspiration!
Ciao
Antonio

Offline Russell

  • Sr. Member
  • ****
  • Posts: 319
Re: Bristol M1.C
« Reply #16 on: June 24, 2013, 07:21:52 AM »
I wrote earlier that my building speed is on the very slow side so not much progress has been made however here it is.

All the reference photos seem to show intake tubes to the carb so I made a pair using aluminium tube - the wall thickness reduced by running in drills of suitable size. The outer ends of the tubes are filed to a chamfer facing into the airstream. I'll join the tubes in the fuselage with a slightly larger diameter tube.


The metal deck over the cockpit has a wooden frame under it which has vertical timber brackets onto the main frame of the fuselage. I'd started making an attempt to show a bit of this (ref the photos above) but it wasn't right so had another go & recreated a semblance of a frame under the (resin) deck that allowed a better recreation of the vertical brackets.


Here it's in position.


I didn't have any pens to colour the frame & stringers cast into the fuselage so I thinned down some Boxwood strip & glued it in position instead. It looks a bit rough in the photo but with the naked eye it's not too bad plus very little can be seen of it when the cockpit frame is inserted.


The tail skid is a white metal part in the kit but compared to various photos of the real thing it looks to be the wrong shape; more precisely it would be more correct off the skid plate had been put on the other end. I made a new one from Boxwood which is so fine grained it's probably 'scale'. The various fitting were photo etch brackets intended for racing car suspensions. The brass vertical post will be set to correct length & painted when it's finally installed. The fuselage casting has had the old skid location hole filled & a new one cut further forward.


I also finished off making the retaining pin brackets for the inspection covers (yawn!)


The builds by Des & Bo Monroe (to rather unfairly name just two) are a real inspiration as they far exceed what I'm able to do but they do help to drag me along in the slipstream as it were & show what is possible.

Regards
Russell


Offline Zabu

  • Hero Member
  • *****
  • Posts: 681
Re: Bristol M1.C
« Reply #17 on: June 24, 2013, 07:44:19 AM »
Really great work you have there.

Amazing.


Offline uncletony

  • Hero Member
  • *****
  • Posts: 4384
    • Aircraft In Pixels
Re: Bristol M1.C
« Reply #18 on: June 24, 2013, 08:13:23 AM »
Fantastic, love love love that tail skid, and those brackets are amazing!

Offline IanB

  • Hero Member
  • *****
  • Posts: 2496
Re: Bristol M1.C
« Reply #19 on: June 24, 2013, 08:14:12 AM »
Beautiful work Russell, should be an absolute gem when it's done!

Ian

Offline lcarroll

  • Administrator
  • Hero Member
  • ******
  • Posts: 8658
Re: Bristol M1.C
« Reply #20 on: June 24, 2013, 09:30:01 AM »
And I thought I'd seen it all here..........the brackets are incredible! Well done Russell, the whole Build is most impressive.
 Cheers,
 Lance

Offline Ernie

  • Hero Member
  • *****
  • Posts: 3961
  • "Once more into the breach"
Re: Bristol M1.C
« Reply #21 on: June 24, 2013, 09:42:58 PM »
Your modelling skills are obvious, Russell.  Thanks for
joining the board and sharing your ideas with us.  It will
really help. 

Best Regards,
Ernie
The new old guy, take two...

Offline Des

  • Administrator
  • Hero Member
  • ******
  • Posts: 9325
    • ww1aircraftmodels.com
Re: Bristol M1.C
« Reply #22 on: June 24, 2013, 10:03:20 PM »
Beautiful work on the tail skid Russell, a much more convincing item when compared to the kit supplied part. Your work on the inspection panel retaining pins is incredible, these items will certainly add a touch of realism to your model. You are doing a superb job on the Bristol so far and I look forward to seeing your next progress post.

Des.
Late Founder of ww1aircraftmodels.com and forum.ww1aircraftmodels.com

Offline mgunns

  • Hero Member
  • *****
  • Posts: 2255
Re: Bristol M1.C
« Reply #23 on: June 25, 2013, 03:29:27 AM »
Hello Russell:

I have to echo the other comments here regarding your recent posts.  Outstanding craftsmanship!

Looking forward to the next update.

Best

Mark
Mark

We few, we happy few.....

Offline mc65

  • Full Member
  • ***
  • Posts: 216
Re: Bristol M1.C
« Reply #24 on: June 25, 2013, 11:34:45 AM »
woooooooow!!

being new here, I assume just little bites here and there each pc session... this night it seems I found a gold cave! I think I'll try your approach at the tailskid, if you dont mind, it's a gem!!

Offline coyotemagic

  • Hero Member
  • *****
  • Posts: 7710
  • "Here's to not buggering it up." -Winston Chuchill
    • My Models
Re: Bristol M1.C
« Reply #25 on: June 25, 2013, 11:44:53 AM »
That tailskid is spectacular, Russell.  How did you stain the boxwood?
Cheers,
Bud
"All men dream: but not equally. Those who dream in the dark recesses of the night awake in the day to find all was vanity. But the dreamers of day are dangerous men, for they may act their dreams with open eyes, and make it possible." -T. E. Lawrence

Offline Russell

  • Sr. Member
  • ****
  • Posts: 319
Re: Bristol M1.C
« Reply #26 on: June 25, 2013, 04:47:49 PM »
Thanks for the very kind encouragement - much appreciated.

Bud, the boxwood I had to hand varied from almost white to a sort of straw colour so I picked a piece that had a some colour to begin with. The assembled skid was dipped in Future which sealed the thread (bungee) & partially sealed the wood. A few licks of MIG ‘Rust’ & ‘Winter Grime’ were used to give a bit of extra staining particularly close to the main bracket & highlight the bungee.

Boxwood is ideal for making bits of timber frame etc on WW1 subjects as the extreme fineness of the grain gives a good ‘scale’ appearance plus it’s easy to carve, split & so on. A touch of stain brings the subtle grain out. I use strips that were sold as ‘beading’ or ‘banding’ by a shop specializing in wood turning & cabinet making supplies. A few lengths have lasted years (originally bought for a small woodworking project). They come in various sizes from 1/32” (0.8mm approx.) square upwards.

Regards
Russell         

Offline Russell

  • Sr. Member
  • ****
  • Posts: 319
Re: Bristol M1.C
« Reply #27 on: May 19, 2014, 06:36:01 AM »
For various reasons which I won't bore you with my modelling has been very much a spectator sport of late but I have been fiddling with some bits on the Bristol; generally centred around ideas to scratch build various items only to decide the effort wasn't likely to be worth it.

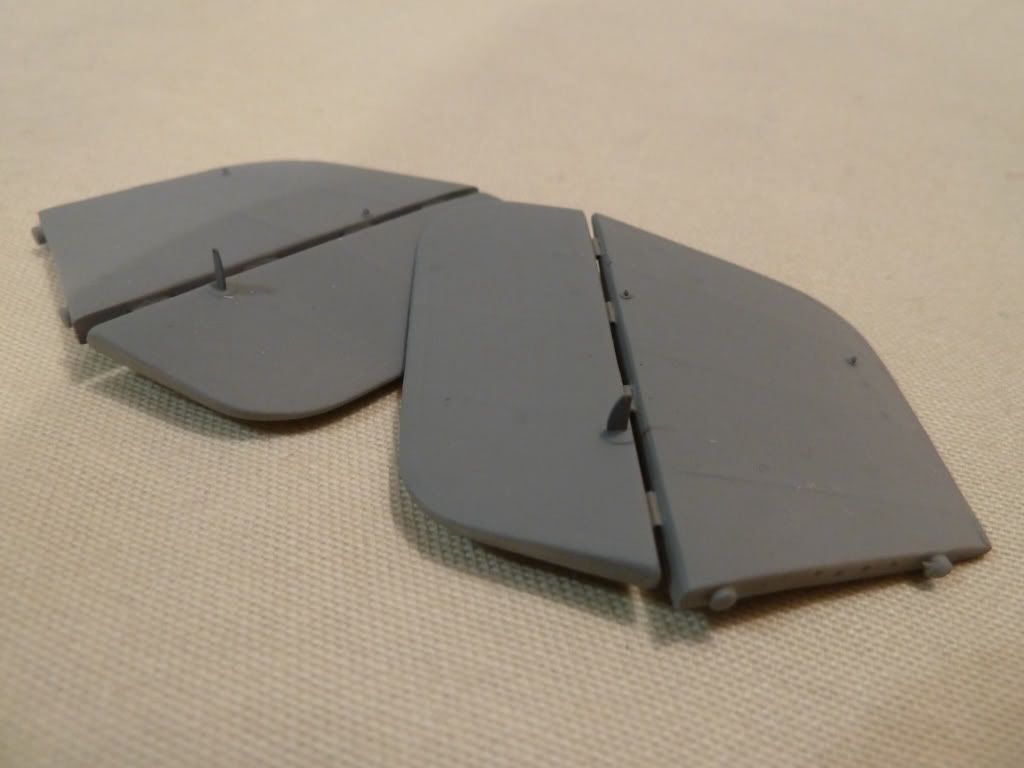
Some real progress has been made recently though. The tailplanes are primed ready for a coat of Alclad. I copied the method Des used on his build & used short lengths of 0.5mm tube to represent the hinges. Bob's Buckles supplied the eyes for the rigging wires.


The wings are further on, painted with Alclad. The domed mounting points for the rigging are a pain to fix as the spigot on the domed part is far larger than the hole in the photo-etch 'washer' plate. It's not difficult to reduce the size of the spigot but it is difficult to hold the tiny domed part whilst it's filed to size.
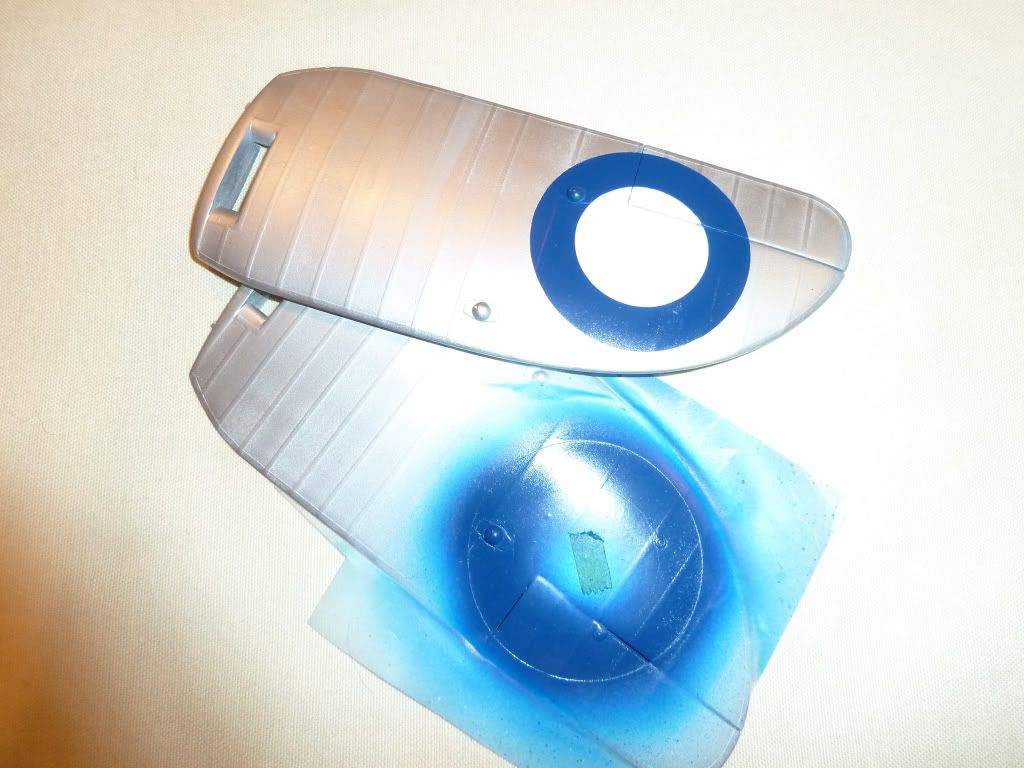


I should have fitted these mounts after paint & decals as it makes decal application easier - but I didn't.  :-[ It's worth noting that some contemporary photos show the mounts as main wing colour not painted to match the roundel. I also got carried away & fitted the control horns which I then had to remove to allow either decal application or the masks which is what I ended up using.

Because of the rigging mounts being in place I decided to paint the roundels. Montex don't do a mask to suit the roundel diameter so I made my own from Frisket paper using an Olfa cutter. This was a new technique for me so I was pleased with the result. The Alcad came away with the mask in one or two tiny areas which are easy to touch up but other than that it worked fine. Just the red centre to go, I've made a mask for it but I may chicken out & use the kit decal which handily is a separate red circle.

The kit supplies the centre section & boss of the prop as a separate item. It's partly visible through the hole in the spinner.
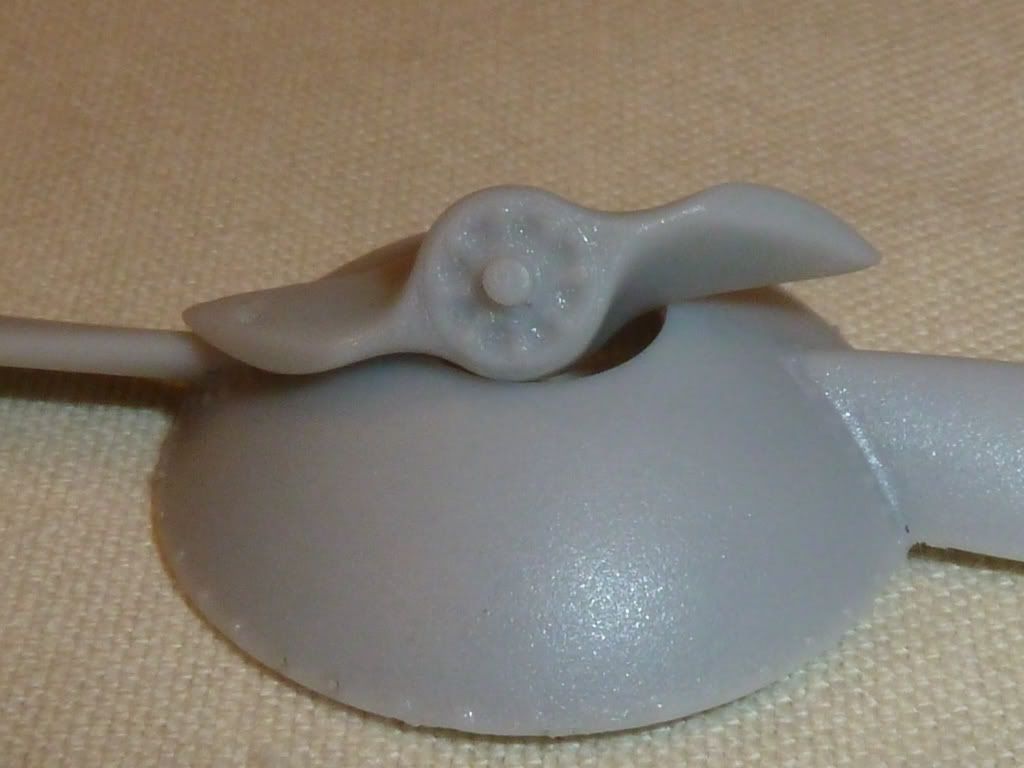


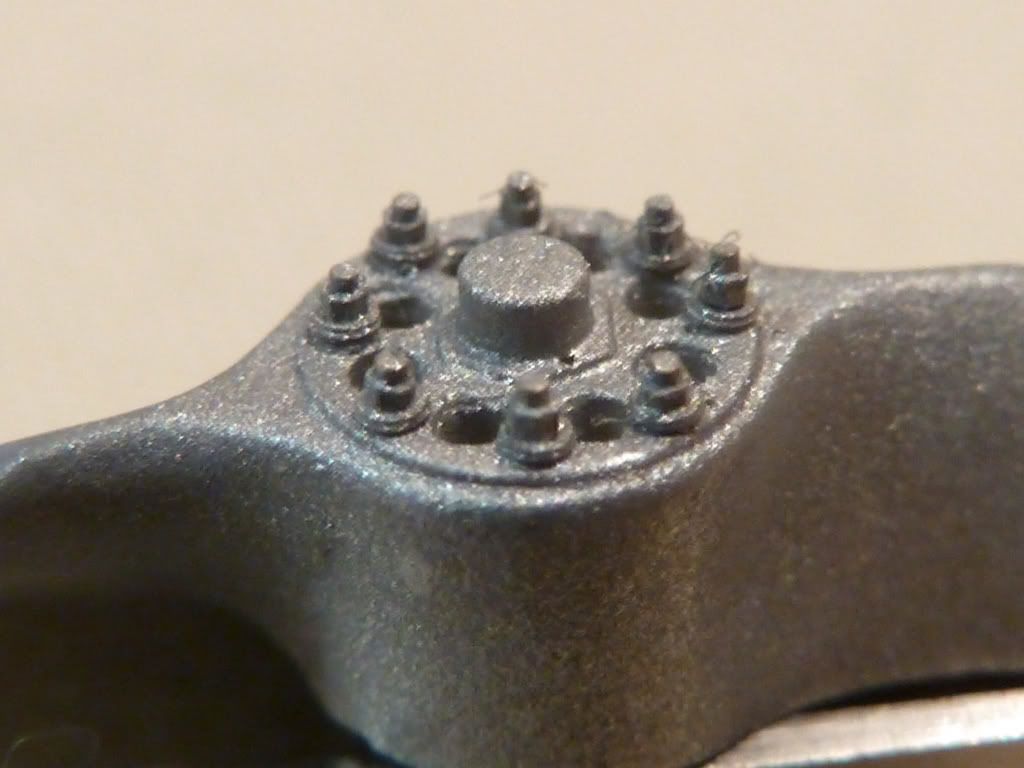
I cut the moulded bolts off & replaced with RB Motion bolts with separate washers. The grainy texture of the resin is apparent in the photo but not to the naked eye, in any case it needs a bit of smoothing & another light coat of primer.


The undercarriage legs are bound with what looks to be a strengthening wrap (in many but not all current photographs - depending on the aircraft). I tried to replicate this by binding thin masking tape around the legs then spraying a few coats of primer to build up a thickness, then removing the tape & spraying another couple of coats.
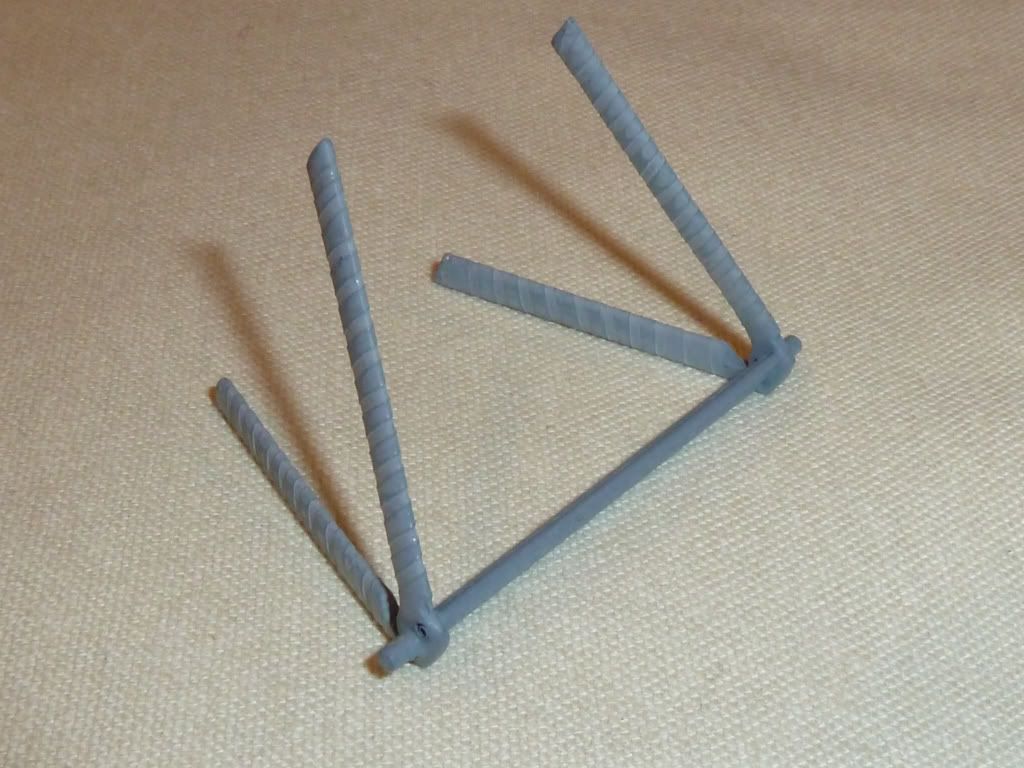


The central rigging 'tower' is formed from fairly flimsy resin struts which are a fairly flat oval in cross section - too flat really plus I'm concerned about them bending.  :-\ Albion Alloys 1.2mm thin wall brass tube flattens nicely to give a more accurate & far stronger version. Here I've just flattened part of a tube as a trial.
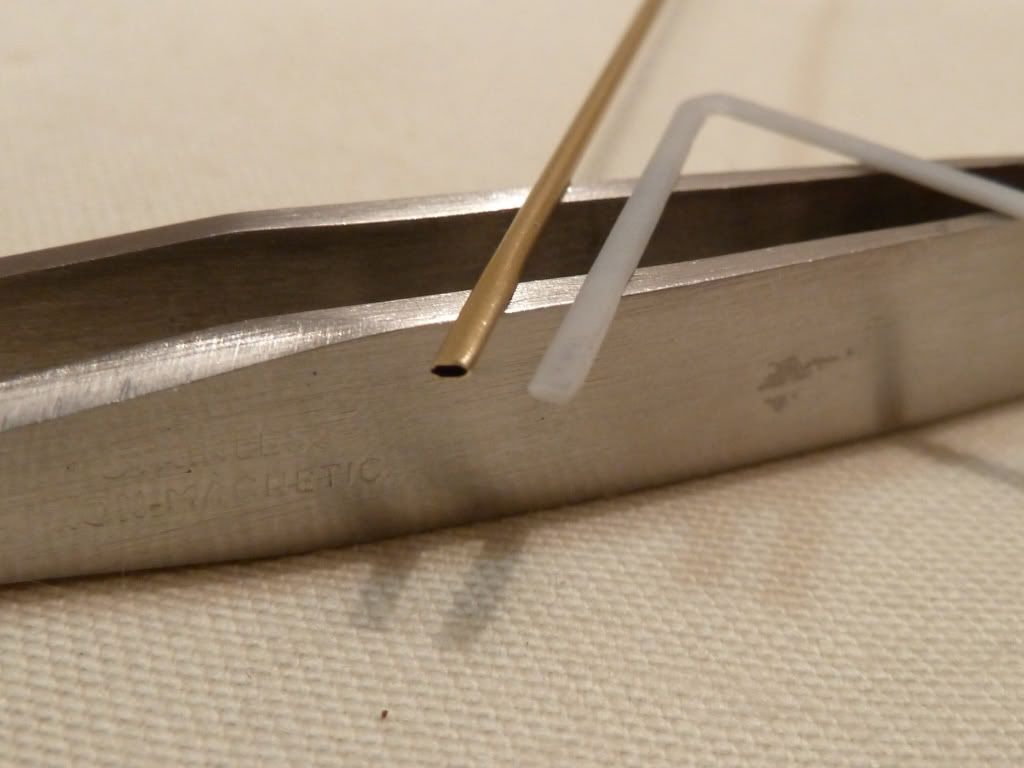


The rigging under the wings connects to a plate(s) protruding through the fuselage. Some current detail photos show the plate protruding as one piece with two holes whilst other aircraft (replicas) show the visible part of it as two separate lugs.
I thought I'd try to replicate this so although I may change the detail at the moment. I used 0.5mm tube, squashed the end & drilled a hole (0.25mm).
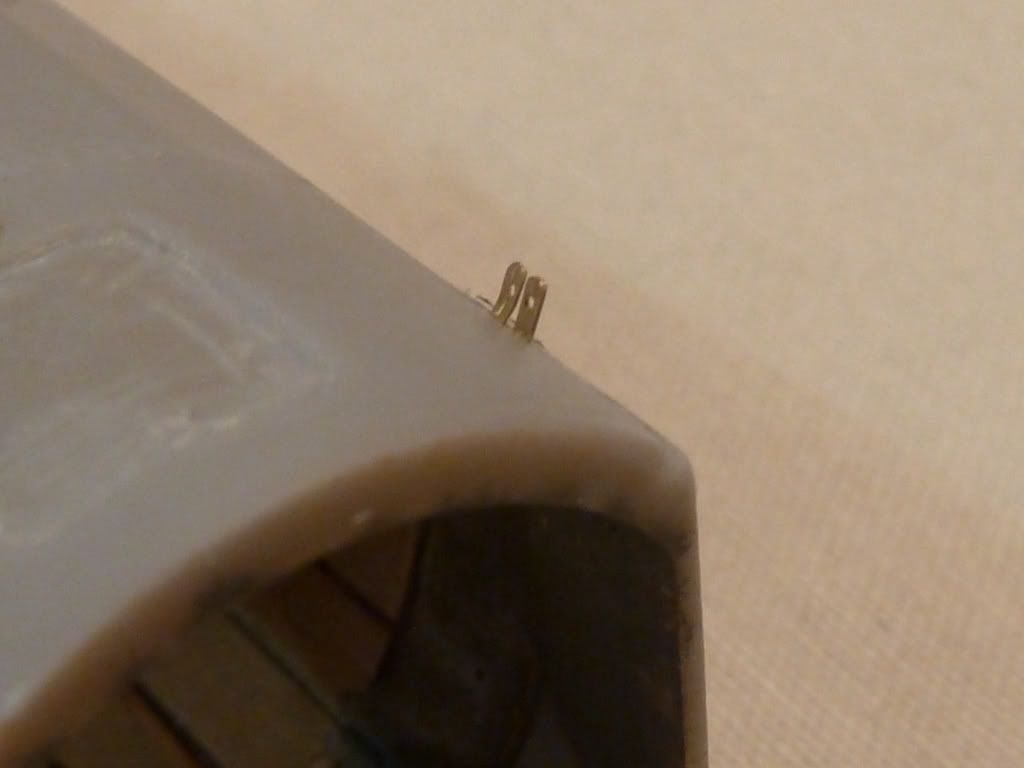
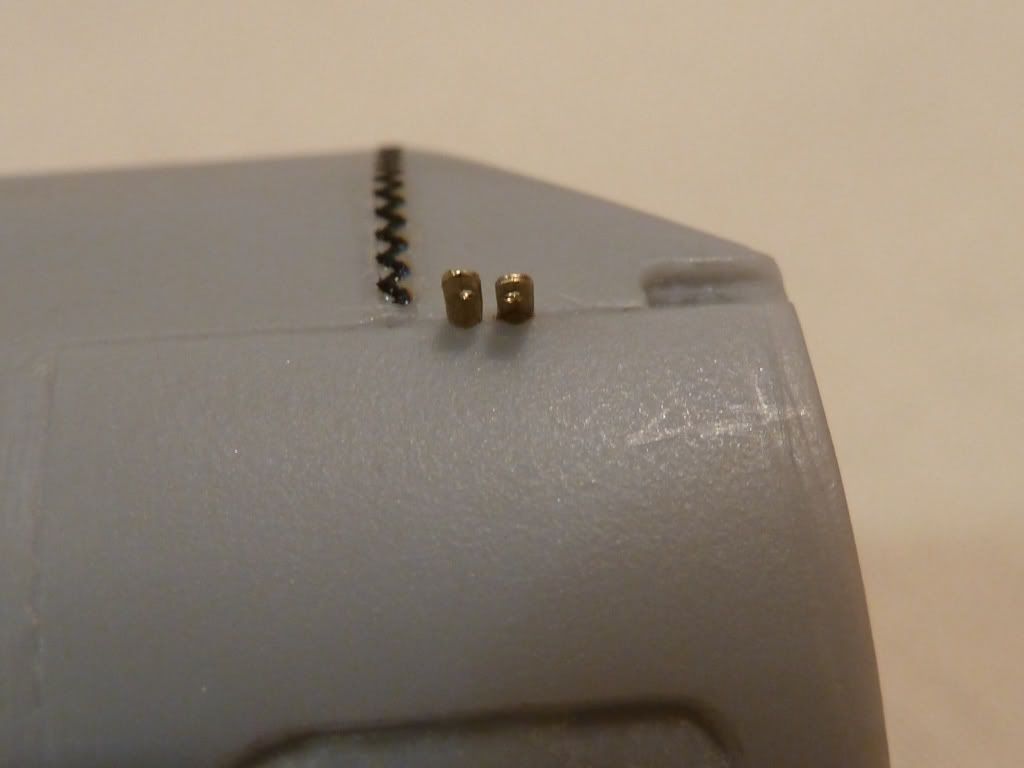


They are only roughly pushed into their holes at the moment & need adjusting for angle & projections.

The plan was to make a forked end connector for the rigging wire which will connect to the lug on the fuselage via a tiny bolt from RB.

This is my attempt so far.
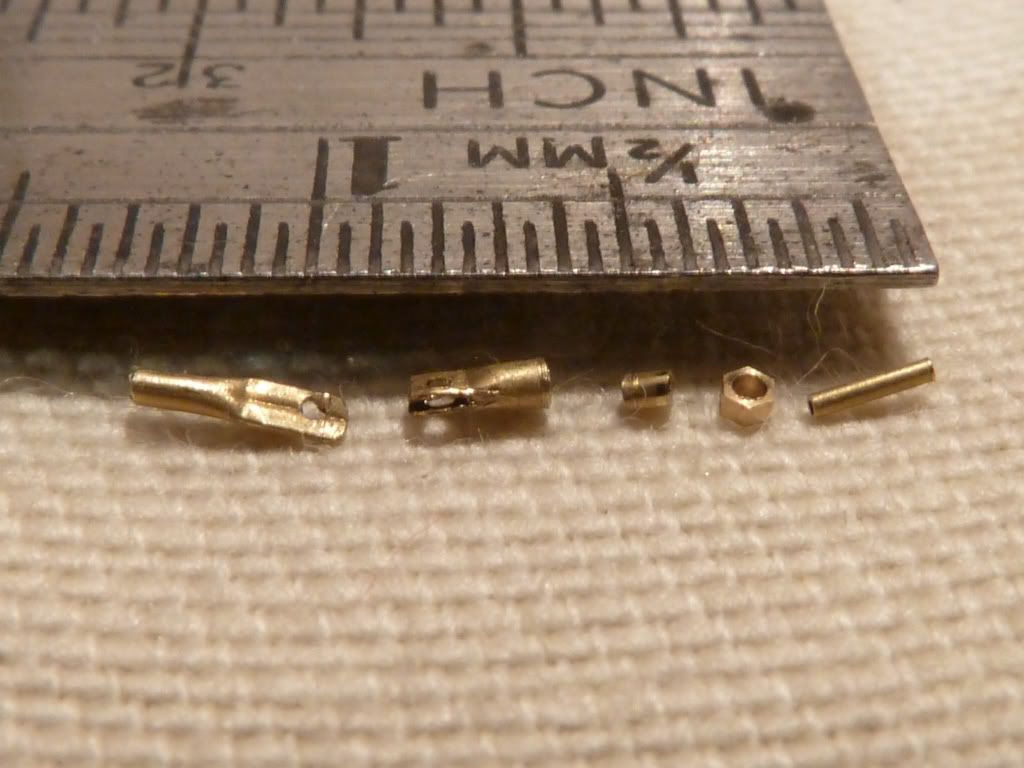


The part on the left is the fuselage lug. The end connector on the rigging wire is formed from a forked plate formed from a length of tube which is partly squashed then a hole drilled then it's split by filing away the sides of the flattened section - this slips over the first lug. Third from the left is a short length of tube which goes into the tubular part of the split connector to reduce the internal diameter to allow the thin tube on the right to slip partly in. The RB Motion nut slides over that acting as the adjuster nut (well not literally at this scale  ;) ). The rigging wire is glued into the end of the thinnest tube. A long winded description of a tiny item. I'll go down this route if I have to but I'm exploring ways of using the Gaspatch RAF connector.

That's about all so far.

Regards
Russell

Offline uncletony

  • Hero Member
  • *****
  • Posts: 4384
    • Aircraft In Pixels
Re: Bristol M1.C
« Reply #28 on: May 19, 2014, 06:54:56 AM »
Great to see you moving on this again Russell. Cool stuff.

Offline RAGIII

  • Hero Member
  • *****
  • Posts: 19688
Re: Bristol M1.C
« Reply #29 on: May 19, 2014, 11:00:52 AM »
Russel,
It seems that I wasn't as active here as I am now when you started this so I had a lot of catching up to do on your build! Brilliant work on the interior,(the seat is perfect), the Hinge work, and all of the other little details you have added! I am extremely impressed by your work!
RAGIII
"A man has to know his limitations": Harry Callahan

"Don't slop it on" Lynda Geisler