Author Topic: DH-6 1/72nd  (Read 3563 times)

Offline djuggie

  • Full Member
  • ***
  • Posts: 145
DH-6 1/72nd
« on: November 23, 2023, 03:03:51 PM »

November 22, 2023

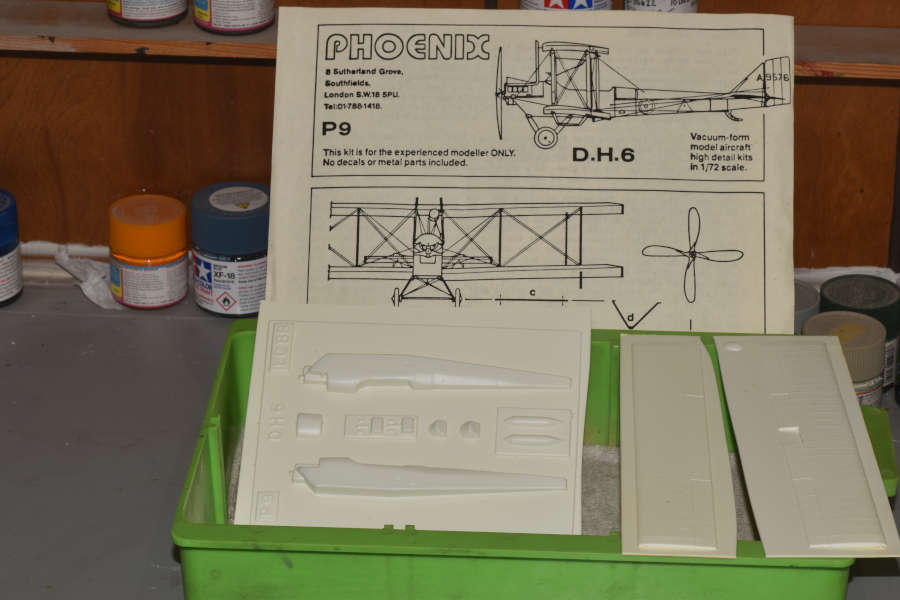
Another very old vacuform off my shelf, this one the Phoenix DH-6  in 1/72nd scale.  I know that few modellers build vacs any more but I have a shelf load of them.  In my collection of models, 43 of them are vacs.  When I came back into the hobby in 1980, space and availability of kits were of great concern.  The only offerings at that time were the Revell series and then I discover Airfix.  About this same time vacuforms were just start to appear on one sheet of plastic and nothing else.  I was not ready to scratch build machine guns and other fiddly parts until Aeroclub came into existence.  I now had an entire selection of white metal parts that transformed vacuforming.  Vacuform kits exploded on the scene followed by decals and there were kits that I figured would never be kitted in any injection form. 

Veeday, Pegasus, Merlin, Toko and Eduard, along with others, came along years later to prove me wrong but the purchases had been made.  Many years later I am starting vac # 44.

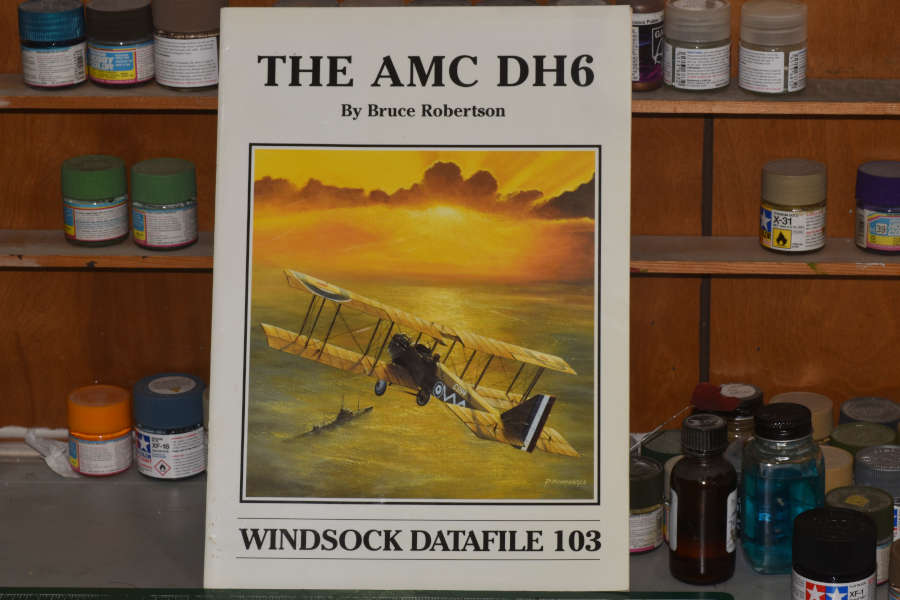
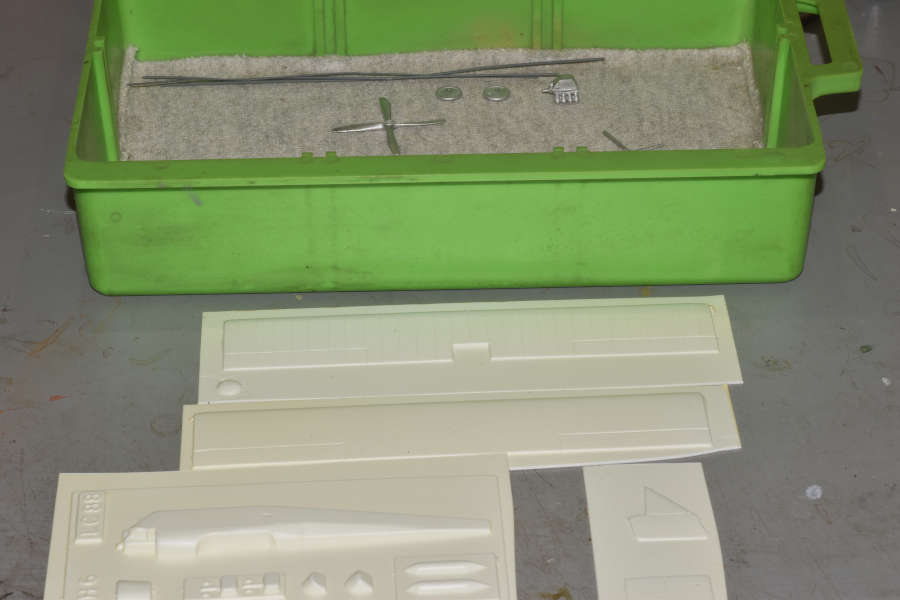
As you can see, everything is on one sheet.  The instruction say no decals or metal parts are included leading me to believe that is a late run kit and metal parts are included.  One beautiful thing is Datafile #103 with reference material that did not exist when I bought the kit.

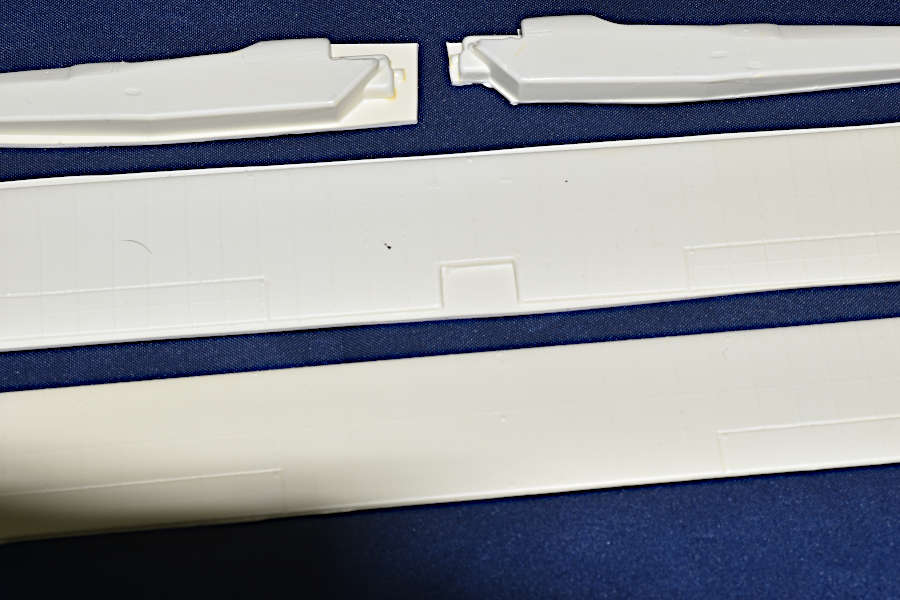
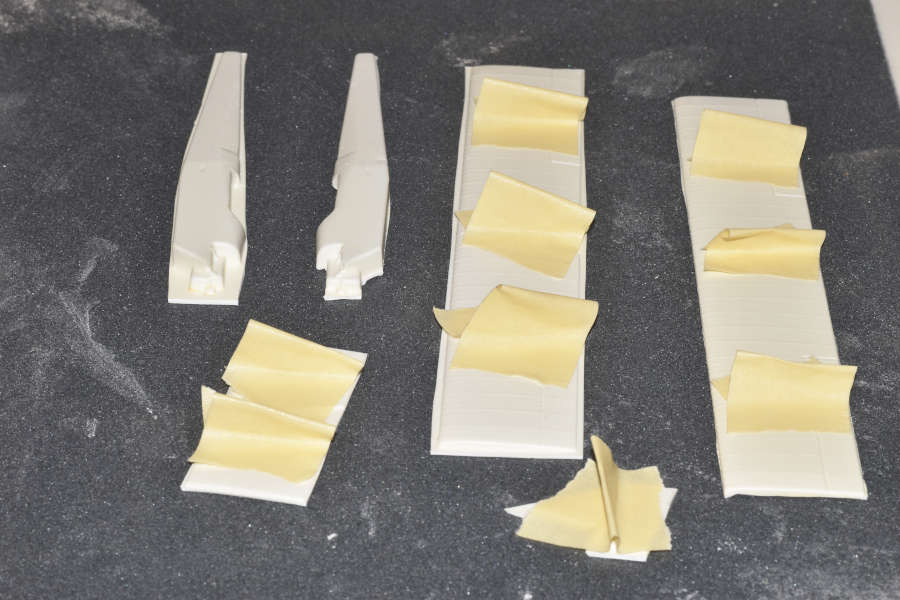
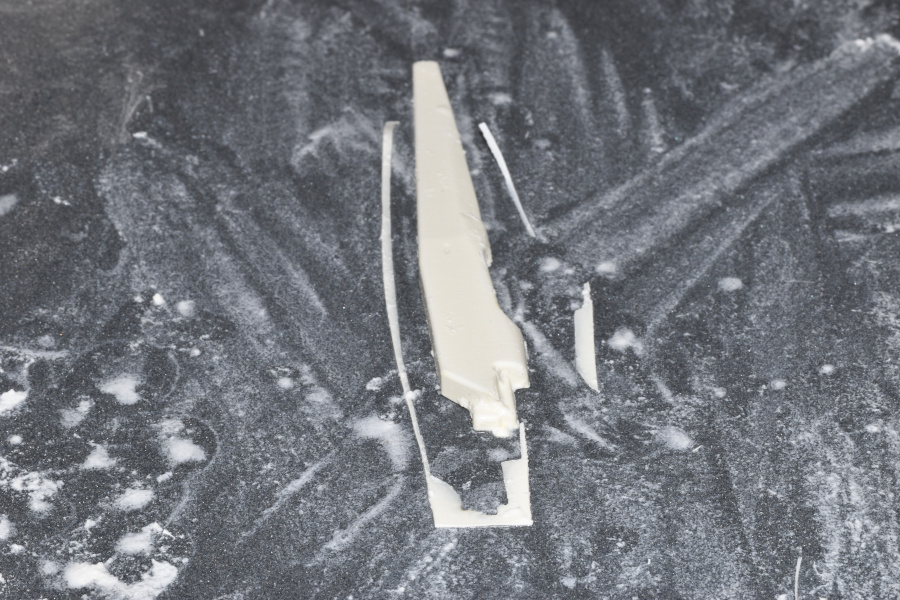
I cut all of the parts off their sheet.  There are two schools of thought on these cuts.  One is to leave a lip around the part and you sand until the lip peels off.  The other is to cut the part off at an angle right next to the part.  This makes for less sanding but great care must be taken not to sand too hard.  This work is done at the kitchen sink as I need access to a lot of water.  The sandpaper is wet/dry 120 grit.  I store the sandpaper under something flat the it will last for years.

The tape on the wings and tails surfaces is for gripping the part and applying even pressure as you sand.  The wings will be sanded using less pressure at the leading edge and sanding the trailing edge to a razor edge.  Touch up sanding will give me the rounded leading edge.


Offline DaddyO

  • Sr. Member
  • ****
  • Posts: 488
Re: DH-6 1/72nd
« Reply #1 on: November 23, 2023, 06:04:59 PM »
Great to see this one being started. I've picked up a few vacs over the last year or so and have cut some of the parts out on this one  :)

Stumbling block I hit before going any further with mine was the cockpit layout since I couldn't find any reference to the overall cockpit area (good photos of the instrument panel in the front though) My thought was that there is no second instrument panel for the back seat, just rudder pedals, throttle and stick.  ???

Pulling up a seat to watch and see how this comes along  ;D

Paul
There cannot be a crisis today, my schedule is full

Offline NigelR

  • Hero Member
  • *****
  • Posts: 665
Re: DH-6 1/72nd
« Reply #2 on: November 23, 2023, 07:18:20 PM »
Another trip down memory lane ;) I had several vacforms in my stash and vowed to build at least one after I retired. Guess what - I got rid of them all! Seems far too much like hard work to me..... :D

Offline DaddyO

  • Sr. Member
  • ****
  • Posts: 488
Re: DH-6 1/72nd
« Reply #3 on: November 23, 2023, 08:19:03 PM »
Another trip down memory lane ;) I had several vacforms in my stash and vowed to build at least one after I retired. Guess what - I got rid of them all! Seems far too much like hard work to me..... :D

Got a lovely Otto Doppledekker sitting on the shelf with your name on it Nigel  ;D
There cannot be a crisis today, my schedule is full

Offline djuggie

  • Full Member
  • ***
  • Posts: 145
Re: DH-6 1/72nd
« Reply #4 on: November 23, 2023, 10:37:58 PM »
Paul, Nigel,

I think this one of the reasons I took so long to build the kit.  No reference material.  Everything had to be scratch built and in 1/72nd could be very tedious and not very rewarding.

In my early vac days that didn't matter to me.  Remember, I was after a large collection and no one could see inside anyway.  But, for you two builders and the perfection you present in your kits, it does matter what the strap holding down the fuel tank looks like.  Me, not so much.  It wasn't until WINDSOCK  began to be published that I started adding more details.

And, Paul, you should not so cruel to offer Nigel an Otto Doppeldecker.  We do not want him running screaming from the room.
Remember, everyone has a breaking point where they will tell you anything to make the pain stop.  :-)

Dennis

Offline Davos522

  • Hero Member
  • *****
  • Posts: 798
Re: DH-6 1/72nd
« Reply #5 on: November 24, 2023, 01:28:24 AM »
You're a braver man than I, Dennis.

I did a quick scan through my WWI Aero indexes but the only photo was the one of the front cockpit from the Harleyford Bombers & Reconaissance book, which is probbly the same one RLR used in the Datafile.

A question, if you're sanding the trailing edges to a paper-thin profile, how do you stick them together? double-sided tape? it would seem liquid cement would deform them, and CA would squeeze out and stick to whatever you used to clamp them together...??

The only vac kit I ever got was one of Koster's, I think, of a Fokker E.V/D.VIII in 1:48. It has lovely lozenge decals with it, probably not accurate in light of modern research, but the colors are subdued and really appealing. Still got it kicking around somewhere.

Dutch

Offline djuggie

  • Full Member
  • ***
  • Posts: 145
Re: DH-6 1/72nd
« Reply #6 on: November 24, 2023, 04:30:06 AM »
Dutch,

Windsock 103 has a photo of the instrument panel.  Nothing on the rear of the cockpit.

I use single thickness wings for 1/72nd so I avoid the need for gluing wing halves together.  This may not work in the larger scales but single thickness wings appear to be in scale.  And none of my vacuform wings have ever sagged.  I was never happy with double thickness wings.  Never could make them look right.

This will be an easy vacuform.  It is all square, simple to make and repair.  It is amazing from the Windsock the number of these planes in trees.  But, it was a trainer.

Dennis

Offline Tim Mixon

  • Hero Member
  • *****
  • Posts: 837
  • Main focus is 1/72 WWI
Re: DH-6 1/72nd
« Reply #7 on: November 24, 2023, 11:56:24 AM »
Nice subject and start Dennis.  I built this one several years ago but cannot locate my build log. Here’s the link to my completed build:
https://forum.ww1aircraftmodels.com/index.php?topic=13651.msg252529#msg252529

I have since painted the ignition wiring a dark brown color.

And just for fun: the Otto Doppeldecker can be built!

https://forum.ww1aircraftmodels.com/index.php?topic=13281.msg247130#msg247130

Really nice to see that there are still others interested in these vaccuform kits. They really are a wonderful medium to work with.  Looking forward to seeing your work!

Tim
« Last Edit: November 24, 2023, 12:09:52 PM by Tim Mixon »

Offline djuggie

  • Full Member
  • ***
  • Posts: 145
Re: DH-6 1/72nd
« Reply #8 on: November 24, 2023, 10:54:34 PM »
Tim,

I just found my reference material, your beautiful model.  Magnificent work.  I just do not build at that level.  Let me see if I can incorporate some of your skills into my kit.

Your weathering is subtle but effective.  I have never mastered the art of weathering.  I build mine off the showroom floor.  I know for at least 15 minutes they looked like that.

Dennis

Offline IanB

  • Hero Member
  • *****
  • Posts: 2441
Re: DH-6 1/72nd
« Reply #9 on: November 25, 2023, 10:46:43 PM »
I'll be following this one. I have a huge collection of vacs, and actually prefer them. They are far more to scale thickness wise, especially the wings.

Ian

Offline djuggie

  • Full Member
  • ***
  • Posts: 145
Re: DH-6 1/72nd
« Reply #10 on: November 25, 2023, 11:13:04 PM »
Ian,

The one thing that throws people off from vac is the cutting out of the parts.  This step adds maybe two hours to the build.  And a vac with metal parts and decals makes them even easier.

Like you, I have a lot of vacs, did I say a lot?  Oh, yea

Dennis

Offline Flamingo

  • Jr. Member
  • **
  • Posts: 99
Re: DH-6 1/72nd
« Reply #11 on: November 26, 2023, 07:32:06 AM »
Took out the Harleyford book and the Datafile just for fun,
only Harleyford show the DH 6, confirming the "no instrument panel" theory!

The DF photo is captioned by HF as a Lloyd C.II.

Have fun with the build

Joachim


Offline djuggie

  • Full Member
  • ***
  • Posts: 145
Re: DH-6 1/72nd
« Reply #12 on: November 27, 2023, 11:16:06 PM »
Thank you, Sir,

Between Tim's build and your photo, progress will made soon.  Had something to before I could get back to building.

Dennis

Offline djuggie

  • Full Member
  • ***
  • Posts: 145
Re: DH-6 1/72nd
« Reply #13 on: December 01, 2023, 02:01:21 AM »

November 30, 2023

Instead of finishing the sanding on the wings, I decided to build the fuselage first.

For a little more detail, the frame was build using flat strips of plastic and glued in with Weld-On 3 liquid glue.  The interior was sprayed olive and frame was painted with light wood.  For some strange reason it was decided that interior bracing was necessary.  No idea why.  It is thin copper wire super glued in and then flat coated to remove the shine.  No attempt was made to make it another color.  After this was done, I realized I could have done this with a pencil and get the same effect. 

The seats are the kit vac seats, the seatbelts are masking tape with silver paint for the clasps.  The foot controls and stick are  plastic rod and copper wire. 

The engine section was trimmed to accept the white metal part.  Also, the propeller and engine were painted.  As of date, the cockpit section has been trimmed and one half of it is glued.  Next up will be instrument panel and it will be glued together.


Offline NigelR

  • Hero Member
  • *****
  • Posts: 665
Re: DH-6 1/72nd
« Reply #14 on: December 01, 2023, 07:27:02 PM »
Nice progress on the interior, it will look nicely filled up when it's done.

I always used to use stretched sprue for rigging my 1/72 aircraft. It's great for interior rigging because it's easy to use and can be painted a suitable steel colour. You can also use it for lines running from the rudder pedals because it has enough inherent strength to stay straight over a relatively short distance (which is mostly what you have in 1/72).

And I just spotted Paul's comment about being offered a Doppeldecker vac - yes, I would run screaming from the room!!