I usually tend to have 2 kits on the go at once so if paint is drying on one i've still got something to do, i haven't achieved much of anything recently due to being back at work but i have made a start on my Camel trench fighter from Roden.
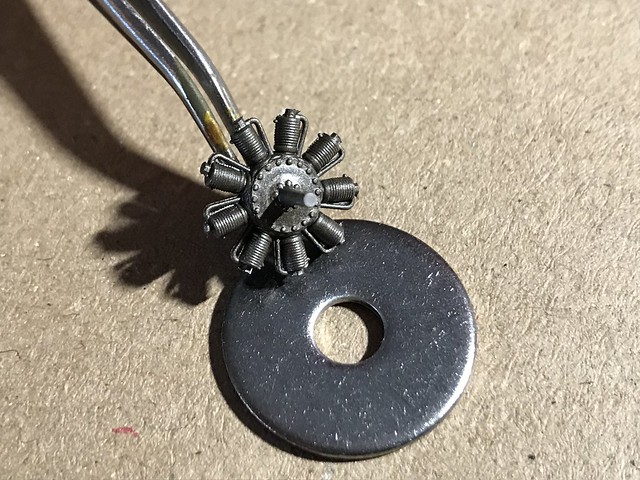
Engine was painted with chrome silver and then a dirty wash on top which was a mix of black and burnt umber for an oily effect, the washer is 20mm diameter just for a bit of scale

Interior parts are all painted, there was no decal for the instruments so i added a few blobs of paint. The white ran a bit which is a shame but i don't think it's really gonna be seen once in place anyway.

Seat and fuel tank assembly, the top tank is currently just held with a small blob of blue tack as i'm not 100% on the fitting location. There's 2 lugs on the top of the lower tank but 4 holes in the base of the upper tank so it's going to sit offset in either the forward or rear position. Pics i've seen of the real thing show the tank sitting forward the same as i currently have it but i'll wait until i know for sure before gluing it. Have to say that the instructions are a bit vague at best, especially with where the interior bits actually fit so a bit of trial and error might ensue.

I didn't go too mad with the interior paint, just enough to hint at a wood effect, it's 1/72 and the cockpit hole is tiny so hardly anything will be seen once all closed up.

It took a lot of fettling to get the wings to fit anywhere near square and flush with the underside, same for the half moon infill piece at the front. I'm not fussed about the gaps in this area as there's a plate which goes over the top that the downward facing guns go through so it will all be covered. Not much i can do till some 1.5mm drills turn up so i can drill through the wing base for said guns, reckon it's best i do that before fitting the interior

Just a shot for scale purposes with a cocktail stick, it's a tiny little thing


