Author Topic: Lloyd C.V 1/32 Scratch Build Project  (Read 44825 times)

Offline rhallinger

  • Hero Member
  • *****
  • Posts: 1976
Re: Lloyd C.V 1/32 Scratch Build Project
« Reply #15 on: November 08, 2012, 11:24:55 PM »
I will be happy to post some pics Chris.  I am relying on plans posted by Doug Bauman on his Aviatik Berg sctrachbuild thread at this link:

http://www.swannysmodels.com/yabb2/YaBB.pl?num=1292601844/15

along with the design of a vac-u-box I have which is too small for this project.  It is a common design that is not too difficult to construct with limited inexpensive materials.  It requires use of your household oven and vacuum cleaner, so watch out for your spouse.   ;D  You may want to check out the description of how it works at:

http://nautilusmodels.com/vac-u-box.htm

I'm just building a larger version for 1/32 scale components, and at about half the cost.  ;)

I'll be sure to include updates here.  I plan to cut the lumber on Saturday, so maybe I'll have it assembled by the end of the weekend.

Regards,

Bob

Offline LindsayT

  • Hero Member
  • *****
  • Posts: 844
  • "Somehow it didn't seem like war at all..."
Re: Lloyd C.V 1/32 Scratch Build Project
« Reply #16 on: November 09, 2012, 03:38:26 AM »
You've got an interesting build going, Bob, which brings me to my stupid question: why even bother vac-forming the fuselage? The balsa fuse you've got looks great, and obviously has all the right shapes that you want, so why go through the extra trouble? Is plastic just that much easier to work with?

Pardon the inexperience-induced ignorance...

LT

Offline rhallinger

  • Hero Member
  • *****
  • Posts: 1976
Re: Lloyd C.V 1/32 Scratch Build Project
« Reply #17 on: November 09, 2012, 04:01:55 AM »
Hi Lindsay.  You pose an interesting question, and the answer may depend on the modeler's particular skills.  The big advantage to a vacuformed plastic fuselage is the ease of installing interior cockpit detail and the engine.  A solid wood fuselage would make it very difficult (at least for me  ;)) to open and build the cockpit and engine compartment.  I am also more comfortable working with plastic, and if I really mess up the plastic fuselage shell (it has been known to happen!) I can simply make another with the master.

Regards,

Bob

Offline LindsayT

  • Hero Member
  • *****
  • Posts: 844
  • "Somehow it didn't seem like war at all..."
Re: Lloyd C.V 1/32 Scratch Build Project
« Reply #18 on: November 09, 2012, 05:47:24 AM »
Hoo boy, you handled that one well, Bob. I know it would have taken a lot for me to not be screaming at the computer, "They are hollow tubes, moron!" Thank you very much for taking a pass on that one.

Reminds me of one of my favourite scenes from Zoolander:


Sorry for the digression, but I did give fair warning that it was a stupid question...

Offline rhallinger

  • Hero Member
  • *****
  • Posts: 1976
Re: Lloyd C.V 1/32 Scratch Build Project
« Reply #19 on: November 09, 2012, 05:55:38 AM »
No problem Lindsay!  Thanks for giving me a good hearty laugh with your reply!   ;D

Regards,

Bob

Offline rhallinger

  • Hero Member
  • *****
  • Posts: 1976
Re: Lloyd C.V 1/ 32 Scratch Build Project
« Reply #20 on: November 09, 2012, 10:58:17 PM »
Progress continues, though the path has some twists and turns.  I've never done a vacuform master before, so I'm generally gleaning what I can from other modeling posts and trying things that seem to make sense.  As noted, it will likely be a crooked path.  :o

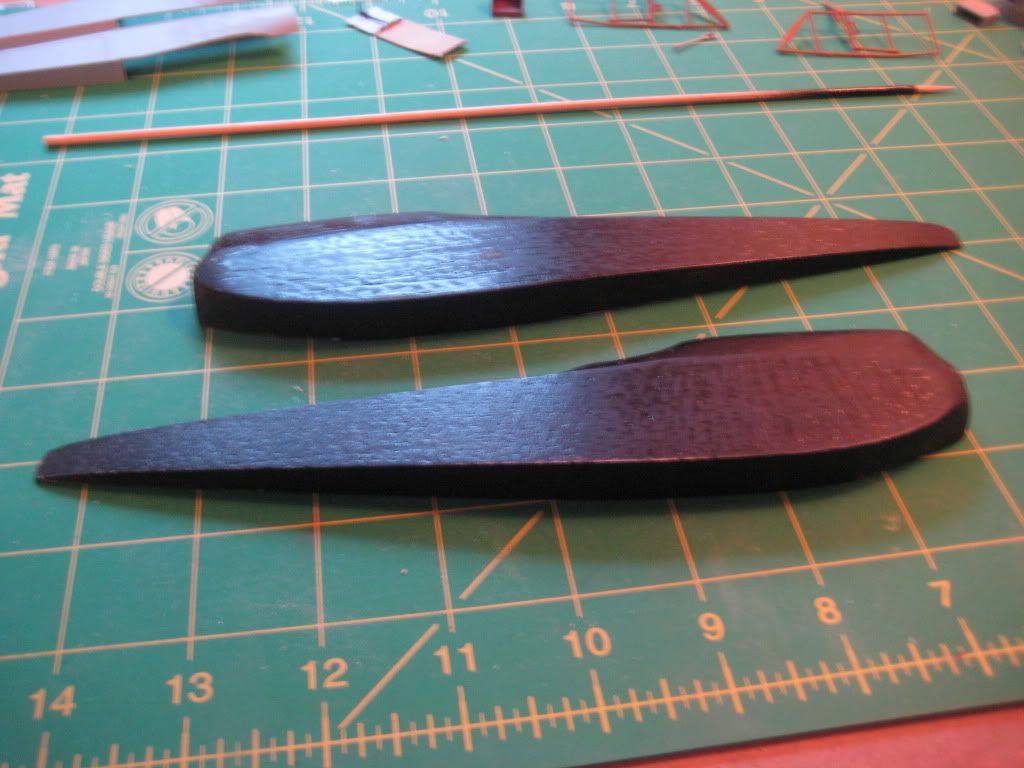
I sprayed the balsa master with rattle can shellac from Lowe's to seal it, sanding between coats.  It was okay, but the shellac seemed to emphasize the wood grain rather than fill it in.  I had a can of Krylon gloss black in the basement, so I decided to try that as a primer.  It too did not fill the grain but instead revealed it.  >:( I think this is an issue with a very soft wood like balsa.  The price you pay for ease of carving and cutting.  Now I have a good stiff surface which has some pitting of wood grain, so I will likely use some Bondo auto putty and see if that does the trick.  I wonder if Mr. Surfacer would work better.  Any thoughts?

Doug Bauman used CA to coat the balsa and then sanded it smooth.  It sounded strange using CA on a relatively large flat surface, so I went with the shellac.  Perhaps I should have followed Doug's method, or just used good old-fashioned sanding sealer.

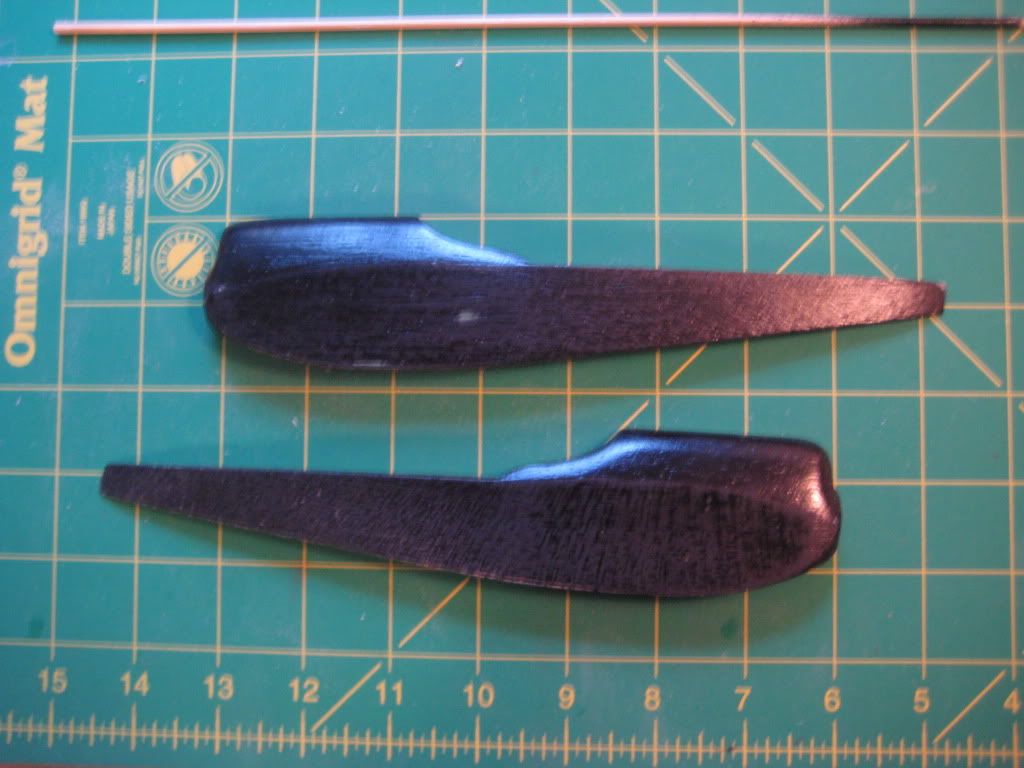
In any event, I decided to split the master at this point, before the centerline seam was completely hidden by coatings.  This proved a bit dicey as I obviously used too much white glue when I glued the wood halves together at the beginning.  Persistence, an x-acto blade, a butter knife, and a razor saw combined to persuade the halves to part reasonably well, but not without some tense moments.  Who says modeling is a tame hobby?  :)   Here are the halves, with filler yet to be applied:


I will try smoothing the pitted surfaces of the master this weekend while also building the vacuform box.  I am sure it will work out.  :)

Regards,

Bob

Offline Chris Johnson

  • Hero Member
  • *****
  • Posts: 1959
Re: Lloyd C.V 1/32 Scratch Build Project
« Reply #21 on: November 09, 2012, 11:48:50 PM »
While it's a little too late for this project, you might try an old wood turning technique on your next project for masters that have to separated. When gluing the blanks together, sandwich a piece of brown paper bag between them and then apply pressure with clamps. When it comes time to break the halves apart, it's a relatively simple matter to pop them apart.

I used this technique whenever I turned bowls. I would glue a piece of scrap to the bottom of the bowl blank and drive the screws through the faceplate into the scrap. The scrap piece would pop right off the bottom of the turned bowl with just a little bit of pressure from a chisel. This eliminated any screw holes in the bottom of the bowl. As balsawood is very fragile though, I think I'd use basswood instead.

Cheers,

Chris
You can have it good; You can have it fast; you can have it cheap. Pick any two, but all three are impossible.

Offline rhallinger

  • Hero Member
  • *****
  • Posts: 1976
Re: Lloyd C.V 1/32 Scratch Build Project
« Reply #22 on: November 09, 2012, 11:56:36 PM »
Thanks Chris!  I'll try the brown paper next time.  I did use some 1" wide strips of copy paper every couple of inches, but I probably used too much glue on the wood in between.  How do you apply the brown paper, and how much?  How do you glue the halves?  This is my first time at this, so I am interested in picking up and refining new techniques as I go.  Thanks for your help! 

Offline pepperman42

  • Hero Member
  • *****
  • Posts: 4507
  • Sergeant, my brown pants.......
Re: Lloyd C.V 1/32 Scratch Build Project
« Reply #23 on: November 10, 2012, 12:58:35 AM »
I think you have the surface smooth enough as it is the interior of the plastic that will pick up what grain there is when it is vac-formed. I dont think its rough enough to show through on the outer surface of the plastic which Im guessing will be at least 40thou. Balsa is pretty fragile. I prefer bass like Chris but that being said the master does look very good. Keep going this is great stuff!!!

Steve

Offline rhallinger

  • Hero Member
  • *****
  • Posts: 1976
Re: Lloyd C.V 1/32 Scratch Build Project
« Reply #24 on: November 10, 2012, 01:13:00 AM »
Thanks Steve!  I was thinking that too, and I might just leave well enough alone and give it a shot as is.  I suspect that you are correct about the grain showing up on the interior if anywhere.  I can simply sand the interior cockpit walls smooth.  Yeah, maybe I'll just try it that way.  Eliminating extra work is a good thing for this project!  I'm glad I have until April to finish it.  ;)

I will probably try basswood for the next one, as the balsa is extremely fragile.  Being new to this mode, I was just following Doug Bauman's process.  His 1/36 Aviatik Berg really did turn out well.

If I don't like the way the vacuform parts turn out with the master as is, I can just tweak the master a bit and remold.  Now, I just have to get my vacubox built this weekend. 

Regards,

Bob

Offline coyotemagic

  • Hero Member
  • *****
  • Posts: 7710
  • "Here's to not buggering it up." -Winston Chuchill
    • My Models
Re: Lloyd C.V 1/32 Scratch Build Project
« Reply #25 on: November 10, 2012, 03:41:21 AM »
Bob, I agree with Steve.  I think your fuselage halves are ready for the vac machine.  Looking really good so far.
Cheers,
Bud
"All men dream: but not equally. Those who dream in the dark recesses of the night awake in the day to find all was vanity. But the dreamers of day are dangerous men, for they may act their dreams with open eyes, and make it possible." -T. E. Lawrence

Offline Jose Chaica

  • Jr. Member
  • **
  • Posts: 95
  • Jose "Von Muttley" Chaica
Re: Lloyd C.V 1/32 Scratch Build Project
« Reply #26 on: November 10, 2012, 03:51:17 AM »
Another one that is going to get my atention... good luck!  :)
Jose Chaica, from Portugal.

Offline pepperman42

  • Hero Member
  • *****
  • Posts: 4507
  • Sergeant, my brown pants.......
Re: Lloyd C.V 1/32 Scratch Build Project
« Reply #27 on: November 10, 2012, 05:35:08 AM »
The interior could be skinned for the cockpit details to hang on therefore eliminating any sanding/thinning of the fuselage walls. Shape is important but strength helps too.

Steve

Offline Galloway

  • Full Member
  • ***
  • Posts: 202
Re: Lloyd C.V 1/32 Scratch Build Project
« Reply #28 on: November 10, 2012, 08:02:47 AM »
Bob,

   Looks great and I don't think you'll have to worry too much about the grain on the inside (you can sand the plastic afterwards if it does show)

But if you would feel better about having no grain at all before forming .... pick up a rattle can of automotive primer .(Lacquer) it will fill wood grain and can be sanded smooth very easily ....

 
 Ken   
"Slàinte mhòr agad!"

Offline Chris Johnson

  • Hero Member
  • *****
  • Posts: 1959
Re: Lloyd C.V 1/32 Scratch Build Project
« Reply #29 on: November 10, 2012, 10:11:00 AM »
Thanks Chris!  I'll try the brown paper next time.  I did use some 1" wide strips of copy paper every couple of inches, but I probably used too much glue on the wood in between.  How do you apply the brown paper, and how much?  How do you glue the halves?  This is my first time at this, so I am interested in picking up and refining new techniques as I go.  Thanks for your help!

All I ever used was a piece of brown paper from an old grocery bag, big enough to cover the entire gluing surface. I used standard white glue or carpenter's glue which, is virtually the same except it's brown in colour, and just smeared it over the mating sides.

Cheers,

Chris
You can have it good; You can have it fast; you can have it cheap. Pick any two, but all three are impossible.