Hi all – it’s been about a month since the last update. The Albie now has some colour.
I stuck with the theme of the aircraft showing some kind of good luck charm, but the original plan for a blue / red Jasta 18 machine went by the wayside, as I really wanted lozenge wings and a wooden fuselage.
I started with replicating the wood fuselage. First was the grain, done with oil paints. I wanted to make sure there was some variation:
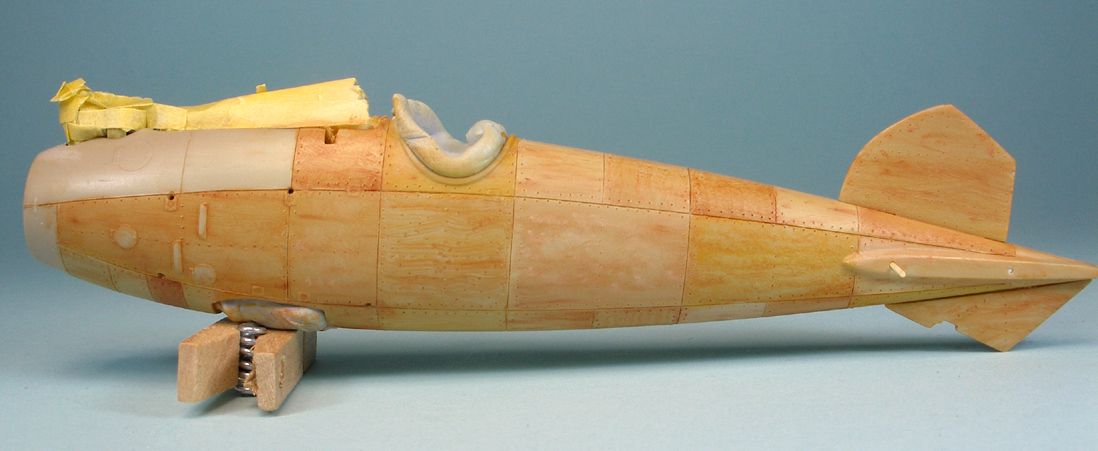


Then an overcoat of clear yellow to blend it all together. I’ve started to block in some of the panel colours.

While that was drying, I started ‘skinning’ the rudder and elevator. The rudder I kept lozenge, so I used Eagle Strike 5 colour lozenge to skin this. The elevator was slightly tricker, as I wanted to paint some Jasta colours over the tailplane, and lozenge decal wouldn’t be up to masking. So, I applied the decal onto the inside of a layer of foil, which I then used to skin the elevator. This would mean that I could paint the elevator and still have the lozenge colours showing through when I ‘battle damaged’ the elevator:


Here the elevator is painted, in some very fictitious blue and red Jasta markings (just to add some colour), prior to the application of weathering and battle damage:
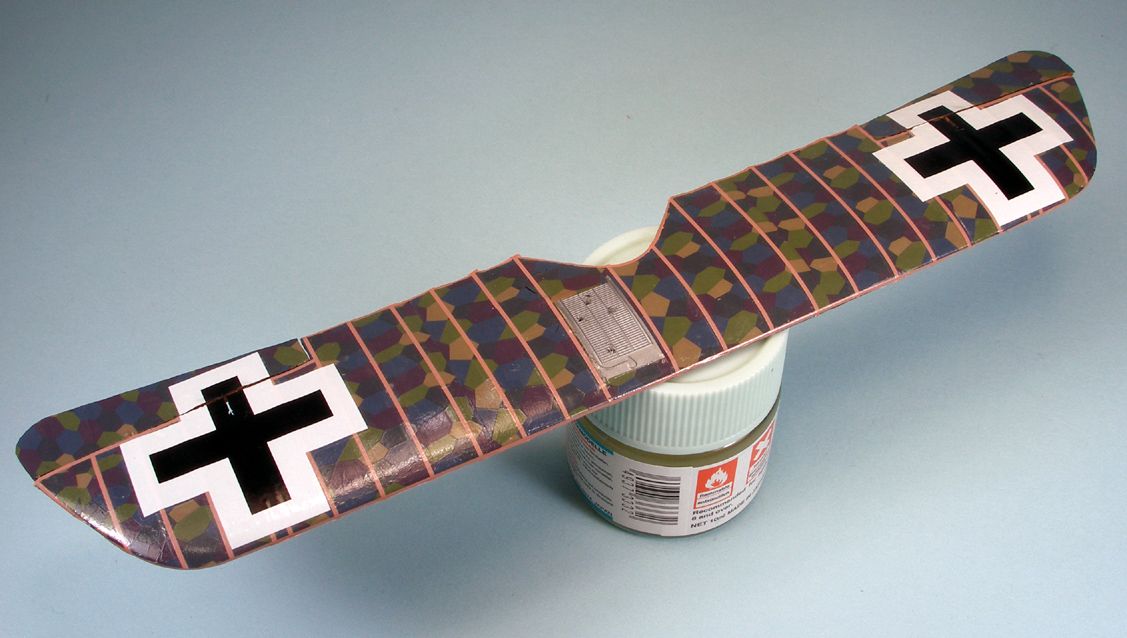
Next was the wings, also done using Eagle Strike lozenge. Here the upper wing is before weathering:
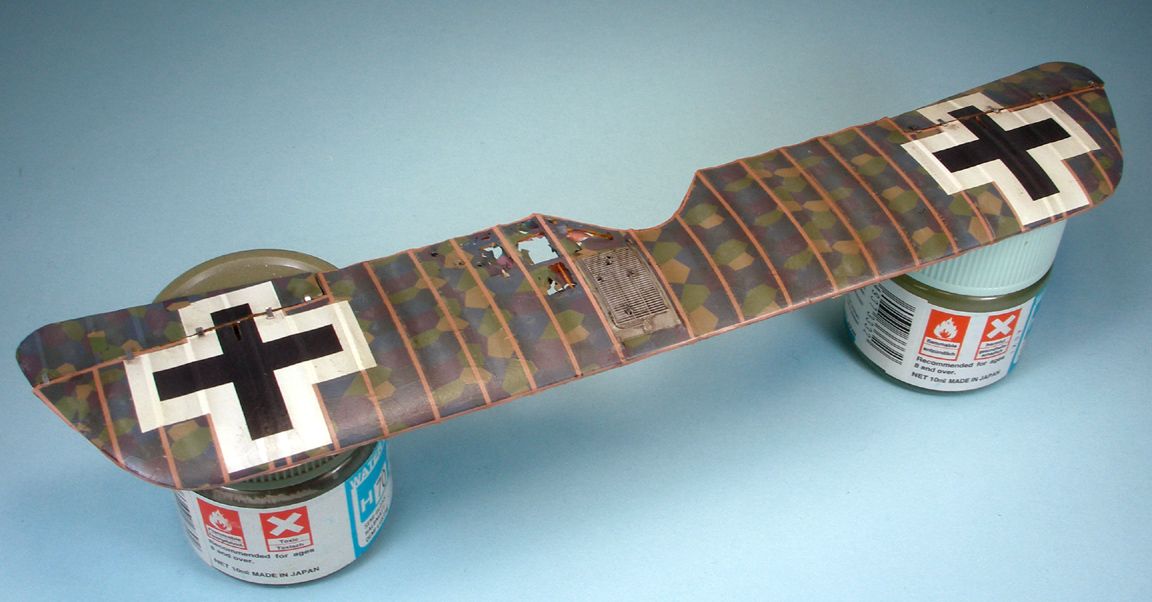
And here it is after weathering, with the battle damage done:
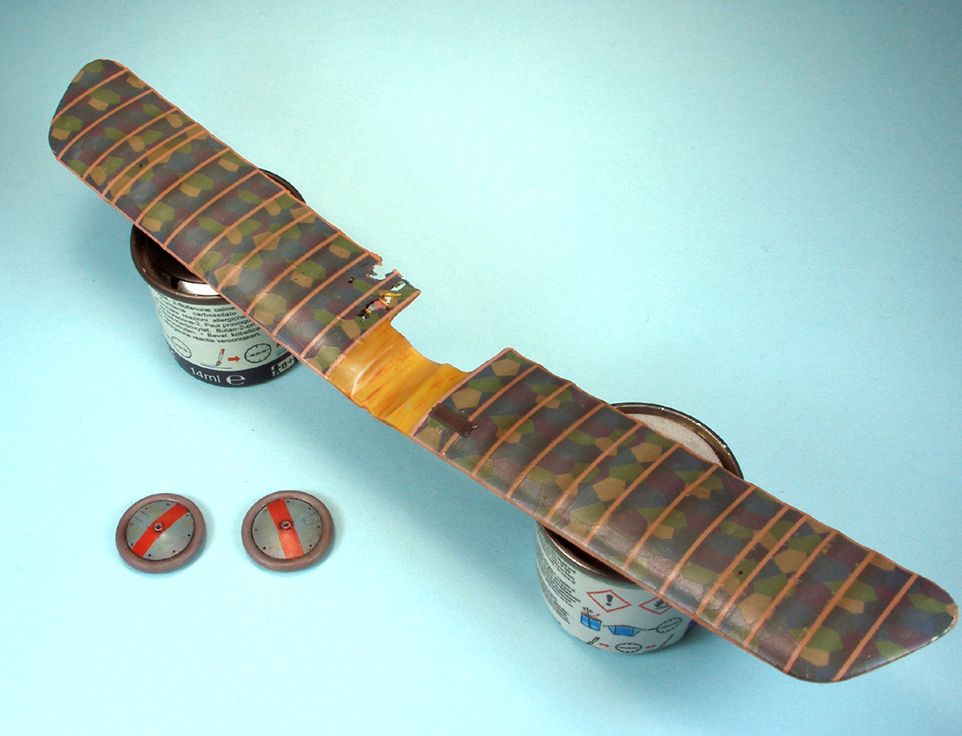
Same with the lower wing:

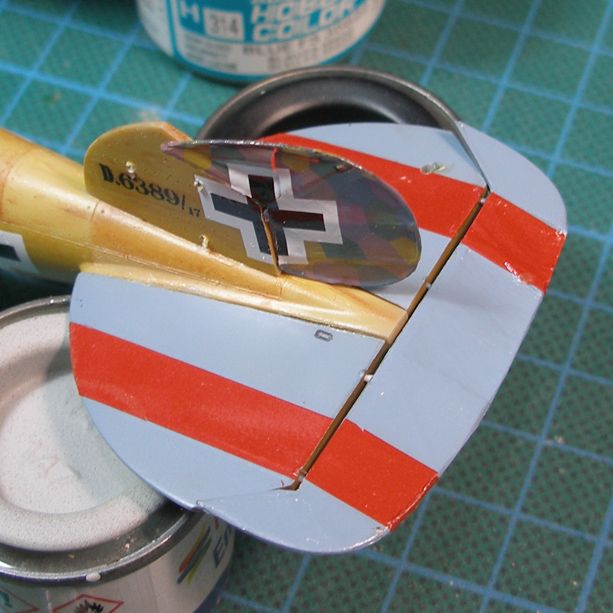
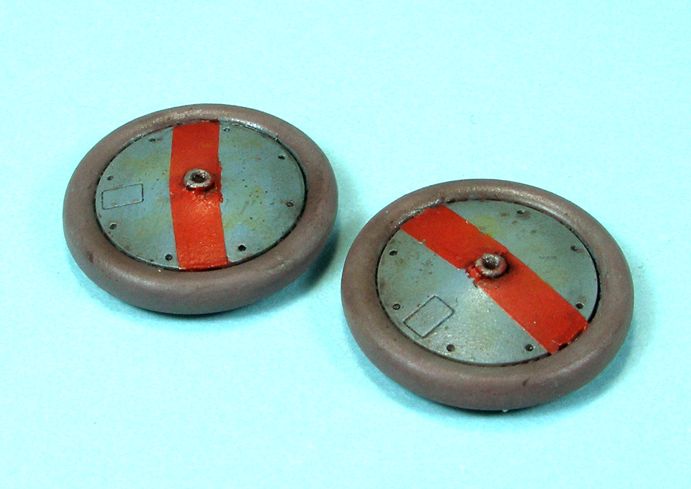
And again, some more of the fictitious Jasta markings on the wheels:
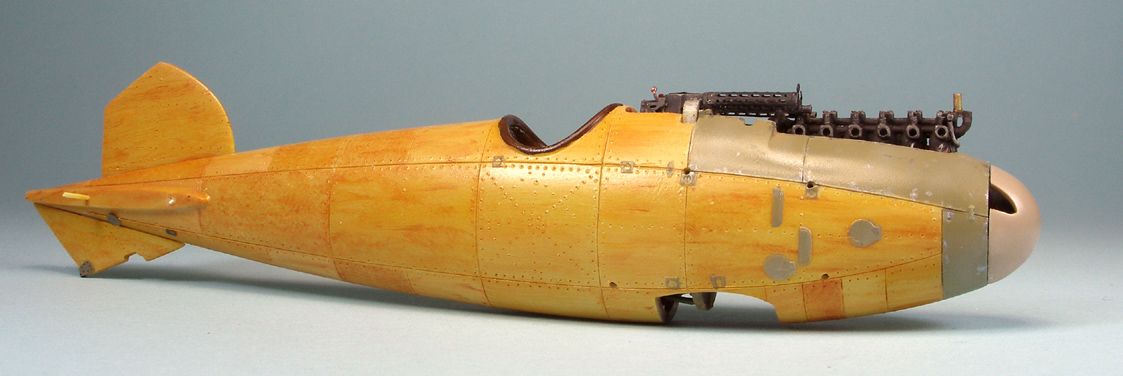
Here is the rest of the fuselage, with the rest of the battle damage done.
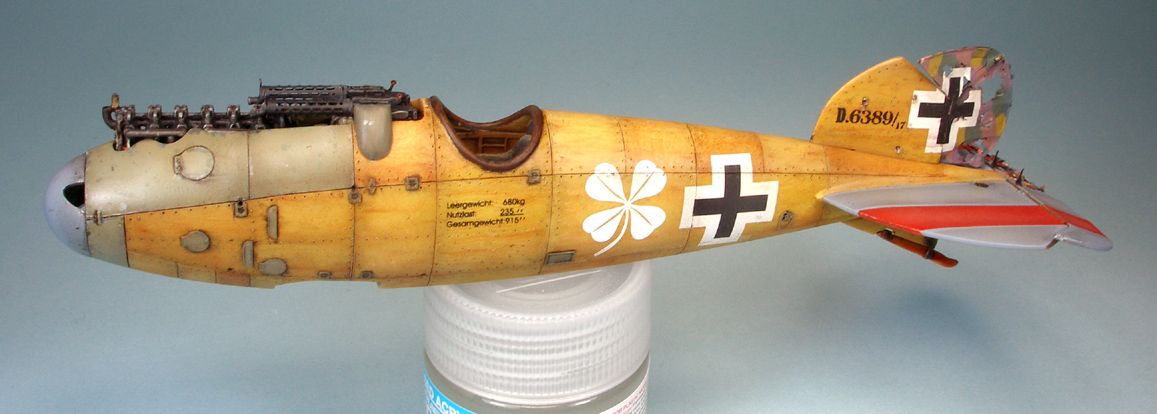
As you can see, I stuck with the ‘four leaf clover’ good luck charm (stolen from the Wingnuts 1/32 decal sheet, which worked well for this scale). The last of the fictitious jasta markings was the blue spinner. The serial number was a home made decal – the astute amongst you will note that this serial number is outside of the range of serial numbers for the DV/DVa series – just to blend in with the fictitious nature of the scheme :-)
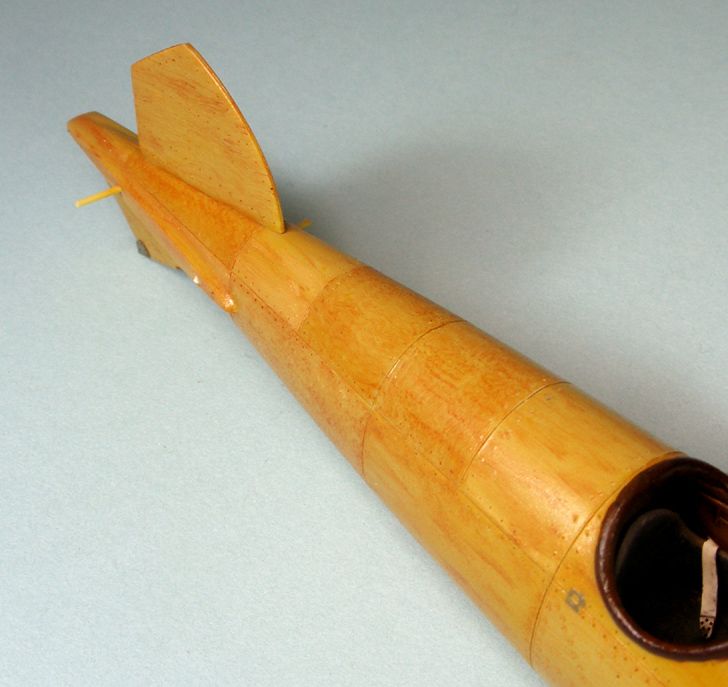
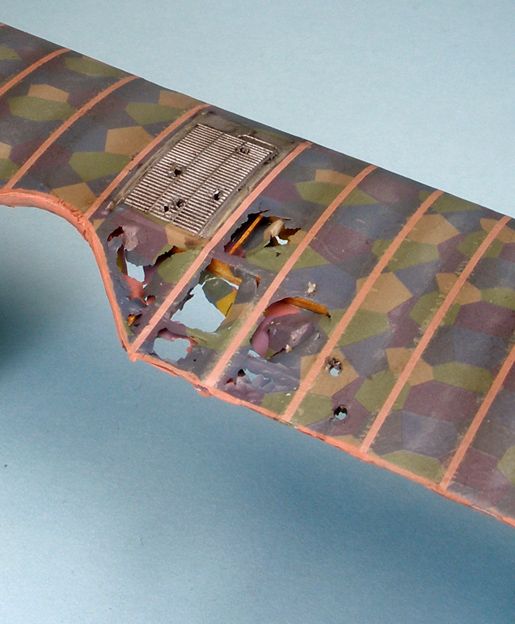
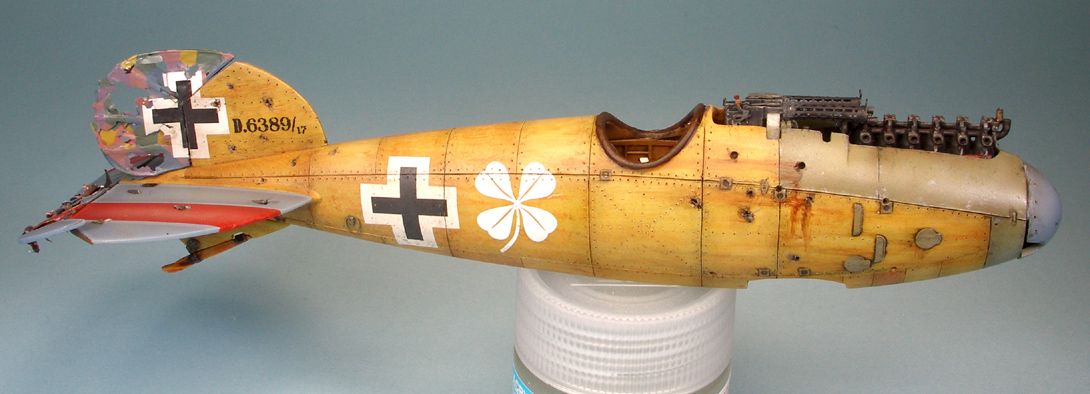
Lastly, here is another shot of the tail damage. I think I overdid it in the end a little too much… oh well, no going back!

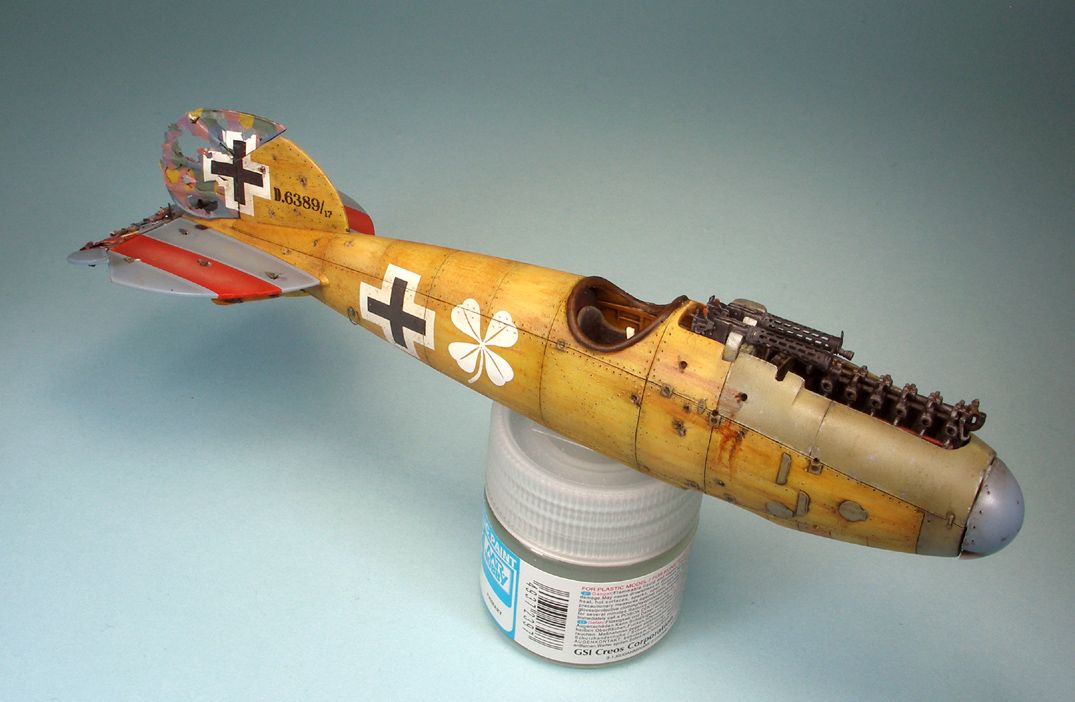
Glad to have made it past this part of the build. Now it’s onto the rest of the major assembly.
Feedback welcomed as always!
Cheers,
BC

