Author Topic: LVA Fokker D.VII from Wingnut Wings  (Read 27494 times)

Offline IvotB

  • Sr. Member
  • ****
  • Posts: 426
Re: LVA Fokker D.VII from Wingnut Wings
« Reply #105 on: February 10, 2013, 04:43:00 AM »
I was considering exactly that, that the radiator should have a recess. I will first install the motor on its base to keep it from moving upward. I just don't have hands enough  ;), because I want to have an exact indication of the recess spot.

But indeed if nothing else workes I am going to mill a small section out to get the fit right. There may also be another solution. The radiator that I am using is the thicker and wider one in front. WNW supplies a separate part with the cooling water hose connected on top. But there are several of those and at least one of them is only half the thickness mine has. Perhaps that might work too.

Unfortunately Idon't have the Windsock Anthology you mention. Perhaps a scan of the mentioned picture in a personal message. I promise I won't publish it anywhere.

Further I had a productive day today. One of my railway modelling friends made some custom decals for me. I had to have dutch versions of the black decals at the wing tips on which it says at the WNW decals in german Nur hier anheben. So I now have those in dutch with the correct text Hier optillen. He made 16 decals for me so that I can make the D.VIIF with BMW later on too with full lozenge outfit (apart from the black motor cowlings) and the orange insignia.

Another railway modeller helped me in preparing grass on a wooden stand for this Fokker, using an upgraded grasmaster (from 15kV to 50kV) to simulate a green field with colored fibres. Looks nice, nut I am going to add some sand and dirt.

regards,
Ivo

Offline IvotB

  • Sr. Member
  • ****
  • Posts: 426
Re: LVA Fokker D.VII from Wingnut Wings
« Reply #106 on: February 10, 2013, 09:35:56 AM »
Finally I fitted the engine in the forward compartment.

I couldn't resist dry fitting the bottom wing, the landing gear and the top wing, to get an impression of the end result.

Still a lot work to be done, but is nice to see that with just a dry fit everything seems to be (almost) parallel and square as it should be. It is a great kit with great engineering to achieve this.


regards,
Ivo

Offline rhallinger

  • Hero Member
  • *****
  • Posts: 1976
Re: LVA Fokker D.VII from Wingnut Wings
« Reply #107 on: February 10, 2013, 10:26:28 AM »
That looks great Ivo!  I like the Dutch scheme very much. :D  You really can tell what she'll look like from the dry fit.  Superb work and a very interesting model.  Outstanding!

Regards,

Bob

Offline IvotB

  • Sr. Member
  • ****
  • Posts: 426
Re: LVA Fokker D.VII from Wingnut Wings
« Reply #108 on: February 12, 2013, 09:14:01 AM »
Today I fitted the radiator and the chin cowling. I took out the inside kit part of the radiator and replaced it with the kit part for the thinner and less wide radiator:


It does need some work around the radiator hose on top. The part itself (left bottom) won't fit in the radiator (right top), but you just file enough room above and beneath the hose, making it longer along the way. When it fits it gives enough room for the brass pipes from the air pump.

And then I removed some material on the top of the radiator, just as you suggested, Keith.


Top view showing the triangular part I removed to give the left side of the air pump enough room.


Side view


View from the inside to see the room created for the copper tubes inside


And the other side


Front view. The radiator hose still needs to recieve a matt black color


Bottom view, just before closing her up here too.

regards,
Ivo
« Last Edit: February 12, 2013, 09:39:37 AM by IvotB »

Offline GAJouette

  • Hero Member
  • *****
  • Posts: 3579
  • " Beware of the Spanish Inquisition"
Re: LVA Fokker D.VII from Wingnut Wings
« Reply #109 on: February 12, 2013, 09:28:20 AM »
  Ivo,
As always my friend very very impressive work. Keep up your awesome progress.
Highest Regards,
Highest Regards,
Gregory Jouette
" What Me Worry"

Offline lcarroll

  • Administrator
  • Hero Member
  • ******
  • Posts: 8565
Re: LVA Fokker D.VII from Wingnut Wings
« Reply #110 on: February 12, 2013, 12:23:45 PM »
Very nice work around Ivo, and excellent work so far. This is going to be a unique and beautiful model.
Cheers,
Lance

Offline kinnies

  • Jr. Member
  • **
  • Posts: 81
  • Biggles flies low
Re: LVA Fokker D.VII from Wingnut Wings
« Reply #111 on: February 12, 2013, 01:27:09 PM »
The more I see these great DVII builds, the more tempted I am to buy kit. Very nice work Ivo.
John

Offline miamiangler

  • Full Member
  • ***
  • Posts: 194
Re: LVA Fokker D.VII from Wingnut Wings
« Reply #112 on: February 13, 2013, 02:52:22 AM »
very nice . great work on the engine .

Offline mgunns

  • Hero Member
  • *****
  • Posts: 2255
Re: LVA Fokker D.VII from Wingnut Wings
« Reply #113 on: February 13, 2013, 03:18:04 AM »
Hello Ivo:

It looks as if you managed to overcome the obstacle and proceed.  Your "field expedient" repair and refabrication did what it was supposed to do and now.......on with the show.

Your engine work is fantastic and will certainly be the focal point of the completed model.

Best

Mark
Mark

We few, we happy few.....

Offline Epeeman

  • Hero Member
  • *****
  • Posts: 1419
Re: LVA Fokker D.VII from Wingnut Wings
« Reply #114 on: February 13, 2013, 08:55:11 AM »
Ivo,

Your work is just getting better and better - not long to go before being completed, I should think!

Regards

Dave
As we say in fencing, what's the point?

Offline IvotB

  • Sr. Member
  • ****
  • Posts: 426
Re: LVA Fokker D.VII from Wingnut Wings
« Reply #115 on: February 13, 2013, 09:30:09 AM »
Thanks for all compliments. Main compliments should go to WNW for producing an excellent kit. I am just assembling it and making small improvements.

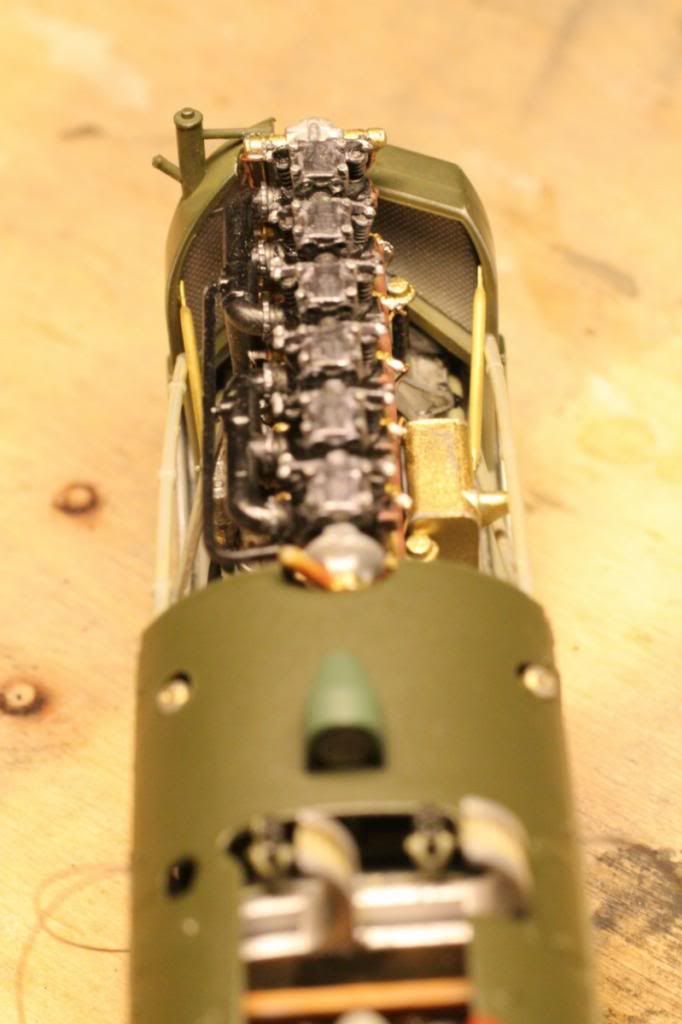
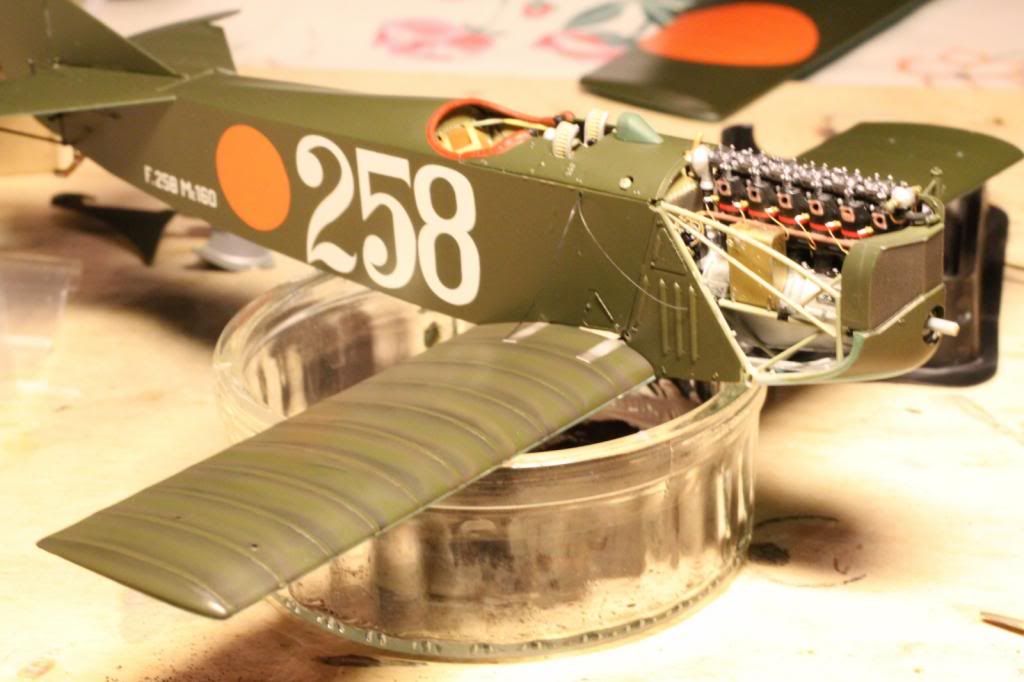
But there has been some more field expedient work going on. The radiator still wasn't connected securely and is in flight pushing on the engine. I discovered that WNW forgot another two tubes in the frame which shows in almost all photographs. So I took another piece of 0,8mm brass tube, cut it at the correct length and clamped the end in pliers:


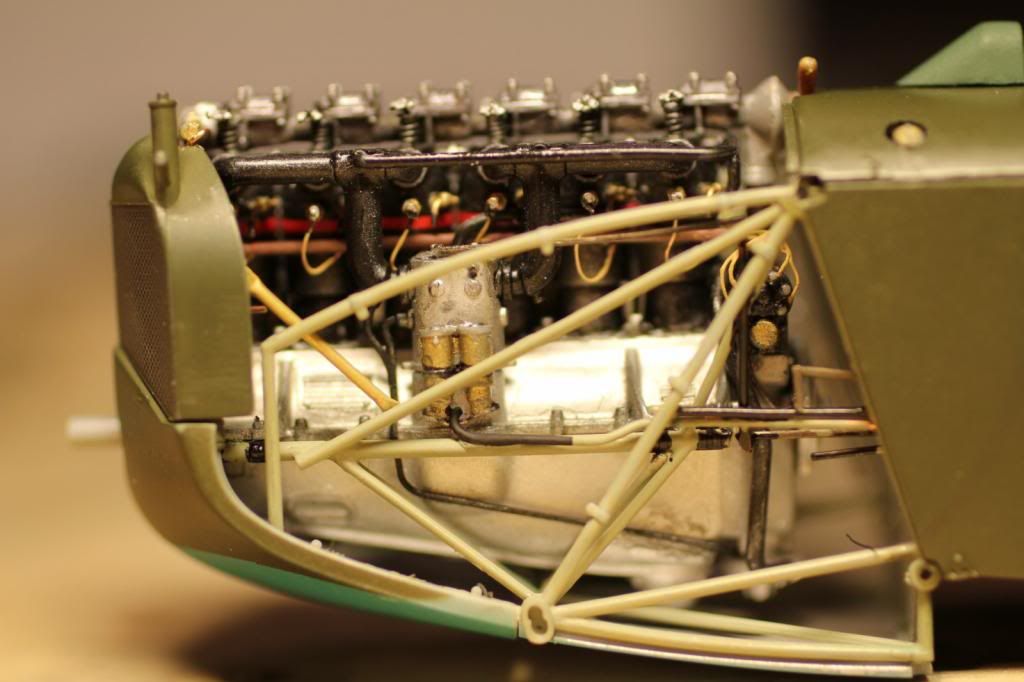
The new part of the forward frame runs from the strut connecting the forward engine mount to the upper frame to the sides of the radiator.

Of course this is done on both sides and they have now got a coat of grey green (after the picture had been taken)


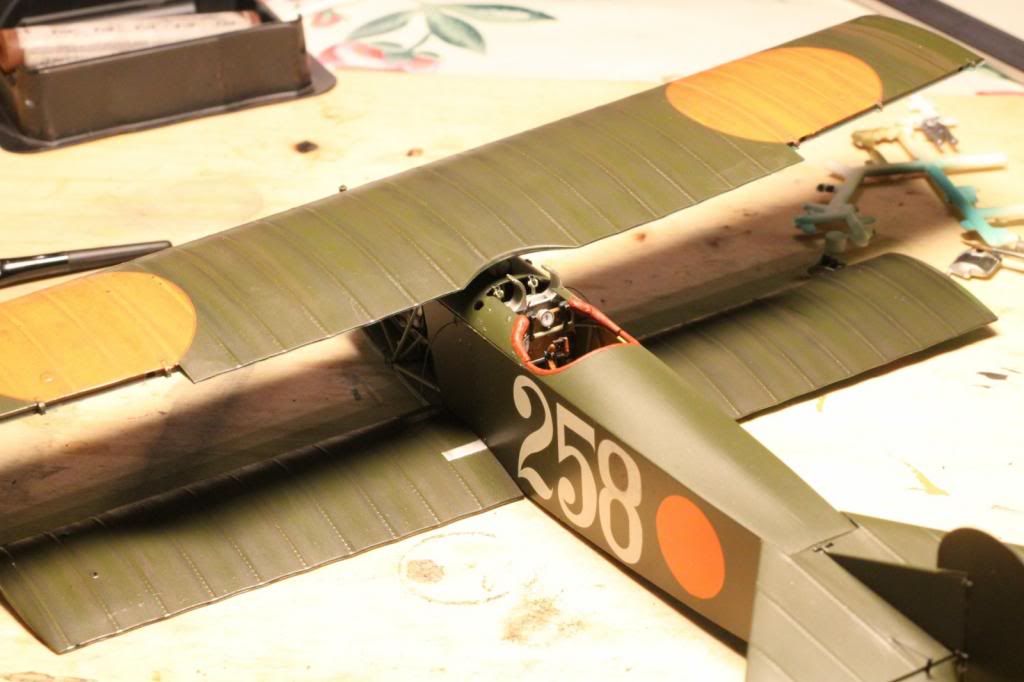
Then indeed Dave it becomes time to finish the aircraft. But first I want to apply some weathering especially to the upper wings. Now this is new to me and Bud sent me some excellent instructions. So after buying some dark pastels and plundering my wife's make up gear I started with the bottom wing:


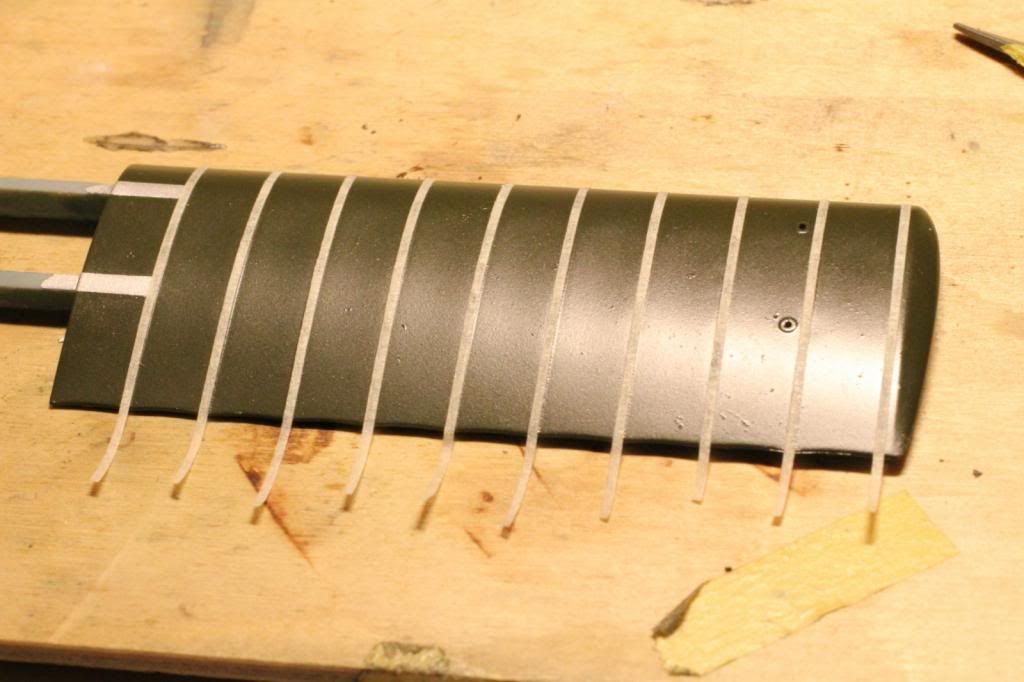
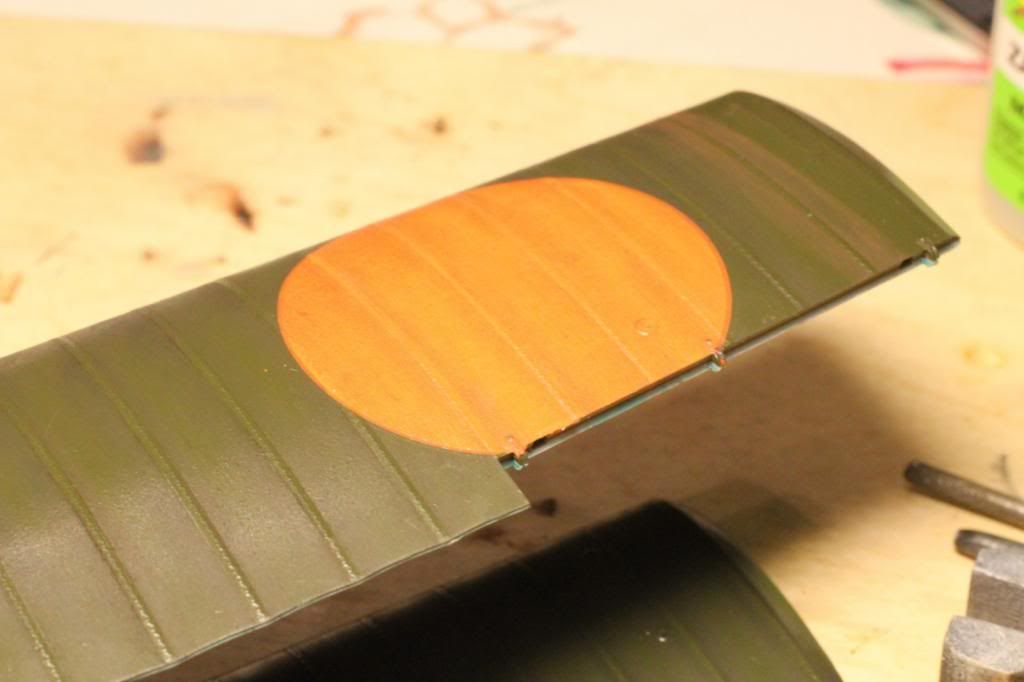
1mm Jammydog paper tape over the ribs. Here I found them too wide, but this proved ok afterwards.

Then I made a mix of black and brown pastel dust. The brown was too light to apply only brown. I wanted a little bit of shading from the greenish Khaki color I sprayed on into a more brownish shade of khaki. Well at first my impression was that it didn't make much difference, but after removing the tape I was satisfied at first, but perhaps it is a little bit too much. I know that after spraying another clear cote the effect will become less, so perhaps it is ok.

An impression:


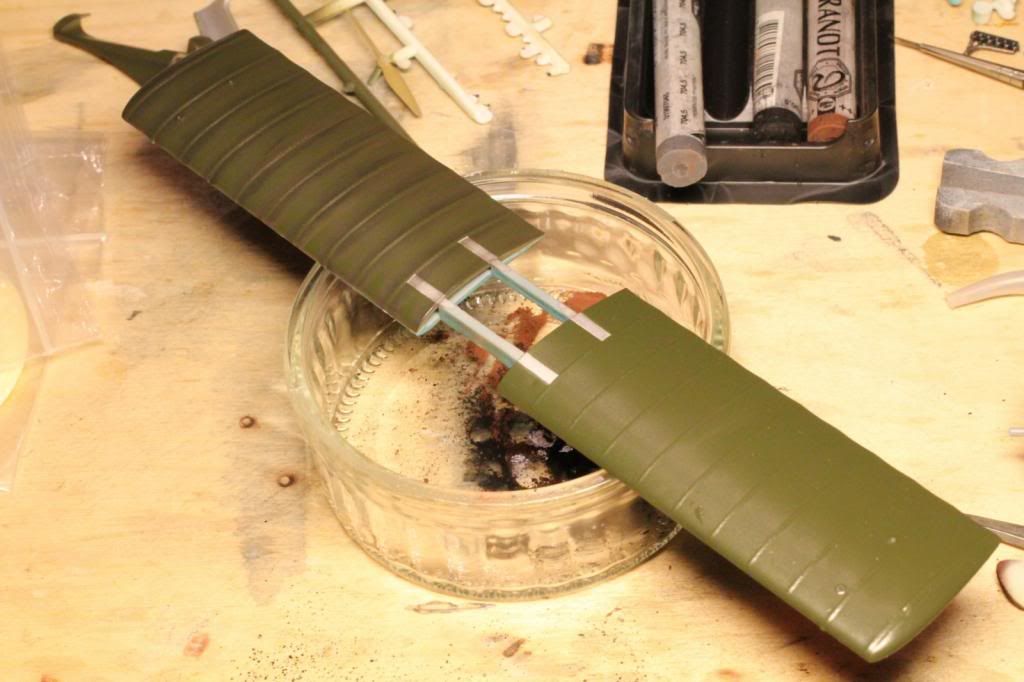
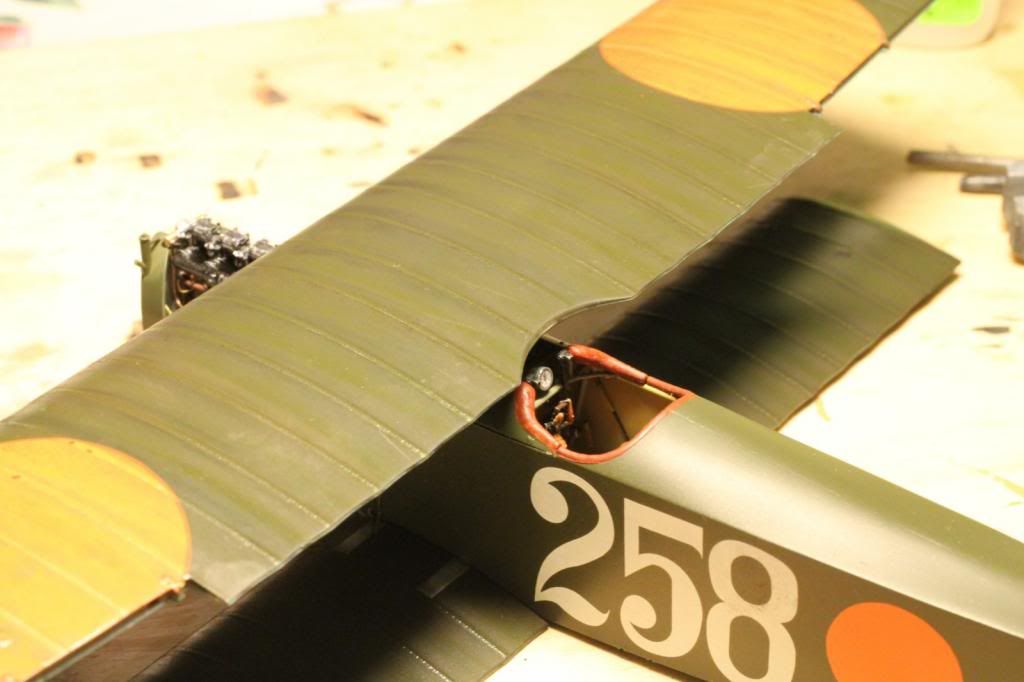
Right bottom wing done, left still to go. The picture gives a darker impression than the real thing


Attached to the fuselage it doesn't look too bad. But now I must probably do something to the fuselage as well. The fuselage however is almost straight, so there isn't much to use as guidance.

I did the upper wing too:


I used a middle grey pastel for the orange. First I was a little bit disappointed in the orange as I found the effect too strong, but I am getting used to it. This photo is mild on my attempts.


If I am satisfied and those wings have their final clear cote then I can assemble the entire aircraft pretty fast. There will then only be two last hurdles. The first is the rigging between the landing gear and the tailplanes and the painting of the laminated propellor.

Please feel free to be hard on me on the weathering if you like. It is now still possible to correct I guess, as nothing is painted.

regards,
Ivo

Offline IvotB

  • Sr. Member
  • ****
  • Posts: 426
Re: LVA Fokker D.VII from Wingnut Wings
« Reply #116 on: February 13, 2013, 11:42:31 PM »
My last question has proved to be a difficult one. Nobody seems to feel free to comment and if you take into account that the usual comments are enthousiastic and positive it is perhaps too hard to express an opinion on my weathering  ;)

Looking at my question you may conclude that I am not totally thrilled with the result, although it requires some getting used to. Today in daylight it looks much better, but still.

I am going to try at least the following: try to flatten out the result with paper kitchen towels to smoothen the colors and contrast between the ribs. I want to do something with the orange circles as well. Drops of dried Micro set have trapped the pastel dust more than other parts. So here I will try to correct that too.

I'll keep you updated.

Ivo

Offline uncletony

  • Hero Member
  • *****
  • Posts: 4349
    • Aircraft In Pixels
Re: LVA Fokker D.VII from Wingnut Wings
« Reply #117 on: February 14, 2013, 12:27:16 AM »
My only comment is to make sure the "cuffs match the collar"  ;)

Meaning, the fuselage is evenly finished whereas you are adding what amounts to lighting effects on the wings. But maybe you haven't gotten that far.

Beyond that, it's hard to judge from photos, depending on lighting etc the effect may be exaggerated or suppressed. You are going to have to trust your eye I think...


Offline mgunns

  • Hero Member
  • *****
  • Posts: 2255
Re: LVA Fokker D.VII from Wingnut Wings
« Reply #118 on: February 14, 2013, 01:14:47 AM »
Hello Ivo:

I agree with Bo:  I think your shading on the wings and insignia is fine, maybe focus a little weathering on the fuselage.  Something as simple as mist coats of tan just to tone it down it a bit.  I am not a big weathering guy so not sure what else to advise.  I am sure others on the forum can provide a clearer method.

Best wishes and good luck
Mark
Mark

We few, we happy few.....

Offline IvotB

  • Sr. Member
  • ****
  • Posts: 426
Re: LVA Fokker D.VII from Wingnut Wings
« Reply #119 on: February 14, 2013, 03:41:31 AM »
Thanks Bo and Mark,

Sure I have to do something with the fuselage. I don't know where to start though. On the wings it is relatively easy as the ribs give you some direction. But the fuselage behind the engine is almost flat, so there is not much to go on.

And light changes everything. My normal lamps, halogen lamps and daylight give an enormous changing effect.

regards,
Ivo