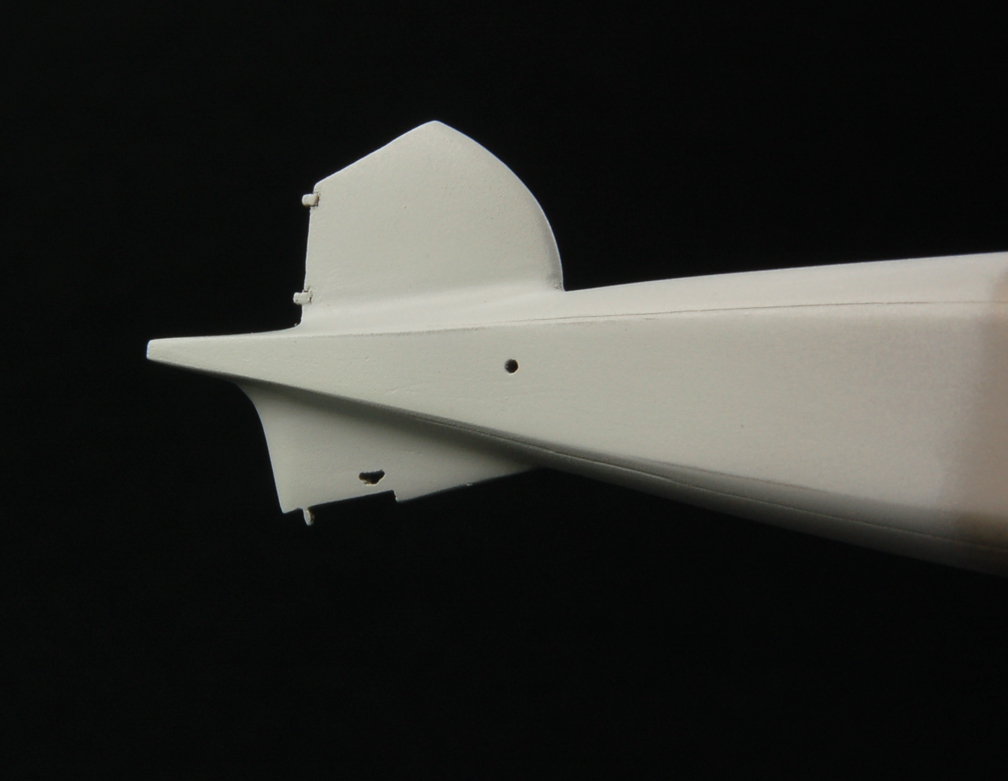
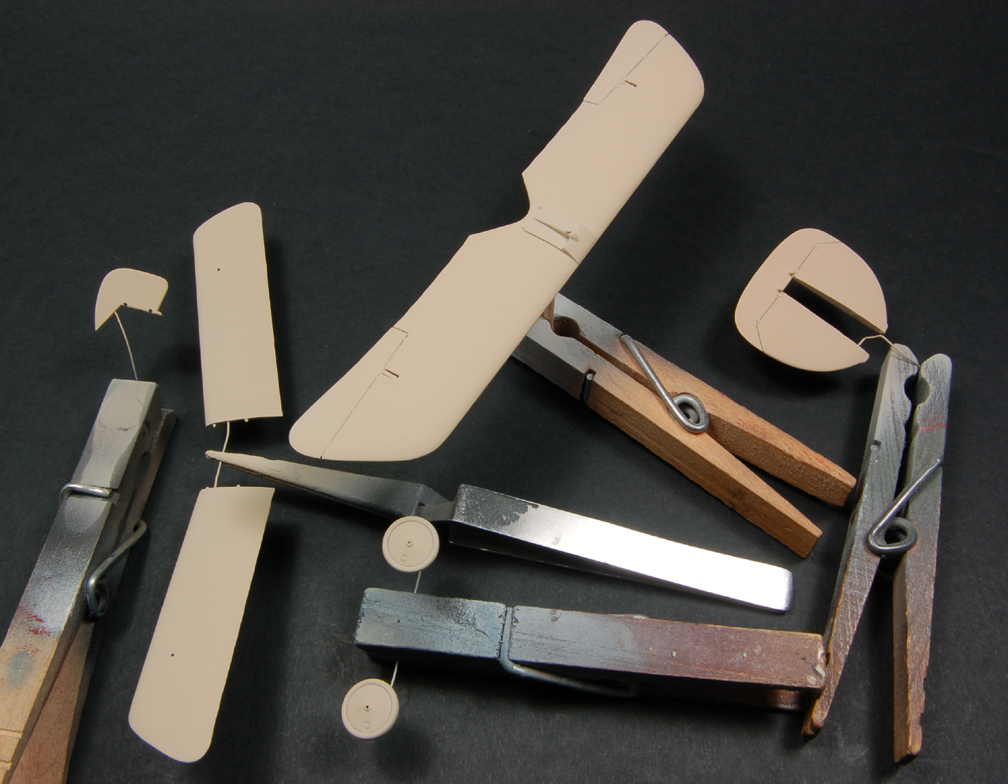
It's been a while since I posted anything, but I have been working on it a little every day & more on the weekends. A couple of weeks ago, I glued on the vertical stabilizer & tailskid faring. I used layers of CA glue to smooth the transitions to the fuselage,
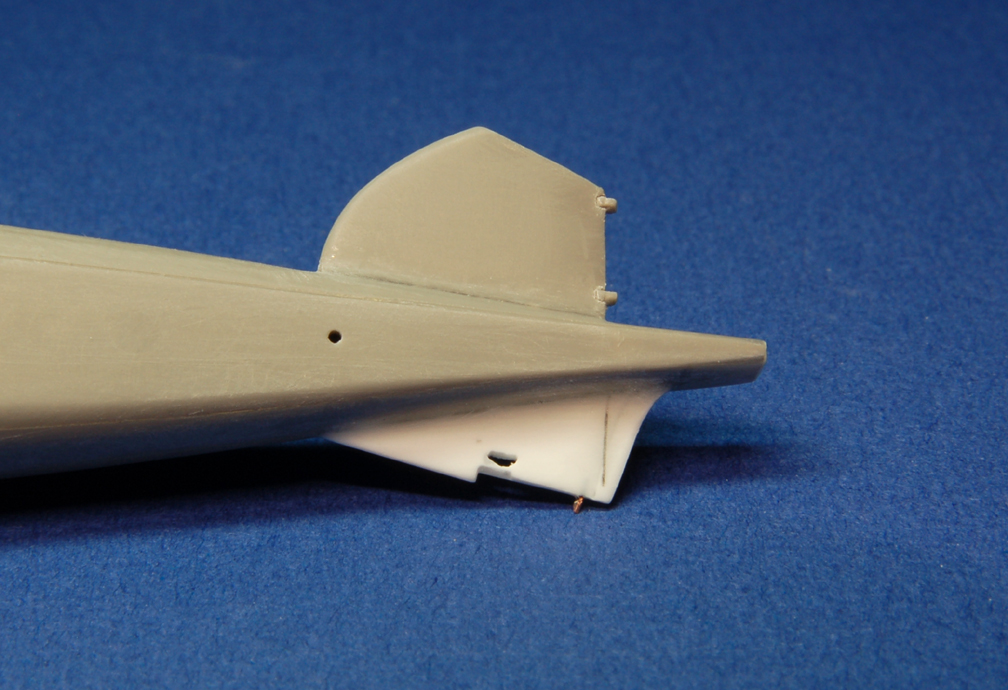
After a few coats of primer.
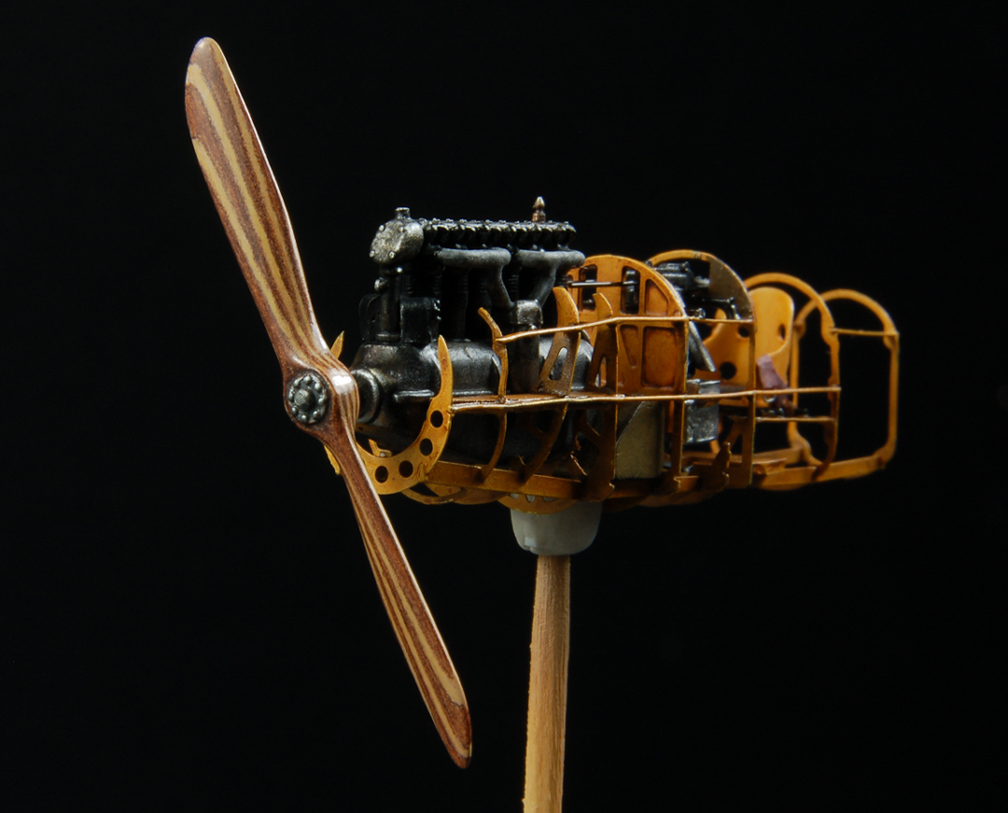
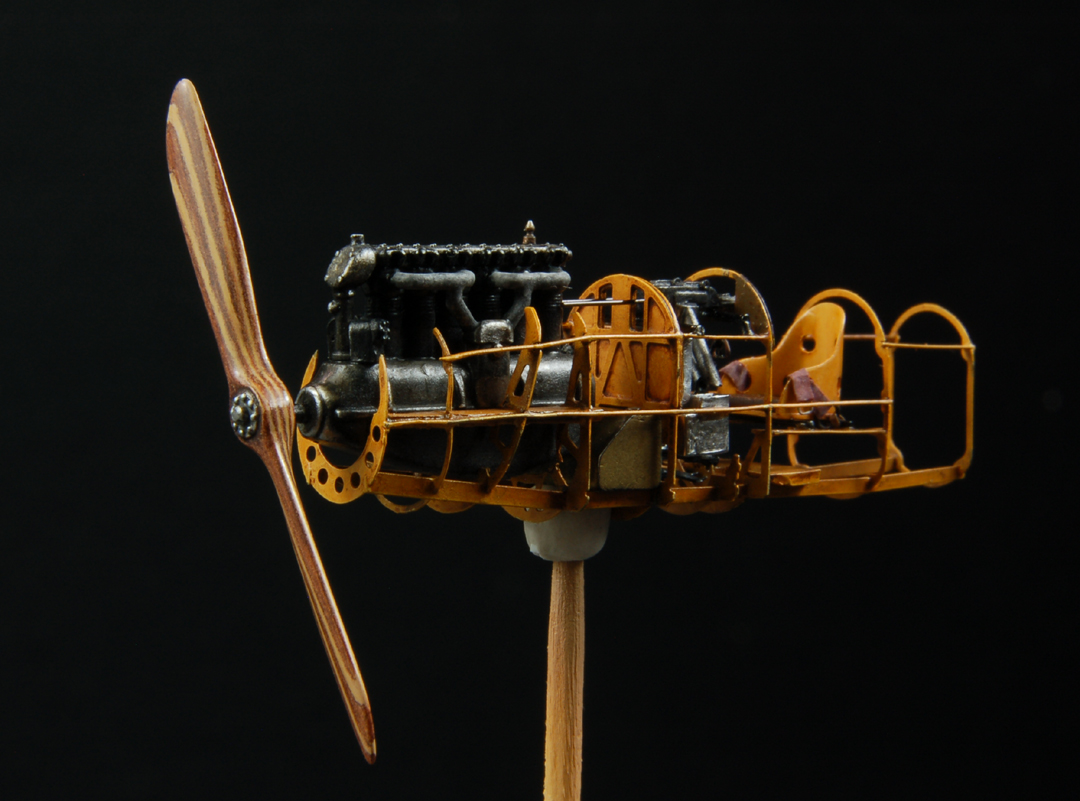
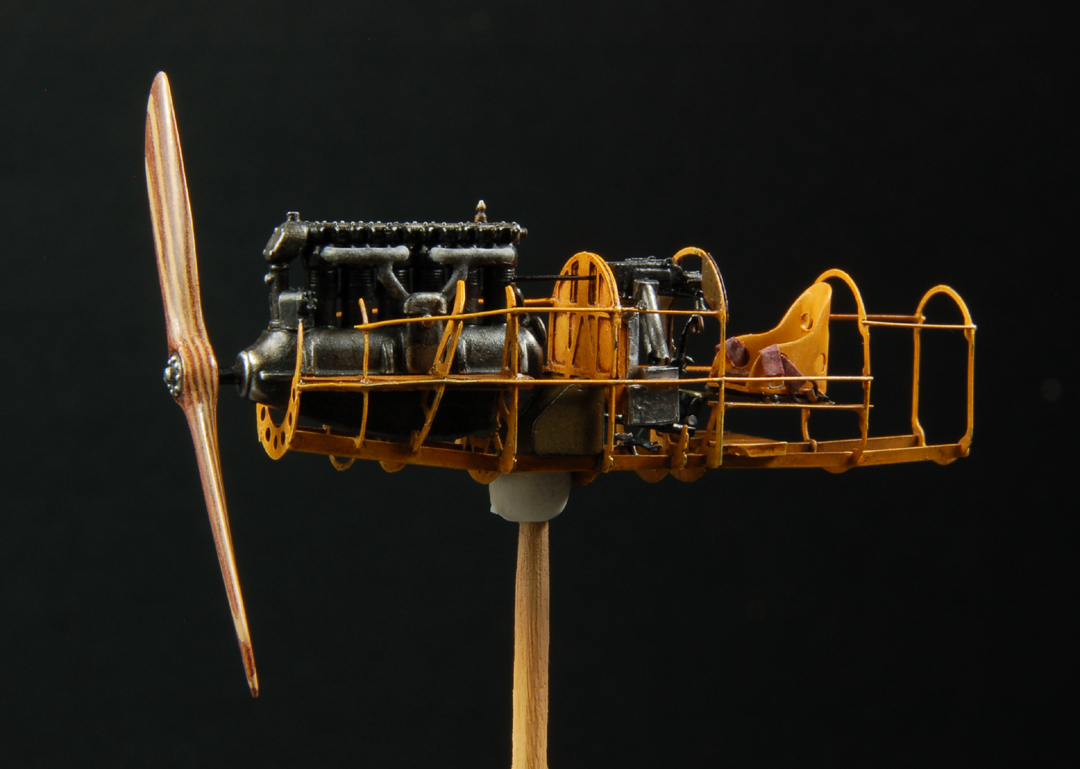
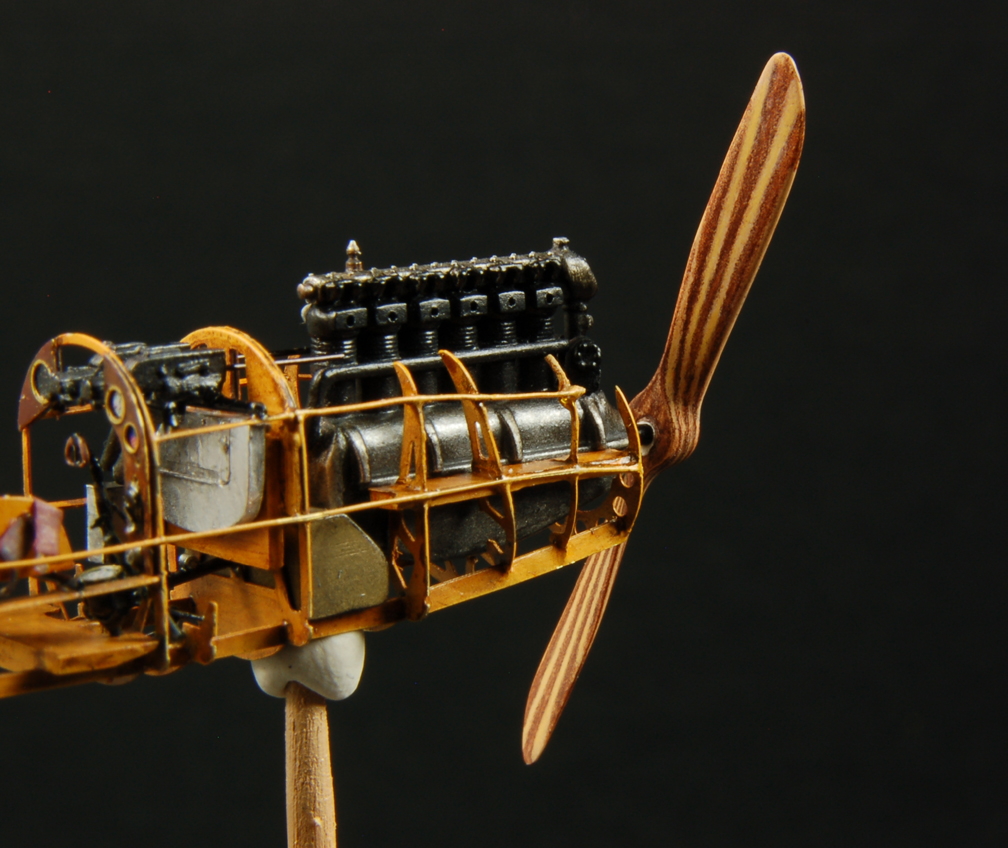
I had been working on the propeller during that time as well. I was going for a bit less contrast between the laminations & more of an overall varnished look. It ended up being quite orange, not exactly what I wanted, but I decided to leave well enough alone. After the Tamiya clear orange/yellow mix dried for a week or so, I sprayed coats of Testors Acryl gloss clear. I chose Acryl over Tamiya clear because I find that it dries to a harder finish. Everything looked great until the next day when I noticed cracks all over it. I tried sanding with 1500 grit paper, but I started sanding through the layers of orange/yellow. In theory, I had apparently not let the Tamiya paint dry enough before spraying the Acryl. In other words, the Acryl dried faster than the Tamiya underneath it which is a recipe for disaster.
So, I stripped it & sprayed another Desert Tan & white mix as the base. Then, I used Prismacolor colored pencils for the grain as Bertl described in his process a while back. I would do one face, then spray Acryl flat clear over it to protect it. Each day, I repeated this until all 4 sides were done. I liked the overall look, so I decided not to use any transparent colors on it. I sprayed quite a few coats of Acryl gloss, sanding between some of the coats to reduce orange peel. After the final coats, I polished with polishing cloths.
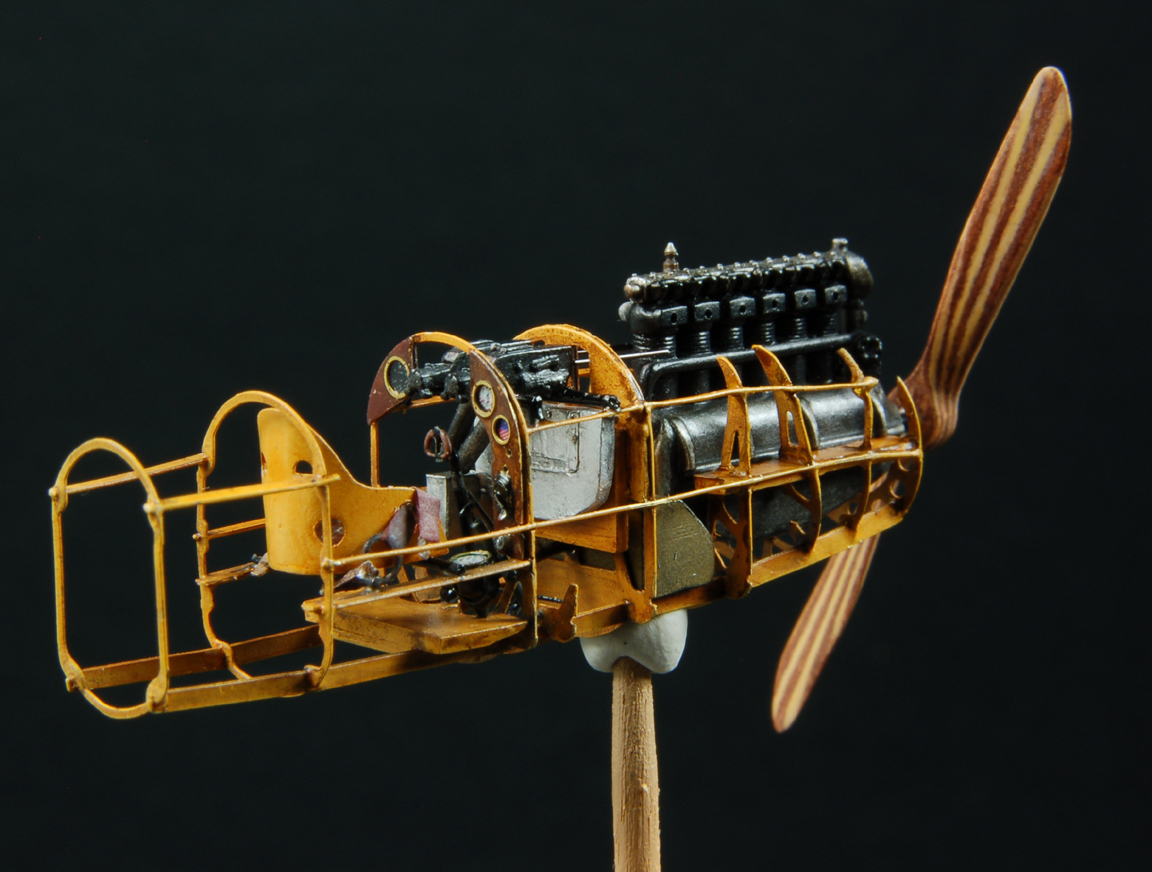
I still need to add a Jaray decal, but I'm not too fond of the one included in the Roden kit. Looking at the photos I realize that I forgot to mention making that little doo-dad on top of the camshaft cover by "machining" plastic rod chucked in my Dremmel. The molded in kit pieces was a domed blob.
As of today, the CDL parts have their base coat.
Steve

