This Looks to be an Excellent Kit and I am Really Looking forward to your Build!
RAGIII
As am I. Looking forward to following along.
Cheers,
Ernie 
Welcome aboard Rick and Ernie - I economised a bit by quoting Ernies reply with him quoting Rick, an effort completely spoilt by this explanation...

Anyway, I'm very happy to have you tagging along. It is a lovely kit and it seems to be very precise and easy to build in that sense, but then most Eduard kits are nowadays.
My packages arrived last Saturday 
Wow, what a kit!
I think about to use option D, but I think not oob 
Cheers,
Frank
Well, we would all be very surprised if you built one OOB! I'm sure you can improve the kit offerings, but I'm not really at your level and this time I'm planning on a straight forward out of the box build, except for rigging and painting the markings of course. It has to be done by January 6 or so...
I saw an excellent paint job made with this kit in the Eduard November online magazine.
Good luck with Your project.
Thank you von Salza! There always seems to be an element of luck somewhere in a build.
So if I only offered poor pictures yesterday, there are some real photos of the build on offering today.
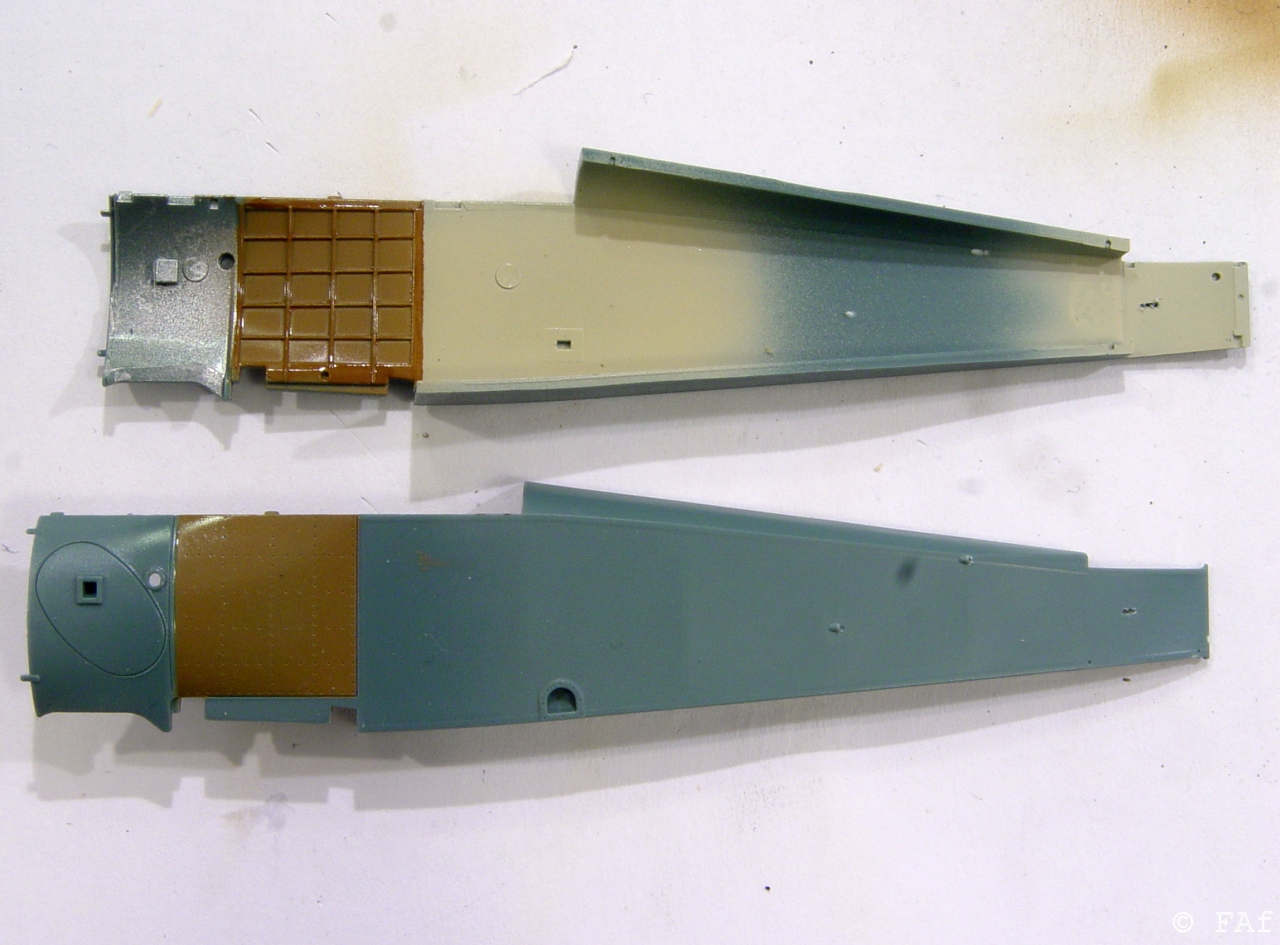
I started with some basic painting - linen, brown, aluminium - and then building sections of the kit that could be assembled without complicating later work. Everythings ahs been given a clear coat, which makes it more difficult to photograph.
First the basic fuselage sides - inside and outside. Then a bit of a dark wash to emphasize the internal structure and some oil paint on the outside to simulate the wood - even more difficult to capture on camera.

I suppose that very little will be seen of the cockpit area once the fuselage is closed and the wings are on, but I added a few pipes from wire and did a bit of detail painting.
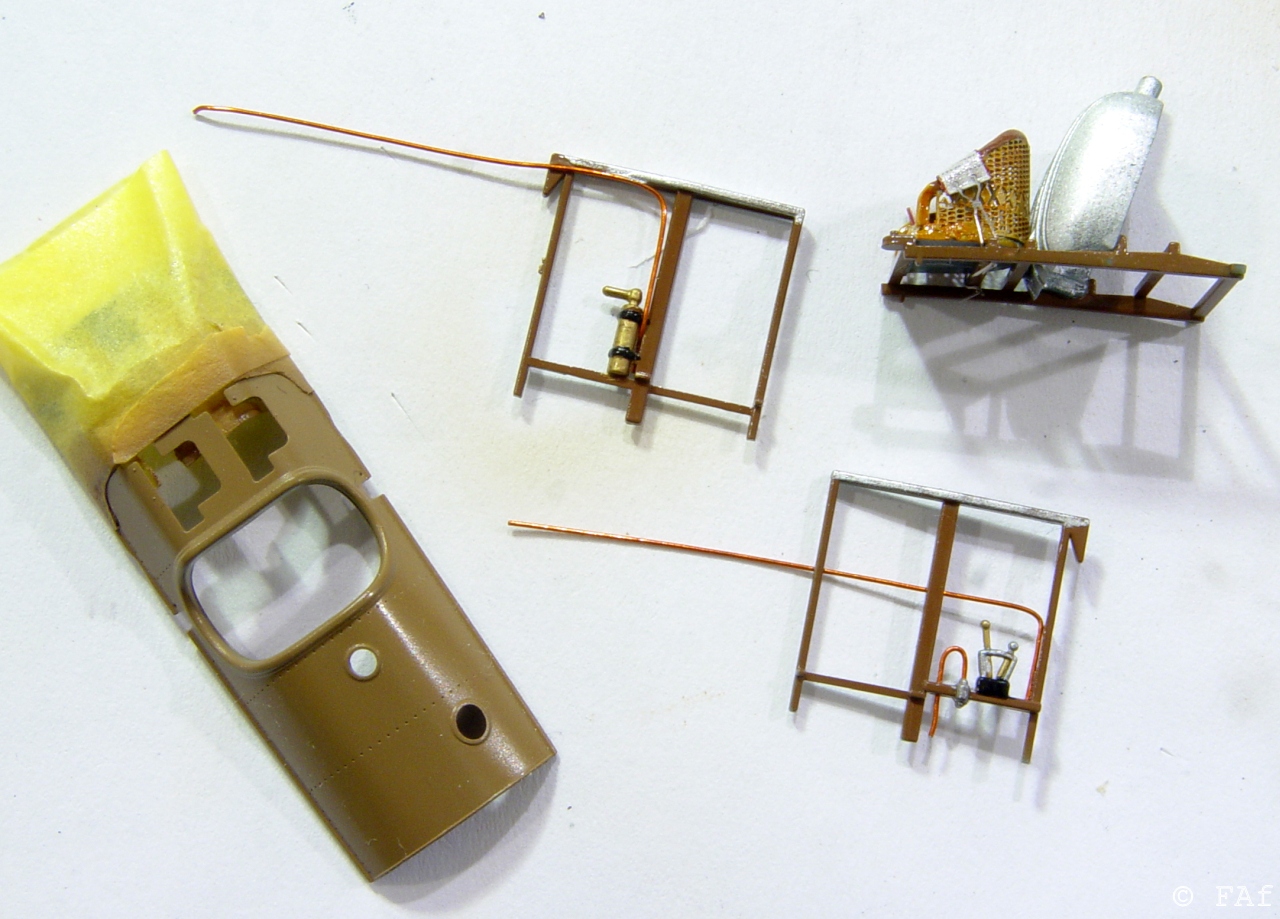
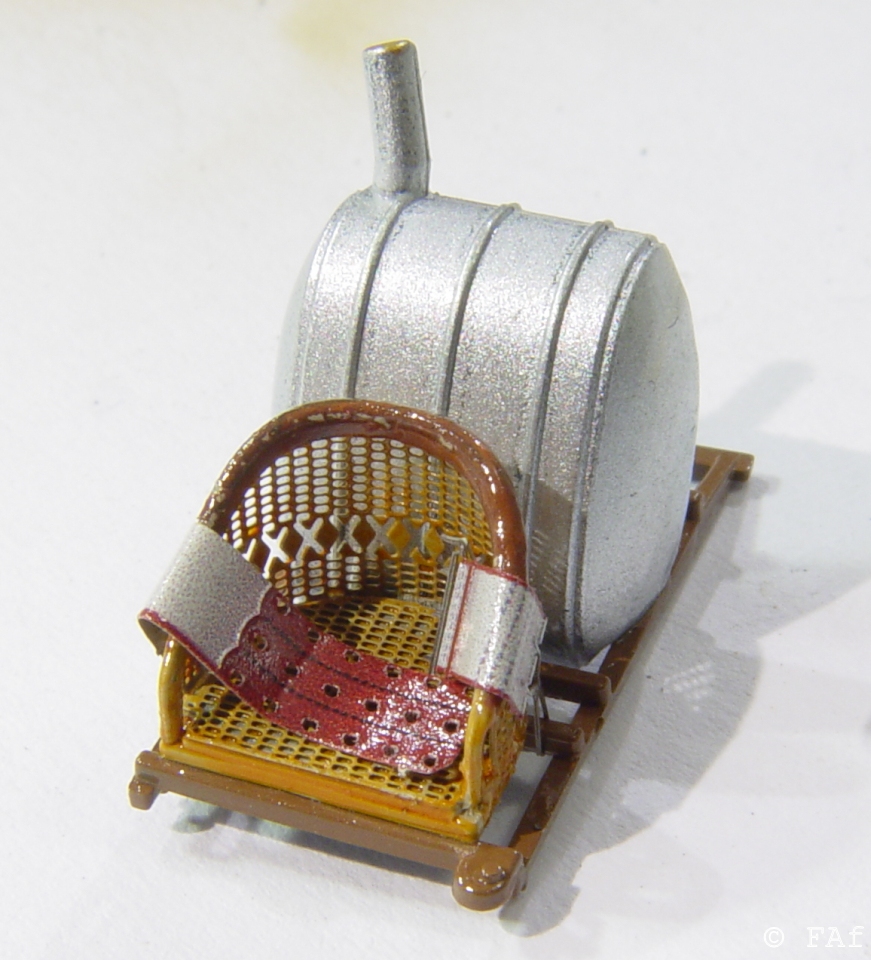
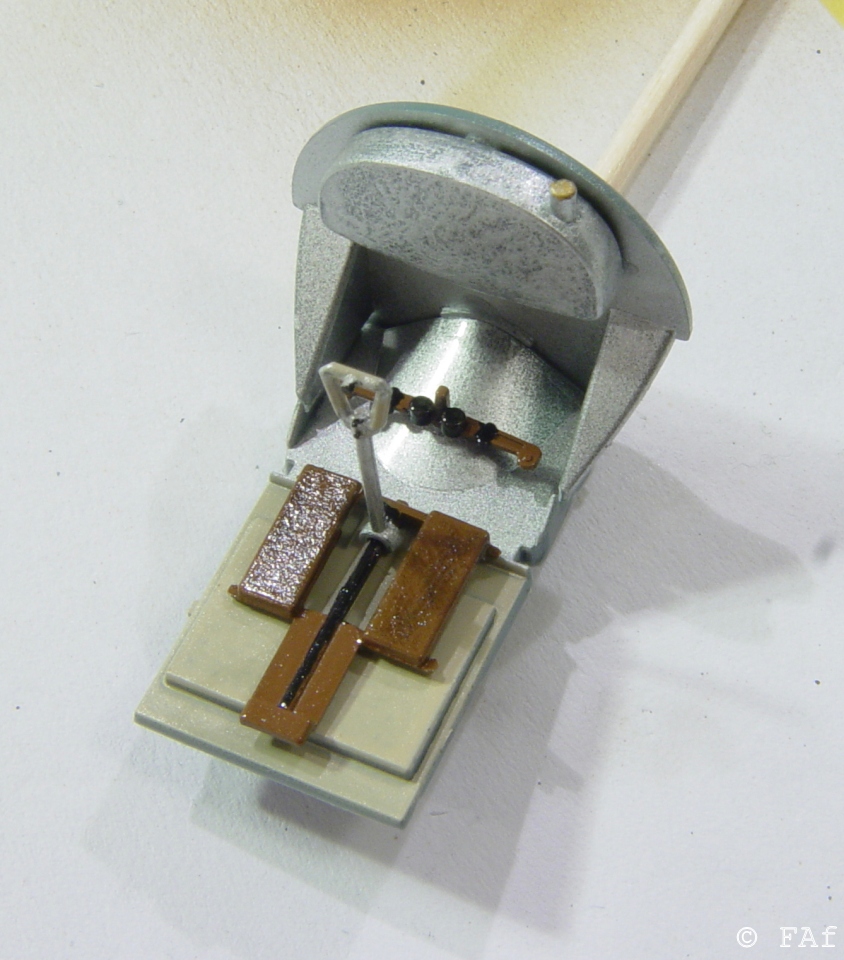
The seat is a bent piece of PE that has to match the seat bottom as well as the leather coaming, both plastic parts - not the easiest of operations, but it looks good. The whole thing will get a wash to lift some details and a matt varnish later.
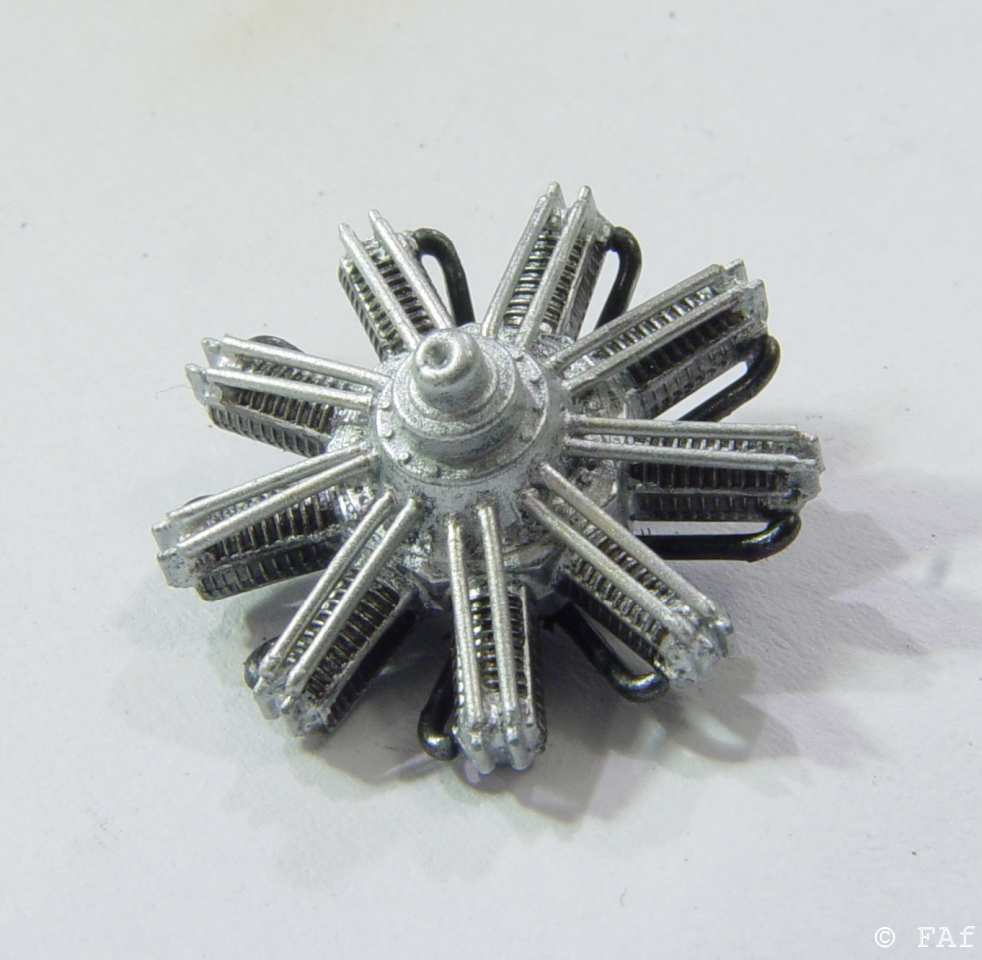
Supposedly a Bentley engine made from kit parts - except for the pushrods which are wire. It will obviously benefit from a wash to lift some of the details.
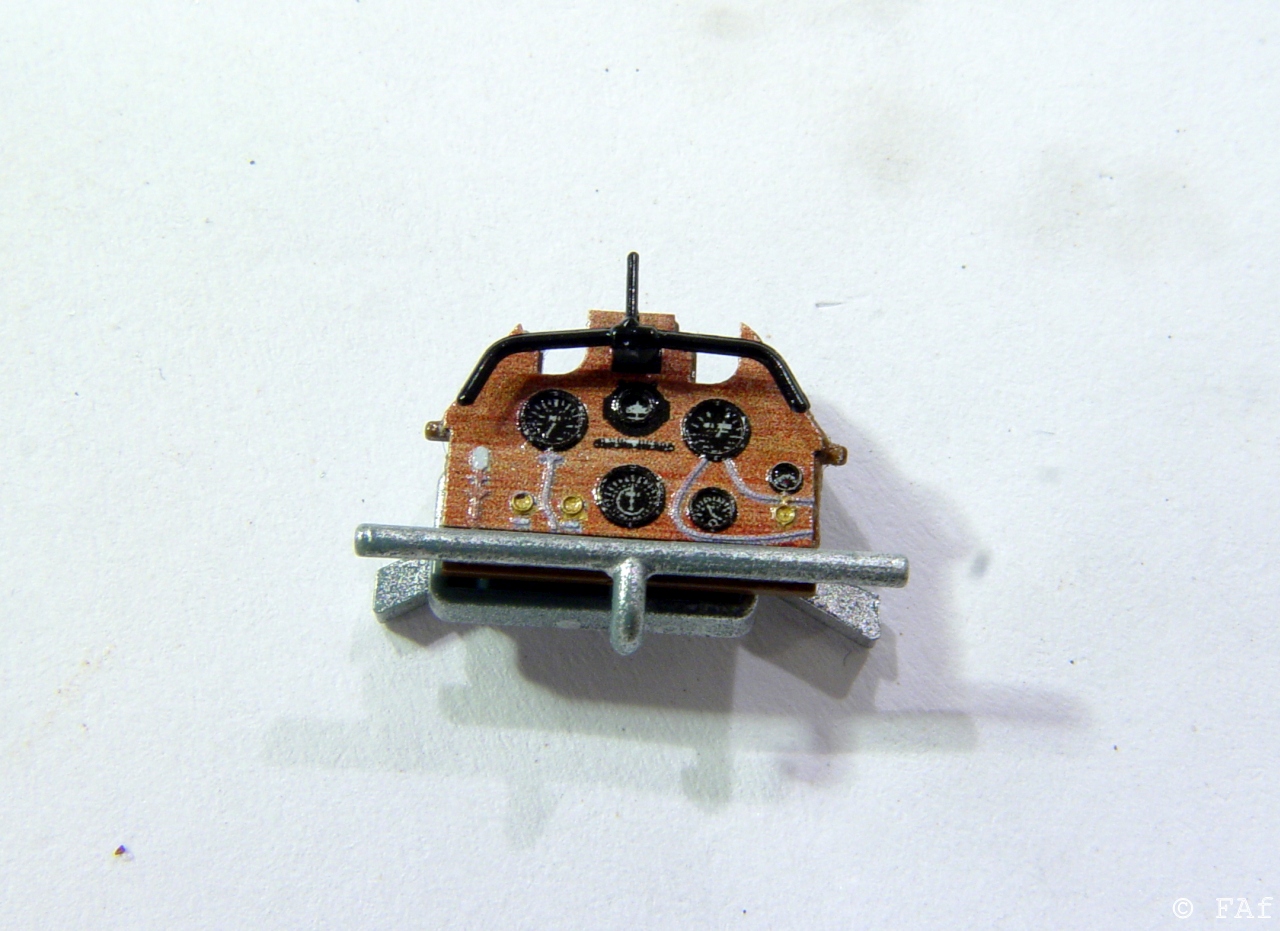
Instrument panel and induction pipes. Eduard's pre-coloured PE, which is quite fine I think. I'll use this build to see what really could benefit from being replaced, but I guess that the engine is a better thing to exchange for a Brassin version than the IP.
I was contemplating adding the controlwires from the rudderbar and the control column, but then had an attack of laziness. I can still change my mind, but I'm wondering if they'll be at all visible?!
Next up: adding internal bracing wires and start putting things together.
/Fredrik

