Author Topic: Finished: 1/48 Albatros C. III  (Read 22156 times)

Offline RAGIII

  • Hero Member
  • *****
  • Posts: 18793
Re: 1/48 Albatros C. III
« Reply #75 on: October 07, 2018, 05:54:12 AM »
I am catching back up on the builds here and must say I am so impressed with your work on this one! Brilliant painting on the Dragondile Markings. Extremely well done all around!
RAGIII
"A man has to know his limitations": Harry Callahan

"Don't slop it on" Lynda Geisler

Offline huberlu

  • Full Member
  • ***
  • Posts: 201
Re: 1/48 Albatros C. III
« Reply #76 on: October 21, 2018, 07:58:50 AM »
Thank you !

Hi!

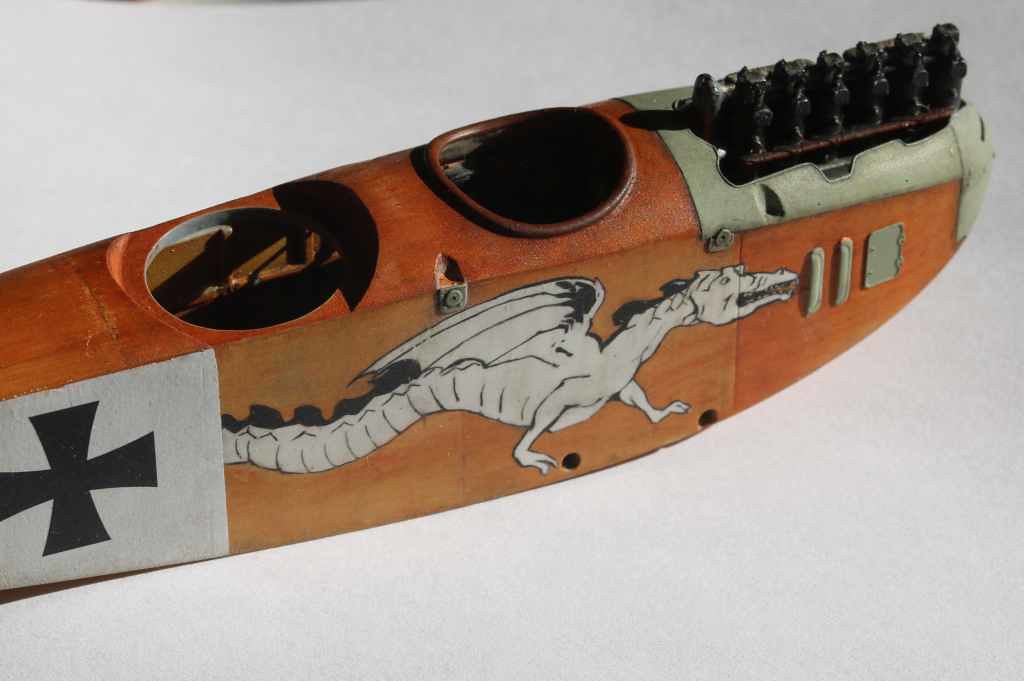
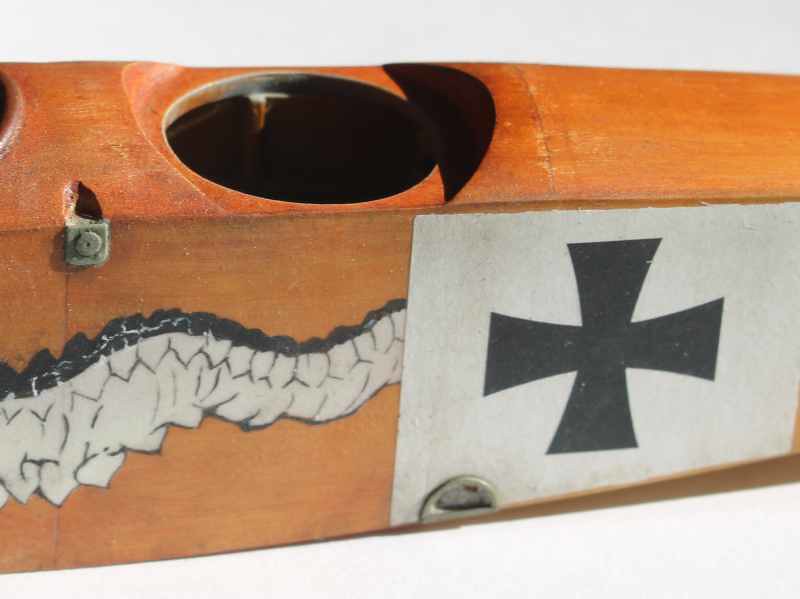
After several weeks the color of the ribs seem to want to stay under the paint. For how long ...


I scraped the varnish with a fiber pen and at the tip of the blade and I messed up the fuselage with oil paint.
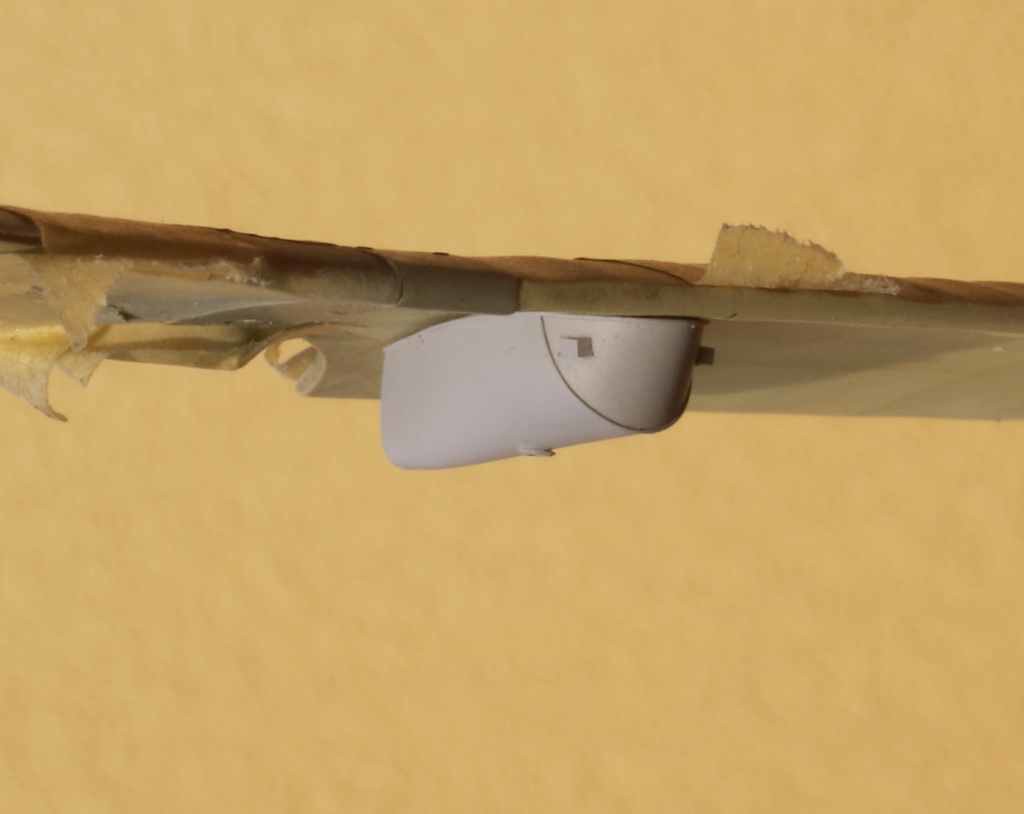
Some hatches and grilles that direct the bombs out of the cockpit were stuck.


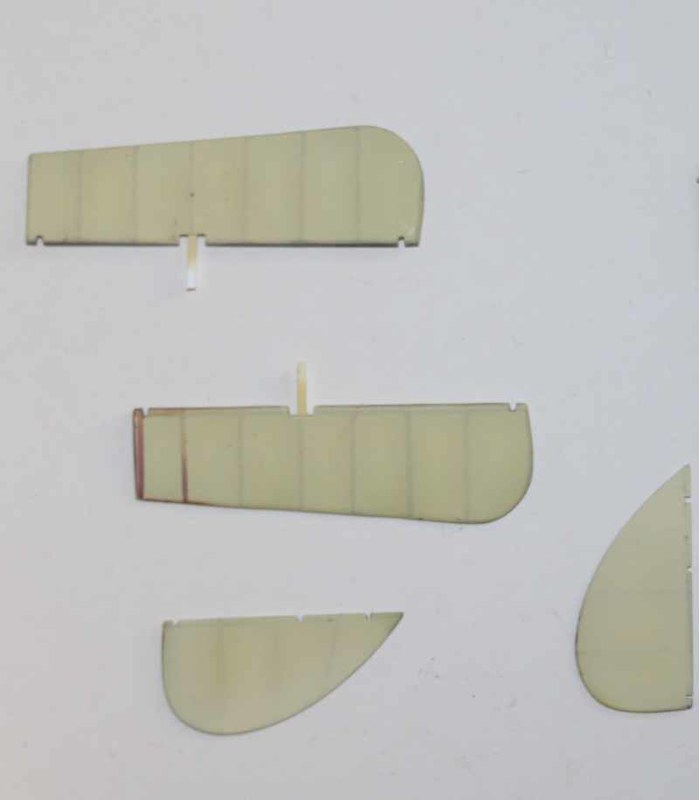
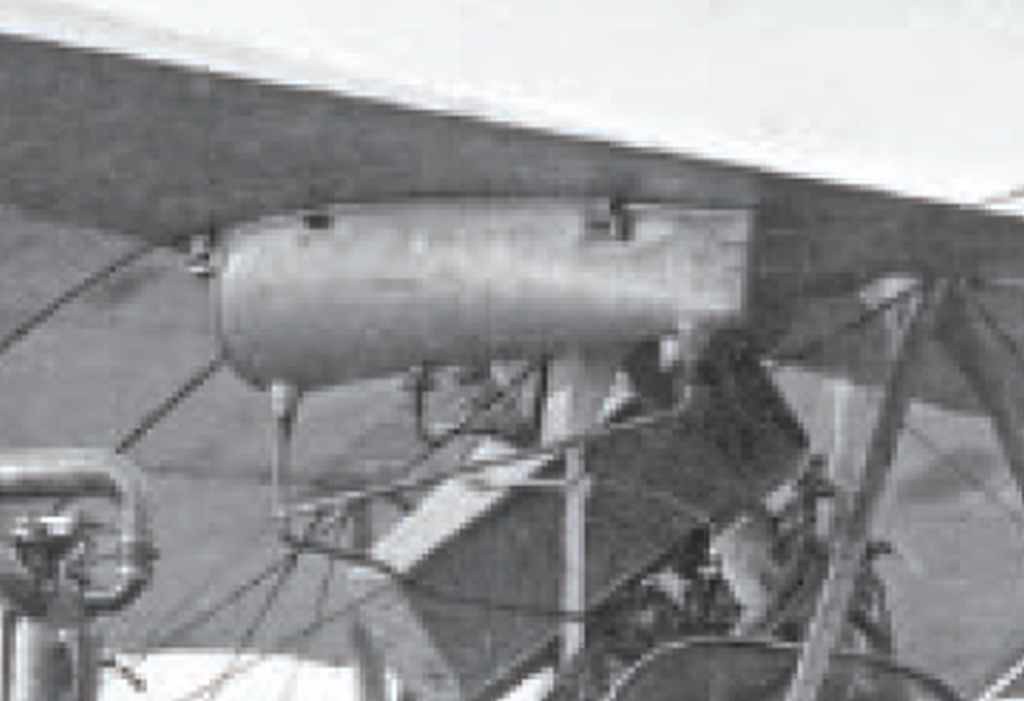
A new tank was made from the pictures in the WNW P24 Albatross BII (457/16)  and the Albatros C1 P23 Windsock. Be careful, there are many sizes (I think).
Large ones that go from the front of the wing to the back, small ones that stop at 2/3.
Obviously I was wrong.


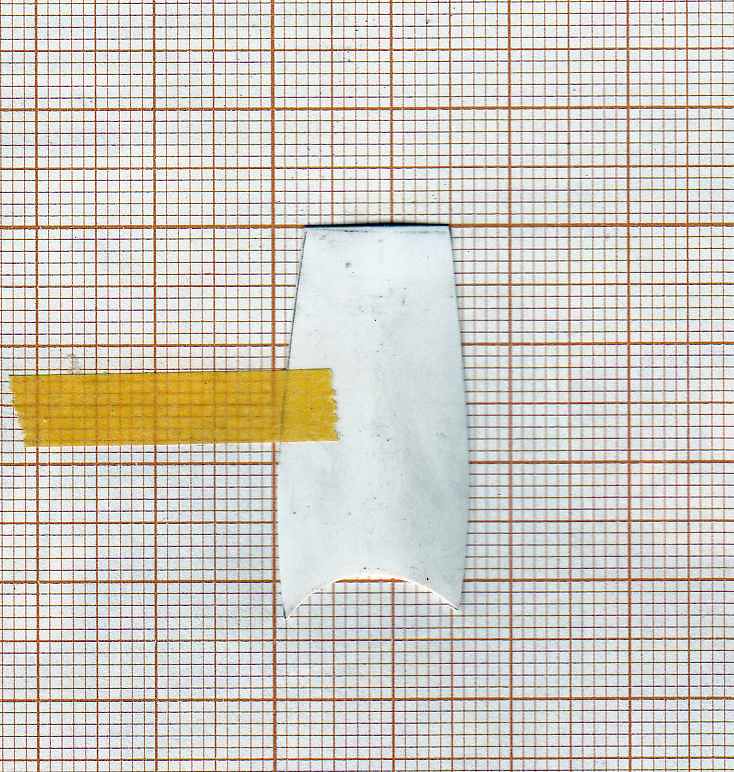
I made a template for a big one. Note that I was also wrong in cutting the round (bottom) that must be the other way ... I used the template provided by Eduard to hold the wings during their assembly to draw the sides of the tank template.


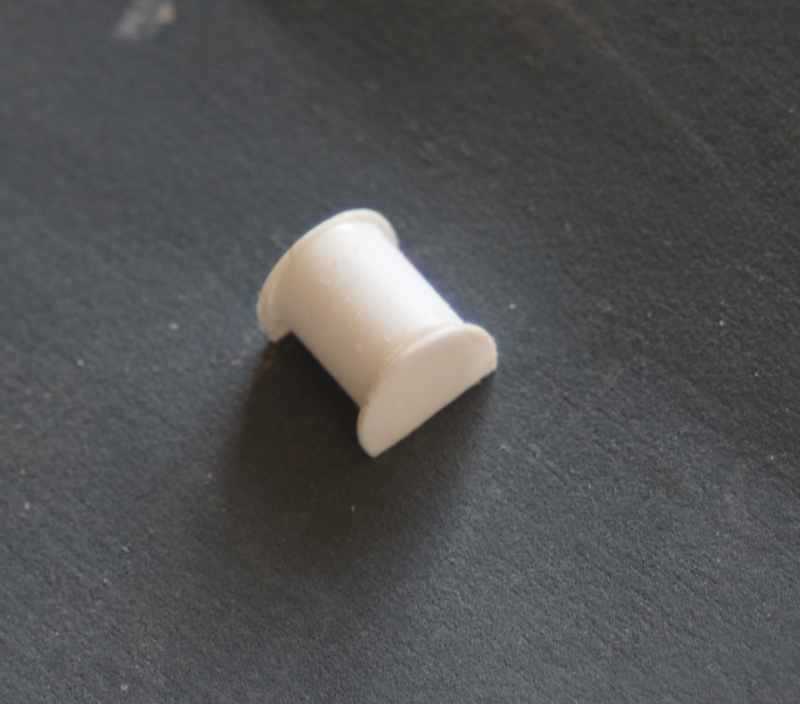
The tank is 23.5mm long.


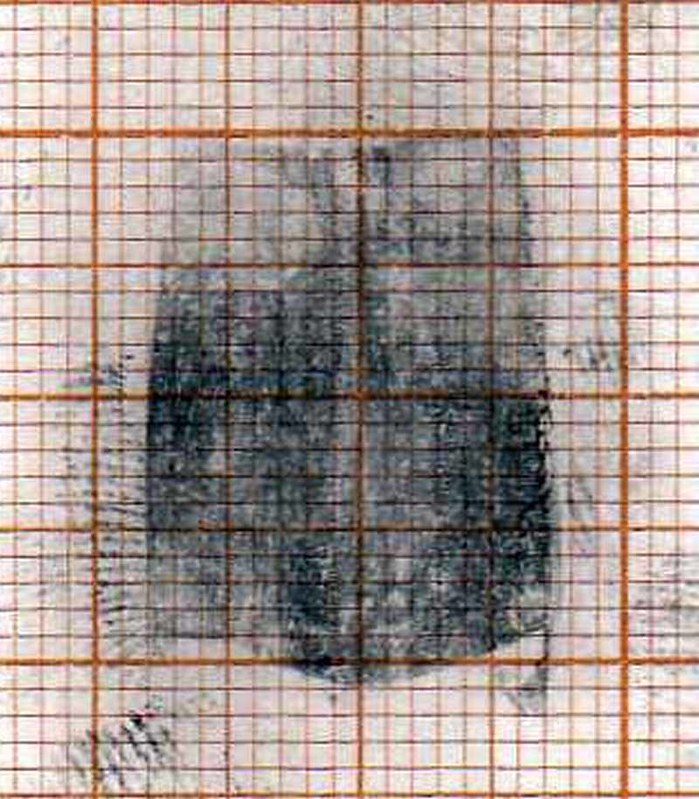
During editing I made a "print" after retouching. If it can be useful to someone.


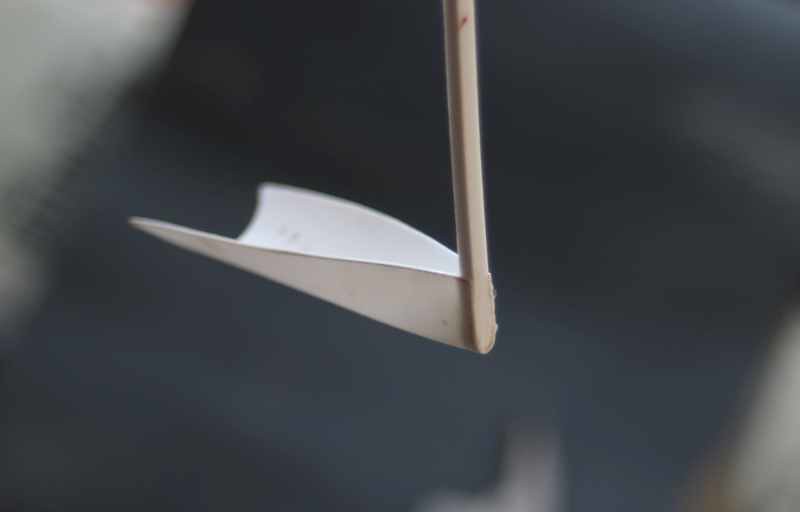
Inside I glued the two discs (8mm diameter) separated by 4mm. They give the shape of the front of the tank.


The length and height of the set have been resized to match the photos.
The welds are made of stretched plastic glued to tamiya glue.
The two square rods at the front are 1.5mm wide.
Below the large nut will receive the hose that will power the engine.


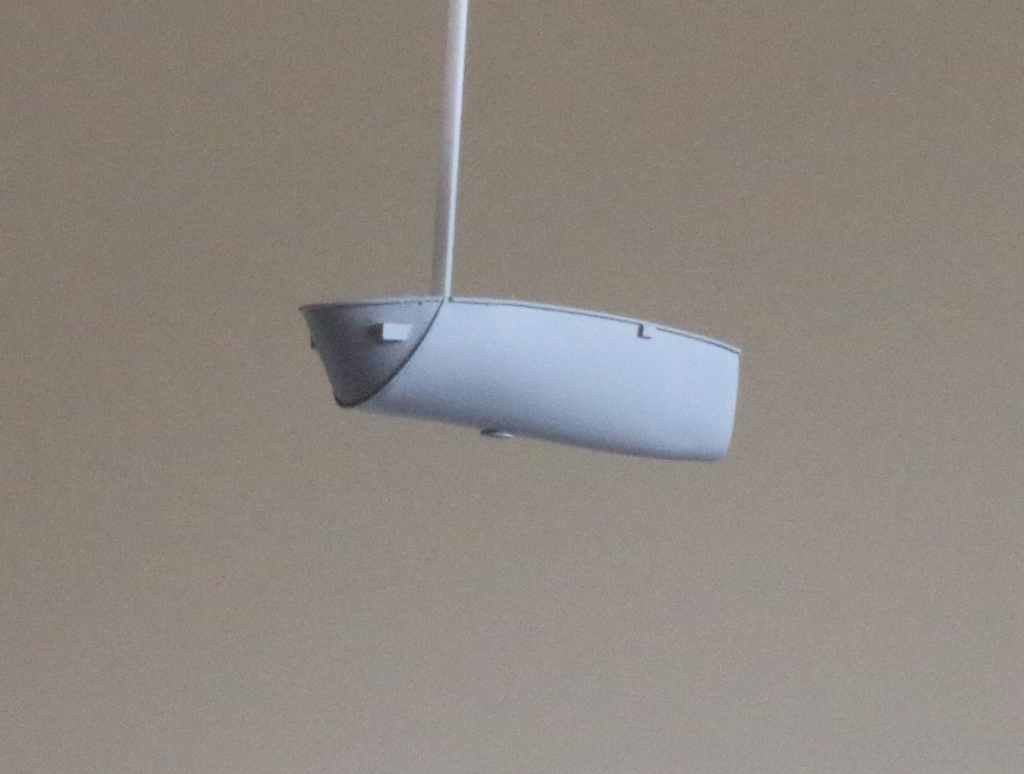
Still to paint, green or metal, or gray?

Regards
« Last Edit: October 22, 2018, 05:55:24 AM by huberlu »

Offline RAGIII

  • Hero Member
  • *****
  • Posts: 18793
Re: 1/48 Albatros C. III
« Reply #77 on: October 21, 2018, 09:11:45 AM »
Awesome work on the tank!
RAGIII
"A man has to know his limitations": Harry Callahan

"Don't slop it on" Lynda Geisler

Offline lone modeller

  • Hero Member
  • *****
  • Posts: 5300
Re: 1/48 Albatros C. III
« Reply #78 on: October 22, 2018, 04:45:19 AM »
Some really beautiful scratch building there. This is a real mini-masterpiece.

Stephen.

Offline KevTheModeller

  • Newbie
  • *
  • Posts: 26
Re: 1/48 Albatros C. III
« Reply #79 on: October 24, 2018, 06:36:33 AM »
Wow, the attention to detail is stunning!
Kev

Offline KevTheModeller

  • Newbie
  • *
  • Posts: 26
Re: 1/48 Albatros C. III
« Reply #80 on: October 24, 2018, 06:45:14 AM »

That's it, it's dry and varnished.

I'm about to start on the road of wood grain with oils and I greatly admire your work.  Could you tell me what varnish and type (Matt, Silk, Gloss) you used please?

Many thanks
Kev

Offline huberlu

  • Full Member
  • ***
  • Posts: 201
Re: 1/48 Albatros C. III
« Reply #81 on: October 24, 2018, 07:46:25 AM »

That's it, it's dry and varnished.

I'm about to start on the road of wood grain with oils and I greatly admire your work.  Could you tell me what varnish and type (Matt, Silk, Gloss) you used please?

Many thanks

Thank you!

I'm using polyurethane acrylic satin varnish from Prince August or AK.  AK does not always resist the solvent of oil paints that I useto give a patina. My coat of varnish might not be thick enough.   The varnish from Prince August is more resistant I feel.
An acrylic varnish works I think.
The klir works well too.

I would like to know which varnish others use and which resists the solvent of oil paints.

Regards.
« Last Edit: October 24, 2018, 08:21:33 PM by huberlu »

Offline dr 1 ace

  • Hero Member
  • *****
  • Posts: 2340
Re: 1/48 Albatros C. III
« Reply #82 on: October 26, 2018, 06:30:18 AM »
Wonderful work, await more photos !

Ed
Life is short, enjoy it, nobody gets out alive.

Offline huberlu

  • Full Member
  • ***
  • Posts: 201
Re: 1/48 Albatros C. III
« Reply #83 on: October 26, 2018, 07:54:04 AM »
Thank you.

Special Hobby and Eduard have planned to fix the landing gear under the plane while it must be fixed on the flanks.


So I extended  legs a bit and gave a fairer shape.They stay a little too thick.


I still have to make the plates that are between the flanks and the legs of the landing gear...

Regards

Hub.

Offline lcarroll

  • Administrator
  • Hero Member
  • ******
  • Posts: 8546
Re: 1/48 Albatros C. III
« Reply #84 on: October 26, 2018, 10:24:00 PM »
   That's great attention to detail and a clever solution, keep up the excellent work on this unique Build! It's a pleasure to follow your progress here and the final result is going to be well worth all of your efforts.
Cheers,
Lance

Offline RAGIII

  • Hero Member
  • *****
  • Posts: 18793
Re: 1/48 Albatros C. III
« Reply #85 on: October 27, 2018, 08:13:08 AM »
   That's great attention to detail and a clever solution, keep up the excellent work on this unique Build! It's a pleasure to follow your progress here and the final result is going to be well worth all of your efforts.
Cheers,
Lance

I have to agree with Lance. Terrific fix!
RAGIII
"A man has to know his limitations": Harry Callahan

"Don't slop it on" Lynda Geisler

Offline huberlu

  • Full Member
  • ***
  • Posts: 201
Re: 1/48 Albatros C. III
« Reply #86 on: December 07, 2018, 05:48:32 PM »
Thank you!

Hello!!!


I stuck all the landing gear masts but there was still a lot of gap to fill. It has been filled with pieces of plastic sheets.


The tank is glued:


The upper plane is fixed without too much trouble except at the level of the mats of cabin. The notches in the hoods are not deep enough and are not well oriented. It had to be re-cut a lot with sandpaper.

The feet of mats do not have the good form. It should be thinner and there is a bell from where stretchers go. It is visible in the photos but I did not have the courage.


The hood machine gun is put in place.


The wooden feet are painted on the wings, the color is without guarantee. Note the hole in the fuselage at the lower wing spar. I had to redo all the tenons of the lower wings which yielded under the weight. I made the holes in the fuselage a bit too big ... It will be necessary to close them


The hoses coming and going from the radiator are glued. The one below the radiator is 0.5mm plastic, the other 0.5mm copper wire.


The windshield is that of the kit. It must be re-cut at both ends a little and round it. The shape is good for once.


The radiator is glued directly against the wing. Then the 4 masts that hold it (stretched plastic about 0.7mm).


The photoetched grid is too wide. It's nice, you have to remove a single (or two I know more) row of this grid.


Regards 
« Last Edit: December 07, 2018, 06:37:44 PM by huberlu »

Offline andonio64

  • Hero Member
  • *****
  • Posts: 1685
  • There's no hurry
Re: 1/48 Albatros C. III
« Reply #87 on: December 07, 2018, 05:56:13 PM »
Hi huberlu,
I can't see the first photo, but the others show a fantastic model so far!

Antonio

Offline huberlu

  • Full Member
  • ***
  • Posts: 201
Re: 1/48 Albatros C. III
« Reply #88 on: December 07, 2018, 06:39:42 PM »
Thank you Antonio.  :)


Offline RAGIII

  • Hero Member
  • *****
  • Posts: 18793
Re: 1/48 Albatros C. III
« Reply #89 on: December 07, 2018, 08:36:58 PM »
Looking terrific! Outstanding detail work and the rigging is looking great!
RAGIII
"A man has to know his limitations": Harry Callahan

"Don't slop it on" Lynda Geisler