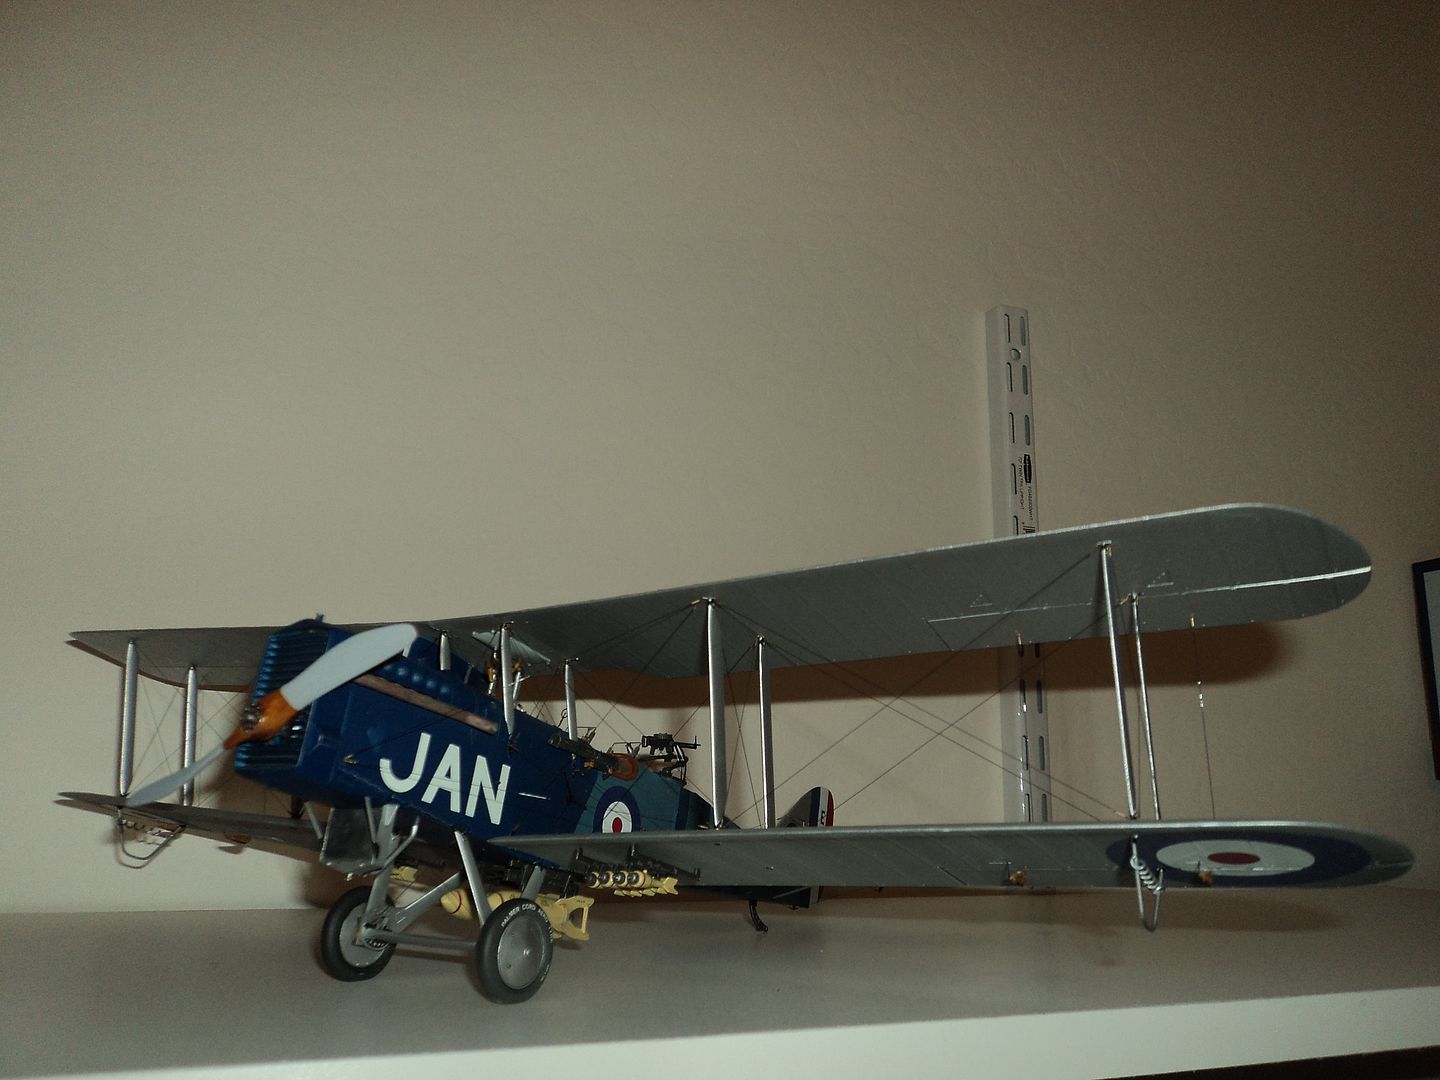
Okay, it's been awhile since I posted a build log. This isn't a build log, but; I feel I have "discovered" some steps to simplify the rigging of the CABANE struts and the interplane struts using elastic line. For this WNW NINAK kit I used Model Kasten .06 stretch rigging thread. I like it better than EZ line as it is easier to work with and less fiddly, plus it is round not flat.
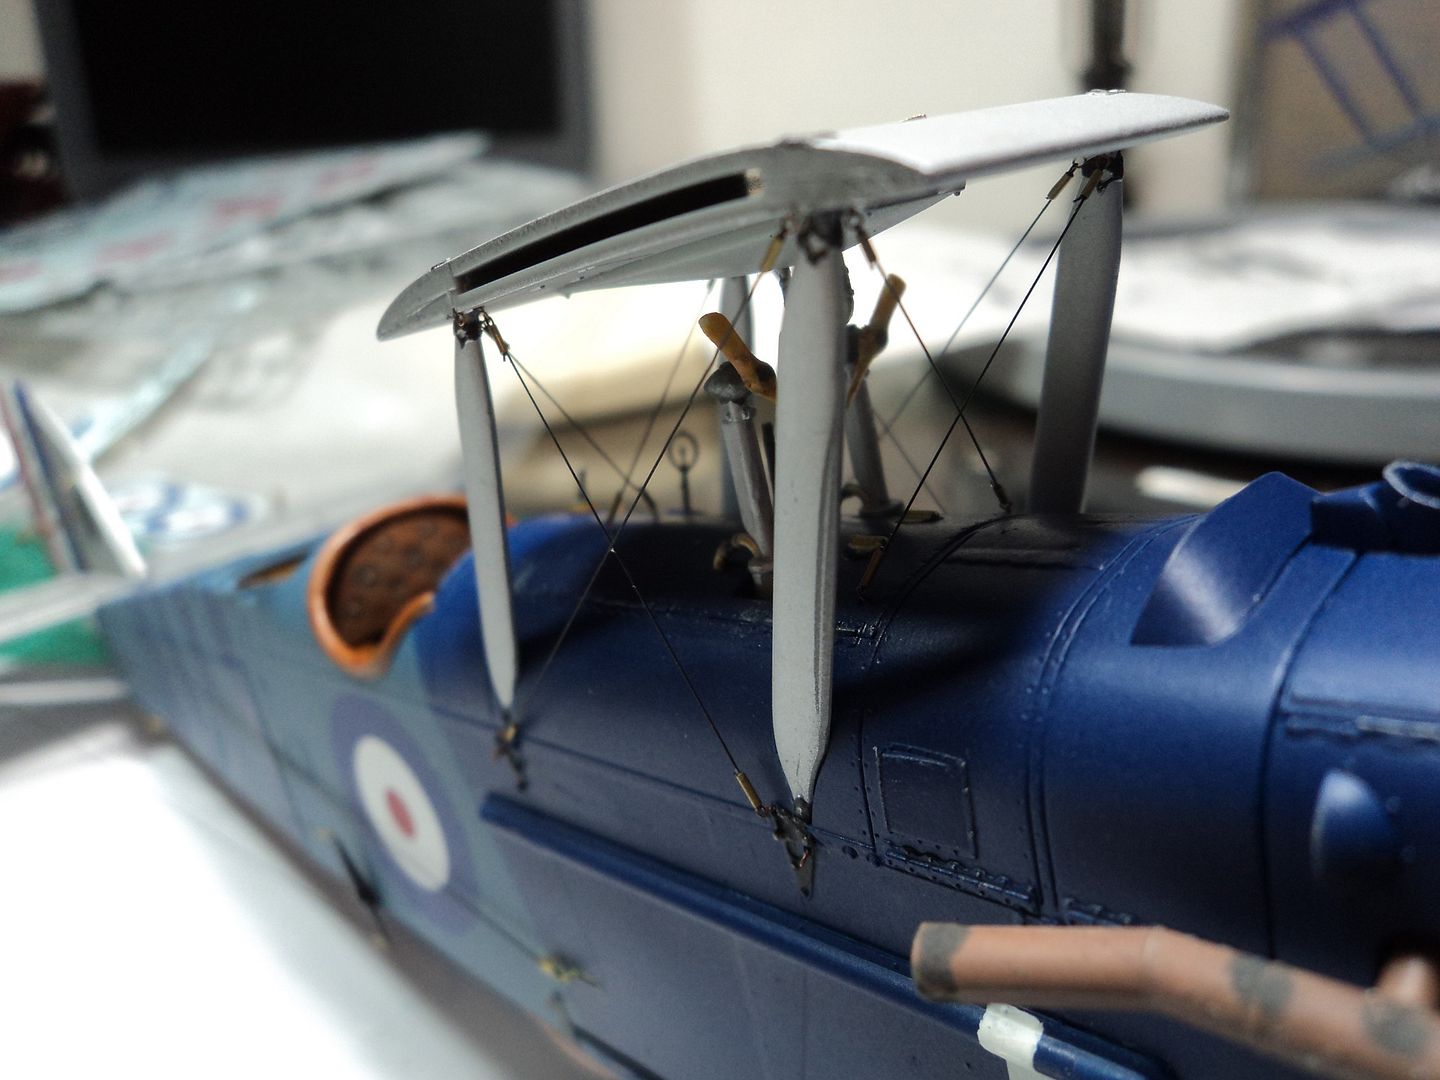
For the cabane struts, rather than assemble the top wing as the instructions would indicate, I pre drilled and added Bob's Buckles eyelets to the center portion of the upper wing. The modeler must ensure that the inboard eyelets are trimmed so as not to interfere with the wing tab slot. Once the eyelets were in, I then rigged the upper portion and attached the upper center section to the cabane struts. Naturally, prior to this I drilled the appropriate holes and fixed eyelets to attach the rigging to. Once on it was easy to finish rigging the center section and the cabane struts. Note that the lower wing has not been installed at this time to allow the modeler easier access to the rigging attachment points and to rig unfettered by the lower wing. This makes this portion of rigging so much easier and stress free and less likely for the modeler to ruin something in the process and keep the language clean.

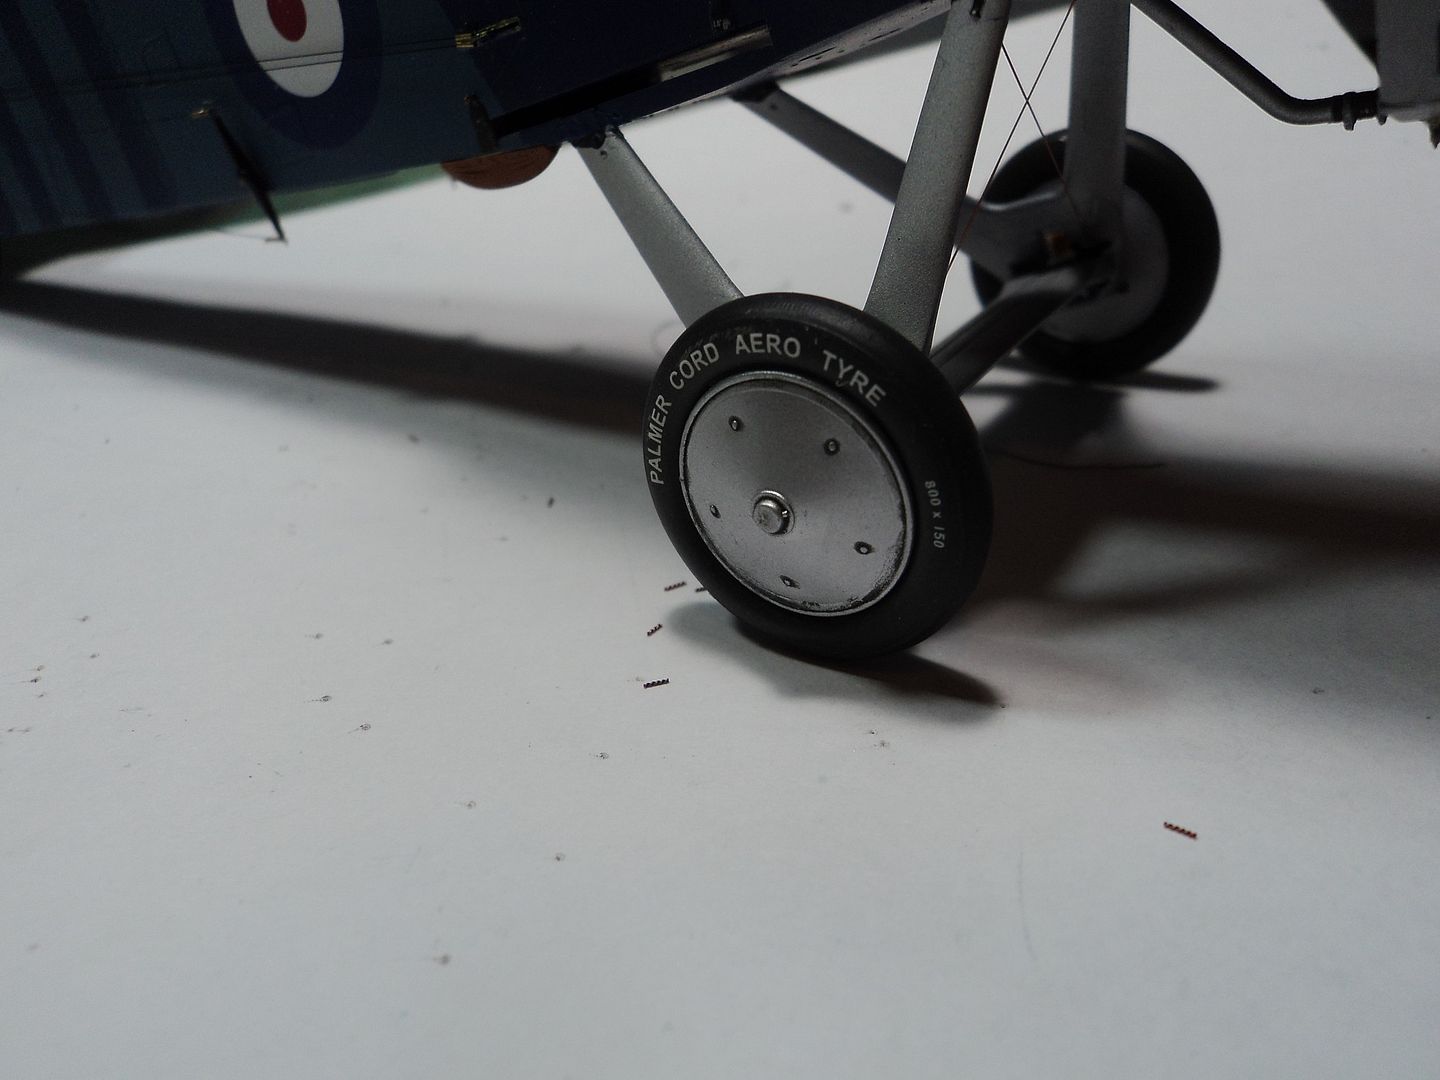
I had always marveled at some of the modelers tires and how nice the "Palmer Aero Tire" decals looked. I tried pre painting the wheels white and then lightly scraping off the black paint to bring out the lettering with limited success. I also applied decals over the raised lettering with no success with the same tepid results using the dry brush method.

On this one, I sanded off the raised lettering, painted the tires gloss black, slid the decals on. When set, I sprayed with Testors Dullcote with about three drops of Tamiya XF55 Deck Tan added achieving the result I was after. The image below shows the assembled and attached wheel. The model should have spoked wheels, but they aren't ready yet from PHEON so I took the liberty of using the wheel covers weathered a bit with AK interactive ships weathering. I think they look pretty spiffy, lack of exposed spokes notwithstanding. I will use them on the next one.
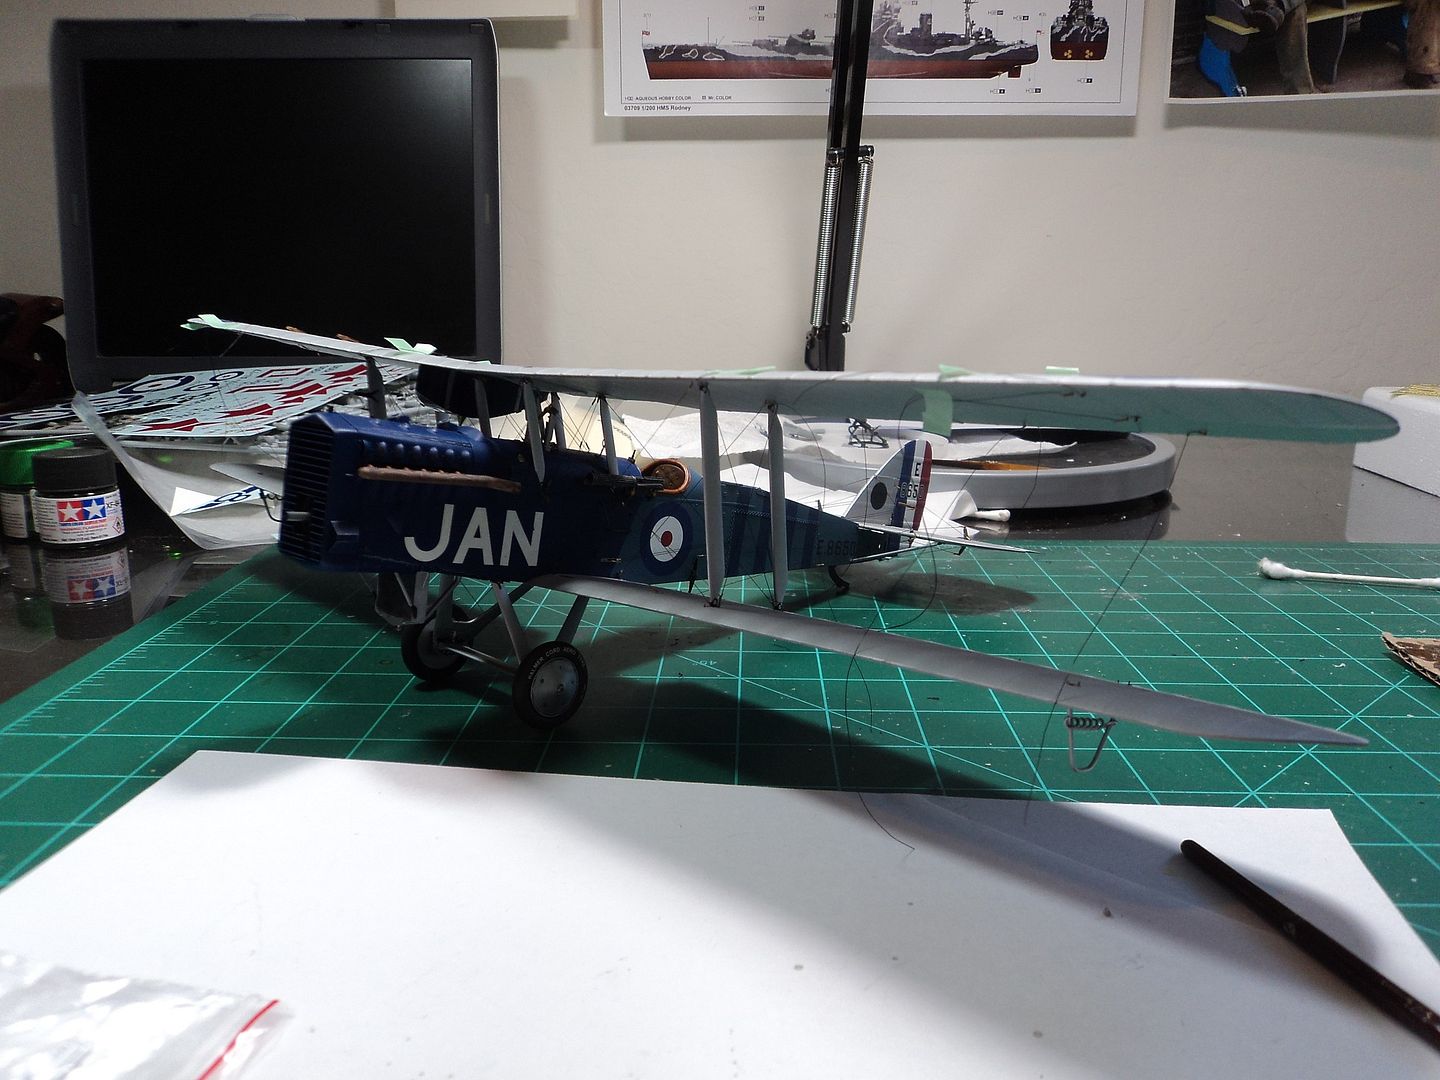
I then attached the lower wing. To give it support I used Cobra Fishing line to rig from the lower fuselage to the wing, the modeler can use whatever mono filament type rigging material that has worked best for him/her. There are two of these per side, which gives the lower wing a solid purchase to the fuselage and to receive the upper wing. I had pre rigged the inboard rigging from the bottom to the upper wing as that would be a bear to rig once the upper wing was fixed. In the image below you can see the cobra line attached and the rigging from the lower wing joint to the upper wing taped to the lower wing. This is critical as by doing this step now, the modeler is doing him/herself a big favor a few steps down the line.


Once the upper wing was rigged with Model Kasten stretch line I attached it carefully to the center section, doing both wings at one time for balance. Once fixed I began to rig the inboard bays. As I was using stretch line, I left the interplane and flying struts off. This makes rigging a breeze. I used this same technique on my Salmson SA-2 with success. Working both the inboard bays I then added a drop of liquid cement into the placement hole on the bottom wing and on the upper peg of the strut and fixing the top portion of the strut into it's receiving hole, slid the bottom one into place. There is enough flex in the line to allow this.
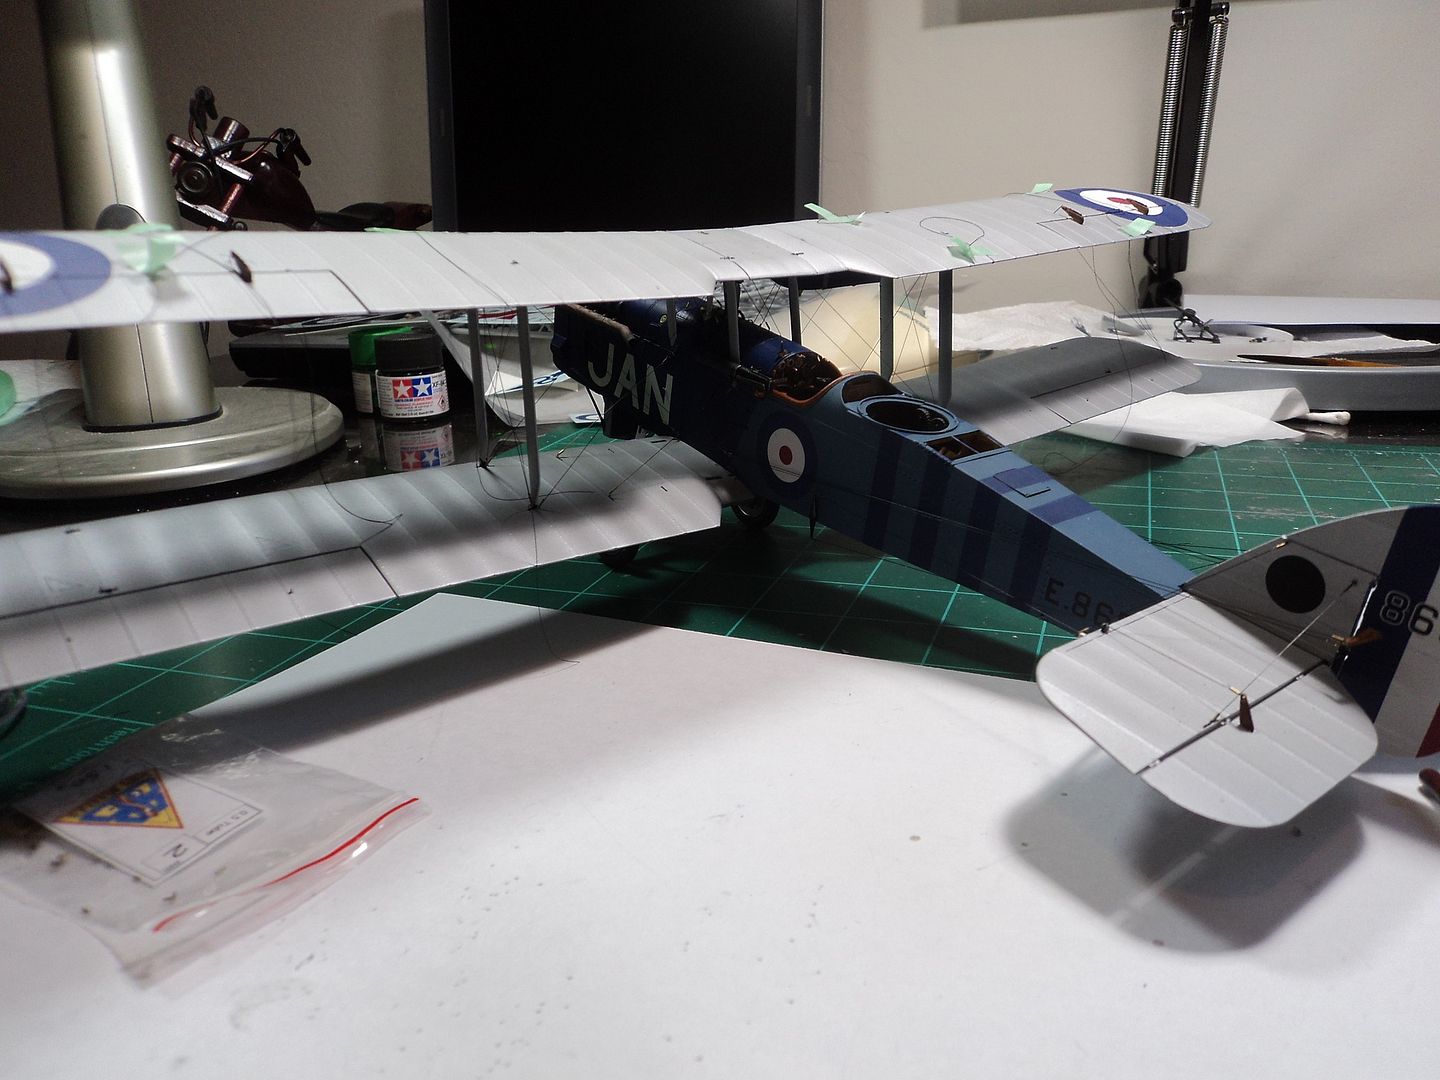
I then proceeded to the outboard bays using the same procedures with excellent results. By using the cobra line to rig the lower wing to the fusleage and fixing the struts with cement it is quite a sturdy structure, flex line notwithstanding. For complex rigging like the Salmson, LVG and the NINAK this system has proven successful in each build providing a sturdy structure. I also used the cobra line for the undercarriage to give it additional strength as well. The model is a heavy model but is sits firmly and I can pick it up by the upper wing center wing section and not be fearful of losing something, or it falling apart.

I hope this bit of information helps those modelers out there in rigging these multi bay Bi Planes or even single bay bi planes. It has served me well with three builds so far and I am currently on the DH9 and will employ the same techniques.
Happy Rigging.

