The Fokker EV wing:-
The fact that the EV had only one wing and that wing was plywood covered, was the main reason that I thought I could construct a reasonable model using a Roden DVI.
I calculated that the scale thickness of the wing was 7mm to the nearest mm. Being not half bad at woodworking, I sandwiched a 6mm and a 1mm section of obeche to make up the scale wing thickness. The obeche can easily be found in model shops and comes in 3ft long x 3inch wide sheets. Again taking advantage of the Avis kit, I marked out the wing shape, cut it to size and sanded it to scale profile – easy when you have a bandsaw and a belt sander. I also inset four minute tube sections to take the subsequent struts. Below are pictures of the wing, both top and bottom. I also show the struts I have made using brass tube and wire inserts.
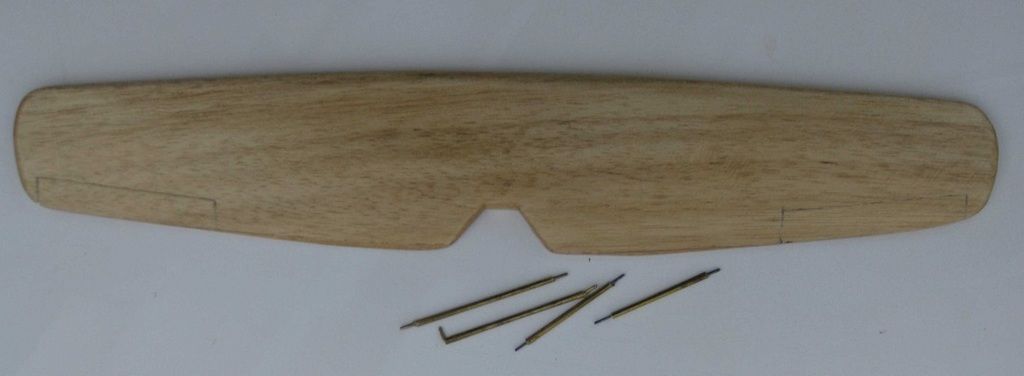
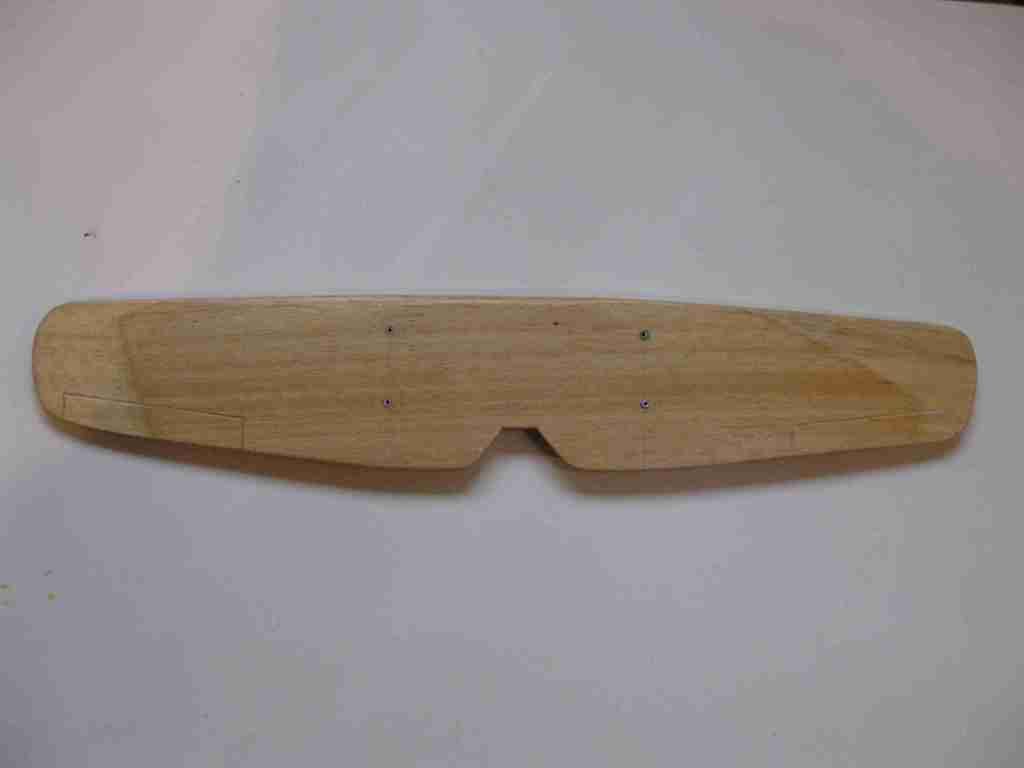
I have read the comments made elsewhere about ‘cupping’ of the plywood between the ribs. This, indeed, will occur over time, especially if the wing is subject to wetting and drying – it happens to most timbers. However, I would suggest that, in the case of the EV which only appeared a few weeks before the armistice, it is unlikely that the aircraft would have suffered that degree of wear and tear in service. Maybe eighteen months later, after having been abandoned in the open air, it would be a real possibility. Anyway, I decided not to depict this phenomenon and simply sanded the wing surface smooth. Several coats of wood seal left the surface just right for streaky paint.
Having read the old Aerodrome correspondence years ago, together with most of the discussions on this and other sadly departed websites, I am fully aware of the debate re three-colour wings – six colours if you include top and bottom. I was always an admirer of P. Endsleigh Castle’s profiles of WW1 aircraft including the EV with the olive green top wing. In fact, I’ve made a few in that colour over the years. The weight of current opinion seems to be the three-colour camo. promoted by the late Dan-San Abbot and on the strength of that, I will paint my wooden wing in that way.
However, I would love to hear any more definitive evidence than a grainy photo with shadows on the wing. It just doesn’t seem logical, that late in the war, for painters to spend time putting on three colours when one will do. Especially as no other aircraft was similarly treated at that time. After all, the shortage of paint was the problem and not the need for camouflage, especially when the first thing the front line pilots would do was to paint them in bright colours.
Please forgive all the above scepticism – it comes with age. Anyway, I show below the wings painted streaked camouflage, based on the colours of Ronny Bar’s profiles. The photos also show the fuselage alongside covered in four-colour lozenge fabric by ‘Wood & Wire’. Note how the framework shows through the semi-transparent and very fragile decals.
The top colours are:- green, XA1002 Xtracrylix RAF dark earth and the brown, XA1225 Xtracrylix RLM 82 Hellbrun.
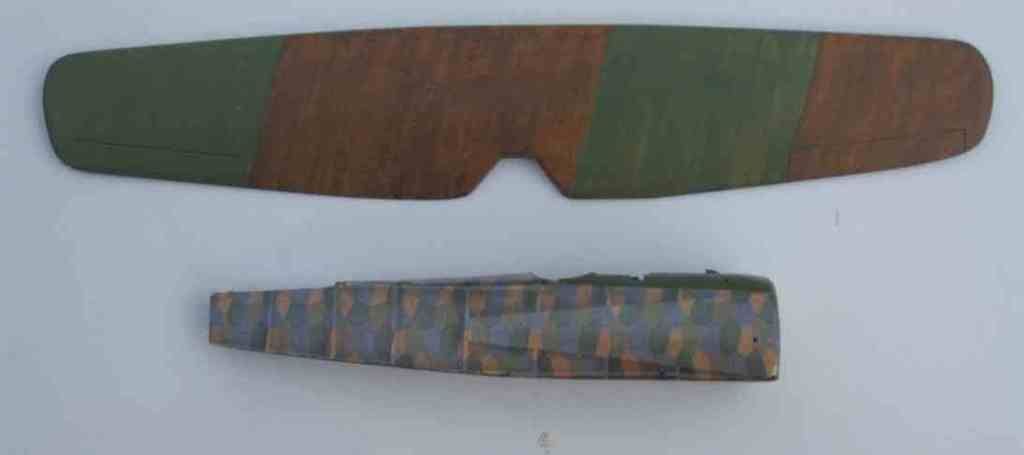
I had two goes at the underside. The first attempt looked O.K. but I decided that it was too dark, especially the blue which, I would have thought should look something like a normal sky colour. As the wing was solid wood, I just sanded all the paint off, resealed it and painted it again. This time using a mixture of Vallejo 70961 sky blue and 70918 ivory for the blue. For the ‘purple’ I used Vallejo 70957 flat red, 70962 flat blue and 70918 ivory.
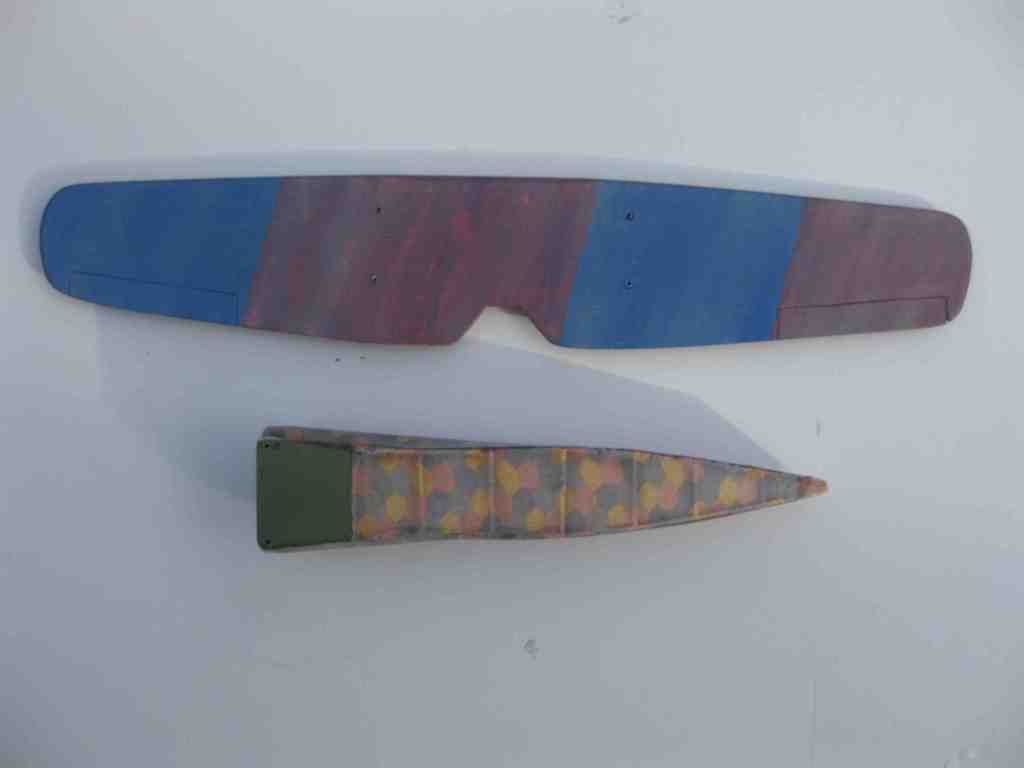
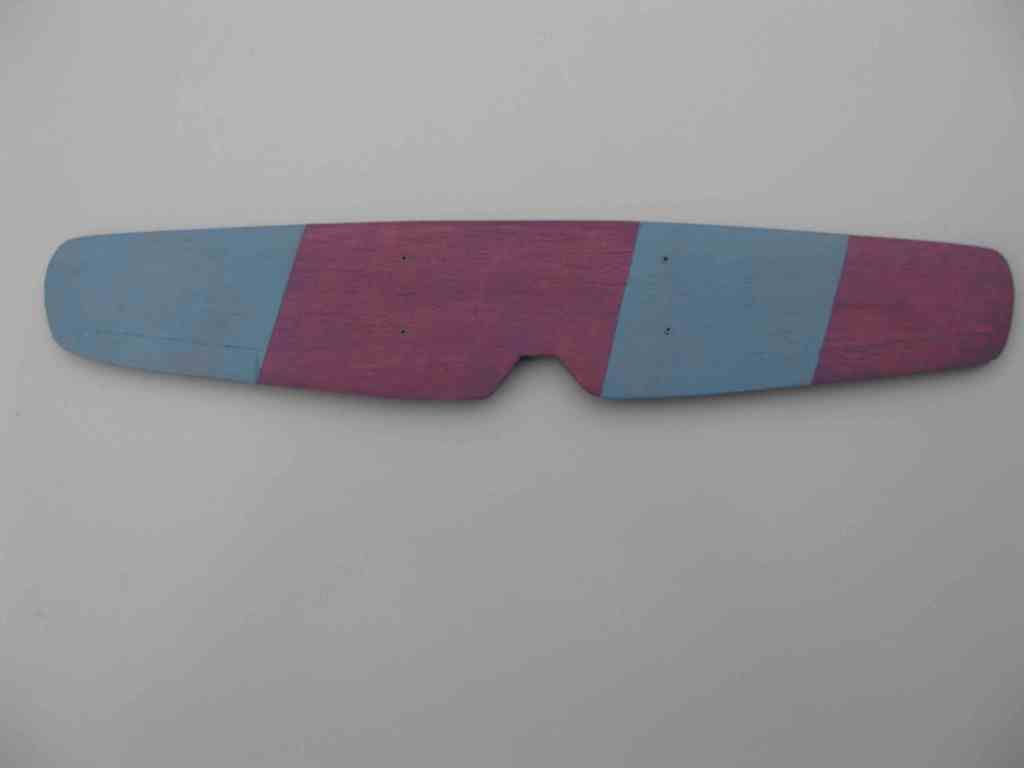
Incidentally, my normal paint of choice for spraying is Tamiya acrylic but I have found that it does not like being brush-painted. If you brush it too much, it tends to strip off. The Vallejo and Xtracrylix paints don’t do this, hence my choice. In retrospect, I guess that the junction between the colours is too sharp and would probably have benefitted being slightly blurred.
I hope that you like the result so far.
Les