Author Topic: Ansaldo A.1 "Balilla" 1/32 Aviattic OOB  (Read 33818 times)

Offline Gisbod

  • Hero Member
  • *****
  • Posts: 2438
Re: Ansaldo A.1 "Balilla" 1/32 Aviattic OOB
« Reply #30 on: January 01, 2017, 04:02:53 AM »
Excellent Bo!

Following along....

Guy
“Oh! I have slipped the surly bonds of Earth -
Put out my hand, and touched the face of God.”

P.O. John Gillespie Magee 1941

Offline uncletony

  • Hero Member
  • *****
  • Posts: 4349
    • Aircraft In Pixels
Re: Ansaldo A.1 "Balilla" 1/32 Aviattic OOB
« Reply #31 on: January 01, 2017, 07:55:27 AM »
On to the cylinders.

First, Ron recommends drilling a large shallow hole in the center of each cylinder bolt plate on the crankcase. The purpose is to help ensure the cylinders sit level & flush with the case. Now, this is not entirely necessary -- I can assure you these have been built skipping this step by both me & Ron and they were "fine" -- but it is helpful.
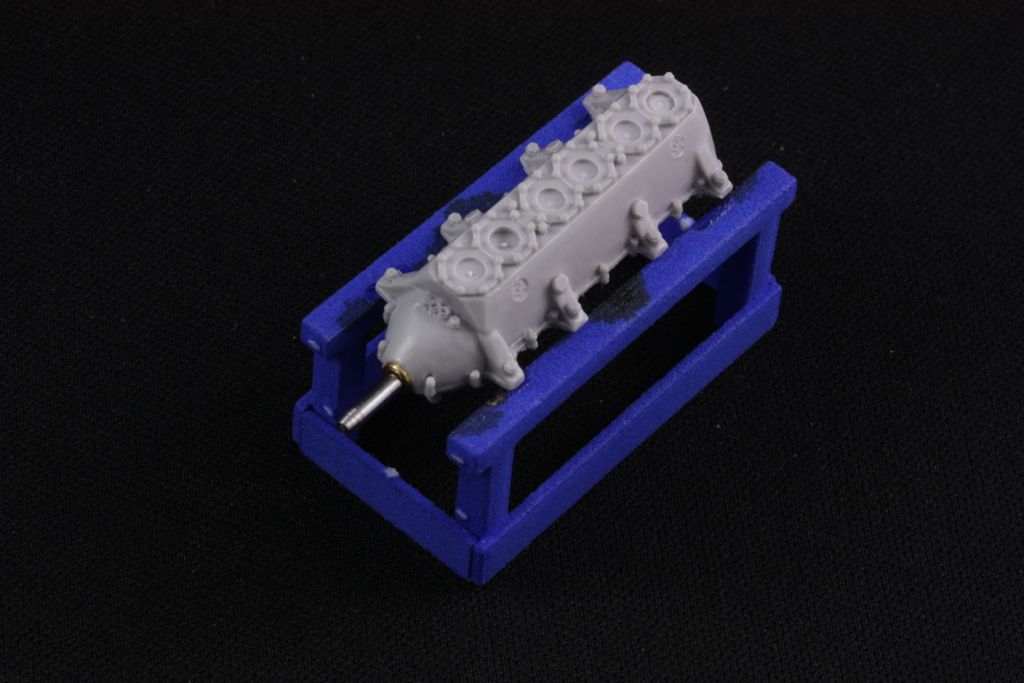


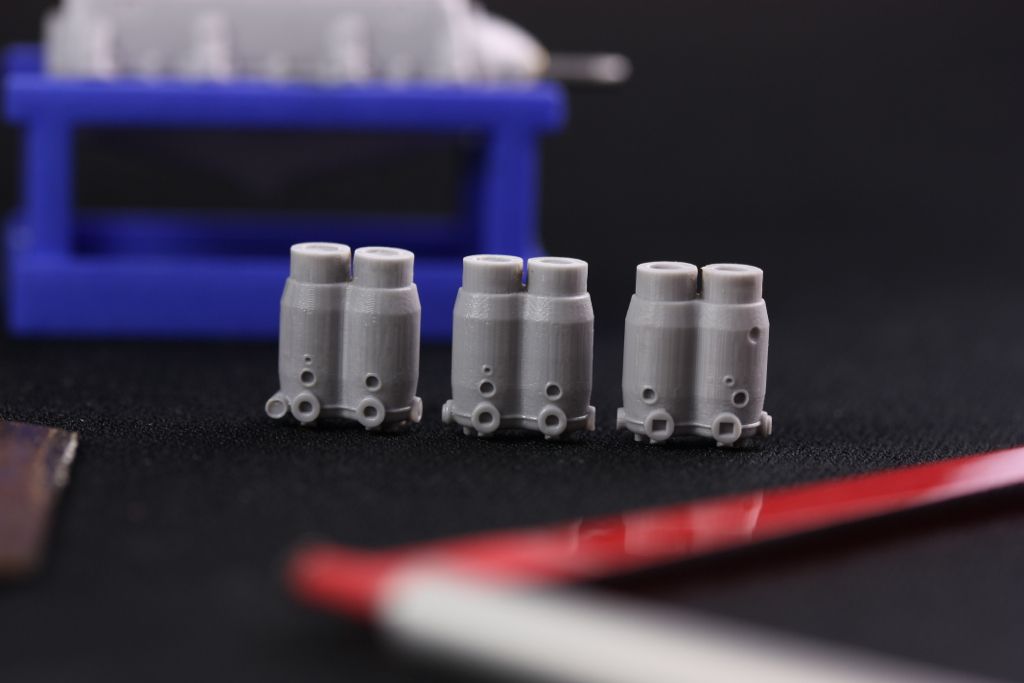
Now, note the order of the cylinder pairs -- this photo shows how it goes together. #9 is rearmost, #7, frontmost. Note too that the exhaust side ports have square holes.
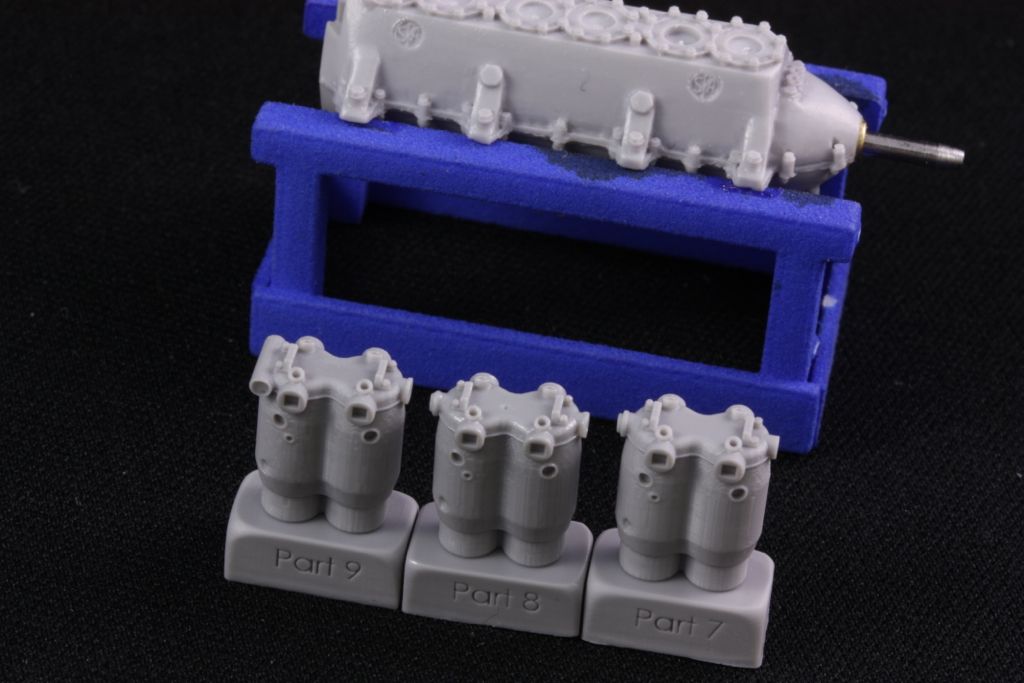


Take your time separating the cylinders from the casting block -- neatness counts here! It might be time to finally replace that dull, bent razor saw blade that you've had out on your bench for the last 4 years with a fresh one.
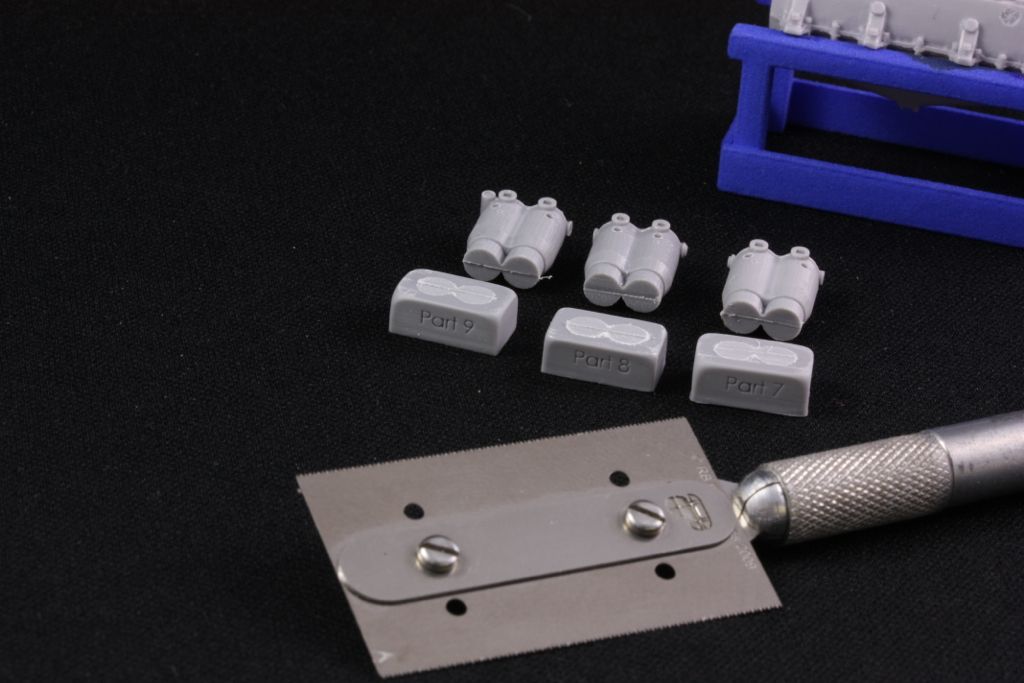


Like the crankcase, the bottoms of the cylinders can be drilled with shallow holes. This makes leveling them easier -- no material in the middle to remove which means they are less likely to get rounded off when you sand them.
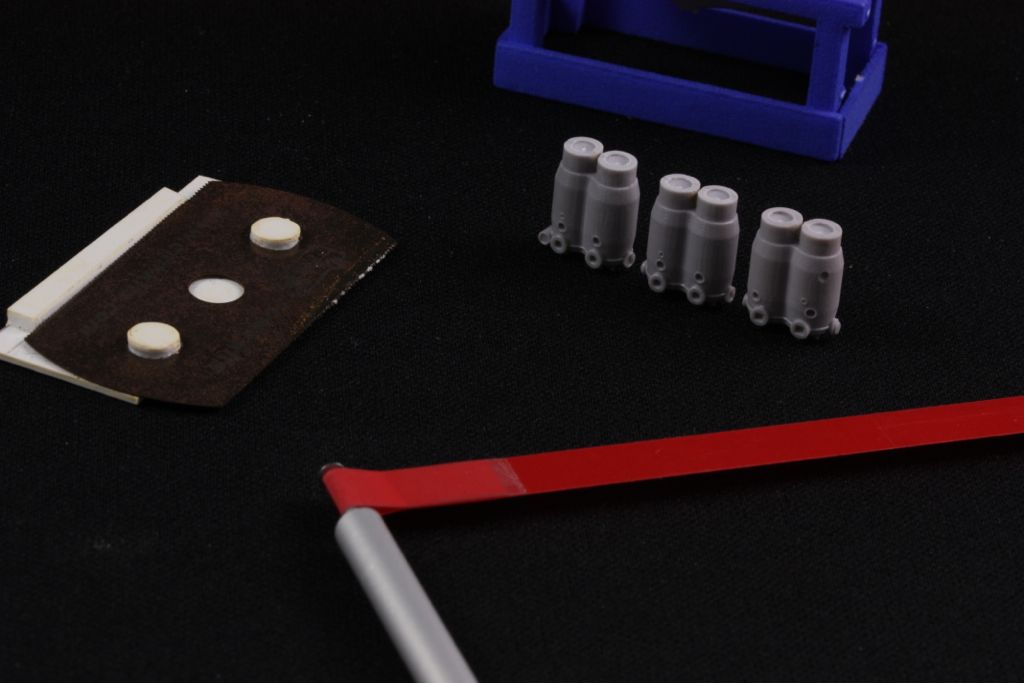


Note that you should open up the space between the cylinders below the jackets. I use a simple tool that I made to hold several saw blades together (in prev photo), this way I can cut notches of precise widths. The bow sanding tool is used to clean up the work:

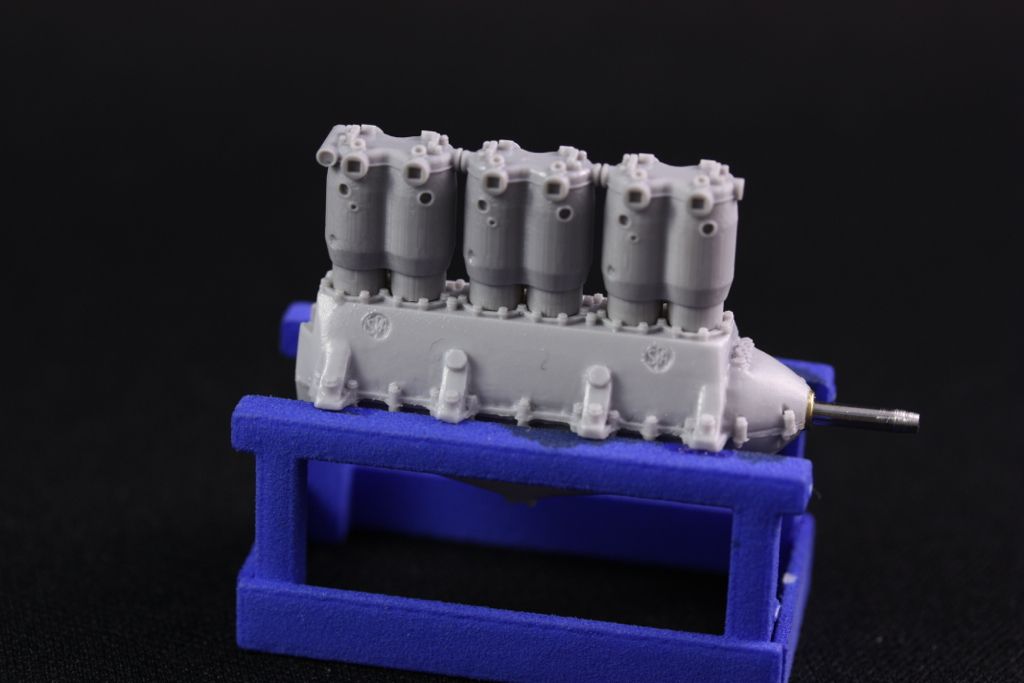
First dry fit is pretty good! It's worth spending time getting the cylinders as perfectly aligned and level as possible, this will make your life easier later...

Offline Mark

  • Sr. Member
  • ****
  • Posts: 258
Re: Ansaldo A.1 "Balilla" 1/32 Aviattic OOB
« Reply #32 on: January 01, 2017, 08:00:43 AM »
Bo, many thanks for your very detailed build notes. This will be an immeasurable help to us neophytes when we attempt this build!

Mark G  8)

Offline Nigel Jackson

  • Hero Member
  • *****
  • Posts: 2608
Re: Ansaldo A.1 "Balilla" 1/32 Aviattic OOB
« Reply #33 on: January 01, 2017, 07:42:38 PM »
A big thank you, Bo, for this build-log. I told Richard that I'd be happy to wait for mine until the new decals have arrived, but when it does come I'll find your advice/guidance invaluable.

Just one quick peripheral question. One of the photos shows the saw you use to remove resin pieces from their plug/base. What make is that? I'm fed up with nearly hacking my fingers off using things that I think might just do.

Best wishes
Nigel

Offline Nigel Jackson

  • Hero Member
  • *****
  • Posts: 2608
Re: Ansaldo A.1 "Balilla" 1/32 Aviattic OOB
« Reply #34 on: January 01, 2017, 07:52:25 PM »
RB Productions - they are brilliant! Get the finest tooth count you can find  ;)

Many thanks, Justin.

Best wishes
Nigel

Offline uncletony

  • Hero Member
  • *****
  • Posts: 4349
    • Aircraft In Pixels
Re: Ansaldo A.1 "Balilla" 1/32 Aviattic OOB
« Reply #35 on: January 01, 2017, 09:40:13 PM »
RB Productions - they are brilliant! Get the finest tooth count you can find  ;)


Yup.

As for the grade, in general I agree, but for this particular job the coarser "fine" blade is much better than the very high tooth count "ultra fine" which cuts so slowly that it is harder to keep it from wandering.

I buy them in bulk. Usually I have the ultra fine out on the bench, and it works quite well on brass too. They do get dull and they do get bent, so don't expect one blade to last forever.

Offline Nigel Jackson

  • Hero Member
  • *****
  • Posts: 2608
Re: Ansaldo A.1 "Balilla" 1/32 Aviattic OOB
« Reply #36 on: January 01, 2017, 10:02:00 PM »
Thanks, Bo.

Best wishes
Nigel

Offline andyw

  • Jr. Member
  • **
  • Posts: 53
Re: Ansaldo A.1 "Balilla" 1/32 Aviattic OOB
« Reply #37 on: January 02, 2017, 04:34:57 AM »
If I follow this I think I am going to end up buying one

Offline TobyCoulson

  • Hero Member
  • *****
  • Posts: 610
Re: Ansaldo A.1 "Balilla" 1/32 Aviattic OOB
« Reply #38 on: January 02, 2017, 04:42:15 AM »
I'm going to enjoy watching this build. I have a feeling it's  going to be a bit special
Ale should be drunk out of a glass. Lager should be drunk out of desperation

Offline uncletony

  • Hero Member
  • *****
  • Posts: 4349
    • Aircraft In Pixels
Re: Ansaldo A.1 "Balilla" 1/32 Aviattic OOB
« Reply #39 on: January 02, 2017, 08:22:08 AM »
cheers people :)

Next step, again, optional but recommended by Ron, is to drill out the holes on the cylinders where the ignition harness attaches to each pair of cylinders. You could skip this step and simply glue the PE harness directly to the cylinders and it would probably stay attached just fine.

PE part 23, which forms the back of the harness is shown. It has three little eyelets of about .5mm hole diameter. Ron suggests using Master Club resin bolts -- a fine option -- I am choosing Scale Hardware brass rivets instead. Holes -- one on each cylinder pair, just below the spark plug sockets -- shown drilled to .5mm diameter to a depth of 3mm the length of my rivets.)


Here is basically how it all goes together, although note the harness is pointing the wrong way! (skinny end points to the front of the engine):


At this point the cylinder jackets are given a coat of Mr. Surfacer and set aside...

Offline UFAG

  • Hero Member
  • *****
  • Posts: 644
Re: Ansaldo A.1 "Balilla" 1/32 Aviattic OOB
« Reply #40 on: January 02, 2017, 08:28:00 AM »
*((*&^)&&*&*.....missed out on this one...another jewel in the making.

Offline uncletony

  • Hero Member
  • *****
  • Posts: 4349
    • Aircraft In Pixels
Re: Ansaldo A.1 "Balilla" 1/32 Aviattic OOB
« Reply #41 on: January 02, 2017, 08:37:42 AM »
Here is the next bunch of parts -- they form the rear of the engine, namely the rear main cover (26A), magneto takeoff / gear tower(26D) & base (26B), oil pump (26C) , water pump (12) & camshaft bevel gear housing (11):


Here they are, cut out & cleaned up in the order -- but not necessarily orientation -- that they go together:


you'll want to run a .9mm drill in the top of the gear tower shaft (26D) to make sure the bevel gear housing fits nicely into it. Similarly, run a 2mm drill in the flange of the bevel gear housing (11) to ensure the camshaft will mate nicely. In both operations you will probably remove very little material...

The little "wings" on part 26A are supposed to be at an angle when viewed from above. Meanwhile, part 26B is supposed to be perfectly flat (it might fight you in this regard)
« Last Edit: January 19, 2017, 12:59:24 AM by Bo »

Offline Juan

  • Hero Member
  • *****
  • Posts: 2456
  • All gave some, some gave all.
Re: Ansaldo A.1 "Balilla" 1/32 Aviattic OOB
« Reply #42 on: January 02, 2017, 09:44:49 AM »
Thanks for this build log Bo, much better than watching a movie.  Really enjoying your rendition of this beautiful kit.

Offline ALBATROS1234

  • Hero Member
  • *****
  • Posts: 2657
Re: Ansaldo A.1 "Balilla" 1/32 Aviattic OOB
« Reply #43 on: January 02, 2017, 03:24:37 PM »
Great job thus far bo. And I am sure an oob build will satiate your  need to get something completed. I can relate I assure you in the years I've been back building models I have only completed a handful compared to all of the unfinished builds which I have either lost interest temporarily, gotten to a problem which will have to fester until a solution dawns on me or got overwhelmed with ams from overdetailing. It is however quite nice to just crank one out time to time. As you mentioned much of the detailing has been done with this ground breaking kit which I have covered for some time. Hopefully there will be some left by the time I can justify dropping that kind of cash on a kit.  Of course it from looking at pics it seems well worth it

Offline Manni

  • Hero Member
  • *****
  • Posts: 1768
    • Der Militärmodellbauer
Re: Ansaldo A.1 "Balilla" 1/32 Aviattic OOB
« Reply #44 on: January 02, 2017, 07:20:55 PM »
Great to see this. I think, now I want one, too.
Can you tell me if the decals of the wing camo is included or should it be handpainted by the coustomer?
Bye,
Manni
"Ich hab' da mal was vorbereitet.": Jean Pütz
"Warum noch mehr Bausätze?!?": meine Frau