Author Topic: Deux Soldats Français , Août 1914  (Read 3103 times)

Offline Old Man

  • Hero Member
  • *****
  • Posts: 600
Deux Soldats Français , Août 1914
« on: February 01, 2016, 03:45:36 AM »


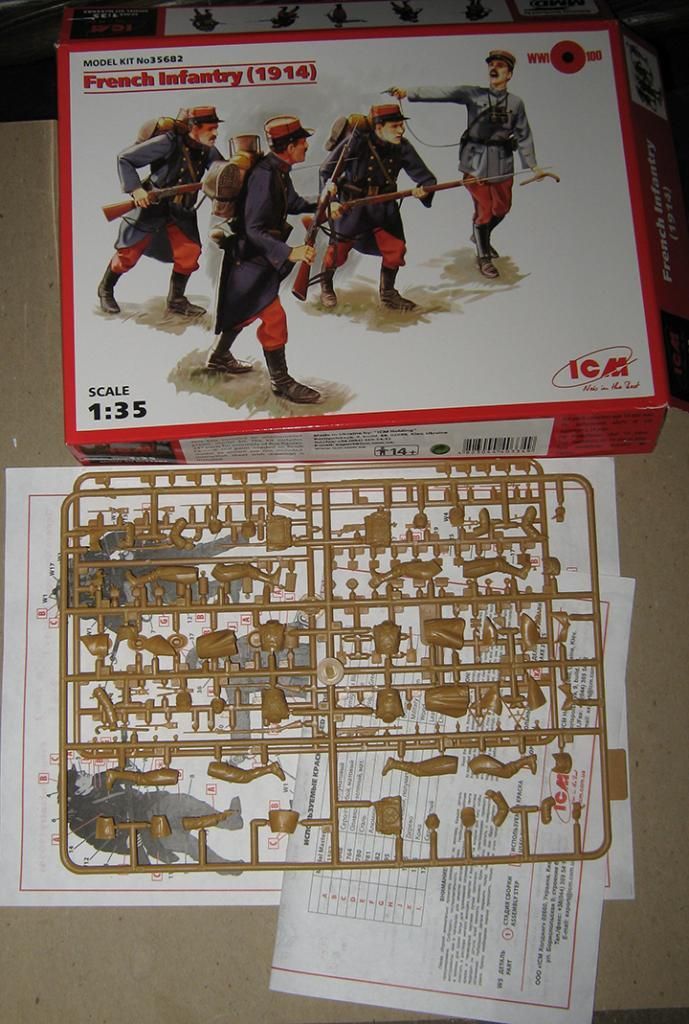
I got the ICM 'French Infantry, 1914' set a year ago. While I certainly wanted to do a figure of a French soldier at the start of the Great War, my intent was that this set would serve, too, as practice for doing a couple of white metal Napoleonic figures I had also bought.

The ICM figures have, however, to be assembled before they can be painted, and that --- well, that is something else again.

The set contains parts for three enlisted men and an officer, all in 'action' poses. I was working on assembling one of the enlisted men when wife had to go to the hospital last year (literally, I set the thing down when she called me), and that one I have been leery even of touching again, and in any case now that I have put two of them together over the last couple of weeks I know most of my work on it (legs and coat skirts) wold have been useless anyway. I was painting as I assembled, in the fond hope things would fit....

I really should know better by now.

I would definitely not recommend this set for the novice or the unwary.


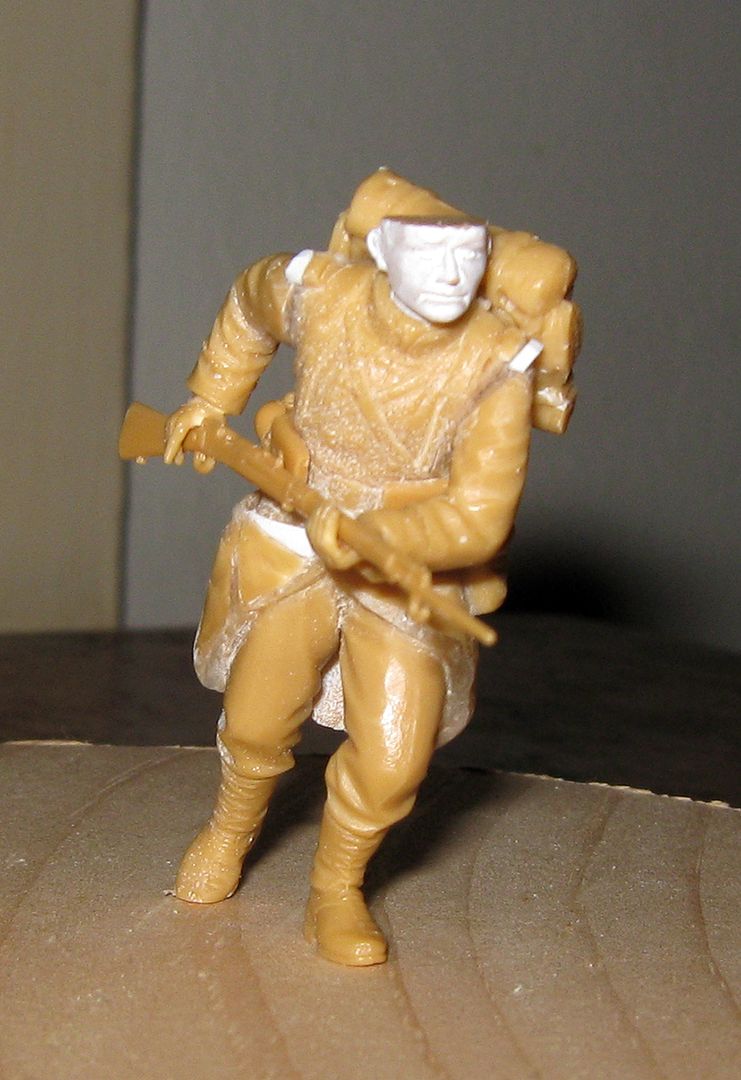
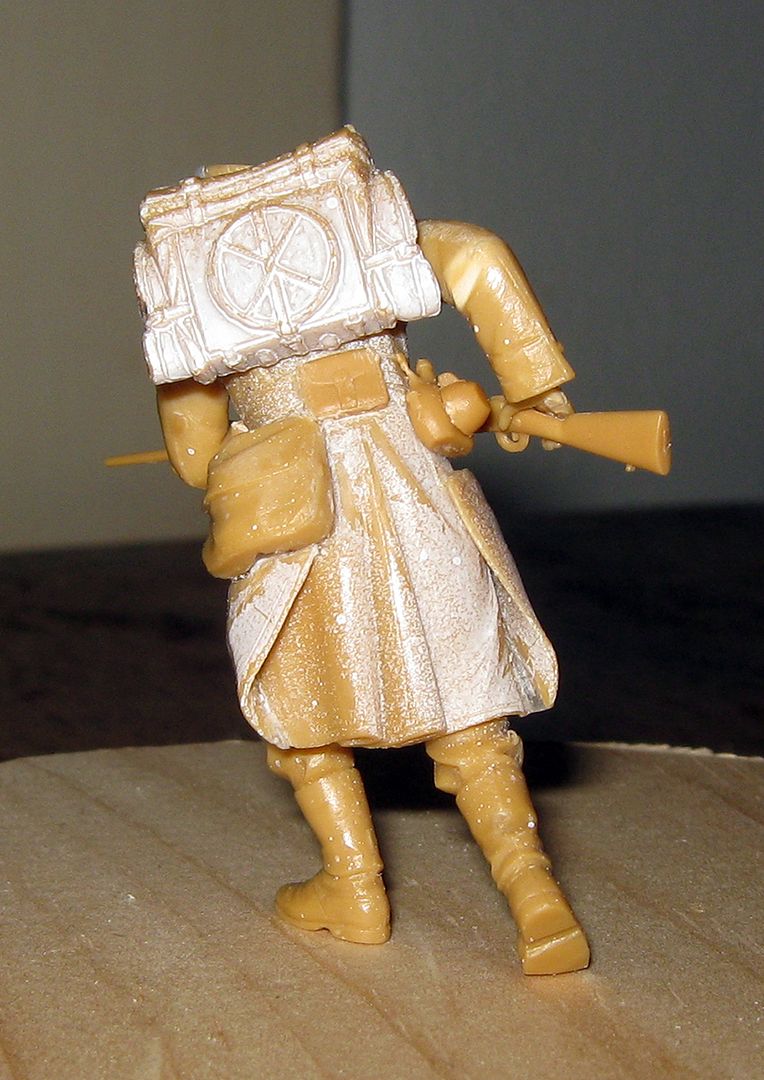
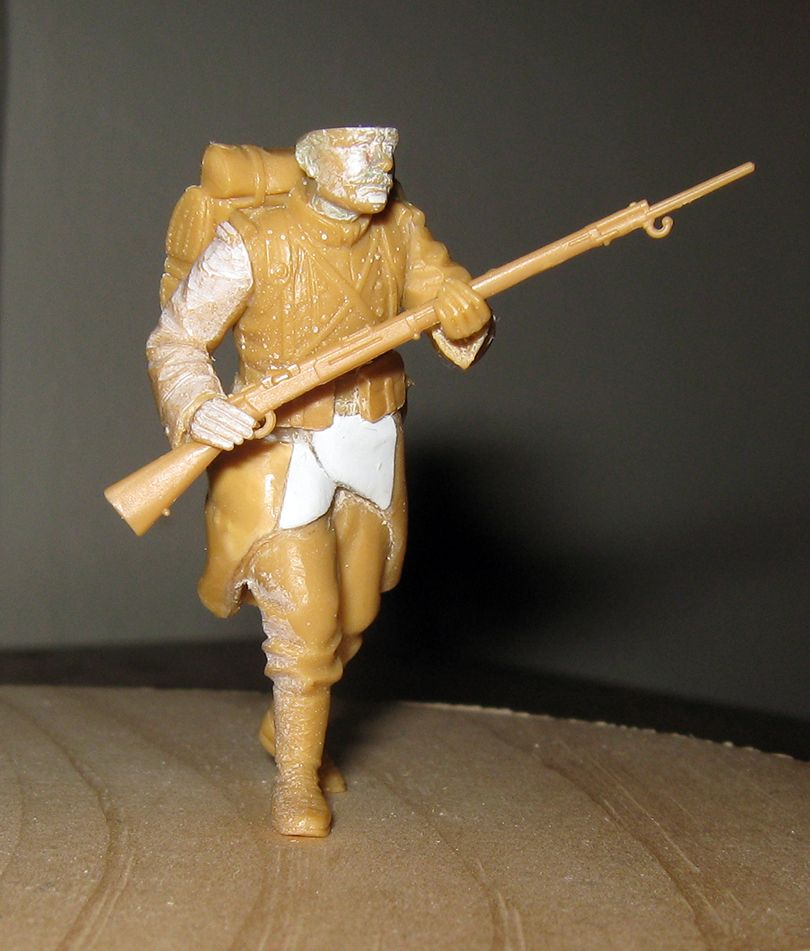
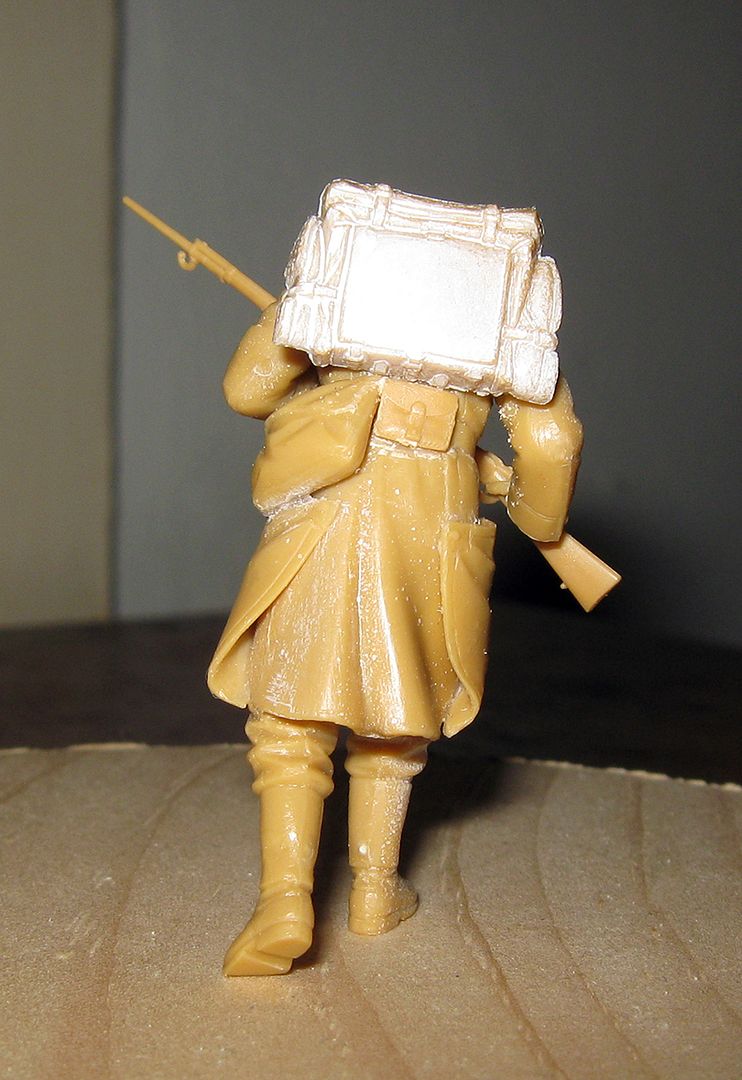
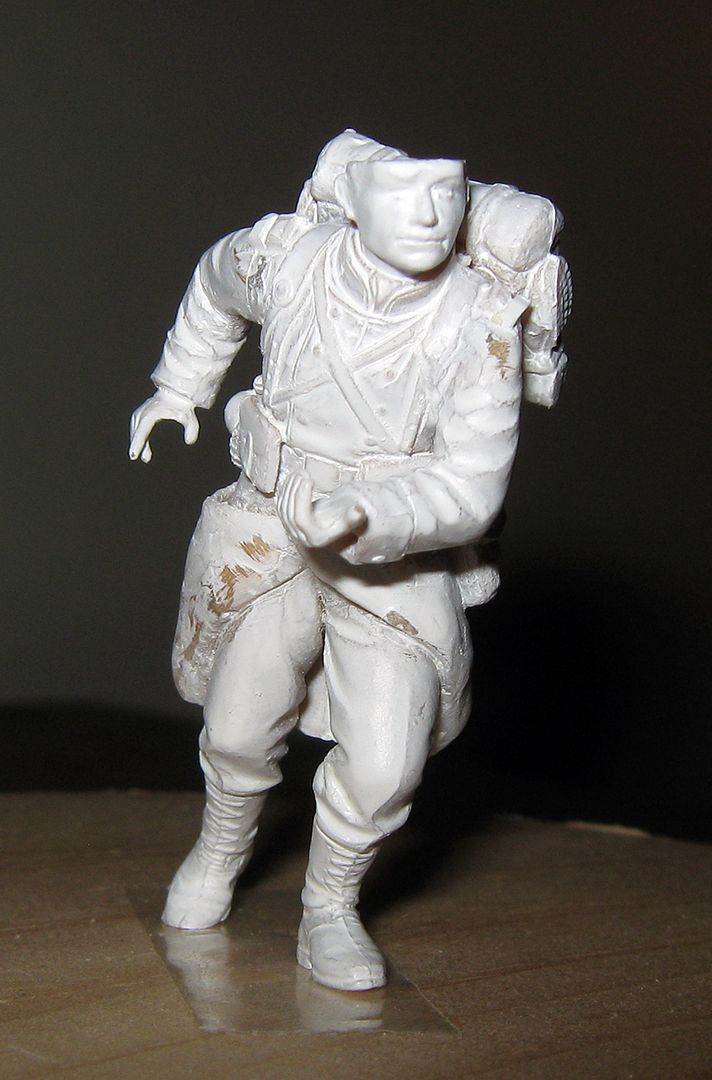
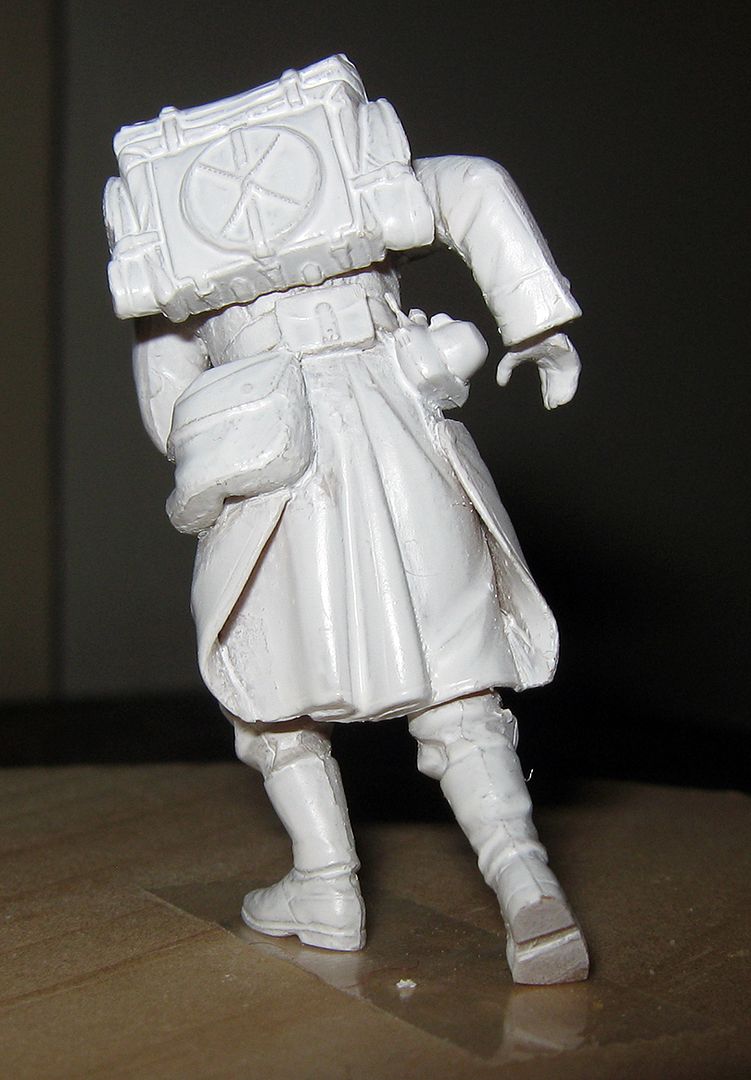
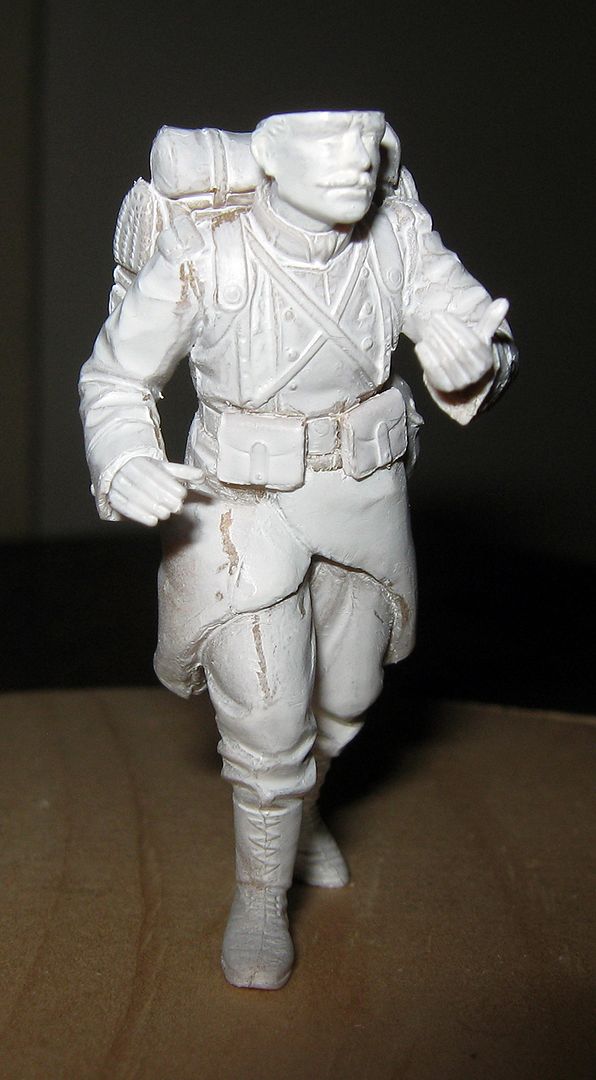
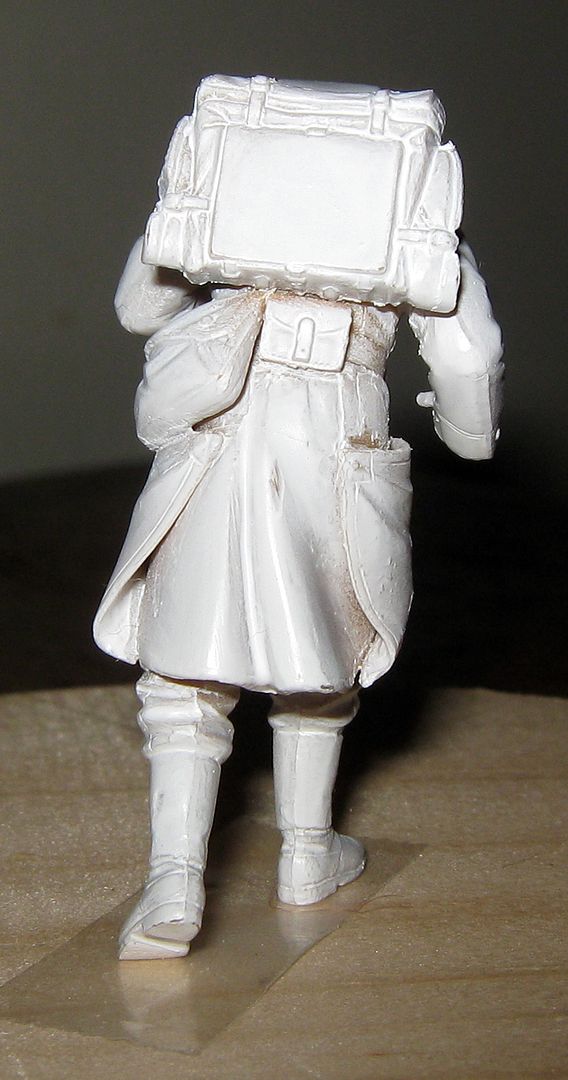
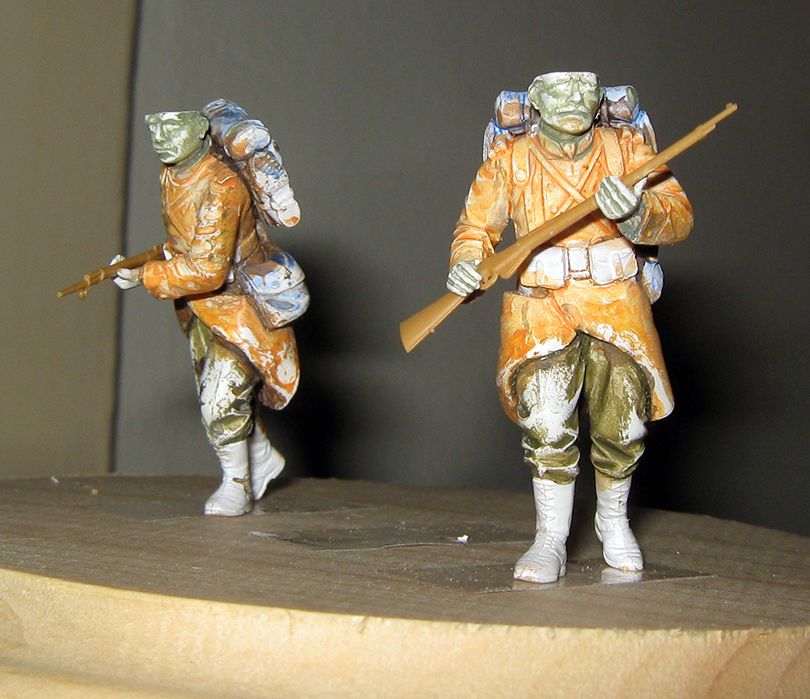
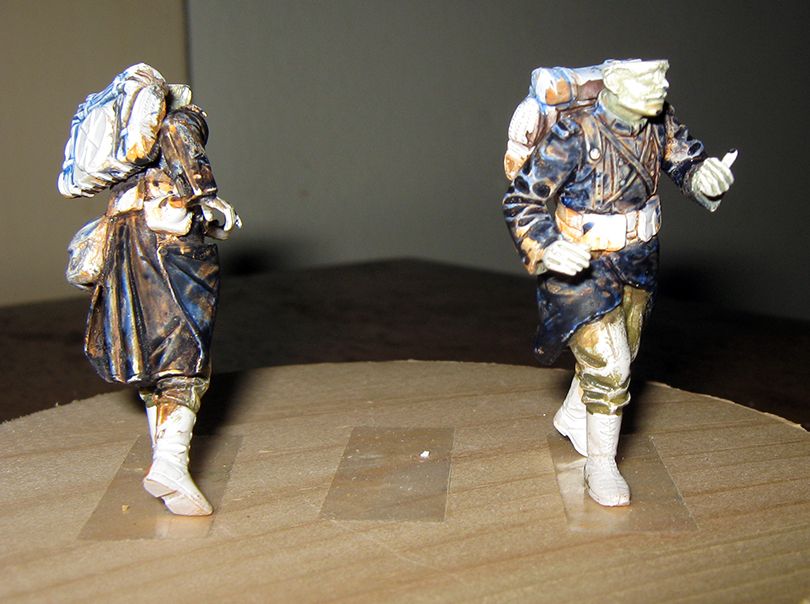
Here are the two figures assembled; rifles are not final, merely in place to illustrate positions, different pieces will be used).

The basic problem with these figures is the coat skirts. A double-breasted greatcoat was worn, and the skirts were brought back and buttoned to the rear of the coat a bit below the belt, getting them out of the way of the legs. The coat fastens to the right, so the left skirt rides over the right skirt, and its 'fold' comes to the belt well to the right of the buckle. When men were standing still, and the coat at fresh inspection standard, this doubled portion tended to bell out a good bit, but when the thing had been worn a bit and the man was in motion, things were different. The kit parts would provide a belling out of nearly half a foot in scale, which is not appropriate for the sort of poses the figures are in. The relevant portions of the greatcoat's skirting comes in three parts (front left, front right, and a small center piece), and they are so consutructed that test fitting of the unit really is not possible --- you have to glue them to see what you have got. And this will be wide belling, and centers that do not happily align anywhere near where they ought to with the belt.

On the first of these I did, the soldier with rifle leveled, I cut broad 'vees' into the skirting and pressed these together, removing much of the belling. I then had to build up a bit on the top edge of the skirting, particularly on the center piece, which I did with half millimeter sheet. A good deal of CA gel was employed for filler and minor sculpting. The second one, the man with the rifle a'slant before his body, I piled into after the first was complete in an 'if I'd known then what I know now' spirit, and it went together much more quickly and easily. On this one, I simply fitted the left and right front pieces so there was little belling to start, and constructed my own center piece to fit, from two bits of custom trimmed half millimeter sheet. This proved much easier to bring off.

The second problem is accoutrements. Things like cartridge cases, haversacks, etc. are separate pieces. This has its points as a method, but the things are not molded in ways that accommodate their attachment to a body. I thinned cartridge cases down a bit, put a bit of hollow into their interior faces, and scraped some recess into the figure to receive them. The haversacks on the left hip, if treated as the kit would have you do, would ride ride out on the belling of the skirts as if that were so much sheet steel, which is simply ridiculous. I cut away portions of the skirting there to accommodate the haversacks.

There are some problems with the arms, and if I had done only the first figure I would be especially critical of their fit. The cuffs have no opening; the hands stick out from a flat solid surface. They have to be opened up.  On the first one, the man with leveled rifle, I opened the cuffs before dressing the sprue attachment, and went on to other things. When I got back to them, I mistook a small tab on the top of the shoulder for excess to be trimmed off. On the second figure, I noticed that this is part of a two-lobed shoulder tab which is part of the uniform, and serves as decent locating indicator, when matched to a similar tab on the shoulder of the torso piece. Without this piece for indicator, I had a devil of a time getting the arms on the first figure. I suspect I would have in any case, because I am pretty sure I did find the 'proper' mating of the surfaces, and it did not work; the angle of the rifle in the hands was very off, and the rifle would not clear the cartridge case on the right front. I wound up sawing a good crease in the crook of the right elbow, to the outside, and bent it so the forearm was both wider from the body, and bent a little more sharply at the elbow. The left arm I fitted to the figure so it gripped the rifle well, which left a sizeable gap to fill with CA gel (a good deal of this was required on the right arm to shoulder joint, too). The arms on the second figure, though, went on quite nicely, and accommodated the rifle well without much fuss. I replaced the tab I cut away on the first figure with a bit of square rod.


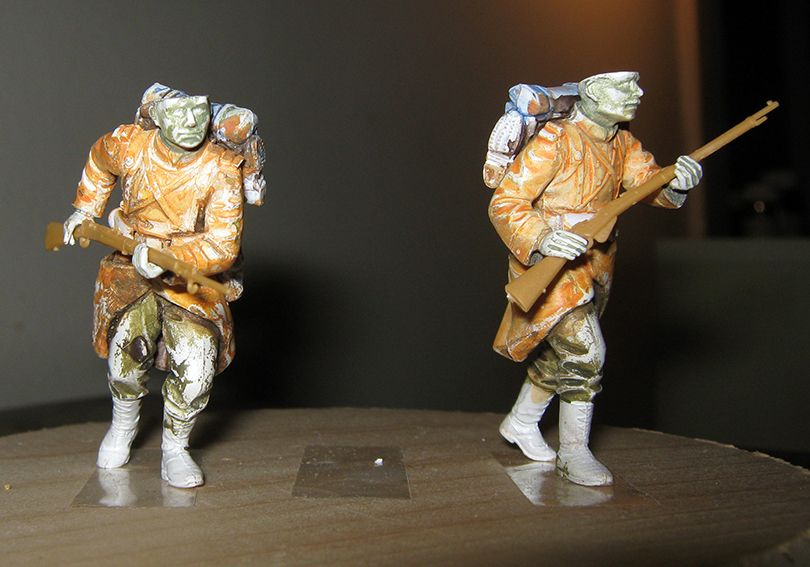
Here are the figures under primer, ready to begin painting.

On the off chance that a painting technique would work, I kept pretty close track of what I did from here on. In looking up information on how to paint flesh tones, I came upon a technique called 
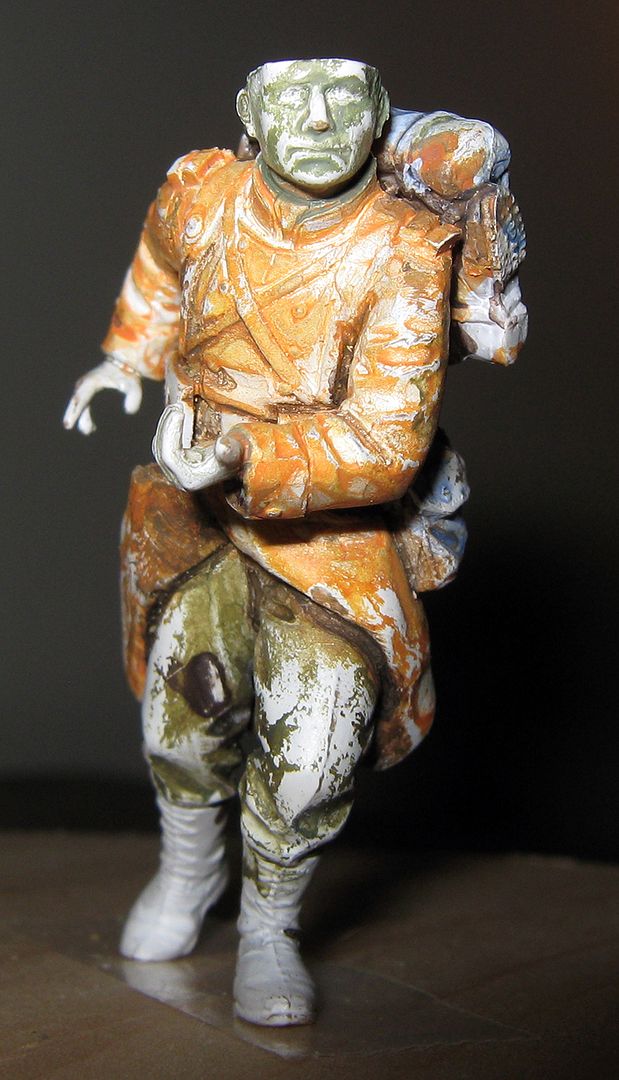
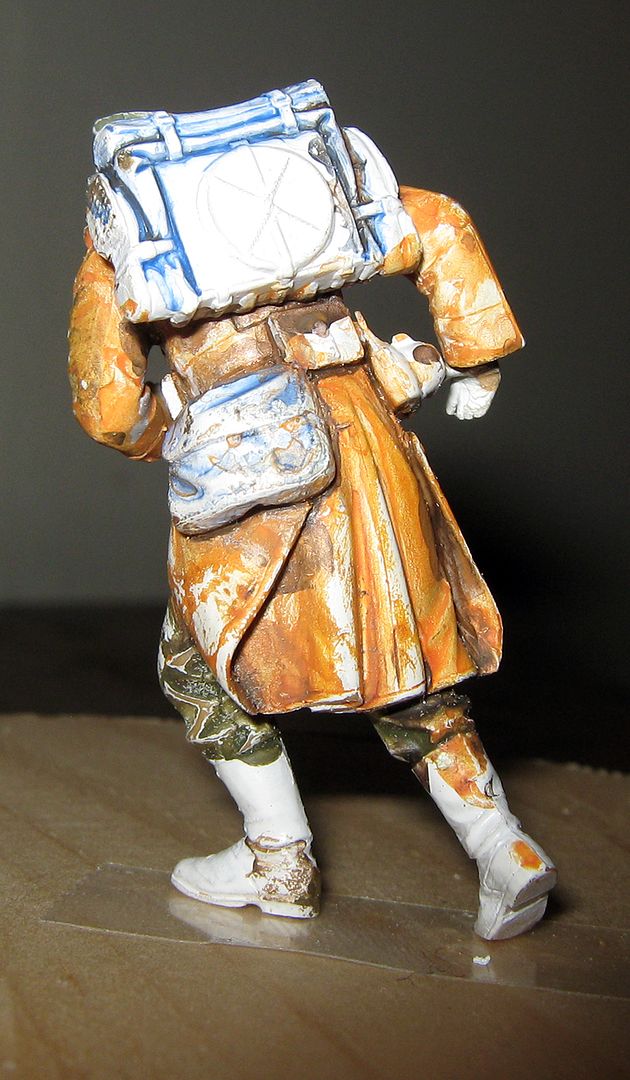
Verdaccio, also known as 'dead coloring', in which flesh areas are first painted a grey-green, after which the flesh tones are added. As this tone is dead opposite to the colors commonly employed for flesh, it gives some depth and shading almost automatically when the flesh tones are applied over it. Some experiment showed it did indeed give decent results. It occurred to me the same principle, if applied to other colors, might give good results, so I prepared the figures in a sort of 'color negative' by applying washes of opposite color over the primer, which concentrate in the recesses: orange where blue will go, dark green where red will go, blue where tan will go. And, of course, the 'dead color' grey-green on the face and hands (with the eyes scraped clean of the wash with a toothpick point). I think the technique worked well enough to persevere with, though it seems better suited to light colors than to dark ones.


(I expect I will be doing both on one base when completed)

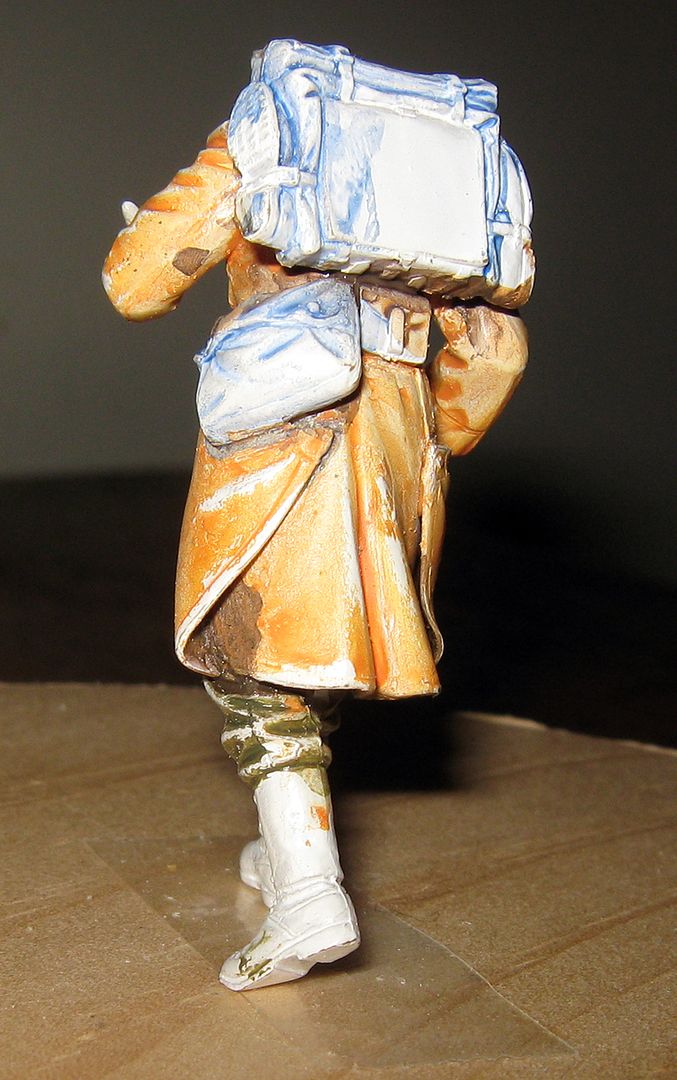
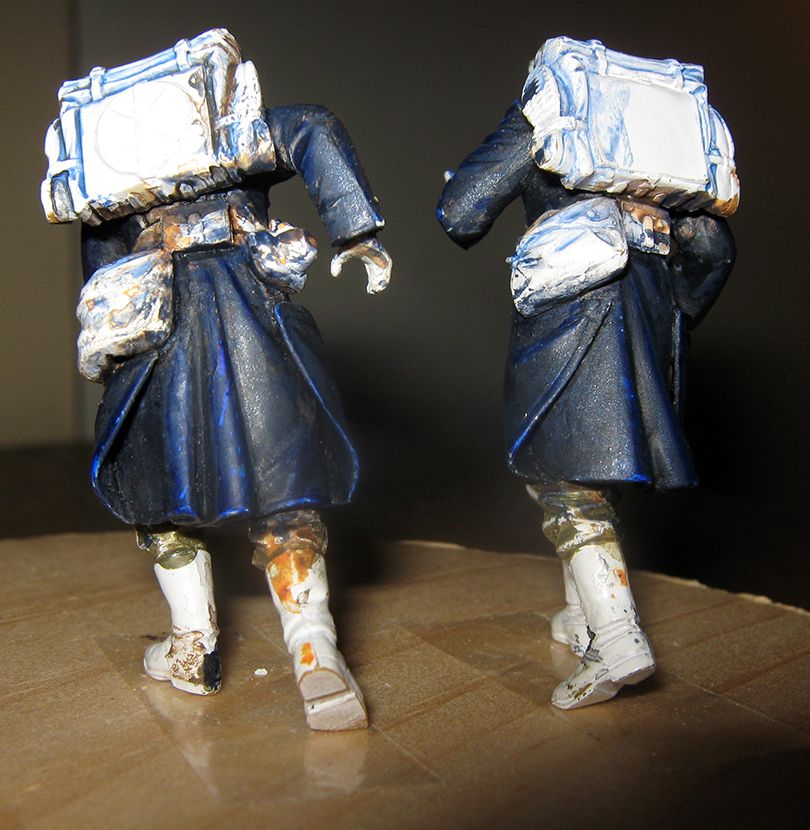
Here are the figures in their 'color negative' undercoat (a bit of burnt sienna was run into places on the coat that wold be particularly dark).

I began by doing the coats, the largest part of the figures. I am using artist's tube acrylics, thinned with water. The basic color here is ultramarine blue with  some black and a bit of white added. Here are the figures with just a coat of the basic color applied:


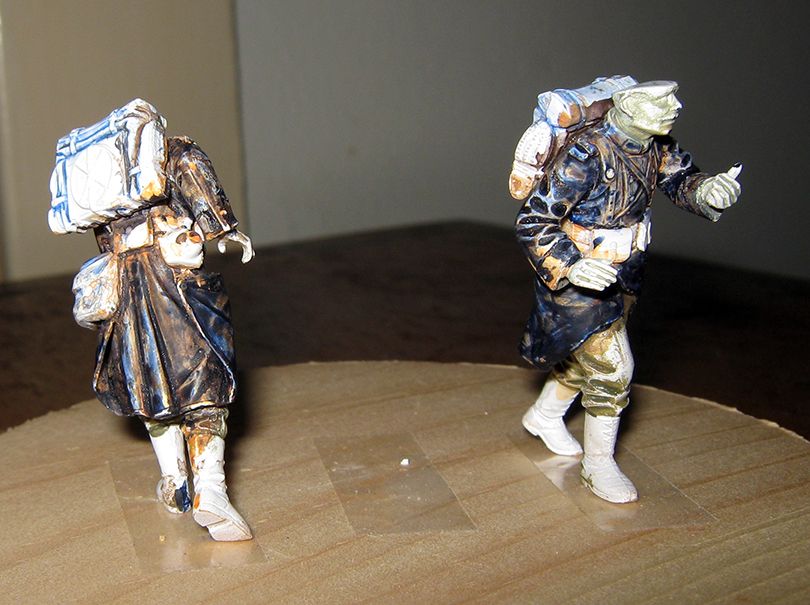
While this did give some deep shadow, I thought it needed more in many places, so here are the figures with some shadow (ultramarine plus black) put in:


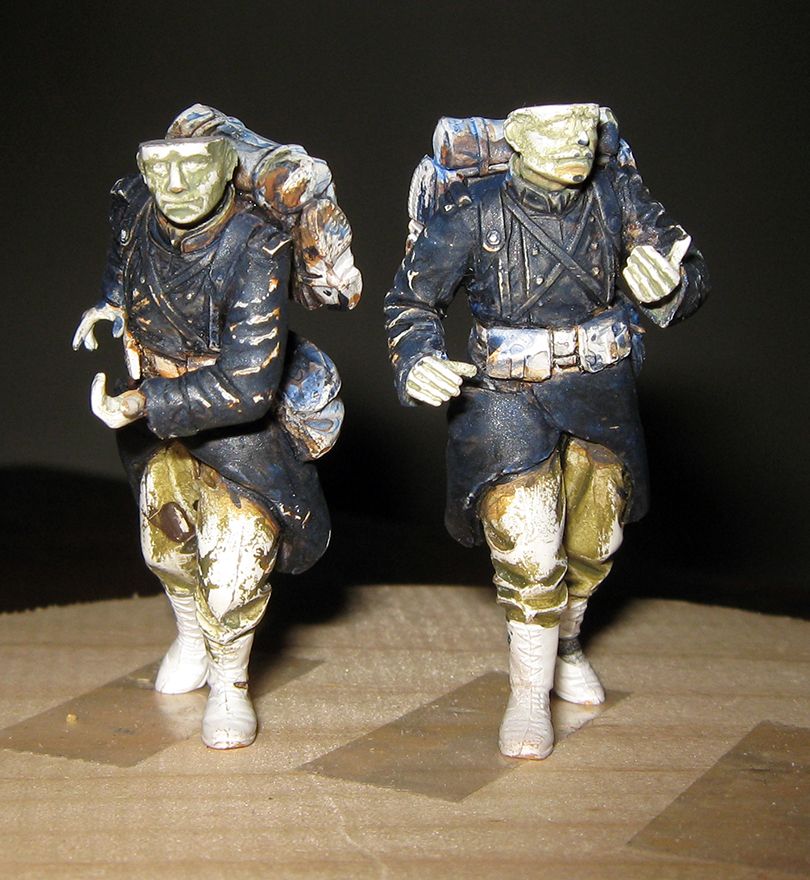
Here are the figures with highlights put in (straight ultramarine):


(somehow, the lens got a bit smudged, but this was not noticed till wife processed the pictures, and more paint was on by then...)

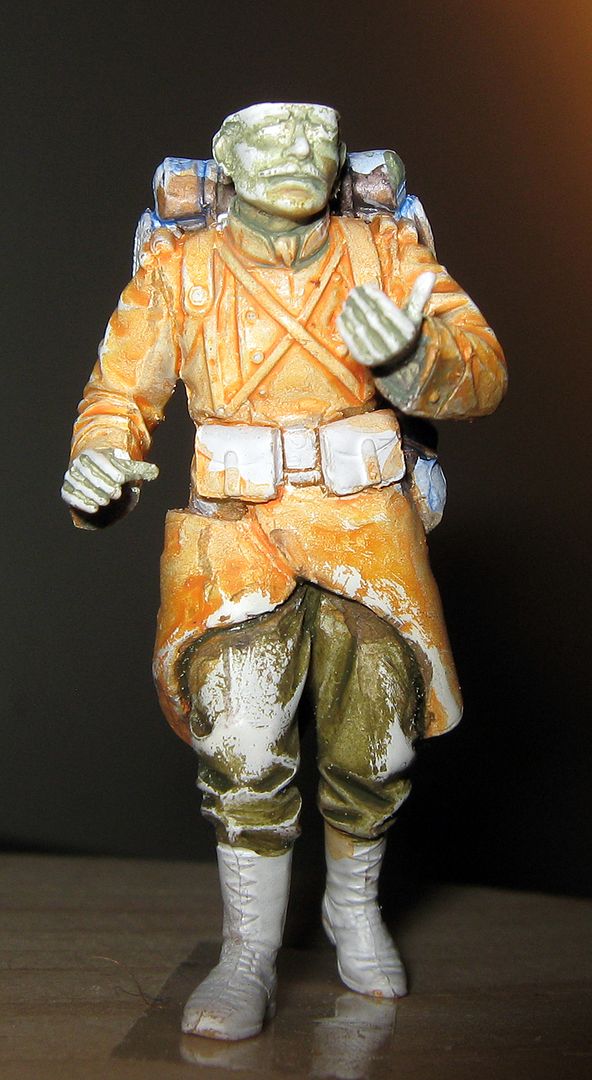
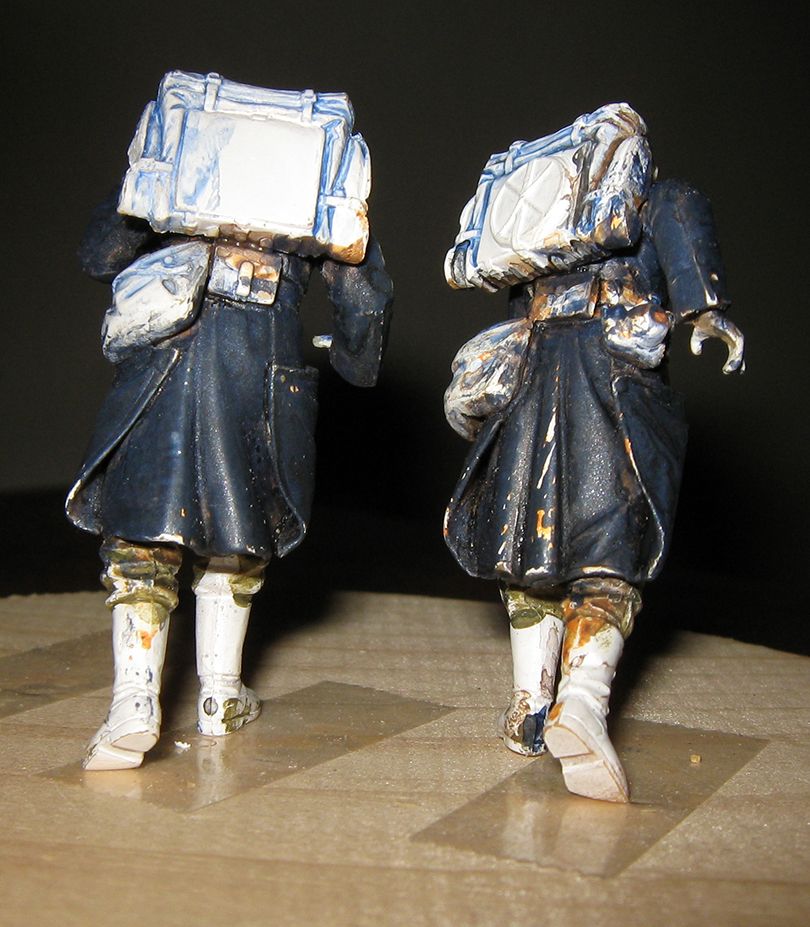
Here are the figures with all other basic colors put in:
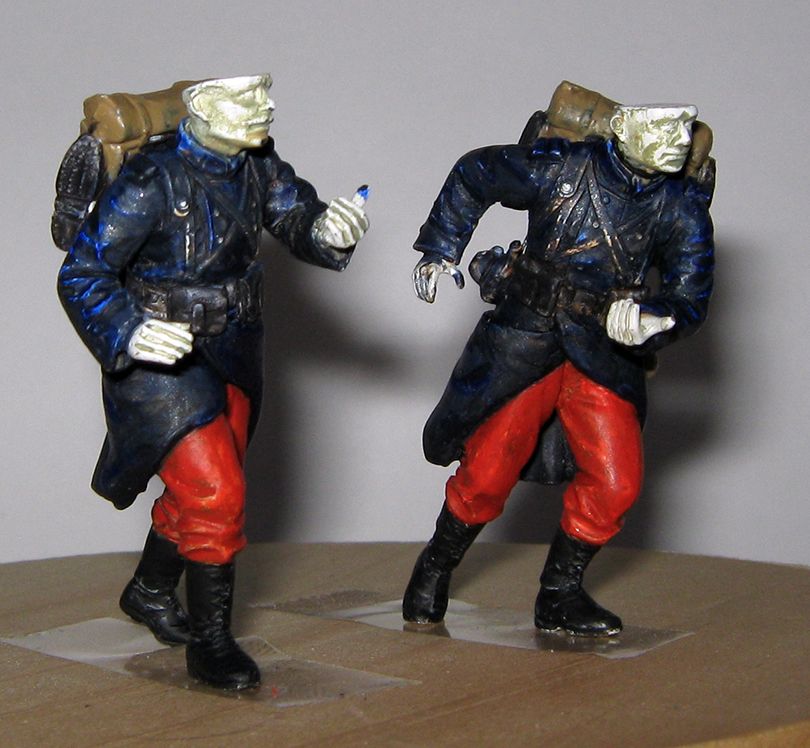
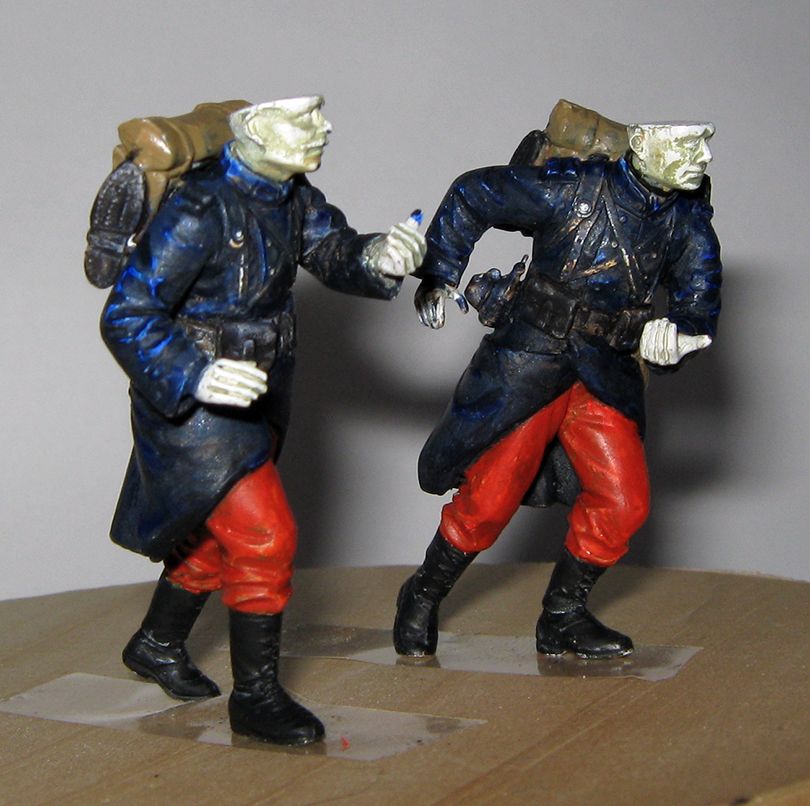
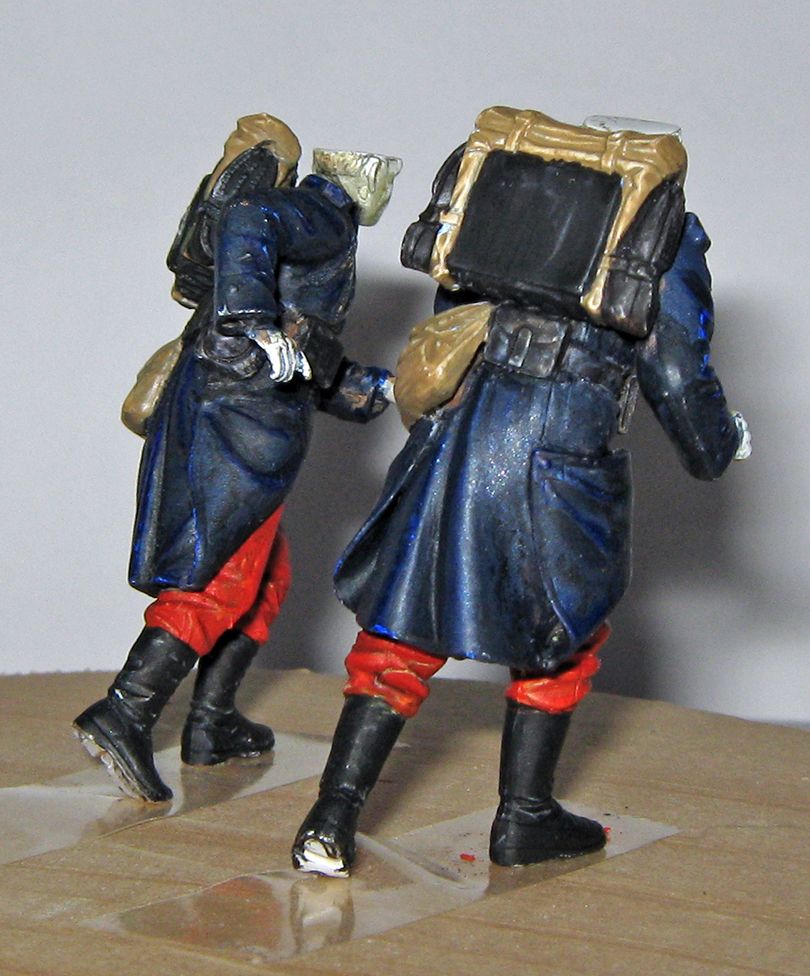


Les pantalon rouge 
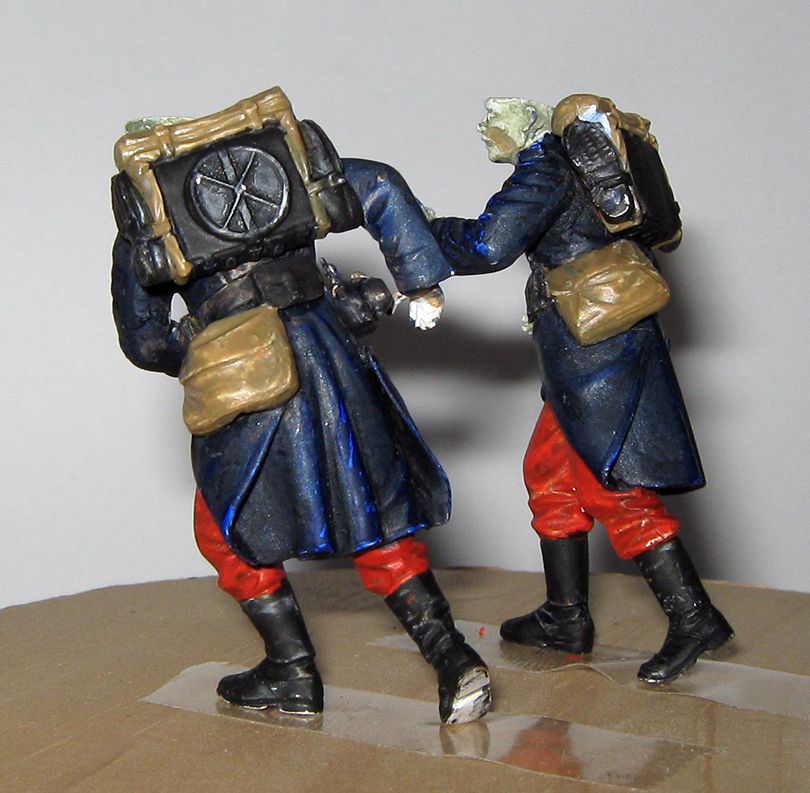
are done with cadmium red mixed with a little burnt sienna. The undercoating worked very well here, what you see is a single thin coat of the basic color. The haversacks and blankets are a PollyScale deck tan cut with a little ultramarine, the black is a Model Master black also cut with a little blue. This will let me use straight black for darkest areas, and most of the black surfaces will be tube acrylic Mars Black, which has a reddish cast. The undercoating worked well on the tan areas also --- I expect the technique is most useful when the opposite color is darker than the color to be applied.

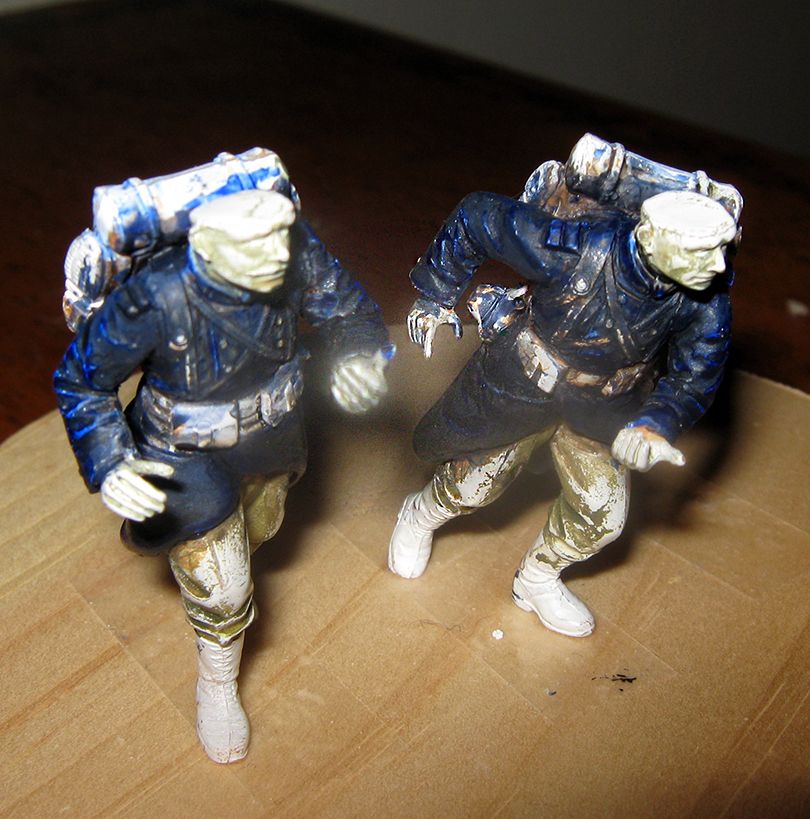
What is on now is only the basic coloring; there will be blending coats and considerable touchings up, and the various belts and straps have to be done, along with some detail painting. But this is pretty much what things will look like.

Next is the faces, and please, wish me luck on the eyes....
« Last Edit: February 01, 2016, 04:00:05 AM by Old Man »

Offline GAJouette

  • Hero Member
  • *****
  • Posts: 3579
  • " Beware of the Spanish Inquisition"
Re: Deux Soldats Français , Août 1914
« Reply #1 on: February 01, 2016, 04:09:55 AM »
 Old Man,
Impressive figure painting my old friend. Far far better than I'm capable of than for certain. I'm looking forward to seeing them completed. I'm always happy to see new WWI figures,but I wish someone would release them for the air services and related.
Highest Regards,
Gregory Jouette
" What Me Worry"

Offline Des

  • Administrator
  • Hero Member
  • ******
  • Posts: 9325
    • ww1aircraftmodels.com
Re: Deux Soldats Français , Août 1914
« Reply #2 on: February 01, 2016, 07:08:07 AM »
Thank you for the figure painting tutorial OM, I am lousy at painting figures so any information in this regard is extremely helpful, I have been taking notes and will continue to follow along with your excellent figure work.

Des.
Late Founder of ww1aircraftmodels.com and forum.ww1aircraftmodels.com

Offline Nigel Jackson

  • Hero Member
  • *****
  • Posts: 2608
Re: Deux Soldats Français , Août 1914
« Reply #3 on: February 01, 2016, 08:30:10 AM »
Good luck with this OM, I'm really interested in the subject matter.

Over the last year, I've been reading everything I can about the August 1914 campaign and then the early September battle of the Marne. It is an extraordinary story, involving amazing acts of individual heroism on both sides and, in the dark days of late August, staggeringly high losses. Despite the view of many that the France was all but beaten (medals were actually minted in Germany and sent to the front to be issued on the capture of Paris) some members of the German high command questioned why so relatively few prisoners and artillery pieces wre being taken - usual outcomes of crushing defeats on the battlefield. I was also much struck to read of the almost disbelieving respect that they developed for the French poilus who, having faced exhausting retreat and maybe at the point of mental and physical collapse, seemed able, almost as if at the flick of a switch, to launch the ferocious attacks which held and finally pushed their enemy back.

Best wishes
Nigel

Offline Old Man

  • Hero Member
  • *****
  • Posts: 600
Re: Deux Soldats Français , Août 1914
« Reply #4 on: February 01, 2016, 01:37:05 PM »
Thanks a lot, guys.

I am no great shakes as a figure painter, I promise. I have only done one since taking up modeling again, and it is a bit OT for here: an English officer in Afghanistan in the late 19th century. I did  a number in my early teens. There was a large hobby shop near where we lived, and I got an after-school job there. They carried a large range of 54mm lead figures (it was lead back then), and I found them fascinating. I remember basics of highlighting and shadow, but that is about all, and back then I suspect I was no good at all at eyes. Eyes in particular make or break a figure; if they are not done to standard, it does not much matter how well or otherwise the rest of the thing is, it won't look good.

The French infantry performed with tremendous valor in the opening stages of the Great War. I'm a Yank, and as such enjoy a good 'running like a Frenchman from a cap pistol' joke as well as the next fella, but I know it's bullshit. French casualties just in the first eight weeks ran to something close to one man in three of initial front-line strength, and they not only took it, they stood it and prevailed. It is an extraordinary feat, something not many armies anywhere have, or could, have managed.

Offline Steven Robson

  • Sr. Member
  • ****
  • Posts: 363
Re: Deux Soldats Français , Août 1914
« Reply #5 on: February 01, 2016, 02:45:34 PM »
Like this figure painting Old Man.

I haven't come across this technique of using the complementary colour as pre-shading.  I can see how this would work for the lighter, top colours and or oil paints.

Great stuff.

Steven
Make Otto your motto for lovely spoked wheels.

Offline Old Man

  • Hero Member
  • *****
  • Posts: 600
Re: Deux Soldats Français , Août 1914
« Reply #6 on: February 07, 2016, 03:12:49 AM »
Like this figure painting Old Man.

I haven't come across this technique of using the complementary colour as pre-shading.  I can see how this would work for the lighter, top colours and or oil paints.

Great stuff.

Steven

Except for the face,  never saw it anywhere else either, Sir. Seems somewhat promising, though. Glad you like it.

Offline Old Man

  • Hero Member
  • *****
  • Posts: 600
Re: Deux Soldats Français , Août 1914
« Reply #7 on: February 07, 2016, 03:23:57 AM »
Am in avoidance mode regarding the faces and eyes. So I went ahead and did the blending, etc., on the uniforms.

Here are some pictures of the result (indoor daylight with flash):


The greatcoats got a thin coat of the basic color over everything, then a dark wash, then highlights picked out with a paler version of the basic color, then another thin coat of the basic color.

On les pantelons rouge I reinforced shadow with cadmium red heavily cut with burnt sienna, highlights were picked out with straight cadmium red, and then the whole thing got a thin coat of the base color.

The shadows on haversacks and blankets were reinforced with the basic ot of bottle tan hit heavily with blue, highlights the tan with a bit of yellow, and the whole given a thin coat of the basic tan.

The black got a thin coat of Mars black cut with some of the dark tan (just because it was ready to hand).

I piled in and did the straps and belts, though I had not intended to at the session's start (it pt off the face and eyes, after all...). Touchings up where the strap color got on the greatcoat I did with the highlight color, to help the black stand out against the dark blue.

You might think I was now ready to proceed to the face and eyes, but you would be under-rating my powers of avoidance and putting off doing elements of a modeling project I suspect (or know) I will not enjoy.

What I did instead was turn to preparing a base for the two figures....

A large expanse of tall grass, of un-mown meadow gone to seed, has always seemed to me a proper base for figures, especially ones on campaign in temperate areas.

I have spent some time thinking how to achieve this look, and finally hit something.

It took about ten hours solid work, but here it is....


The grass area is three inches by two and a quarter inches (76mm x 57mm).

These are the materials and tools used:


Sisal twine, a green washable marker, white glue on a bit of foil, a bent-nose tweezers, and a scissors.

To make a tuft, hold the twine near its end. Withe your other hand, twirl the twine against the braid, tap it down on the end, rake at it with the tweezer point --- anything to separate the fibers a bit. Hit the loosened portion with the marker, several times. It does not have to be all green, just mostly green. Hold the fibers at the bottom of the colored portion with the tweezers. Cut along the tweezer grip with the scissors. Dip what protrudes from the tweezer in the glue. Put that on the base. Repeat (for something this area...) something on the order of three hundred times....

Here is what it looked like midway through....


The terrain effects are applied to a square of 1mm plastic sheet, painted dark green and covered with static grass, attached with white glue, as insurance against any gaps in tuft coverage. I marked where the figures will go before applying the static grass by putting black paint on the soles of the boots and touching them to the painted base. I started with a clump in the center, and then went at it like a jigsaw puzzle, doing corners and working along the edges. For the pictures at this stage, I put a few stand-alone tufts in, to show what the individual elements look like. You can see single tufts sort of flanking the central clump in the picture above.

Here are a couple of pictures showing single tufts up closer:


The sheet bearing the grass fits into the recess in the base (which was a novelty miniature chalkboard in a craft store when it started life...). The fit is snug, but loose enough it can be prised out with a knife-point.

I laying in the tufts, I was careful to leave the 'footprints' open, and to lay tufts pressed down where the men's feat would have gone.

Here are a couple of shots of the base with the figures in their positions (taken about four in the morning with flash when the thing was finally done...)....


I confess I am running out of things to employ to put off doing the face and eyes.

Probably will have to start on my Nieuport 27 if things are to be put off further....

Offline Des

  • Administrator
  • Hero Member
  • ******
  • Posts: 9325
    • ww1aircraftmodels.com
Re: Deux Soldats Français , Août 1914
« Reply #8 on: February 07, 2016, 06:25:03 AM »
The uniforms turned out looking excellent, the technique you used worked extremely well. I like your idea for making the grass base and with the figures it looks very realistic, now, on with the faces  ;)

Des.
Late Founder of ww1aircraftmodels.com and forum.ww1aircraftmodels.com

Offline RAGIII

  • Hero Member
  • *****
  • Posts: 18793
Re: Deux Soldats Français , Août 1914
« Reply #9 on: February 07, 2016, 10:12:42 PM »
Your uniform colors turned out great! Interesting technique and one worth trying. Really nice work on that grass. I don't think I would have the patience and determination required  :(
RAGIII
"A man has to know his limitations": Harry Callahan

"Don't slop it on" Lynda Geisler

Offline Old Man

  • Hero Member
  • *****
  • Posts: 600
Re: Deux Soldats Français , Août 1914
« Reply #10 on: February 11, 2016, 09:55:07 AM »
Thanks for the kind comments, guys. I am doing my best, but this is a very different art than aeroplanes.

I have finally piled on in on the eyes and faces, and here is what I have so far....


These pictures were taken in indoor sunlight, with some Kleenex over the flash to soften the light a bit; it seems to give a result closer to what these look like to the eye in a well-lit room.

A couple of things I did not notice till looking at the pictures, and which I have fixed since they were taken:

The right eye of the left-hand figure lost its lower lid lining; I have put it back in, to about the standard of the rest, and also brought back the white between the iris/pupil and the nose on that eye.

The final color coat on the right-hand figure left something looking a stark line on the right cheek; I have blended that better.

I neglected the sides of the necks, which shows starkly, and that I have addressed.

I tried to get some color for the iris, but seem to have failed: I wanted the fellow without a mustache to have hazel eyes, and te fellow with a mustache to have brown eyes. I tried using transparent green and browns and yellows over the white of the eyes, but it does not seem to have worked. I picked up washable marker color with Future, like I do for wood and metal tinting and some other things.

I first gave the eyes a wash of dark brown for the 'lid lines', put in the 'iris' as a line extending past the lids, then painted up to the 'lid lines' with a darkish red brown, gone over with paler flesh-tones. I mixed the flesh colors out of white, cadmium red, cadmium yellow, burnt sienna, and ultramarine blue, getting a large pool with various shades for basic, shade, and highlight. Final was a couple of thin coats of a yellow ocher (on the dark side, called 'bronze yellow' by the maker, Liquitex), to give a sense of both olive complexion and tan from summer sun. The hands just got the ocher as a place-holder; I expect I will be bending fingers over the rifles at the end, and figure that will ruin and paint work.

I did some of the eye-work with sharpened toothpicks and barely thinned tube paint. I don't thing the pros recommend such, but it is something I know, for tiny dots of color, and also for scraping off excess. It did seem to work somewhat in policing the 'iris/pupil' centers, especially since the primer under everything is pretty tough and basically an off white all on its own. One thing you do not want to do is use straight white for the whites of the eyes, it should be anything from a pale grey to a very pale flesh (a sort of combination of scale effect and the fact that the little blood vessels in the eye do tint the whites a bit, and that the eyes are by design of the brow ridges, usually in a bit of shadow).

I am going to give this a couple of days un-looked at to clear my eyes, and then see if any more work is in order. I have this posted up on a miniatures site called Planet Figure, and am hoping for some hints. It is a very friendly place, and worth rummaging around in for illustrations of techniques, though nowadays it seems most people do work with figures larger than 1/35 or 1/32 (54mm), and not everything readily scales down....

Next phase will be putting in buttons and such, putting on the hats (once I am sure of the face and eyes), and the rifles....

So far, this has really been pretty fun, an enjoyable break from flying machines....

Offline Edo

  • Hero Member
  • *****
  • Posts: 702
Re: Deux Soldats Français , Août 1914
« Reply #11 on: February 11, 2016, 06:07:48 PM »
wow!
those figures look great!
I have to read your post carefully to try to learn something before setting to the task of painting my ICM German troopers!
thank you for sharing
Edo

Offline Old Man

  • Hero Member
  • *****
  • Posts: 600
Re: Deux Soldats Français , Août 1914
« Reply #12 on: February 24, 2016, 10:50:54 AM »
wow!
those figures look great!
I have to read your post carefully to try to learn something before setting to the task of painting my ICM German troopers!
thank you for sharing
Edo

Thank you, Sir.

I am no great shakes as a figure painter, though. It is a very different art than aeroplanes....

Offline Old Man

  • Hero Member
  • *****
  • Posts: 600
Re: Deux Soldats Français , Août 1914
« Reply #13 on: February 24, 2016, 11:03:49 AM »
Decided I was not happy with the eyes, and had over-bronzed the skin. So I stripped color off the eyes with a toothpick (down to the tough white primer), and re-did them. I used sage green paint for irises on the clean-shaven figure, and dark brown for irises on the mustachioed figure. I did little dots for pupil with a toothpick. A lot of futzing about was involved, including removing bits of paint as often as adding them. I went over the face with various flesh tones, mixed as above in a large 'pool' of varying shades. I tried to keep it thin, a glaze rather than a coat. I also put on the buttons, and belt buckles, and the red tabs on the color....

The first three pictures are in outdoor sunlight, but not direct sunlight....


The next three are in outdoor sunlight, but not direct sunlight, with flash....


If i decide I am satisfied with the eyes in a couple of days, I will put on the hats, do some final futzing about, and do the rifles to complete the project....

Offline coyotemagic

  • Hero Member
  • *****
  • Posts: 7710
  • "Here's to not buggering it up." -Winston Chuchill
    • My Models
Re: Deux Soldats Français , Août 1914
« Reply #14 on: February 24, 2016, 01:01:22 PM »
I think the eyes look fantastic, OM!  In fact, both figures, overall, are superb.
Cheers,
Bud
"All men dream: but not equally. Those who dream in the dark recesses of the night awake in the day to find all was vanity. But the dreamers of day are dangerous men, for they may act their dreams with open eyes, and make it possible." -T. E. Lawrence