Author Topic: Roden Fokker Dr.1 1/32  (Read 2074 times)

Dharma66

  • Guest
Roden Fokker Dr.1 1/32
« on: April 24, 2015, 07:12:37 AM »
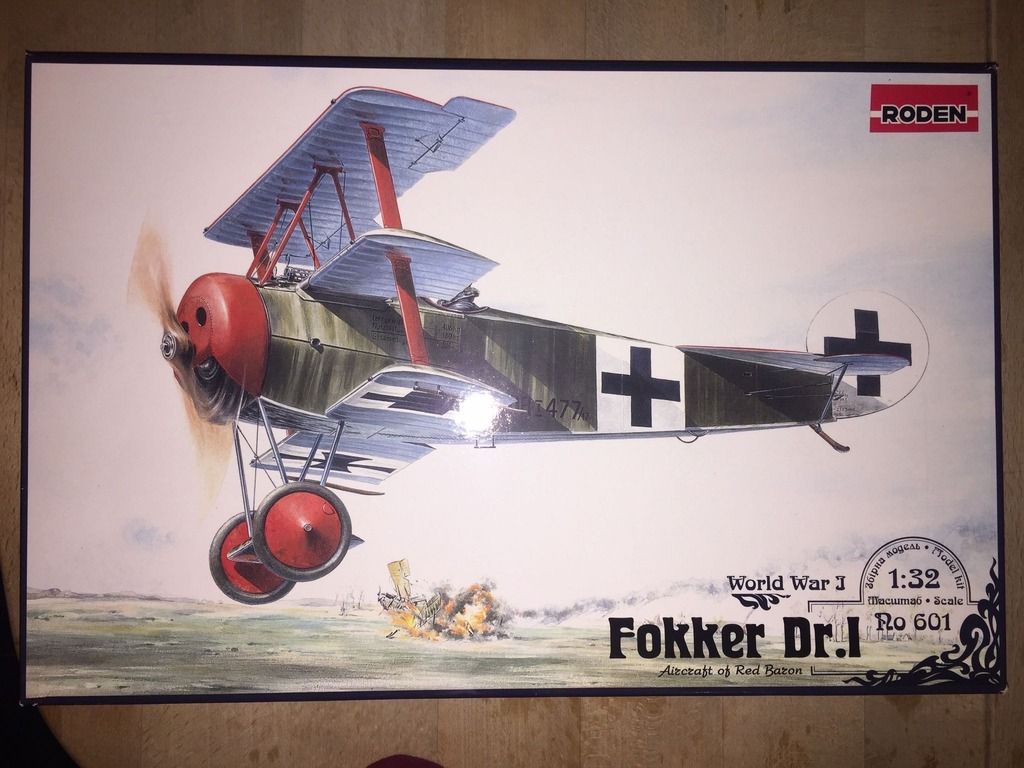
Taking the advice of the 'what kit is right for me' page, being basically a beginner, I'm going to have a go at this:


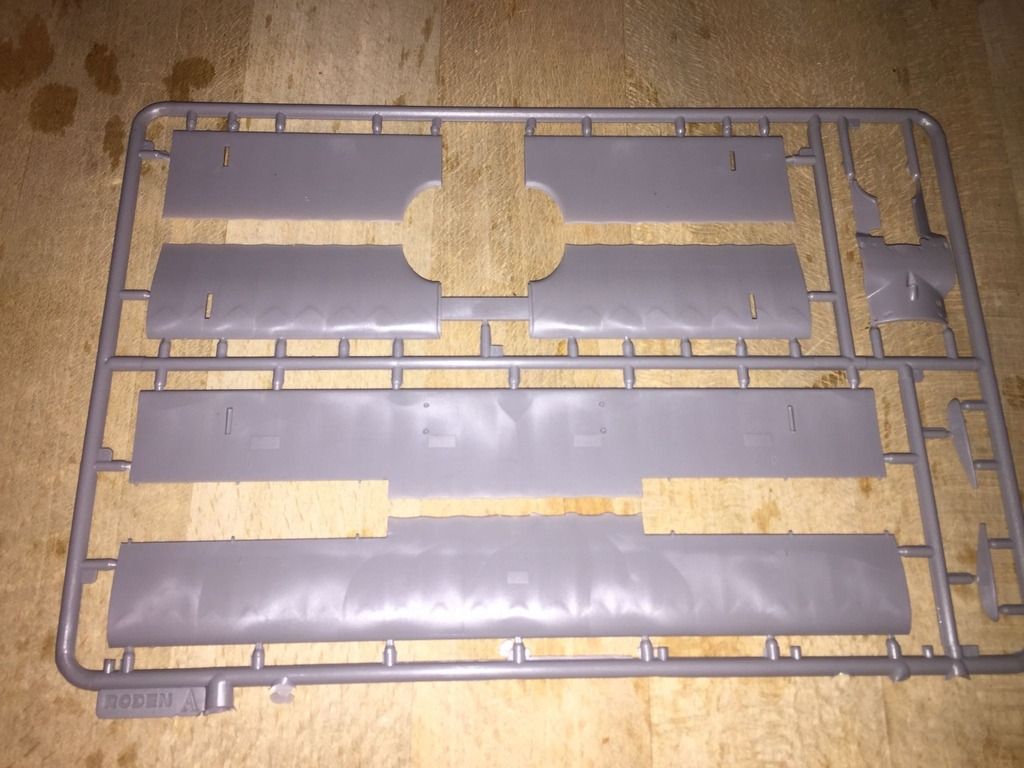
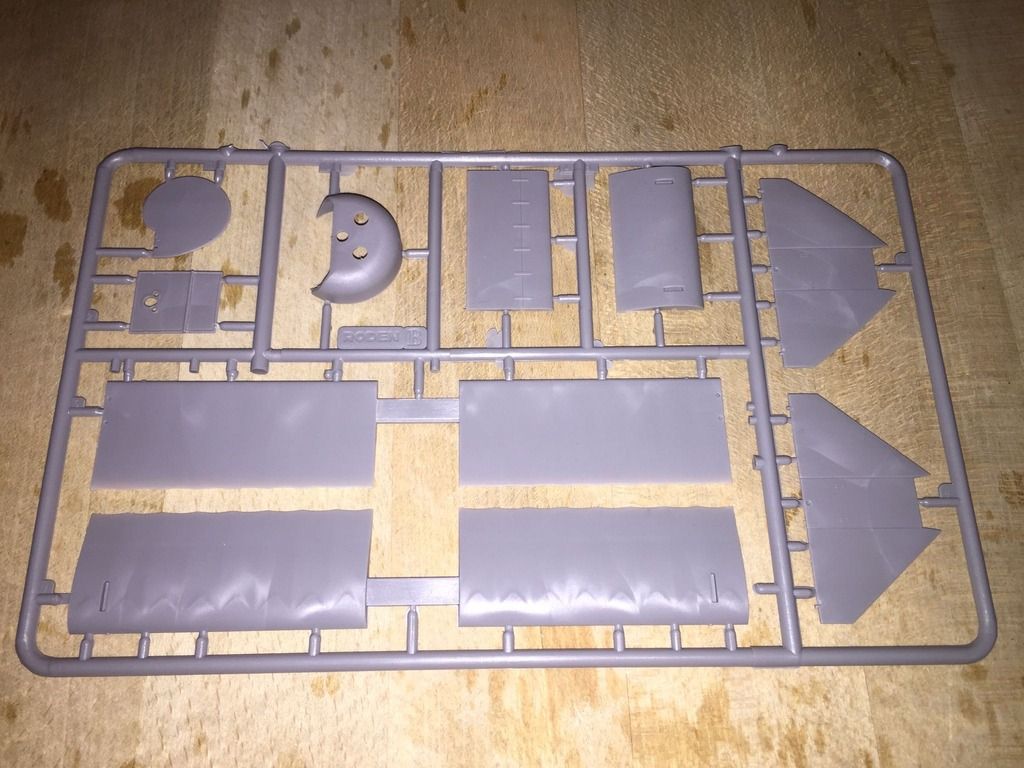
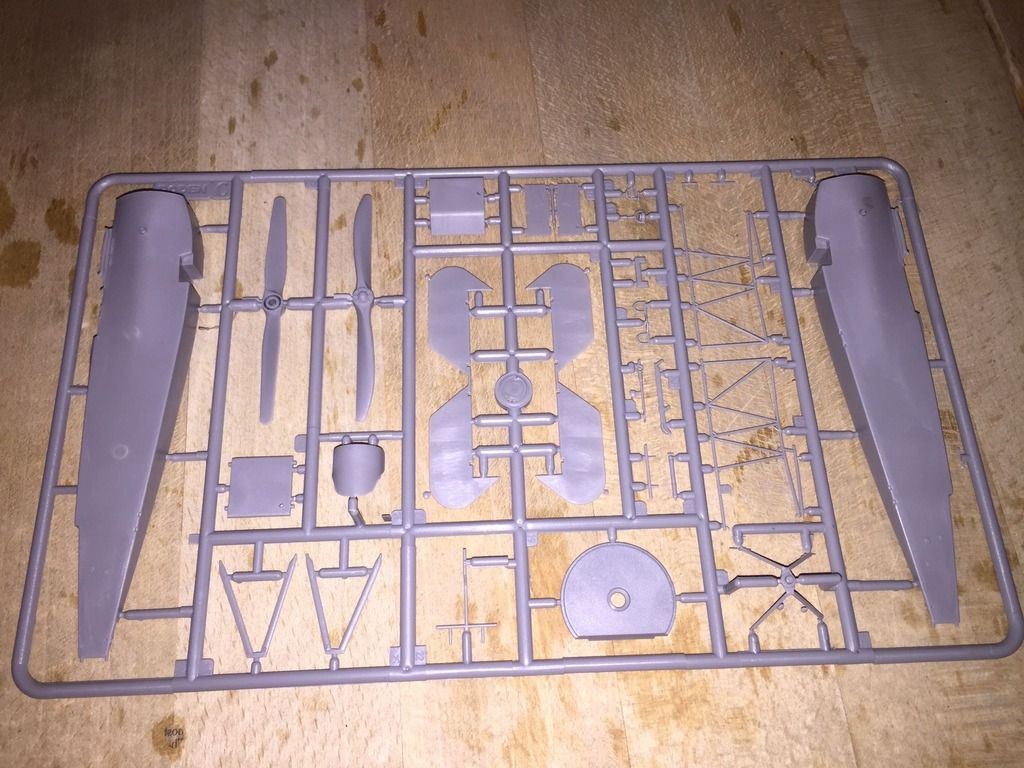
There are six sprues in the kit, labelled A through E, with two of sprue D. Sadly, there is a bit of an issue with these sprues in my kit, as you'll see shortly, but here they all are:

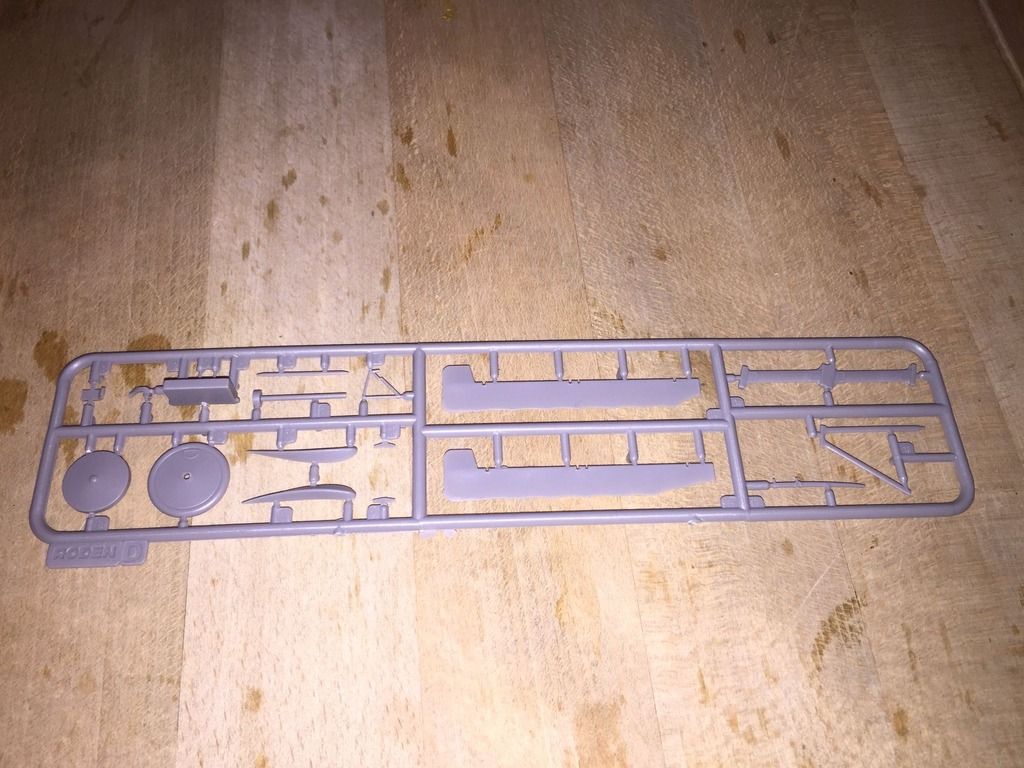
Sprue A contains upper and middle wings, plus what appears to be a piece of fuselage, and a couple of wingtips:


Sprue B has the lower wing, axle wing (please forgive any incorrect terminology - it's my first ever venture in early flight, both as a modeller and even as a subject of study), cowl, rudder, tailplane and a square bit I haven't yet identified:


Sprue C has fuselage, bracing for the cockpit area, props, ailerons and a few other bits and pieces:


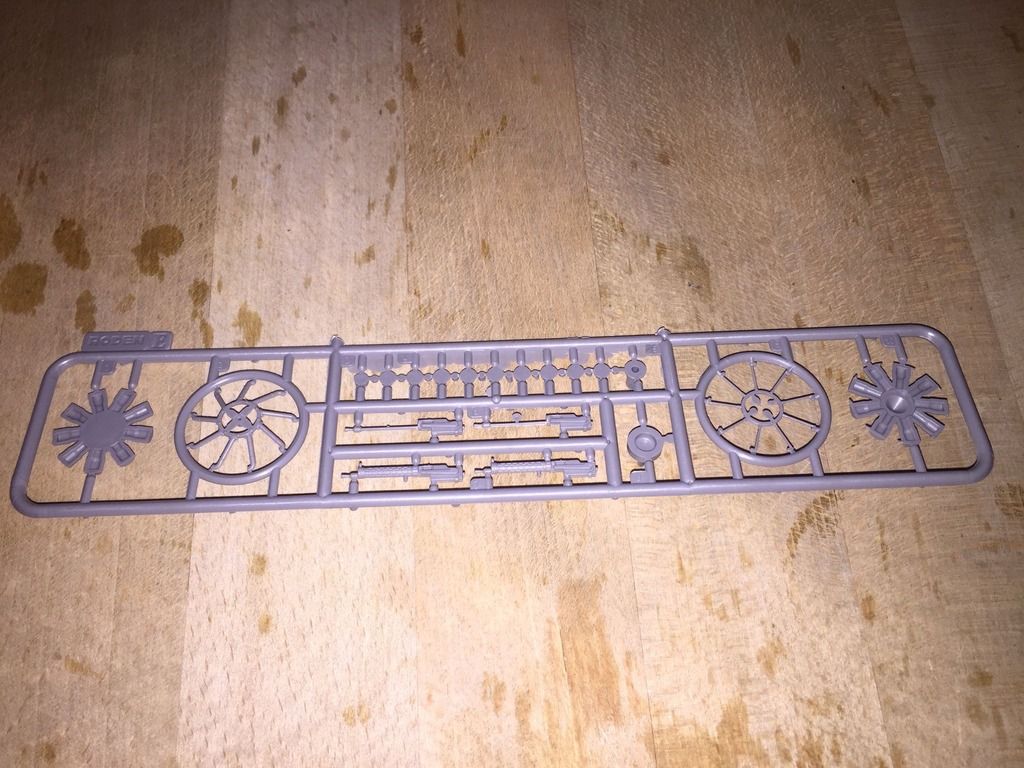
Sprue D has wheels, more ailerons (?), seat supports, and various small parts:


Sprue E has engine and guns. Rather nicely, two versions of the guns are provided, one without heat diffusers, which makes using PE parts easier (I hope).


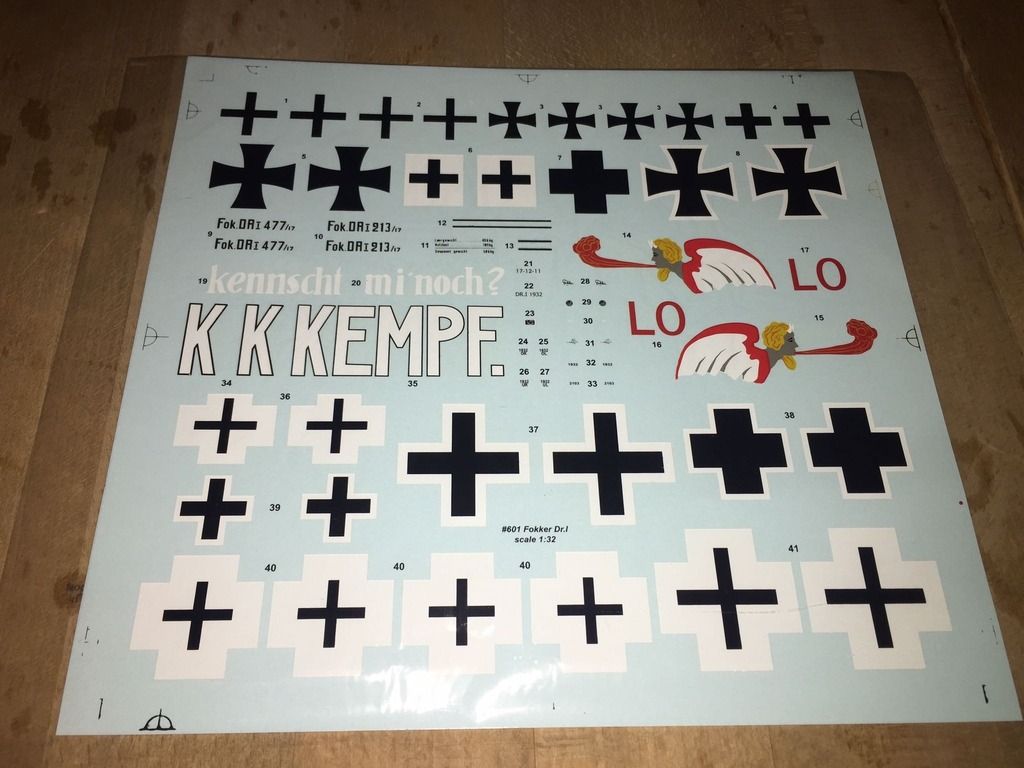
Here are the decals as provided with the kit:


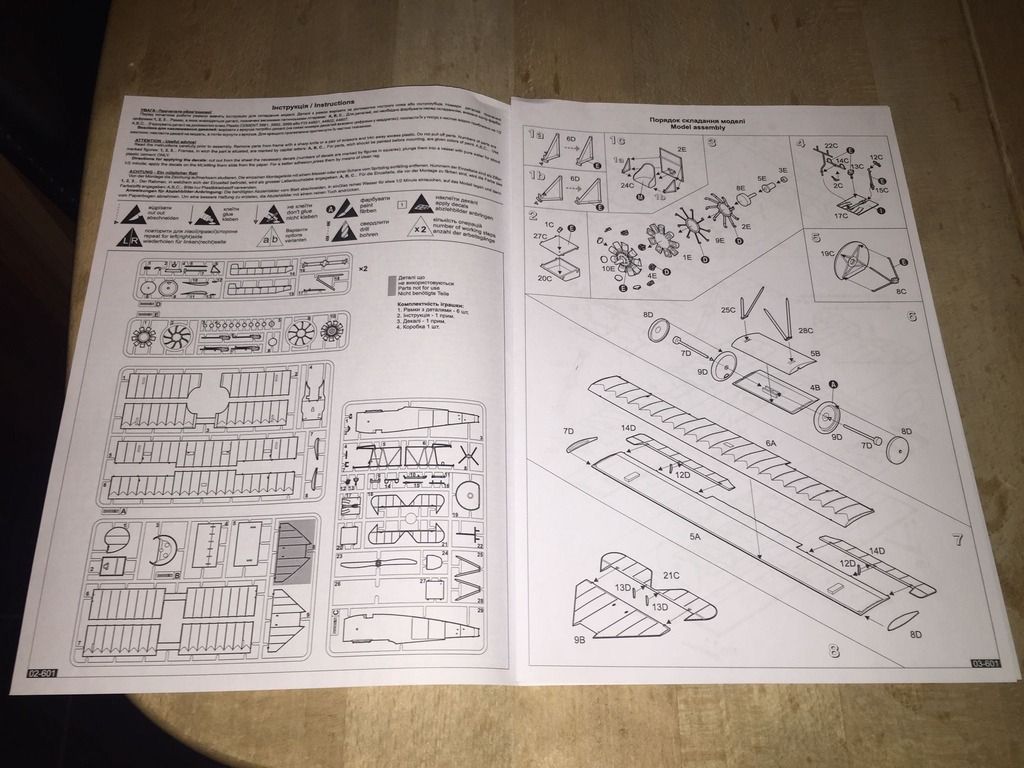
And a sample page from the instructions:


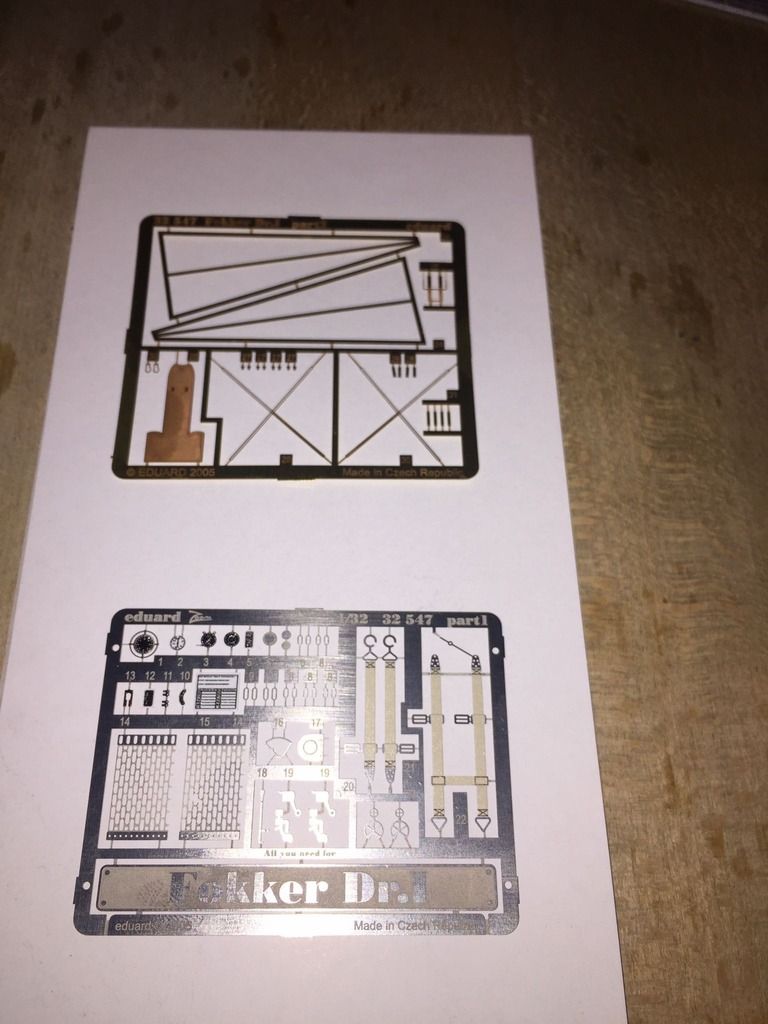
I've also got an Eduard PE set that's matched to this kit:


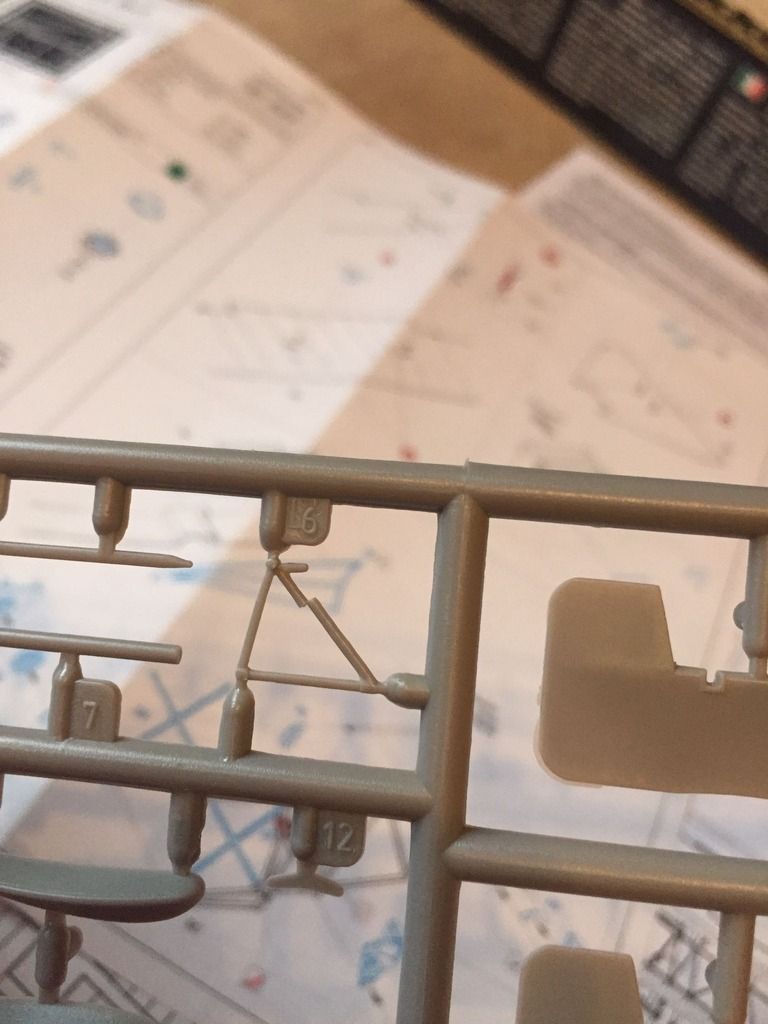
Now, the issues with both sprues D...

The very first step of instructions in the kit are to build the seat support and seat, so the very first parts I looked at were these...


Which is made all the more frustrating by the fact that, it being so long since I did any modelling, I have absolutely no scrap, and no 'store cupboard ingredients', such as ~1mm plastic rod...

Given that both sprues have the same fault in the precise same position, it seems there may be a problem with the mould or the process for this sprue.

Other than this, I'm quite happy with the overall quality of parts. Other than the well known issue with tailplane, I can't comment as to accuracy - much more experienced people can do that. There are some ejector marks, but they all seem to be well out of the way of any visible areas. I'm not sure if there is some sinkage in the props, or if they are just of an aerofoil profile I'm not used, being much earlier than I've seen before...

Now to the first of many questions I'm sure I'll be asking of the experienced guys on here...Given my local modelling shop has sadly closed in recent years, where is a good place (sadly, preferably online) where I can stock up on basics, such as plastic rod in various sizes and profiles, brass tube, plastic card etc?

Thanks for looking. Please don't expect great things of this build. I'll be amazed if I don't muss up something badly along the way...

Offline RAGIII

  • Hero Member
  • *****
  • Posts: 19694
Re: Roden Fokker Dr.1 1/32
« Reply #1 on: April 24, 2015, 09:06:35 AM »
I am looking forward to your progress and will help as much as I can if asked. As for the seat structure, what a shame. I had no problems with the two I built or the Encore version in the stash. No plastic rod, well you could do a very slow pull of stretched sprue. I have had success doing this in the past.
RAGIII
"A man has to know his limitations": Harry Callahan

"Don't slop it on" Lynda Geisler

Offline Alexis

  • Hero Member
  • *****
  • Posts: 8092
  • Love the self
Re: Roden Fokker Dr.1 1/32
« Reply #2 on: April 24, 2015, 09:26:56 AM »
Haven't built this kit so can't aid in the construction for any faults .

Stretched sprue works very well for replacing rod . I use this for replacing push rods on engines when I'm out of stock . Still takes me a few tries too get the right diameter .

Looking forward to your progress .


Terri
Hurra ! , Ich Leben Noch
Body and life is a vessel we use to travel the planet . Femininity is the gift , The miracle comes from what we do with it .

Offline Des

  • Administrator
  • Hero Member
  • ******
  • Posts: 9325
    • ww1aircraftmodels.com
Re: Roden Fokker Dr.1 1/32
« Reply #3 on: April 24, 2015, 09:40:02 AM »
Great to see that you have made a start on this kit Phil, I'm sure that you will have a good time putting this model together, it will be a great learning curve for you. Please feel free to ask any questions you may have during your build as there are plenty of very talented members here who are all willing to share their knowledge.

Evergreen produce a huge variety of styrene strips and sheets which are available from most good model shops online. For brass tube I use Griffon and get mine from Lucky Model online but you can also get a good selection from Albion Alloys again available from most good Model shops, try Hannants in the UK.

Des.
« Last Edit: April 24, 2015, 09:44:46 AM by Des »
Late Founder of ww1aircraftmodels.com and forum.ww1aircraftmodels.com

Offline uncletony

  • Hero Member
  • *****
  • Posts: 4388
    • Aircraft In Pixels
Re: Roden Fokker Dr.1 1/32
« Reply #4 on: April 24, 2015, 09:40:41 AM »
If you happen to be in North America (though I think maybe not) Sprue Brothers is a great source for all the basic tools and supplies.

http://spruebrothers.com

Offline BigBlue

  • Hero Member
  • *****
  • Posts: 640
Re: Roden Fokker Dr.1 1/32
« Reply #5 on: April 24, 2015, 11:21:42 AM »
You may be able to repair those, especially since they will be attached to the seat, not bearing any significant weight, and largely out of sight.  I'd try a little C/A to put them back together, then handle them carefully until you get the seat assembled. I've been in the same boat and managed to get to shore.

I'm looking forward to your build.  Good luck and welcome to the forums,

Chris

Offline KitRookie37

  • Sr. Member
  • ****
  • Posts: 489
Re: Roden Fokker Dr.1 1/32
« Reply #6 on: May 01, 2015, 03:34:57 PM »
Hello gentlemen,
I'll follow this build.
Best regards.
Alain.
Use the force, Luke.

Offline Ian from Doncaster

  • Hero Member
  • *****
  • Posts: 1164
Re: Roden Fokker Dr.1 1/32
« Reply #7 on: May 01, 2015, 05:05:36 PM »
Great model to choose - another Dr1 - delighted to see this build.

As for the seat support issues, these look to be clean breaks, so may repair satisfactorily?  These parts will eventually be fixed to each side of the seat, and the seat itself to the "unidentified" square part you point out on Sprue B, which also attaches to the supports.  Therefore the broken parts themselves will not bear any weight etc.

I would also check references in the instructions and elsewhere, but the lap belts may perhaps be positioned to hiode the repairs?