Author Topic: Revell Fokker Dr1 in 1:48 MvR  (Read 4970 times)

Offline Ian from Doncaster

  • Hero Member
  • *****
  • Posts: 1164
Revell Fokker Dr1 in 1:48 MvR
« on: February 25, 2015, 11:58:58 PM »


Having finished (finally) the Revell VW Samba Bus a few days ago, I looked at my stash for the next build.  I haven't got (yet) a model for the main GB, and couldn't decide (yet) what scheme to do with my WNW DV, in order to join the mini group build.

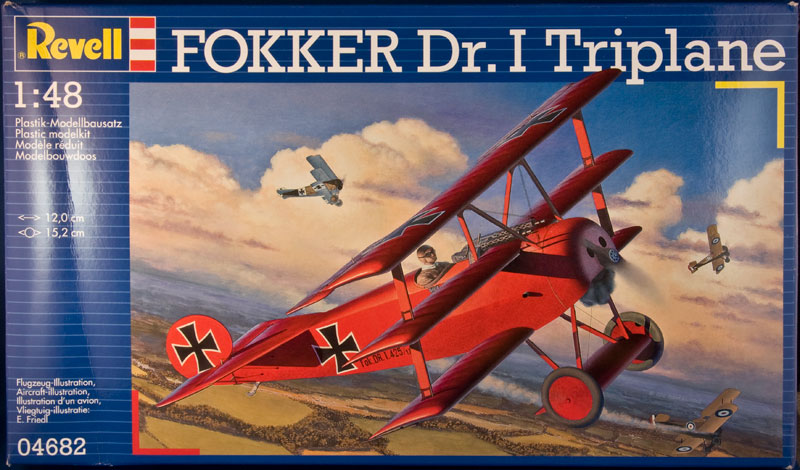
Therefore I opted for Revell's Dr1 in 1:48.  This is the one that is a re-boxed Eduard molding, but in bright red plastic!  I have the Eduard Weekend version and the extra PE set, but will use those at some other time.

I will do this one OOB bar the rigging.  As much as it seems corny to build this kit in the MvR scheme, it appears to me that folks avoid doing so, in the belief that everyone does.  I have read several "debates" on the markings for this particular aircraft, ie when the cross style changed, the interior colour, was the red paint applied at the factory or over the original streaking etc etc.

I decided to avoid falling into the trap of trying to get a truly historically accurate model, as I was getting a headache with the inconclusive research - what the heck, it is only a model that will sit on my shelf!  I'll do the all red scheme, and probably darken the final coat with some black weathering powder to avoid a toy-like finish.

Pics may be few and far between as I am in between cameras and laptops, but will show progress when I can,  I have cut out some of the major components to do a bit of test fitting ie fuselage halves, mid and lower wing etc and with minimal fettling all should be fine.  So far the components exhibit a little flash, but not so much that can't be cleaned up with a sharp blade.

I am expecting this to be a relatively quick assembly.

Offline Modelnut

  • Full Member
  • ***
  • Posts: 228
Re: Revell Fokker Dr1 in 1:48 MvR
« Reply #1 on: February 26, 2015, 09:17:53 AM »
I say go for the MVR scheme. I debated a long time before adding the all red plane to my shelf. I have Lothar 's yellow plane so his brother HAD to be wingman.

Offline petrov27

  • Hero Member
  • *****
  • Posts: 1085
Re: Revell Fokker Dr1 in 1:48 MvR
« Reply #2 on: February 26, 2015, 09:36:20 AM »
Fantastic - will be following this one! I actually have the same build of MvR's tripe underway in 1/32 with many of the same thoughts you mention about how to do it
-Patrick

Offline Alexis

  • Hero Member
  • *****
  • Posts: 8092
  • Love the self
Re: Revell Fokker Dr1 in 1:48 MvR
« Reply #3 on: February 26, 2015, 12:38:15 PM »
Looking forward to your build Ian  :)


Terri
Hurra ! , Ich Leben Noch
Body and life is a vessel we use to travel the planet . Femininity is the gift , The miracle comes from what we do with it .

Offline Naimbs

  • Sr. Member
  • ****
  • Posts: 297
Re: Revell Fokker Dr1 in 1:48 MvR
« Reply #4 on: February 26, 2015, 05:53:10 PM »
A Triplane! Yes!!!!  ;D!

Offline Ian from Doncaster

  • Hero Member
  • *****
  • Posts: 1164
Re: Revell Fokker Dr1 in 1:48 MvR
« Reply #5 on: February 26, 2015, 07:35:09 PM »
Thanks for the comments folks :)  When I do the Eduard version I'll pick a different scheme.

A little progress last night.  I painted the interior of the fuselage halves, initially using a white primer spray.  The inside of the linen received a light tan coat, and the wooden panel was done with several brown pencil shades covered in a satin mid-brown wash.  The metal framework has been primed with Mr Metal Aluminium - this brushes on very thin and retains all the details so makes an excellent primer for "metal" components that are painted later.  I'll choose a suitable blue/green/grey colour to wash over for the framework.  Applying a thin top coat allows some of the metal effect to come through.  I primed the engine components and the cowling in the same way.

The Revell kit has no instrument decals - not even for the instrument (is it a fuel gauge?) on the bar between the guns.  Fortunately, the PE set I have for the Eduard version has some parts duplicated, one of them being this gauge.  I will use a spare instrument decal from a WNW sheet for the compass face - it isn't a compass decal but will be so small as to make no difference.  I also have some spare PE seatbelts from the Mirage Halberstadt, not exactly identical to the set on the Eduard PE set, but close enough to make little difference.

So much for OOB then!  I may even look to do control rigging in the cockpit and engine spark leads, but maybe not any interior frame rigging.

The best news for me so far is the fit.  The fuselage halves match very well, and the mid/lower wings and cowling look to be a good fit too - in alignment as well as the fit itself.  Flash is present but minimal, especially compared to Airfix for example.

As long as I don't make too many mistakes, this may be better than I expected.

Offline Ian from Doncaster

  • Hero Member
  • *****
  • Posts: 1164
Re: Revell Fokker Dr1 in 1:48 MvR
« Reply #6 on: February 27, 2015, 10:20:51 AM »
First pics showing starboard side cockpit frame added to fuselage.  Not my best wood effect but will be virtually hidden.

Second pic shows how the fuselage fits together well, and with the map(?) case fitted.  I cut out some other components such as the floor and seat bulkhead - everything fits.  I learned with WNW to test fit at every available opportunity!


Offline Alexis

  • Hero Member
  • *****
  • Posts: 8092
  • Love the self
Re: Revell Fokker Dr1 in 1:48 MvR
« Reply #7 on: February 27, 2015, 11:41:17 AM »
Looking good Ian , nice wood !


Terri
Hurra ! , Ich Leben Noch
Body and life is a vessel we use to travel the planet . Femininity is the gift , The miracle comes from what we do with it .

Offline Ian from Doncaster

  • Hero Member
  • *****
  • Posts: 1164
Re: Revell Fokker Dr1 in 1:48 MvR
« Reply #8 on: March 03, 2015, 10:32:26 AM »
A bit more work on the cockpit interior.

I assembled the rudder bar and its support and control column, and the little yoke for the aileron control.  Wires (ez line painted steel) were attached for controls, and also for the frame rigging that will be visible.

I used a spare instrument decal for the compass.  It isn't a compass, but will suffice at this scale, and is sealed with a drop of klear.

The metalwork is painted Mr Metal Aluminium then coated with blue/grey paint, showing metal where worn.

The parts still fit well, and I keep closing the fuselage to check the tolerances etc.  Next up is the seat/seatbelt assembly, the ammo boxes and closing up the fuselage.


Offline coyotemagic

  • Hero Member
  • *****
  • Posts: 7710
  • "Here's to not buggering it up." -Winston Chuchill
    • My Models
Re: Revell Fokker Dr1 in 1:48 MvR
« Reply #9 on: March 03, 2015, 10:41:54 AM »
Great start, Ian!  Looking forward to watching this come together.
Cheers,
Bud
"All men dream: but not equally. Those who dream in the dark recesses of the night awake in the day to find all was vanity. But the dreamers of day are dangerous men, for they may act their dreams with open eyes, and make it possible." -T. E. Lawrence

Offline Alexis

  • Hero Member
  • *****
  • Posts: 8092
  • Love the self
Re: Revell Fokker Dr1 in 1:48 MvR
« Reply #10 on: March 03, 2015, 10:54:25 AM »
She is starting to come together nicely , looking forward on the next up-date .


Terri
Hurra ! , Ich Leben Noch
Body and life is a vessel we use to travel the planet . Femininity is the gift , The miracle comes from what we do with it .

Offline Ian from Doncaster

  • Hero Member
  • *****
  • Posts: 1164
Re: Revell Fokker Dr1 in 1:48 MvR
« Reply #11 on: March 05, 2015, 10:18:14 AM »
Thanks Bud, Terri.

The cockpit is now done.  I made the seat assembly including the robbed seatbelts.  Once the seat was in place I threaded the elevator and rudder control cables through a hole I made in the frame beneath the seat, then tightened the rigging before fixing with CA.

The ammo boxes and cross member to support the guns are not fixed yet at both ends, I can do that from the top.  The rear gun supporting frame is also yet to be added, but I will fit that with the guns later as the assembly will be too fragile to press the guns into place otherwise.  The fuselage halves are now glued together and the fit is still good.  I also started the engine, there are only 2 kit parts - the main engine body and a spider-like set of pipes.  I think I will make push rods from brass tube as these will be visible.  No pics yet, but the engine fits nicely inside the cowling.


Offline BigBlue

  • Hero Member
  • *****
  • Posts: 640
Re: Revell Fokker Dr1 in 1:48 MvR
« Reply #12 on: March 06, 2015, 11:35:00 AM »
Very nice so far, Ian!

Chris

Offline RAGIII

  • Hero Member
  • *****
  • Posts: 19694
Re: Revell Fokker Dr1 in 1:48 MvR
« Reply #13 on: March 06, 2015, 02:07:07 PM »
Ian,
Really well done interior! I am looking forward to your further progress! By the way I like your choice of red!
RAGIII
"A man has to know his limitations": Harry Callahan

"Don't slop it on" Lynda Geisler

Offline radio

  • Hero Member
  • *****
  • Posts: 3952
Re: Revell Fokker Dr1 in 1:48 MvR
« Reply #14 on: March 06, 2015, 07:36:31 PM »
Great work to the interior Ian.
Martin