Author Topic: Nieuport 17 Academy 1:32  (Read 13156 times)

Offline mgunns

  • Hero Member
  • *****
  • Posts: 2255
Re: Nieuport 17 Academy 1:32
« Reply #30 on: January 30, 2015, 11:20:22 PM »
Hello Adam:

I concur with the others, nice work on the cowling and the motor, looks the business.  Nice photo's of your grandson and you lounging.  Glad that Auntie is up and about and you are back at the bench.  Looking forward to seeing how this all turns out.  It isn't the greatest kit, but it isn't a bad one either and you are making it into a great model.

Best

Mark
Mark

We few, we happy few.....

Offline coyotemagic

  • Hero Member
  • *****
  • Posts: 7710
  • "Here's to not buggering it up." -Winston Chuchill
    • My Models
Re: Nieuport 17 Academy 1:32
« Reply #31 on: January 31, 2015, 02:40:08 AM »
Glad to see that you got your work area back and that you are back on track with this one, Adam, although it looks like you were having fun anyway!
Cheers,
Bud
"All men dream: but not equally. Those who dream in the dark recesses of the night awake in the day to find all was vanity. But the dreamers of day are dangerous men, for they may act their dreams with open eyes, and make it possible." -T. E. Lawrence

Offline davecww1

  • Sr. Member
  • ****
  • Posts: 464
Re: Nieuport 17 Academy 1:32
« Reply #32 on: January 31, 2015, 10:31:53 AM »
Hi Adam,
Glad to see another Nieuport builder and sorry I'm late to this thread as I may have had some ideas for you but you are already past the point of no return.  I remember reading years ago that the forward fuselage was too wide on the Hobbycraft/Academy kit, and a narrow wedge should be cut out of the fuselage top and bottom and it should be clamped and glued together, maybe that is why the resin cowl would not fit.  It would make sense, unless the resin cowl was not round to start with.  Also for the resin interior for best fit I would sand the outside of the inner walls thinner then glue the walls directly to the fuselage. this would give you the best fit as the floor can be added later and shimmed a little wider if needed to fit properly. 
I have a link to the Nieuport 23 photos someplace so let me see what I can find...
Dave C

Offline davecww1

  • Sr. Member
  • ****
  • Posts: 464
Re: Nieuport 17 Academy 1:32
« Reply #33 on: January 31, 2015, 10:33:50 AM »
Here are the links to the Nieuport 23 under restoration.  http://users.skynet.be/fa233213/En/RealAircrafts/Nieuport/Nieuport23.html
Dave C

Offline Adam

  • Hero Member
  • *****
  • Posts: 647
Re: Nieuport 17 Academy 1:32
« Reply #34 on: February 02, 2015, 08:14:43 AM »
I'm glad my friends that I still remember.  ;)
Dave really is too late for changes.
But thank you very much for the link, I think I'll find a lot of interesting photos.
Already I finished work on the engine. He got the weathering


I did spark plug cables.


Now I have to finish the cockpit and than glue the fuselage halves.

Adam.

Offline Des

  • Administrator
  • Hero Member
  • ******
  • Posts: 9325
    • ww1aircraftmodels.com
Re: Nieuport 17 Academy 1:32
« Reply #35 on: February 02, 2015, 08:42:39 AM »
Lovely work on the engine Adam, looking forward to seeing it fitted to the plane.

Des.
Late Founder of ww1aircraftmodels.com and forum.ww1aircraftmodels.com

Offline RAGIII

  • Hero Member
  • *****
  • Posts: 19106
Re: Nieuport 17 Academy 1:32
« Reply #36 on: February 02, 2015, 11:45:54 AM »
Excellent work on the Engine Adam! Looks Terrific!!
RAGIII
"A man has to know his limitations": Harry Callahan

"Don't slop it on" Lynda Geisler

Offline Adam

  • Hero Member
  • *****
  • Posts: 647
Re: Nieuport 17 Academy 1:32
« Reply #37 on: March 03, 2015, 07:04:10 PM »
Thank you RAGIII and Des.
I have not had much time to work on my Nieuport. Two weeks I was on holiday and the next two weeks on a business trip.
The current status of work on the Nieuport is as follows.
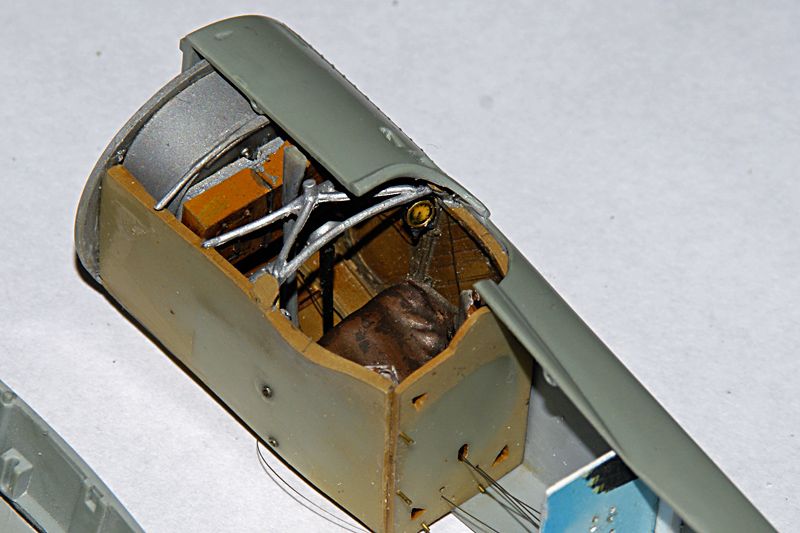
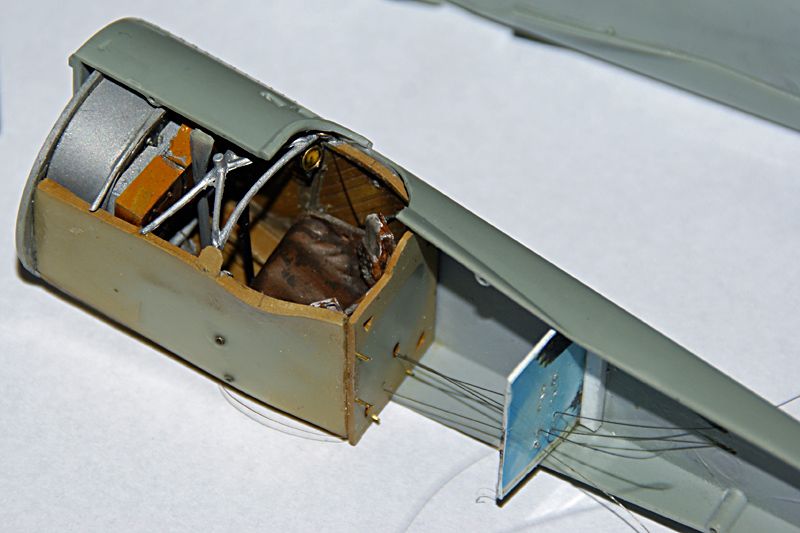
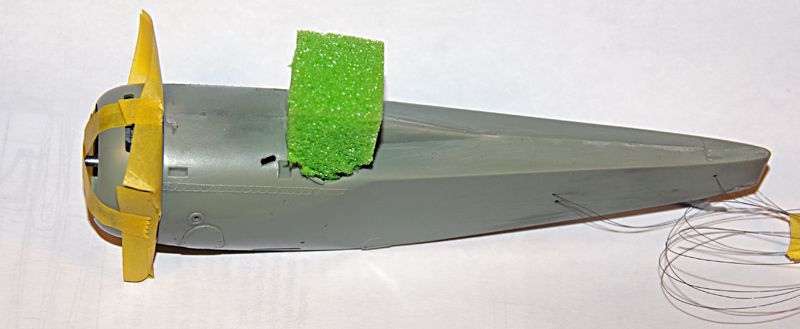
Cockpit is glued to the fuselage.


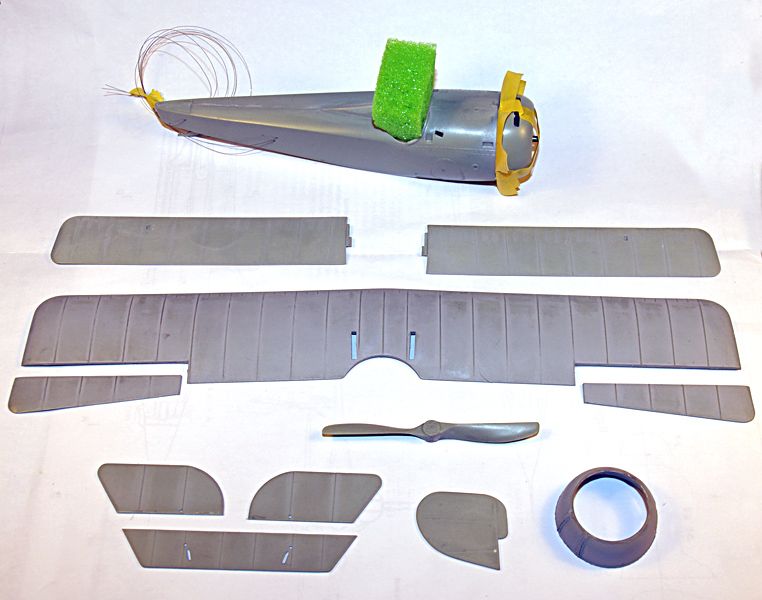
Elevator was cut off.


I also cut off the ailerons.


Fuselage is already glued.


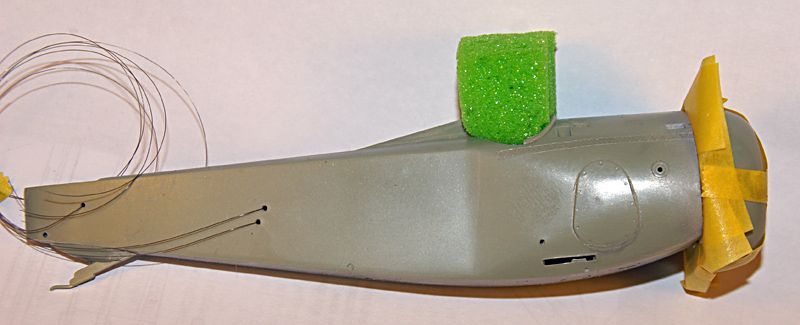
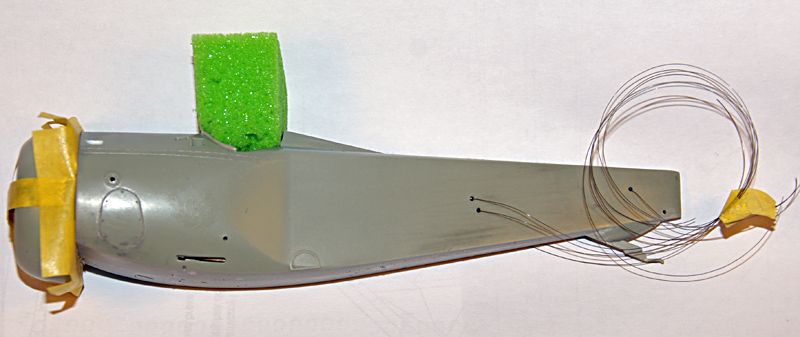
Some parts are ready for surfacer.


Last two days I spend with surfacer.  ;)
Unfortunately I can not show you the result, because I lost the photo camera cable. It hid somewhere in the house and it looks how I'm looking for it.  ;) >:(.

Adam.

Offline andonio64

  • Hero Member
  • *****
  • Posts: 1687
  • There's no hurry
Re: Nieuport 17 Academy 1:32
« Reply #38 on: March 03, 2015, 08:04:08 PM »
Fantastic Adam,
I look forward to seeing more... hopefully you'll find the cable!

Offline Des

  • Administrator
  • Hero Member
  • ******
  • Posts: 9325
    • ww1aircraftmodels.com
Re: Nieuport 17 Academy 1:32
« Reply #39 on: March 03, 2015, 08:29:33 PM »
You're moving along very well with this build Adam, it is looking really good.

Des.
Late Founder of ww1aircraftmodels.com and forum.ww1aircraftmodels.com

Offline IFF1418

  • Hero Member
  • *****
  • Posts: 1541
Re: Nieuport 17 Academy 1:32
« Reply #40 on: March 03, 2015, 09:11:42 PM »
Hello Adam,

Fantastic build from the start on, lovely woodpainting and a very nice engine. Well done!

Kind regards
Patrick

Offline Adam

  • Hero Member
  • *****
  • Posts: 647
Re: Nieuport 17 Academy 1:32
« Reply #41 on: March 03, 2015, 09:24:09 PM »
Thank you my friends.

By the way, I'm planing to paint France national insignia by masks, but I don't know what paint, Fsxxxxx or other number paint to use, maybe you can help.

Adam.

Offline RAGIII

  • Hero Member
  • *****
  • Posts: 19106
Re: Nieuport 17 Academy 1:32
« Reply #42 on: March 03, 2015, 11:22:06 PM »
Adam,
Outstanding work to date! The interior looks excellent and your work on the fuselage, ailerons, and elevators is fantastic!
RAGIII
"A man has to know his limitations": Harry Callahan

"Don't slop it on" Lynda Geisler

WarrenD

  • Guest
Re: Nieuport 17 Academy 1:32
« Reply #43 on: March 05, 2015, 09:00:08 AM »
It's a Nieuport, ergo I love it. Hope that cable shows up soon.

Warren

Offline Adam

  • Hero Member
  • *****
  • Posts: 647
Re: Nieuport 17 Academy 1:32
« Reply #44 on: March 21, 2015, 09:09:57 PM »
RAGIII and Warren thank you for the good words.  :)

Now I'm getting down to painting the wings. They will paint green and brown camouflage with a silver border. I have question for you whether the camouflage was painted with a brush or spray gun?
I watched the images and there I saw rather the sharp border between colors, which would indicate that wings was painted by brush.
Is the subject experts can help you?

Adam.