Author Topic: Wingnut Wings Fokker E.II/E.III Early  (Read 29345 times)

Offline Des

  • Administrator
  • Hero Member
  • ******
  • Posts: 9325
    • ww1aircraftmodels.com
Re: Wingnut Wings Fokker E.II/E.III Early
« Reply #45 on: August 29, 2014, 10:14:13 AM »
Very nice indeed Chris, the interior looks excellent and the metal swirls are well done.

Des.
Late Founder of ww1aircraftmodels.com and forum.ww1aircraftmodels.com

Offline mgunns

  • Hero Member
  • *****
  • Posts: 2255
Re: Wingnut Wings Fokker E.II/E.III Early
« Reply #46 on: August 29, 2014, 10:52:13 AM »
Hello Chris:

It all looks pretty nice to me.  The swirls look great and the interior equally great.  Looking forward to your next update and the Taurus.

Best

Mark
Mark

We few, we happy few.....

Offline stefanbuss

  • Hero Member
  • *****
  • Posts: 976
Re: Wingnut Wings Fokker E.II/E.III Early
« Reply #47 on: August 29, 2014, 07:30:09 PM »
As other already said: the swirls look great. Very convincing.

Stefan

Offline Nigel Jackson

  • Hero Member
  • *****
  • Posts: 2608
Re: Wingnut Wings Fokker E.II/E.III Early
« Reply #48 on: August 29, 2014, 07:50:36 PM »
Lovely work Chris.

Best wishes
Nigel

Offline BigBlue

  • Hero Member
  • *****
  • Posts: 640
Re: Wingnut Wings Fokker E.II/E.III Early
« Reply #49 on: August 29, 2014, 11:19:34 PM »
Thanks for the positive comments everybody!  Given how highly I regard your collective talents, the encouragement is deeply appreciated.

Offline Chris Johnson

  • Hero Member
  • *****
  • Posts: 1959
Re: Wingnut Wings Fokker E.II/E.III Early
« Reply #50 on: August 29, 2014, 11:22:50 PM »
Verrrry nicely done 'pit' Chris. It sure looks the part!

Cheers,

Chris
You can have it good; You can have it fast; you can have it cheap. Pick any two, but all three are impossible.

Offline BigBlue

  • Hero Member
  • *****
  • Posts: 640
Re: Wingnut Wings Fokker E.II/E.III Early
« Reply #51 on: September 05, 2014, 12:41:08 PM »
Well, its been a while since I've posted any updates, but I have been making progress.  The fuselage is now together and painting is underway, and the wings have made it as far as getting their iron cross decals.

The sequence of events for the wings went as follows:

First, a base coat of primer.  I am using the black Mr. Finishing Surfacer 1500, thinned 1:1 with Mr. Color Leveling Thinner.


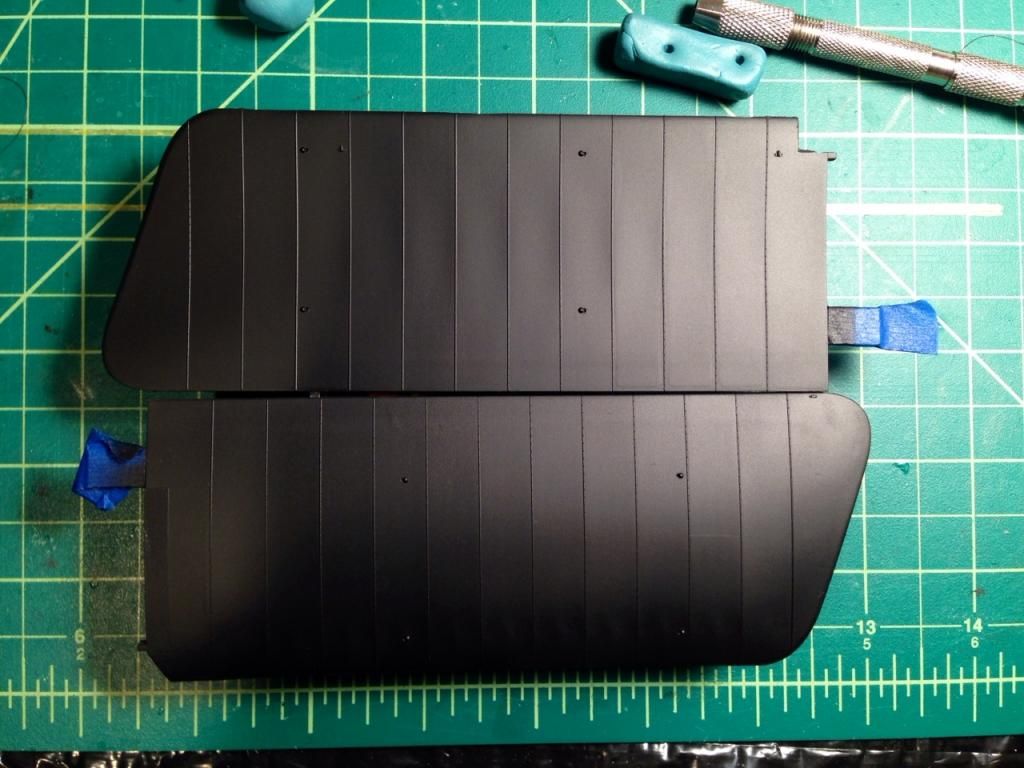
I am a big fan of this primer as it goes on very easily, and dries to a really nice, consistent light satin finish.  Nice stuff.  Next, I masked off the internal ribs using 1.5 mm strips of tape.  I am not going for a particularly pronounced rib effect, but in a number of reference photos, they do appear slightly darker than the surrounding fabric.  I am guessing that this is likely due to a) shadow, or b) oil stains, rather than some kind of transparency, but regardless, I wanted to allude to the effect.


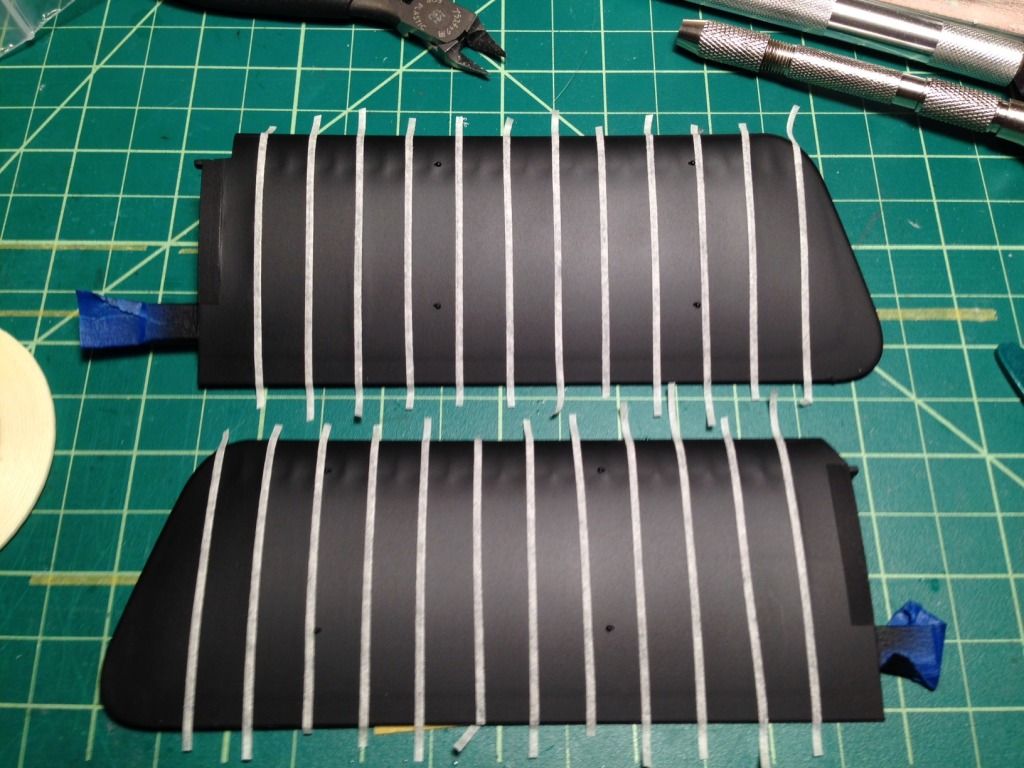
I didn't mask the framing around the edges of the wing, but instead went a big light on the next coating of paint in those areas.  Similarly, I didn't see any evidence of the longitudinal structures showing in the reference photos, so I left them out as well. 

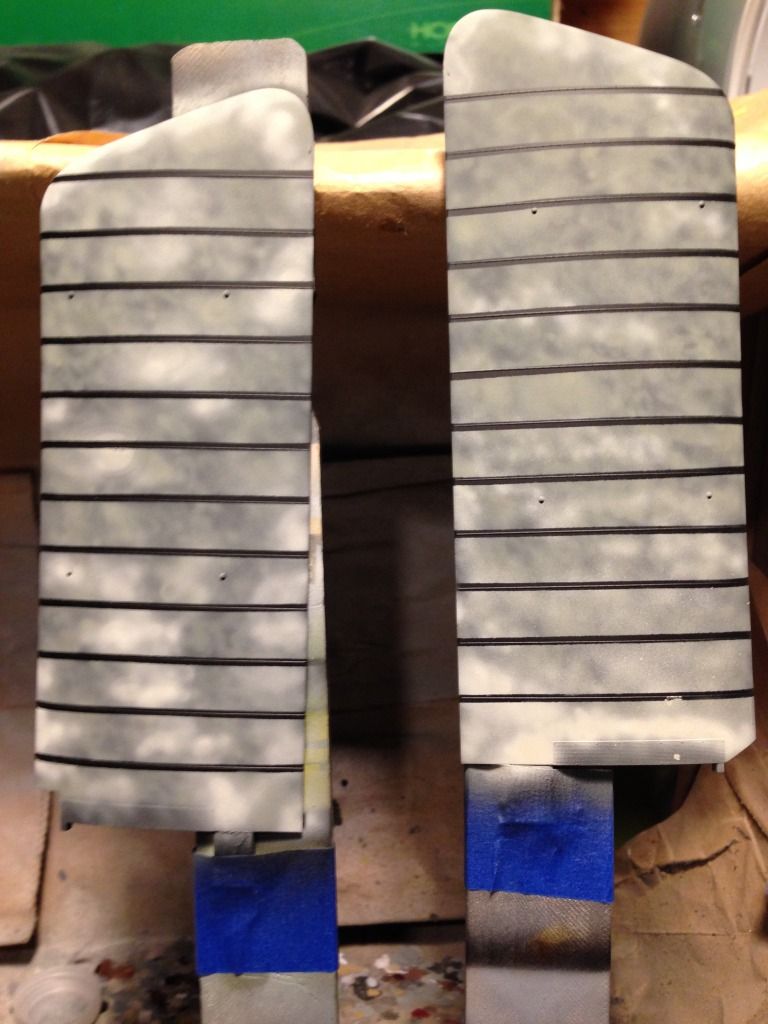
Next, I sprayed a thin (1:2) and extremely uneven coat of XF-22 (RLM Gray, my exterior color) followed by a similar coat of XF-55 (Deck Tan) in a handful of semi-random locations.  After removing the tape:


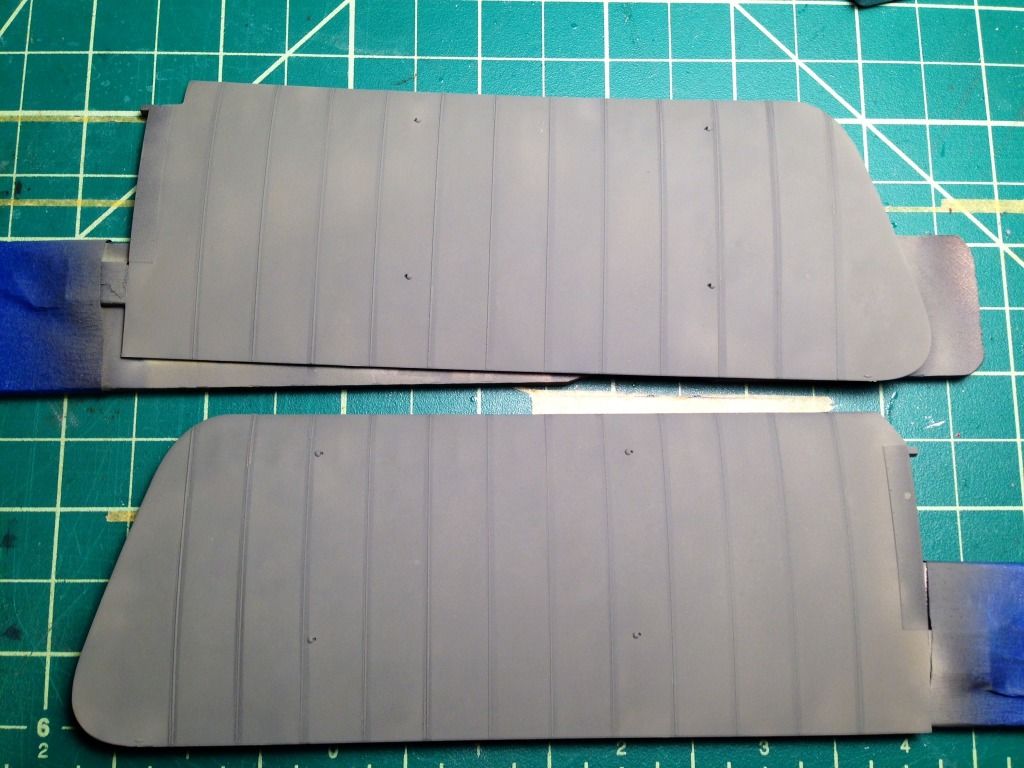
I next sprayed an even thinner (1:3) coat of XF-22, stopping when the the contrast between the ribs and the spaces looked about right, and some subtle variety in the final color was still evident.  It is challenging to capture in a picture (particularly one shot with a phone under the glare of a 100w incandescent desk lamp), but this is close:


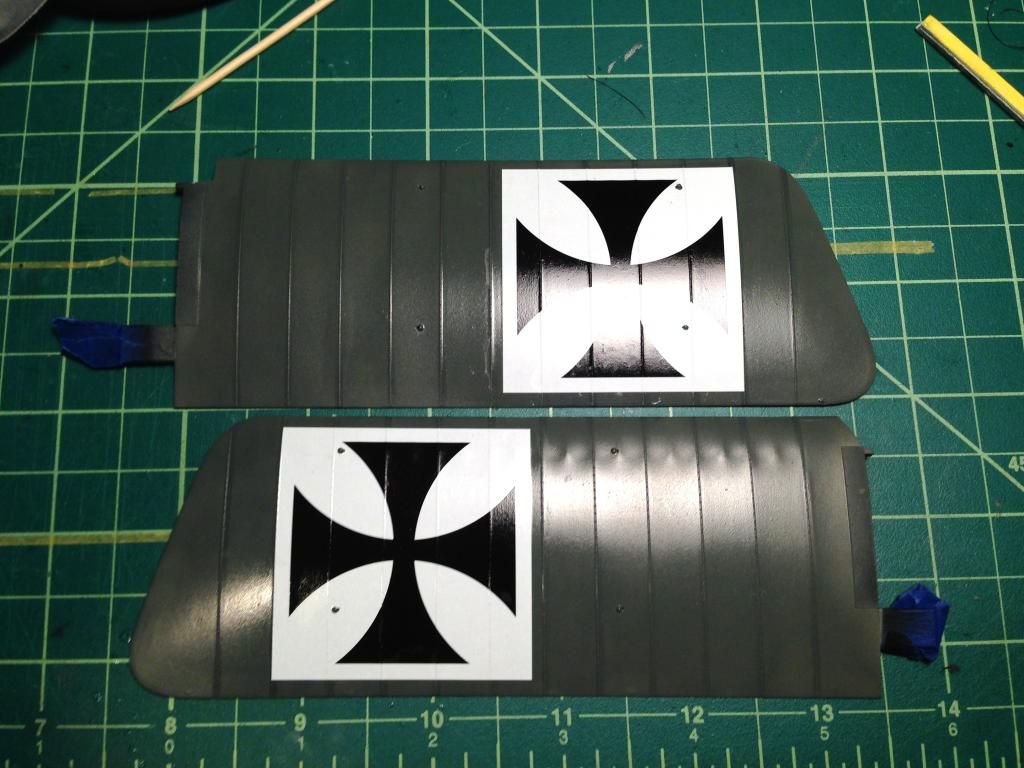
Next comes a gloss coat (Alclad Aqua Clear), and the iron cross decals.  I have left the smaller stencils off until later so as not to risk damaging them:


Finally, I carefully reapplied the tape to the ribs (after putting another coat of Aqua Gloss over the decals), and sprayed them with a thin coat of Tamiya Smoke, followed by a VERY thin touch of XF-1 (Flat Black) in a handful of areas where I wanted a stronger effect:


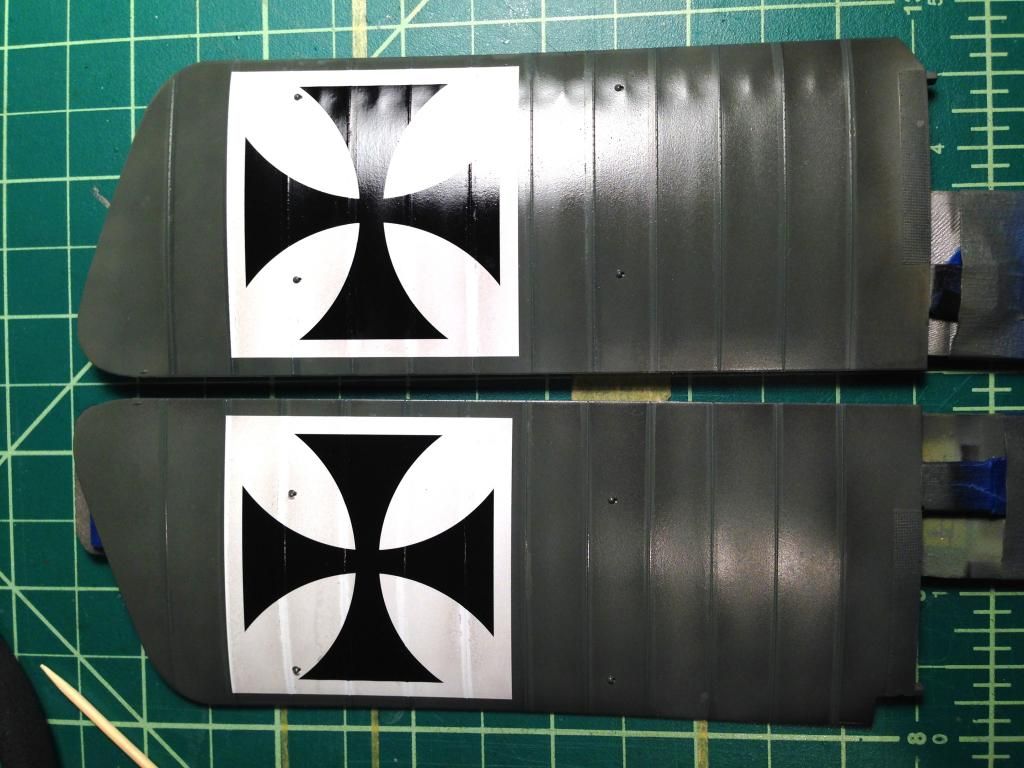
I am generally happy with the outcome, but continue to have problems gauging the strength of the Smoke shading; I just can't see the stuff until I remove the tape and see the contrast, so I wind up applying it heavier than I originally intended.  As can be seen, my "darkened" ribs are now, in fact, lighter than the surrounding fabric.

I plan on adding specific oil stains and streaks, and will paint the metal walkways after the final clear coat is on in order to retain the aluminum finish.  I have only shown the upper surfaces, but the process was the same on the bottoms.  As this has been a long post (for a small amount of progress!), I will show the parallel steps undertaken on the fuselage in a separate post.

« Last Edit: September 05, 2014, 01:21:29 PM by BigBlue »

Offline BigBlue

  • Hero Member
  • *****
  • Posts: 640
Re: Wingnut Wings Fokker E.II/E.III Early
« Reply #52 on: September 05, 2014, 01:14:48 PM »
Update Part Two, The Fuselage:

I closed up the fuselage as suggested in the Wingnut instructions (top first, then bottom), and spent a painfully long time filling and sanding.  I realize this is modeling 101, but for some reason, I seem to have trouble getting those final hair-line seams to disappear.  I fill and sand, but by the time I have the area smooth, the tiny seam re-appears.  It takes far more rounds of this than I think it should.  I've tried Squadron Green, Tamiya White, Mr. Surfacer 500 & 1000.  I've sanded and used solvents (thinner, acetone, etc.).  Pretty sure its me rather than my materials.

Ok, so once I was satisfied with my efforts, the fuselage process was basically the same as that of the wings.  Black primer base, followed by a thin, uneven undercoat.  In a slight change of order versus the wings, I waited until after applying the base coat prior to masking off the internal structure as a number of my reference photos show the fabric over the framing to be subtly lighter than the rest of the fuselage.  Once taped, I applied a blotchy coat of equal parts XF-1 (Flat Black), XF-22 (RLM Gray), and XF-64 (Red-Brown), thinned (1:3).


I used a handy diagram from Dan San Abbot that I found to guide my tape placement (somewhat poorly from what I can see in the photo!).  The second photo shows the pencil lines I added behind the cockpit representing the framing wires.  This is based on a photograph on page 14 of the instructions where they can be seen.

Like the wings, the final coat of paint was XF-22 (1:3) to tie everything together and knock down the contrast:


Sorry for the blurry photo, but it is the only one I have prior to gloss coating.  The framing is subtle enough that it is apparent in certain lights and viewing angles, and not in others.  This picture was also taken after I had added a handful stains with MIG Russian Earth pigments while the surface was still matte.  I increased the streaky effect with light directional sanding using fine grit micro cloth, but the gloss coat hides much of this.

The fuselage awaits decals, and this thread is up to date.

Thanks for making it through these two long posts.  Comments, questions, and advice are welcome.

Chris

Edit:  I forgot to mention that I made a bit of a mess of a number of the Taurus Oberursal's valve rocker arms (and a cylinder head or two to which they were attached), and am now on hold while I await replacement parts.  I'd like to make a HUGE endorsement for Lukasz: not only are his products tiny works of art, but his customer service is as good as it gets.  I'm a big fan, and will happily send my business his way again.
« Last Edit: September 05, 2014, 01:21:47 PM by BigBlue »

Offline Chris Johnson

  • Hero Member
  • *****
  • Posts: 1959
Re: Wingnut Wings Fokker E.II/E.III Early
« Reply #53 on: September 05, 2014, 10:09:05 PM »
Excellent work on that fuselage effect. It looks superb!

Cheers,

Chris
You can have it good; You can have it fast; you can have it cheap. Pick any two, but all three are impossible.

Offline RAGIII

  • Hero Member
  • *****
  • Posts: 19687
Re: Wingnut Wings Fokker E.II/E.III Early
« Reply #54 on: September 05, 2014, 10:21:09 PM »
Looking fantastic! Excellent results!!
RAGIII
"A man has to know his limitations": Harry Callahan

"Don't slop it on" Lynda Geisler

Offline uncletony

  • Hero Member
  • *****
  • Posts: 4384
    • Aircraft In Pixels
Re: Wingnut Wings Fokker E.II/E.III Early
« Reply #55 on: September 05, 2014, 10:43:15 PM »
Looking great Chris.

Regarding the seams, I find it helps to chamfer the edges of the seams prior to filling (I learned this doing auto body work. Also hanging drywall :) ).

Filler is softer than the plastic and will tend to erode into a trench as you feather it. The chamfered edge gives the filler something to hang onto as it tapers off. Seems counterintuitive to make an even bigger gap to fill, but it works.


Offline Ian from Doncaster

  • Hero Member
  • *****
  • Posts: 1164
Re: Wingnut Wings Fokker E.II/E.III Early
« Reply #56 on: September 05, 2014, 10:46:37 PM »
....slaps forehead with a thud of realisation "that's where I've been going wrong"...!!

Great tip Bo, will try this on the next opportunity.

Chris - the wings and fuselage are looking great, the paint variations work very well.

Offline lcarroll

  • Administrator
  • Hero Member
  • ******
  • Posts: 8654
Re: Wingnut Wings Fokker E.II/E.III Early
« Reply #57 on: September 05, 2014, 11:12:31 PM »
    Very nice work Chris, I like the look of that fuselage and you're doing an exceptional job on bringing out the detail. Looking forward to seeing this one at the completed stage.
Cheers,
Lance

Offline xmald

  • Hero Member
  • *****
  • Posts: 1099
Re: Wingnut Wings Fokker E.II/E.III Early
« Reply #58 on: September 06, 2014, 03:35:25 AM »
It looks great in my opinion! I have to try to use this technique! Keep up the good work!
Best regards
Filip

Offline BigBlue

  • Hero Member
  • *****
  • Posts: 640
Re: Wingnut Wings Fokker E.II/E.III Early
« Reply #59 on: September 06, 2014, 07:20:18 AM »
Thanks to all for the positive comments, they are certainly appreciated.

Bo, thanks as well for the pro-filling tip.  There's hope for me yet!  Do you actually chamfer the edges of the fuselage halves prior to joining, or get some narrow file down in there after the fact?  Thanks also to Ian for making me feel I'm not alone in my struggles!

Chris