Rick, Alain, Martin and Michael, thank you, once again, for your very kind comments. I have really appreciated the positive support.
Well, it took longer than I expected, but I am declaring this build finished. About an hour after I finished rigging and snapped the last set of pictures I shared, I realized to my horror that the seam along the upper fuselage had
once again re-appeared! Those pictures show that at the time I finished rigging, the seam was completely fine, and yet there was the divot, as bad, or worse than the first time! While I was certainly more comfortable that I would be able to deal with it this time, this was not what I wanted to see!
The repair is now finished, and only delayed this post by a couple of days. I didn't bother with pictures this time, and I won't go too heavily into the procedure as it was basically the same as what I did when the seam appeared the first time: clear coat, sand, repeat as needed. I did eventually resort to a bit of Mr. Surfacer, so had to do a bit of repainting, but it wasn't too bad. After an oil wash to dirty it up, and a final Matte coating, it was done.
I finished the few remaining items on my to do list, mainly attaching the engine cowling and prop:
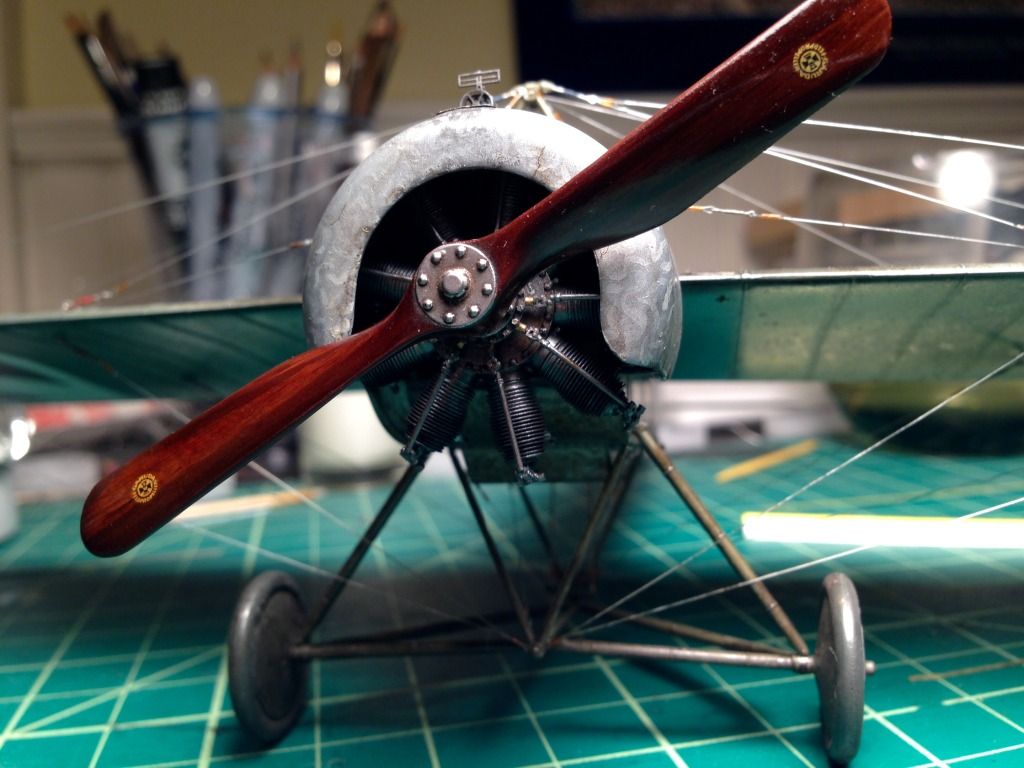
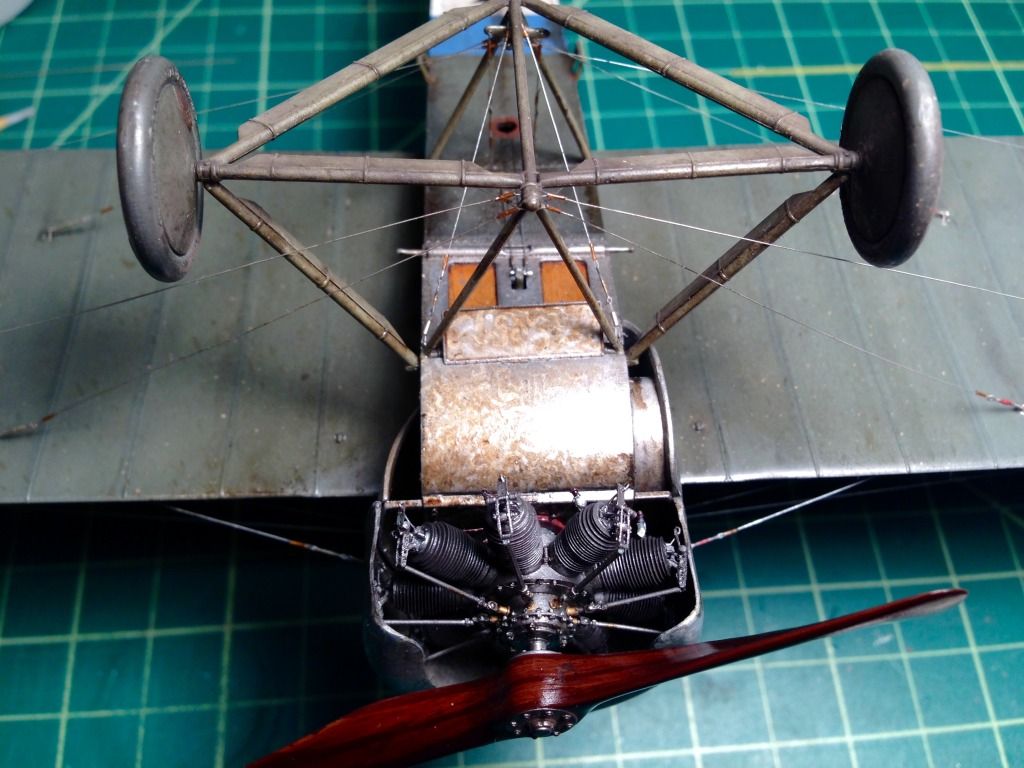
Even with the Aviattic resin cowling, the engine was a tight fit (likely due to my poor construction resulting in the valve arms extending too far out from the cylinders.) I would up fitting the cowling around the engine and CAing them to the aircraft simultaneously to allow a bit of movement to get everything in place. Once those two pieces were set, I put a bit of CA on the end of the shaft, and held the propeller in place until it held. As I mentioned in my last post, there were a few touch ups I wanted to do on the Matte coat (which I did as I finished the seam repair), and that was about all.
I am going to put up a thread in the Completed builds section, and will post the link here once I do. I enjoyed this build, and aside from the reoccurring issue with the seam, had no issues with fit. If I do another (and I could see myself doing so), I will add a bit of plastic-card along the inside of that back seam for reinforcement.
I wish to thank all of you who followed along and gave me such positive support. I am also deeply grateful for the Eindecker build threads that I referenced many times during this build, as well as those who offered me helpful guidance in this thread. Sharing my build added a great deal to an already enjoyable process.
Thanks one last time to all for checking in. Comments, questions and feedback are still welcome. I'll come back with the link to the final pictures.

