Have been underway with this for a few weeks, for the WWI contest over at Swanny's Forums, and have enough in hand now to present here.
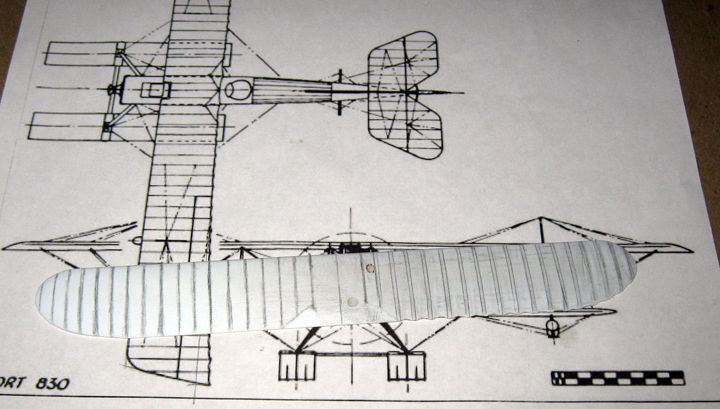
First, this is the subject of the model:
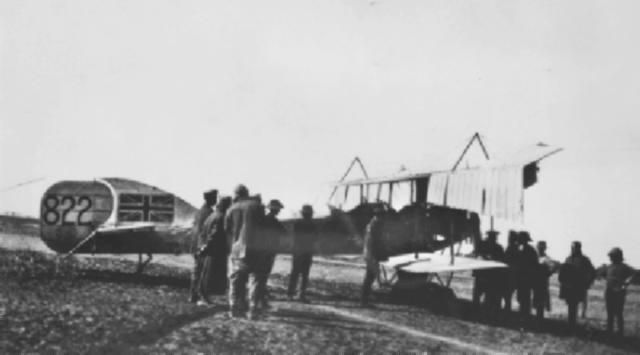
It was the first of the type delivered, and was delivered as a float-plane. Early in 1915, it was shipped out to Zanzibar, along with two fellows, as part of the effort to deal with the S.M.S. Konigsberg. From Zanzibar, the three machines were shipped up to Mesopotamia, where they arrived in September, to co-operate with Royal Navy gun-boats on the Tigris supporting Gen. Townsend's drive for Baghdad. Difficulties were encountered operating as float-planes off the Tigris, so 822, and at least one other of Shorts, had its floats replaced with an improvised land-plane arrangement. After some months of service, the machine was badly bent in February, 1916, just as the airlift into the siege of Kut was getting underway, and written off.
Here is the scratch-builder's 'kit'....
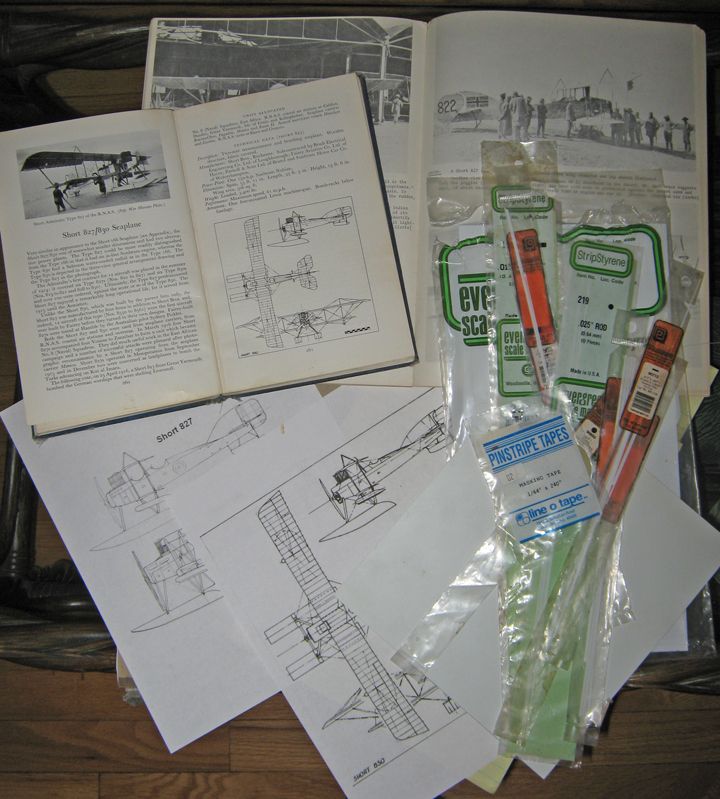
References for this are rather thin on the ground, so there is an unavoidable element of conjecture in some portions of this project. I have come upon some useful photographs of the type here and there on the web, and I have an article in an old issue of Crass and Cockade Journal which has several photographs of this particular machine in Mesopotamia.
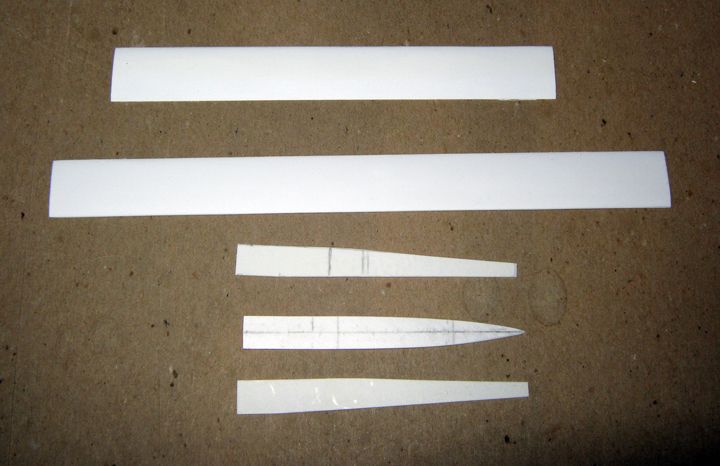
Here is the first step in the build: blanks for the wings, made out of 2mm sheet and already sanded to airfoil section, and bottom and sides for the fuselage rear of the fire-wall (all panels were removed from the nose on operations in Mesopotamia to assist cooling), the sides made from 0.75mm sheet, and the bottom from 1.0mm sheet.
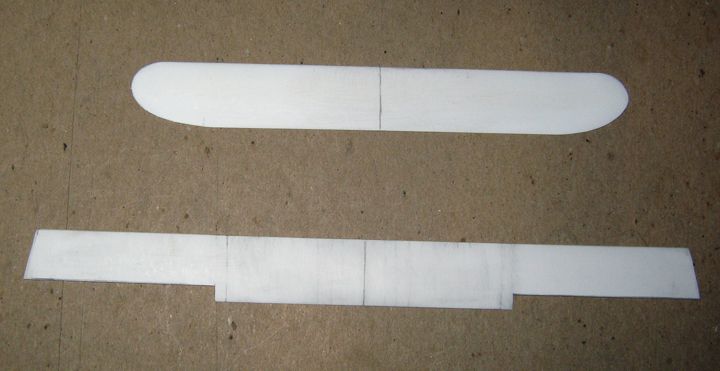
Here are the wings put into their proper shapes:
I have left off making the ailerons, as I may pose them hanging, which they did when the machine was at rest on the ground. They are big items, with inverse taper.
Here are a couple of shots of the fuselage pieces assembled, with basic side-wall detail and floor added:
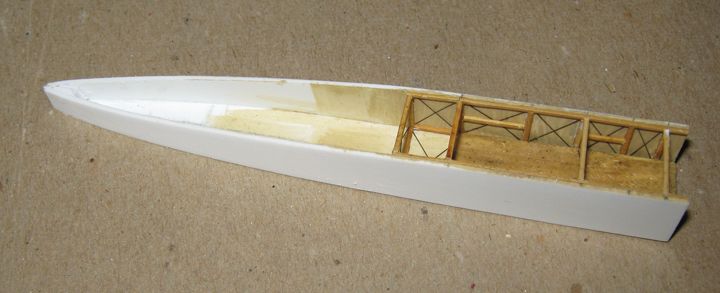
At this point, I decided to change things a bit. However convenient for a modeler, the raised wood floor is likely not accurate (all of this is conjectural and speculative), and I pulled it out. I then went to a bare skeleton for the floor (no picture), and finally decided on a thin, metal floor, riding right above the fuselage bottom's structural members (as seems to be the case with the Short 184).
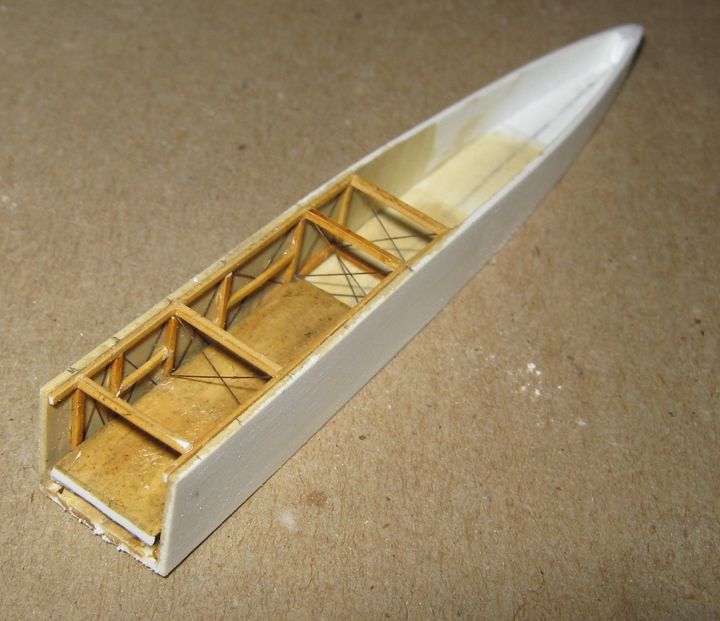
Here is the fuselage interior more or less completed:
Shorts used a distinctive five-spoked Depperdussin wheel stick control, which has been scratch-built. Instruments and such are a simplified version of the arrangements for a Short 184 (it was being built at about the same time, so I think a 'family resemblance' not unreasonable). Bezels are 34 gauge brass beading wire wrapped around styrene rod, to make a short coil, cut into links with a razor knife, and lightly flattened in a pliers. Instrument faces are disc shaved off styrene rod, pressing into the bazals after these are glued to the panel. Seats are left-overs from various Eduard kits, trimmed down a bit (they probably should have some holes, but I figured I could skip that). The observer's seat is perched on a fuel tank: there was a gravity tank at the front of his cockpit, but it does not seem large enough to have been the only fuel store, and the observer's cockpit is about the only place a main tank could be put in this).
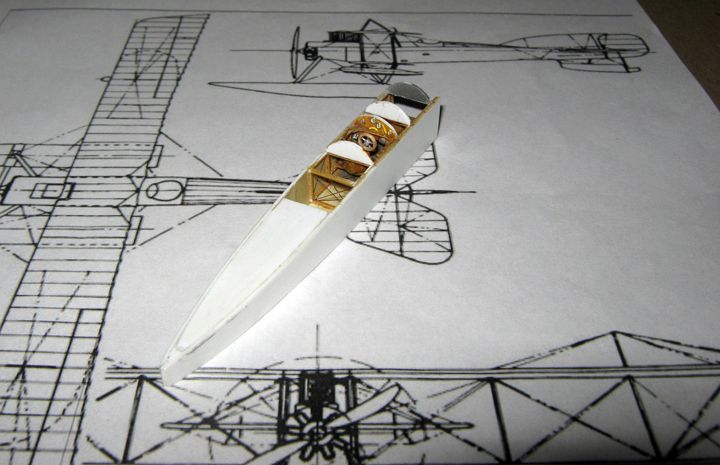
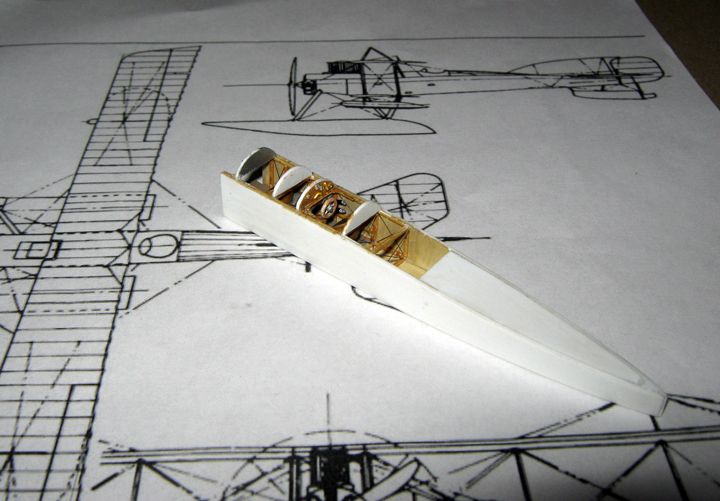
Here is the fuselage closed up:
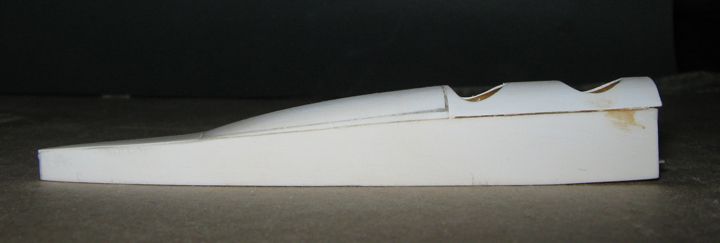
Forward decking is a piece of 0.015" sheet, bent into a curve and glued down, with cockpit openings cut in after attachment.
The turtleback is put on in two pieces: first, a piece of 1mm sheet, shaped to plan and sanded down in a taper to the rear, then a piece of 3mm sheet. The whole is sanded to plan, then to profile, and finally to section.
Nose is left unfinished; there will be adjustments when the engine assembly is dealt with, but that is still a ways off.
Here are a couple of looks into the cockpit....
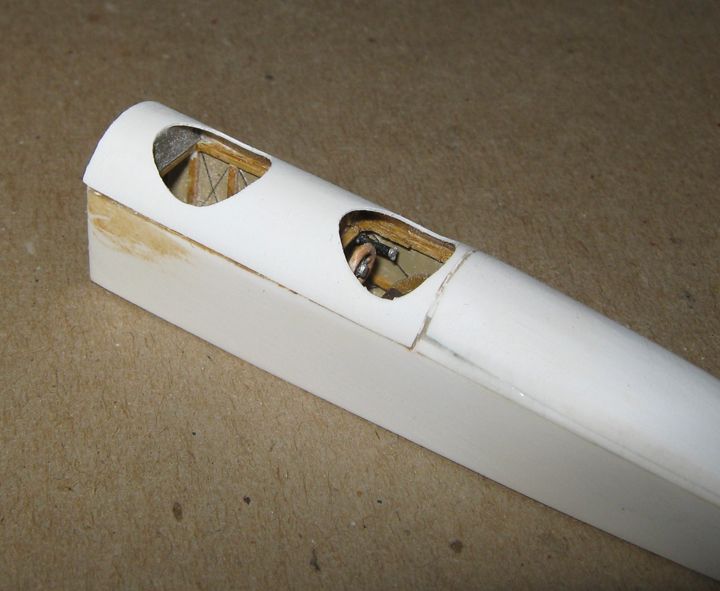
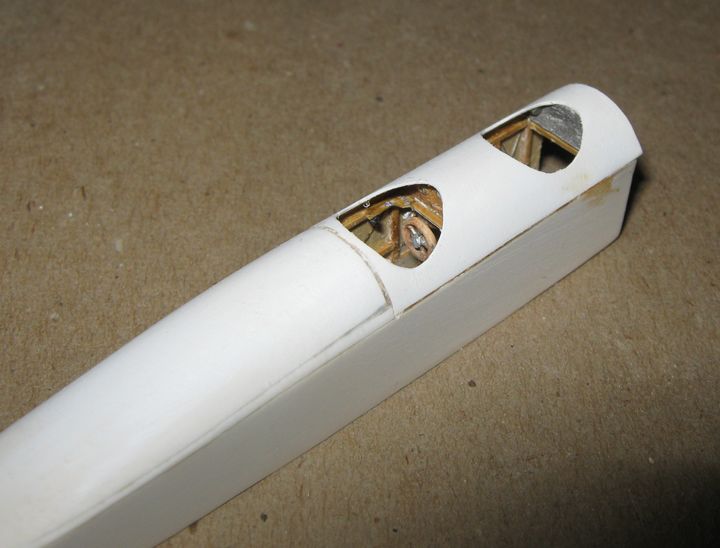
Had a bit of a set-back, but it has not put me seriously behind schedule. In my first run at the forward decking, the instrument panel dislodged, which I did not notice till I had the thing all shaped and trimmed. Only way to fix it was to strip off the decking, and by the time this was done, a fair amount of reconstruction had to be done in the pilot's office, and with the formers. All is secure now.
I am using a new method for indicating rib tapes on this build, rather than the striping tape applique method I have been employing.
First, the ribs are lined in with pencil. Then, they are scribed in with a needle in a pin-vise, using a flexible piece of half millimeter sheet for a straight-edge guide. Then the area between the tapes is made to sag, using first a heavy grit 'swizzle stick' sanding stick, and then by scraping with the curved edge of a #10 blade, and final touches with a folded bit of medium grit sand-paper. I went fairly deep doing this, as this machine saw long service in tropic and desert conditions with sketchy maintenance, and its fabric must have been in pretty poor shape by the latter stages of its career. Just 'breaking the plane' a bit with the sanding stick and smoothing down the result would suffice for a newer machine. After this, the scribed lines are gone over again.
Here is the upper surface of the lower wing, half-way through the process:
Here is the upper surface of the upper wing, painted and decalled:
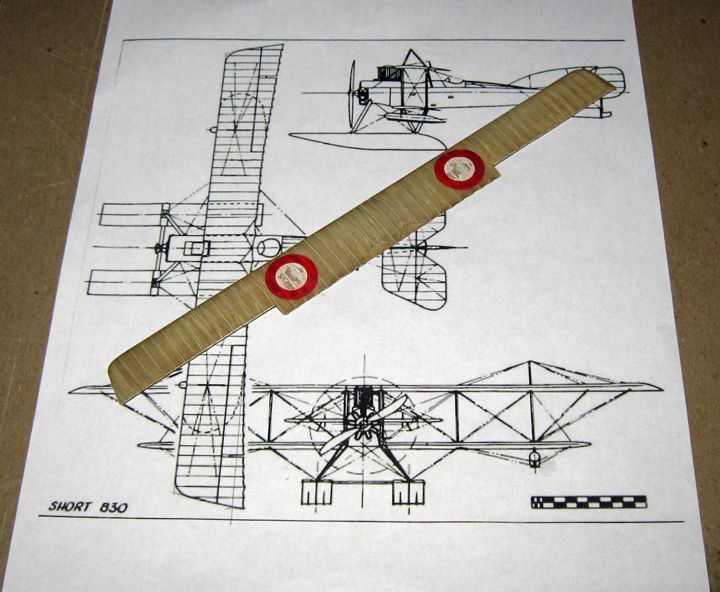
Basic color is PollyScale 'Old Concrete', hit after application with dark brown wash, and lightened base color painted over the tapes. This machine was marked with the old 'red ring' marking of the R.N.A.S. (it was shipped out from England probably in March of 1915). I have never seen a picture from the early days of an English machine serving in the Middle East where the white paint of markings was not in very bad condition, and I have roughed up the decals accordingly. They began as Italian markings for a SPAD XIII, and after application I hit them very hard with a polishing pad, and chipped away some bits, too, with the point of a knife. Remaining areas were then painted over with a slightly greyed white. I left the ribs themselves white, as I think the flaking would be concentrated where the fabric flexed in flight. I added various shades of darker red to the ring to allow for the deterioration of the pigment under sun. Aftre work on the decals was done, the whole thing got another dark brown wash treatment.

