Author Topic: Wingnut Sopwith Triplane  (Read 2904 times)

Offline RAGIII

  • Hero Member
  • *****
  • Posts: 18859
Re: Wingnut Sopwith Triplane
« Reply #15 on: May 09, 2013, 06:07:50 AM »
Dave,
 I just came up with an alternative solution to the cockpit coaming fit issue. WNW called for the coaming on the twin gun version to be cut at the join between metal and wood. I did the same on the single Vickers coaming and voila, slide it on from front and rear after securing both sides, instrument panel/ fuel tank etc. and no fit issue. Your way will work as evidenced by your build, I am just offering an alternative that I think may be easier.
RAGIII
"A man has to know his limitations": Harry Callahan

"Don't slop it on" Lynda Geisler

Offline Dave W

  • Administrator
  • Hero Member
  • ******
  • Posts: 1608
Re: Wingnut Sopwith Triplane
« Reply #16 on: May 09, 2013, 07:21:23 AM »
Many thanks for the cockpit coaming fix idea RAGIII, much appreciated and duly noted for a future Tripe build. Your suggestion is certainly an easier fix than mine.

Many thanks to all for the kind words and feedback which is much appreciated.

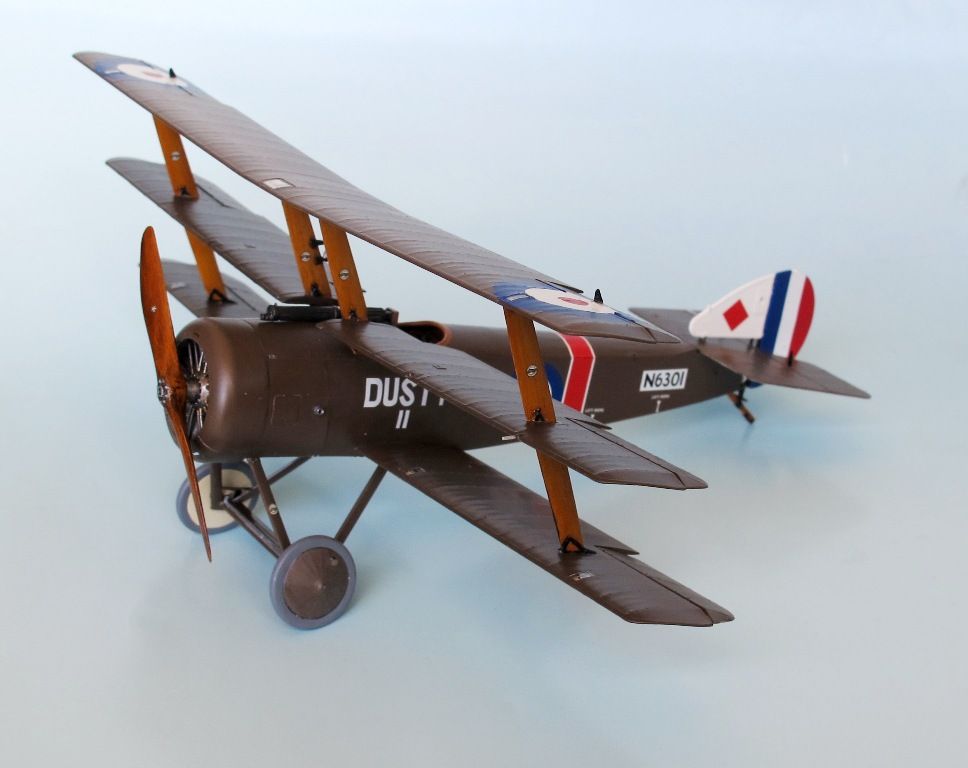
Kinnies - I used Humbrol #10 gloss brown slightly lightened with semi gloss white, and then overcoated with a 50/50 blend of Pollyscale Flat and Satin finishes.

B Brockel- Bob- I lay down a primer coat of very diluted matt white or very light grey on the surface and then thin the primary colour with Humbrol brand thinner or white spirits. The object is to achieve a smooth, brush mark- free surface, so sometimes two nicely thin coats are better than one thick coat which only smothers details. I Allow 24 hours between coats with Humbrol enamels just to ensure the paint is dry.

Whiteknuckles- my brush method has evolved over the years but there's no special secrets to it, just trial and error. Always use good, soft brushes- sables are best- Winsor & Newton the best, but I use Humbrol brand brushes #7 and #8 for main coats and coupled with properly thinned paint the Humbrol brushes give a smooth mark- free finish. I only brush in one direction - fore to aft and make sure there is not too much paint on the brush. Dip in tin, wipe both sides of brush on tin edge, then apply to model. Don't go back and forth over the area painted. Paint in one direction, ensure no brush hairs are left on the model :) then leave it. A second thin coat the next day with a chisel edge brush will fill in any patches.

A tip - Future will cover and smooth out any surface imperfections. Once decals are on and the finish coat of Pollyscale Flat/ Satin is applied, the model should have a nice smooth finish.


Cheers

Dave Wilson
Gold Coast
Australia
Owner and Administrator of ww1aircraftmodels.com and forum.ww1aircraftmodels.com

Offline mgunns

  • Hero Member
  • *****
  • Posts: 2255
Re: Wingnut Sopwith Triplane
« Reply #17 on: May 13, 2013, 07:46:18 PM »
Hello Dave:

I am catching up after a bit of a break and like the way this turned out.  As has been stated, hard to believe it is brush painted, but; your summary of how you do it explains a lot.  Good brushes, paints and patience.

This may be my next model.  It is growing on me.

Best

Mark
Mark

We few, we happy few.....

Offline Ernie

  • Hero Member
  • *****
  • Posts: 3961
  • "Once more into the breach"
Re: Wingnut Sopwith Triplane
« Reply #18 on: May 16, 2013, 10:31:51 PM »
I can only echo what the other fellows have said about your
brush painting...I didn't think it was possible to some out with
results like that without an airbrush.  Well done!
Thanks for sharing your work.

Best Regards,
Ernie
The new old guy, take two...