After some additional work on the tire letters I regard my Fokker as finished. I will add a bicycle and mechanic later, based on the advice given here.
Let me first thank this wonderful forum for providing me with so much valuable assistence, that it gives me the impression that although I build this Fokker with my hands and eyes, I feel a lot of you were encouraging me behind me. As I mentioned in the
first under construction post I had been waiting for a number of years for Wingnut Wings to produce this kit. I had been drawn to WNW over the years by many enthousiastic reviews and pictures and WNW got a lot of praise for their products. So already there was a Sopwith Pup in my stash, but that one is still in its plastic wrapping (the parts, not the box

).
So after recieving the kit early december I started studying the manual and finding more information about the subject. And this is how I stumbled on this forum which has proven to be a treasure of information and help on ww1 subjects.
Especially I would like to thank Des for this forum and his information on spark plugs, turn buckles and pre shading, Bo for offering many directions on techniques and useful links with more information, Bud for his demonstration of weathering with pastels, Keith for pointing me towards Taurus models and many others that have given advice, comment and just thumbs up for my progress.
It was my first 1:32 model, my first WNW kit, my first time for weathering, the first laminated propellor and the first time of rigging with EZ line
I added a number of things to the WNW kit, not that it is a bad kit, but such a kit is challenging to make even a better model out of it.
Things I added:
- control lines Spandau MG
- remote control throttle
- throttle control
- spark advance lever control
- spark plugs
- spark plug leads
- plug leads guiding tube
- priming valves
- air pump tubing
- valve springs, rocker arms, rocker boxes
- manifold nuts
If I am going to build another ww1 model I have to improve the fixing of the top wing by using Des' method and the weathering can be better. I am considering at least 3 other WNW kits that have flown with the LVA, but it will have to wait as I should be finishing a lot of brass railway models.
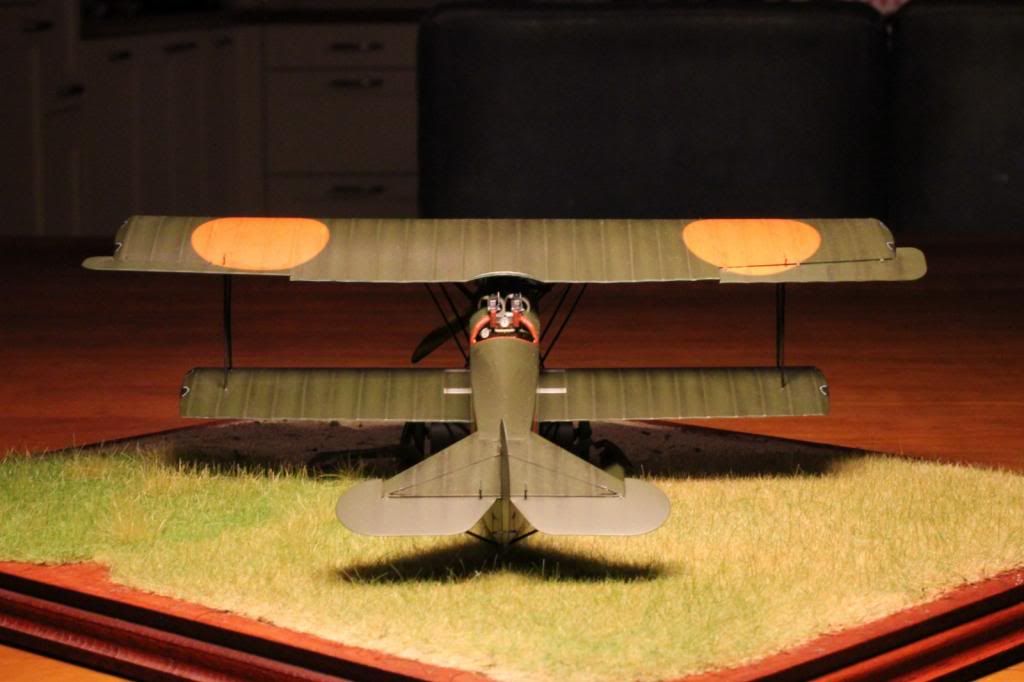
I must compliment WNW for issuing a perfect kit. I had no problems with the fit of the fuselage and the motor panels as many have experienced. A thing nobody has mentioned but is really a striking feature of this model is the shape of the top wing. The thick rounded part in the middle becoming slimmer towards the wing tips where the top of the wing remains level is typical for all Fokker wings on all Fokker aircraft until 1940. You see it on the biplanes, but also on the many passenger aircraft from F.II to F.XXXVI. There are only a few models of those aircraft.
A discussion might ensue about the colors I used on this aircraft. In comparison to all the beautifull colored german schemes provided by WNW and Pheon models, this LVA scheme is rather dull. It has just LVA blue on the lower surfaces and LVA Khaki on top. White Ensign Models have produced these colors, but my LVA Khaki tin just wasn't big enough (there wasn't enough left after a number of 1:72 models
). So I used a Revell tin instead. Now the White Ensign Khaki is very similar to Revell Khaki, although the White Ensign tends to be more brownish, while the Revell tends to be greenish. Discussions about the correct colors is always difficult and I am going to leave it as it is.
Now on to the pictures:


Most common picture of the original


And to prepare it for take off, the engine cowlings can be closed too:


regards,
Ivo

