Author Topic: Albatros W.4 float feedback  (Read 7660 times)

Offline pepperman42

  • Hero Member
  • *****
  • Posts: 4507
  • Sergeant, my brown pants.......
Re: Albatros W.4 float feedback
« Reply #15 on: February 24, 2013, 09:33:15 AM »
It all looks great and would be well received by the WWI builders as a conversion kit. Count me in.

Steve

Offline Chuckt5

  • Full Member
  • ***
  • Posts: 205
Re: Albatros W.4 float feedback
« Reply #16 on: February 24, 2013, 10:51:03 AM »
Thanks again everyone for the encouragement.

Someone asked how I made it. I used the data files plans (enlarged to 1/32) and cut out profiles from thicker card including bulheads. From there I applied a skin from .02" card. From there I did lots of sanding and used filler as needed. The most complexe shape to capture was at the rear (pointed end) of the float which was filled with balsa, then filled with bondo and filler. After much sanding, priming, sanding, priming... I ended up with the basic shape which I shared at the top of the thread. Just installing the strips along the bottom sides  and bottom right now. Then will come the drain port surrounds and walking strips on the top. Shes getting closer!

Here are a few earlier shots:


Offline rhallinger

  • Hero Member
  • *****
  • Posts: 1976
Re: Albatros W.4 float feedback
« Reply #17 on: February 24, 2013, 10:55:04 AM »
This is a fine, thoughtful piece of modeling Chuck! ;D  Thanks for sharing it with us.  Well done!

Regards,

Bob

Offline uncletony

  • Hero Member
  • *****
  • Posts: 4391
    • Aircraft In Pixels
Re: Albatros W.4 float feedback
« Reply #18 on: February 24, 2013, 11:10:10 AM »
This is a fine, thoughtful piece of modeling Chuck! ;D  Thanks for sharing it with us.  Well done!

Regards,

Bob

+1

Offline Chuckt5

  • Full Member
  • ***
  • Posts: 205
Re: Albatros W.4 float feedback
« Reply #19 on: February 24, 2013, 01:53:08 PM »
Man, I'm going bugg eyed with all this riveting!  :o

Ended up working on the trims that go on the exterior of the float both top and bottom. Boy that thin CA is tricky to work with!

Took a while to install and then rivet the strips with a pin. I would have used my BR production riveter but didn't think I was skilled enough to keep it running down the center of the strip which is only .02" wide. I put a little wash into the nail holes so they show up better in the pics.

I was also hoping to also install the wooden wear strips on the bottom and walkway strips on the top but I discovered too late that I didn't have the right size of strips in my stash. That coupled with the fact the hobby shop was closed means this is all I get done tonight.

Heres a couple of pics. It needs some cleaing up but I like how its coming.


Offline GAJouette

  • Hero Member
  • *****
  • Posts: 3579
  • " Beware of the Spanish Inquisition"
Re: Albatros W.4 float feedback
« Reply #20 on: February 26, 2013, 04:06:34 AM »
   Chuck,
Outstanding work on your W-4 float my friend. Looks absolutely perfect from here.It must have been a real you know what to place all those many rivets in such a straight line. But details like these realy make this one stand out. I'm realy looking forward to watching this awesome project play out.
Highest Regards,
Gregory Jouette
" What Me Worry"

Offline coyotemagic

  • Hero Member
  • *****
  • Posts: 7710
  • "Here's to not buggering it up." -Winston Chuchill
    • My Models
Re: Albatros W.4 float feedback
« Reply #21 on: February 27, 2013, 03:42:07 AM »
Outstanding detail work on the floats, Chuck.  I'm looking forward to watching this project unfold.
Cheers,
Bud
"All men dream: but not equally. Those who dream in the dark recesses of the night awake in the day to find all was vanity. But the dreamers of day are dangerous men, for they may act their dreams with open eyes, and make it possible." -T. E. Lawrence

Offline Chuckt5

  • Full Member
  • ***
  • Posts: 205
Re: Albatros W.4 float feedback
« Reply #22 on: February 27, 2013, 09:07:17 AM »
Thanks again guys. I have done more but won't be able to post pics until my shift is done (working the old 24 hr shift!)  :o

Until then, Chuck.

Offline Chuckt5

  • Full Member
  • ***
  • Posts: 205
Re: Albatros W.4 float feedback
« Reply #23 on: March 06, 2013, 02:38:41 PM »
Sorry for taking so long to post any updates. Family, work, travel... it all seems to take up so much time and leave so little for the hobby bench, but I'm sure I'm not the only one who knows about all this!  ;)

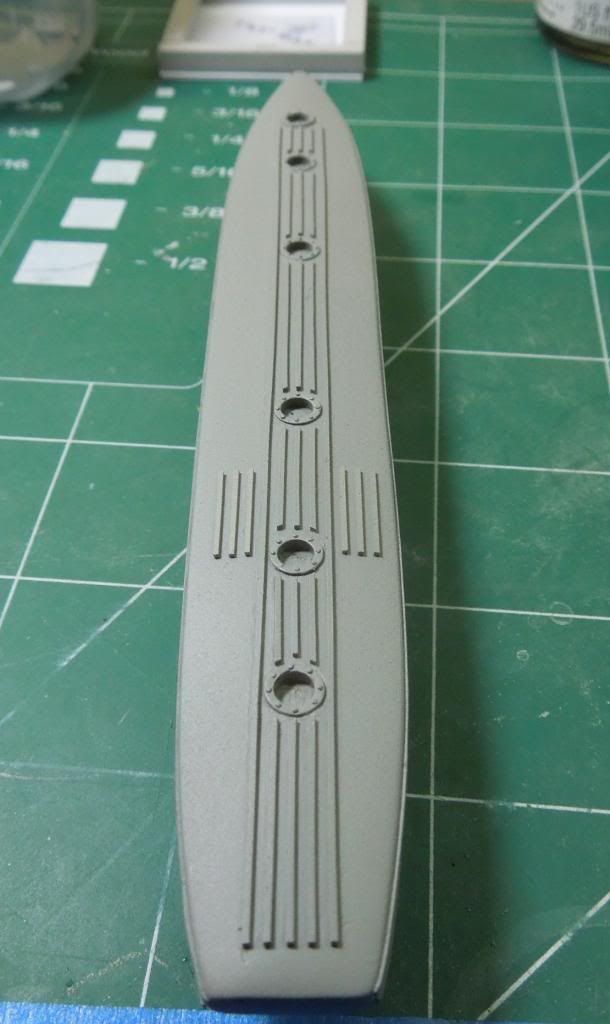
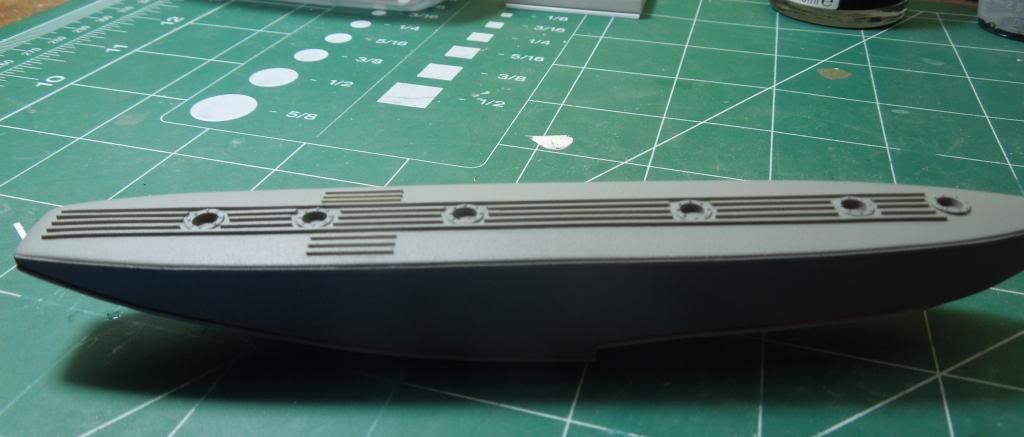
I have been able to install the walkway strips on the top surface from .02" by .02" strip. Pretty finicky, but I think it turned out pretty good.


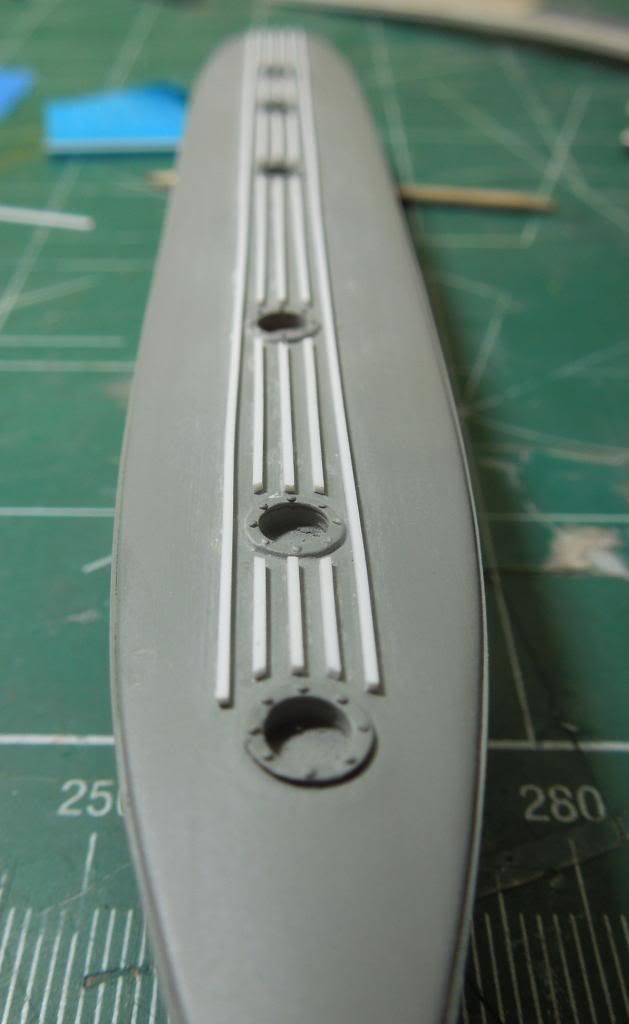
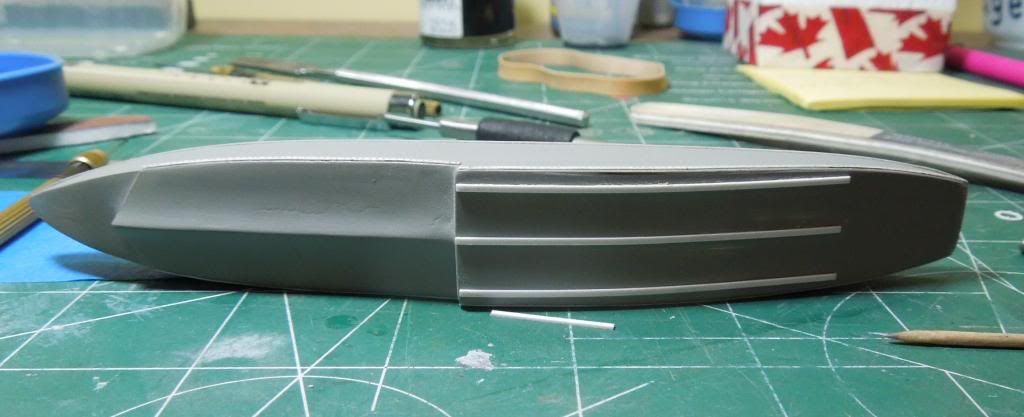
I then installed the remaining walkway strips and threw down a coat of primer. What do you guys think? It just needs the drain caps finished up and installed, then I can move onto the wings or maybe the engine.

Not sure what I'll do next, but I have a yearning to get to something that I can paint and finish.  :D

Feel free to post your comments.


Offline rhallinger

  • Hero Member
  • *****
  • Posts: 1976
Re: Albatros W.4 float feedback
« Reply #24 on: March 06, 2013, 09:35:03 PM »
Fantastic piece of modellng Chuck! ;D  Is this your master, or were you adding details to a resin casting?  Whichever, it looks great! :D  Keep going!

Regards,

Bob

Offline uncletony

  • Hero Member
  • *****
  • Posts: 4391
    • Aircraft In Pixels
Re: Albatros W.4 float feedback
« Reply #25 on: March 06, 2013, 10:12:52 PM »
Gosh darn, that's beautiful!

Offline Pete Nottingham

  • Hero Member
  • *****
  • Posts: 906
  • I chose the wrong week to stop sniffing glue
Re: Albatros W.4 float feedback
« Reply #26 on: March 06, 2013, 10:37:48 PM »
Lovely work Chuck, great job.

Cheers

Pete.

Offline Chuckt5

  • Full Member
  • ***
  • Posts: 205
Re: Albatros W.4 float feedback
« Reply #27 on: March 07, 2013, 12:15:40 AM »
Thanks guys. This is my master that I'll copy in resin once done.

Offline ALBATROS1234

  • Hero Member
  • *****
  • Posts: 2657
Re: Albatros W.4 float feedback
« Reply #28 on: March 08, 2013, 02:43:46 AM »
looks great and i think you have a product you could cast and sell. i would be in. this is very nice work and will look fantastic on the 1/32 w4. you may know this already if you cast regularly. you have to be careful casting a part that is primed. the mold release will soften the primer and cause it to stick fast to the silicone mold material. i lost a cockpit decking i scratched to convert a 1/32 roden d.iii albatros into a d.iii oeffag. when i went to demold the part it stuck to the rubber so tight i destroyed both the original and the mold trying to get it free. it caused me to become frustrated and loose interest in the project. anyway point is i dont prime parts i want to cast. i imagine if you envelop it in an acrylic primer it wont melt with the solvent based mold release. or perhaps dont used mold release or maybe use some sort of dish soap based lubricant to insure the rtv wont imbed itself. you may know all this if so i apologize. but if you didnt i posted this in hopes that your cast went well. sorry to drone on.....scott
« Last Edit: March 08, 2013, 02:47:24 AM by ALBATROS1234 »

Offline pepperman42

  • Hero Member
  • *****
  • Posts: 4507
  • Sergeant, my brown pants.......
Re: Albatros W.4 float feedback
« Reply #29 on: March 08, 2013, 03:52:48 AM »
Thats going to be a fair chunk of RTV and resin. Are the floats "handed" or both the same?
Looks great!!

Steve