Author Topic: Colourful Camel, Eduard 1/48  (Read 1659 times)

Offline FAf

  • Hero Member
  • *****
  • Posts: 1077
Colourful Camel, Eduard 1/48
« on: March 10, 2024, 12:13:18 AM »
Hi all... after a fairly long absence from the forum and a period of low building intensity, I now feel that it might be time to post something again.

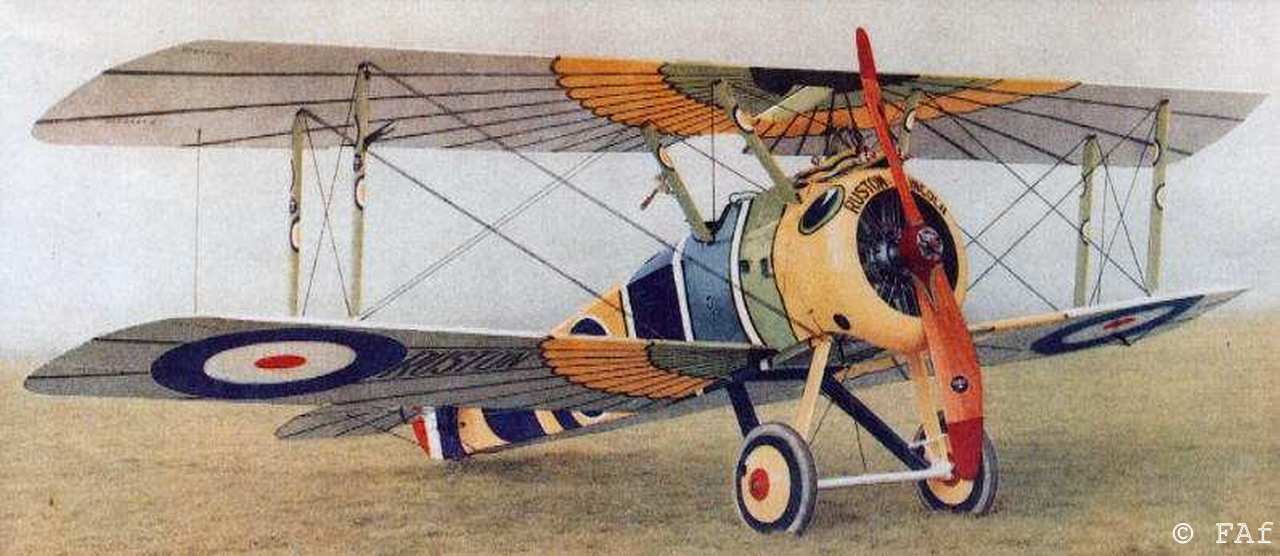
It's been about nine months since I last took a picture of one of my models/my modelling progress, and I realise that I've left some unfinished build logs here. I'll see what to do about those. In the mean time I've build one Eduard Camel and one Eduard Albatros D.III Oeffag and inspired by the easy build of the former I decided to start this new Camel build and to build the celebratory Ruston Camel.

Not my copyright on this image.


Some progress shots will bring you to present status. The aim is to have in finished until April 13th, when my closest modelling contest is returning after a few years abscence.

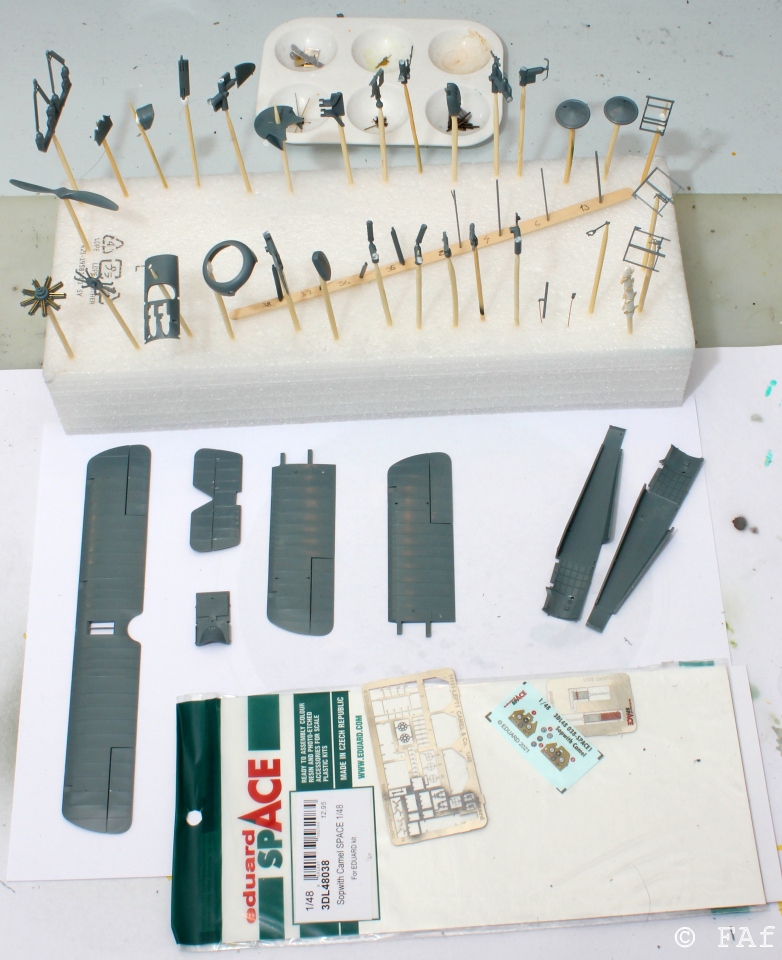
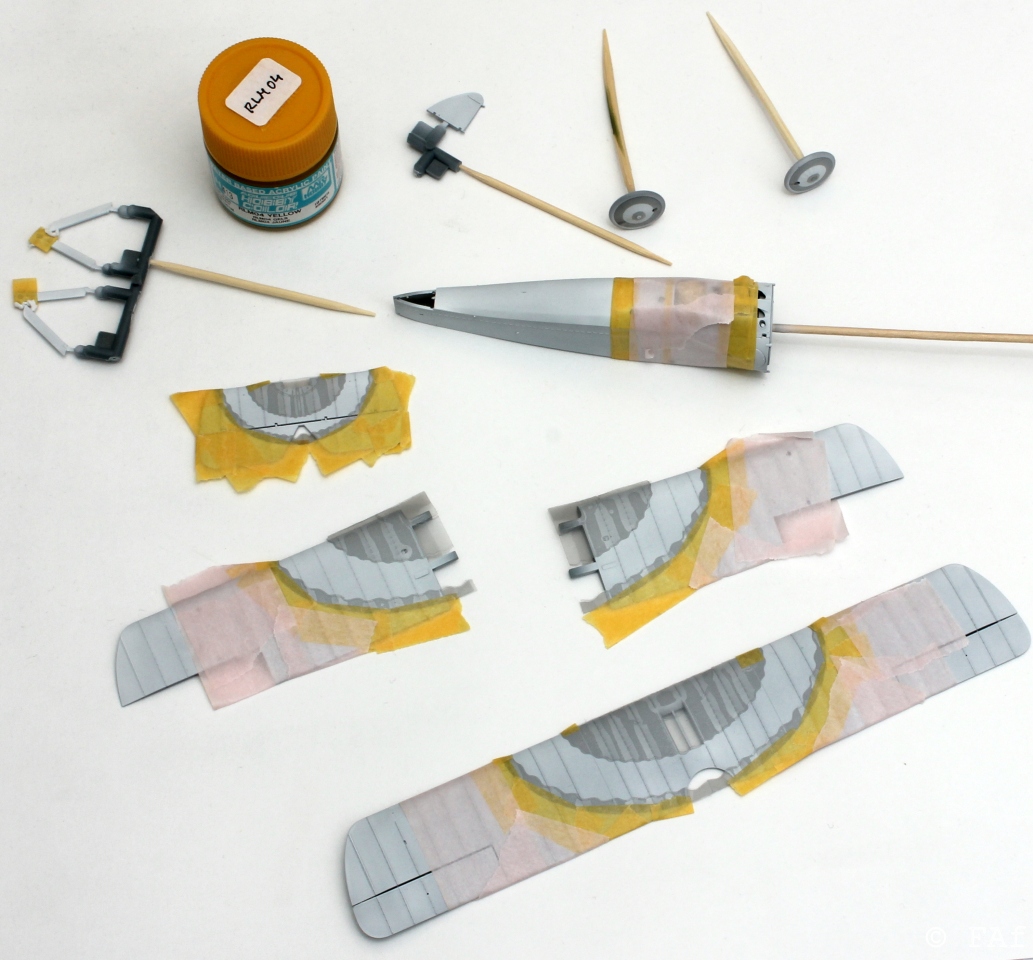
All parts prepped and ready for primer. This is the Weekend boxing, so I added the Space set to get the seatbelts.


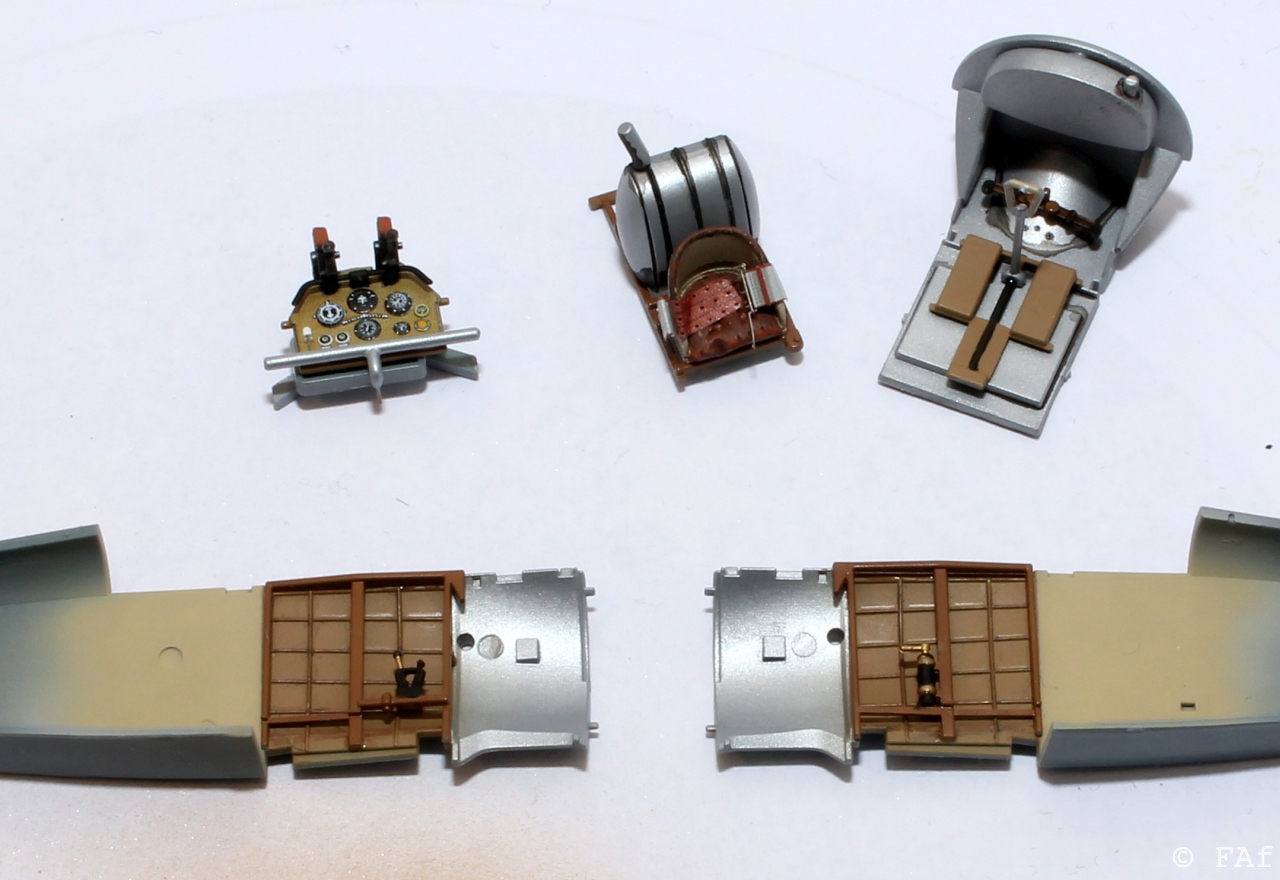
This is my third Eduard Camel and I've come to realise that very little will be visible down the cockpit opening, so I took some shortcuts. No woodgrain in the cockpit, just different colours of wood. No internal rigging. Pretty basic painting.


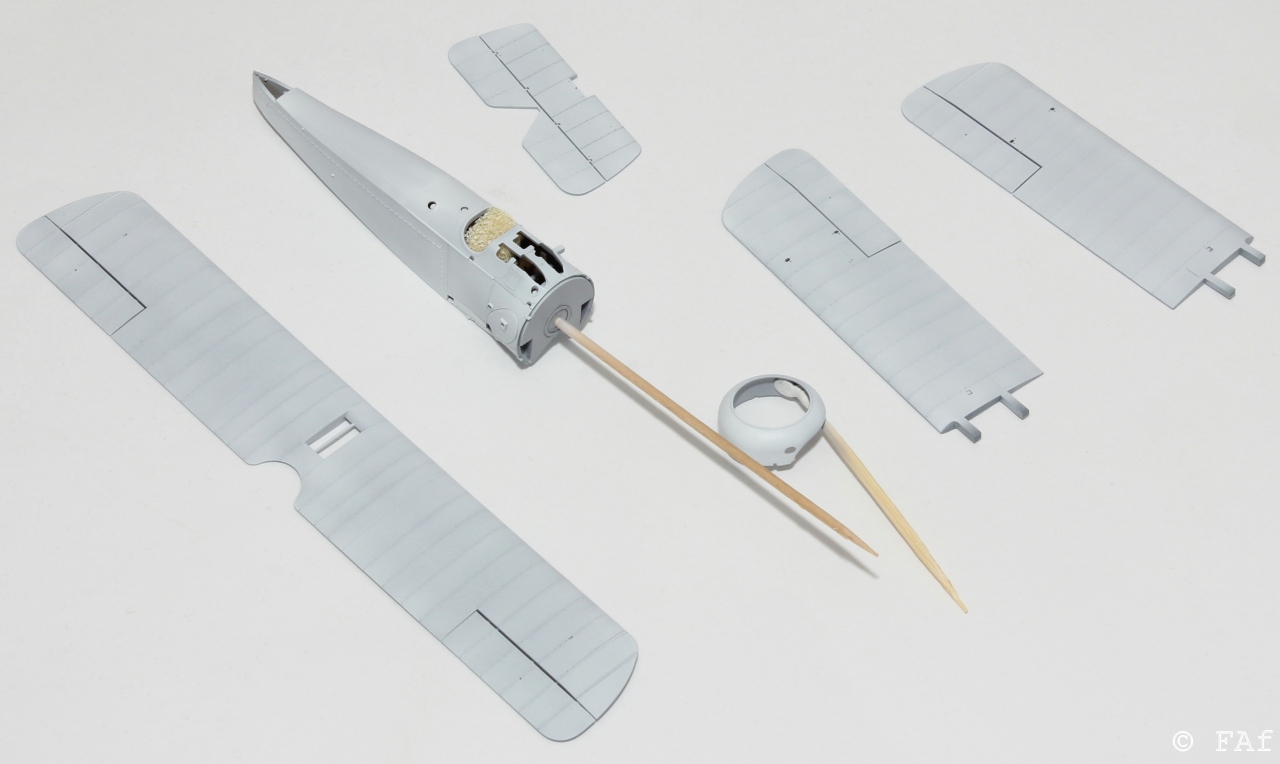
White was the first colour to paint, as it is the basic colour for the wings and horisontal stabilisers.


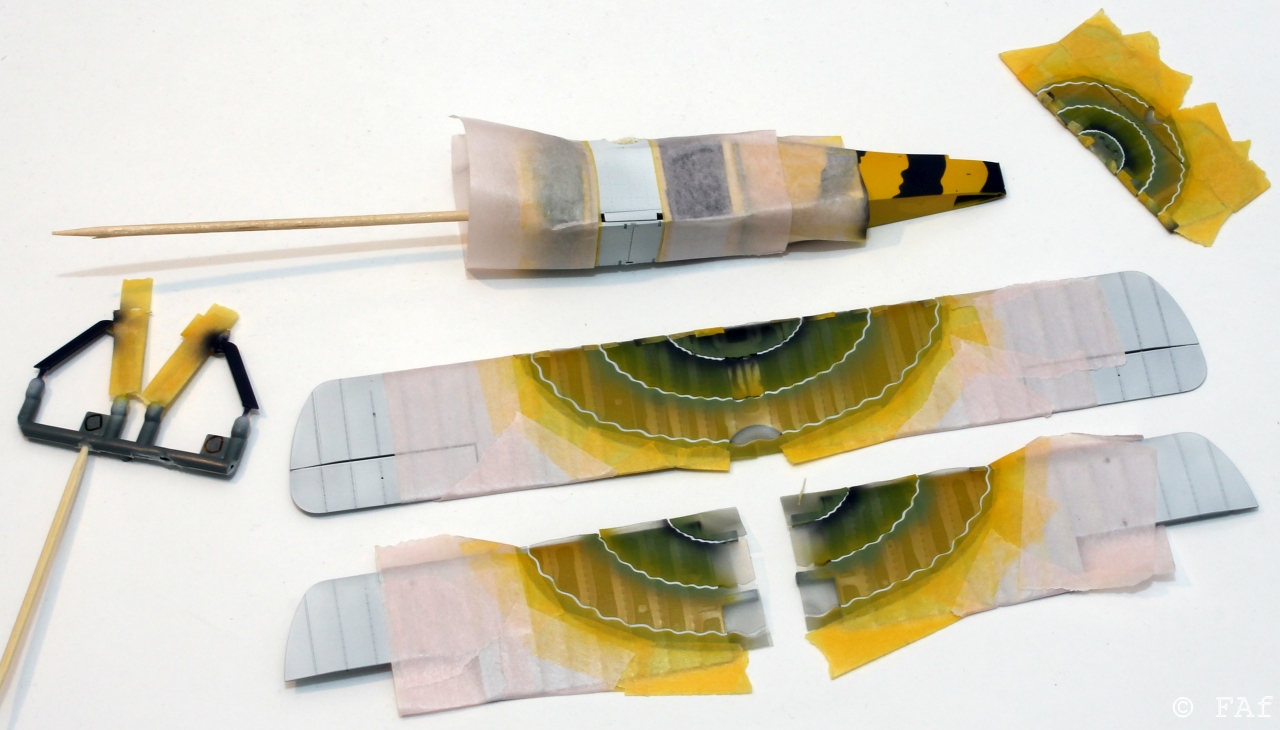
Masks prepared and ready for yellow paint. Next picture is just before painting the last colours.


Unmasked! Pretty happy with the results. It took some careful masking and painting, but, except for a few areas to touch up, everything went according to plan.


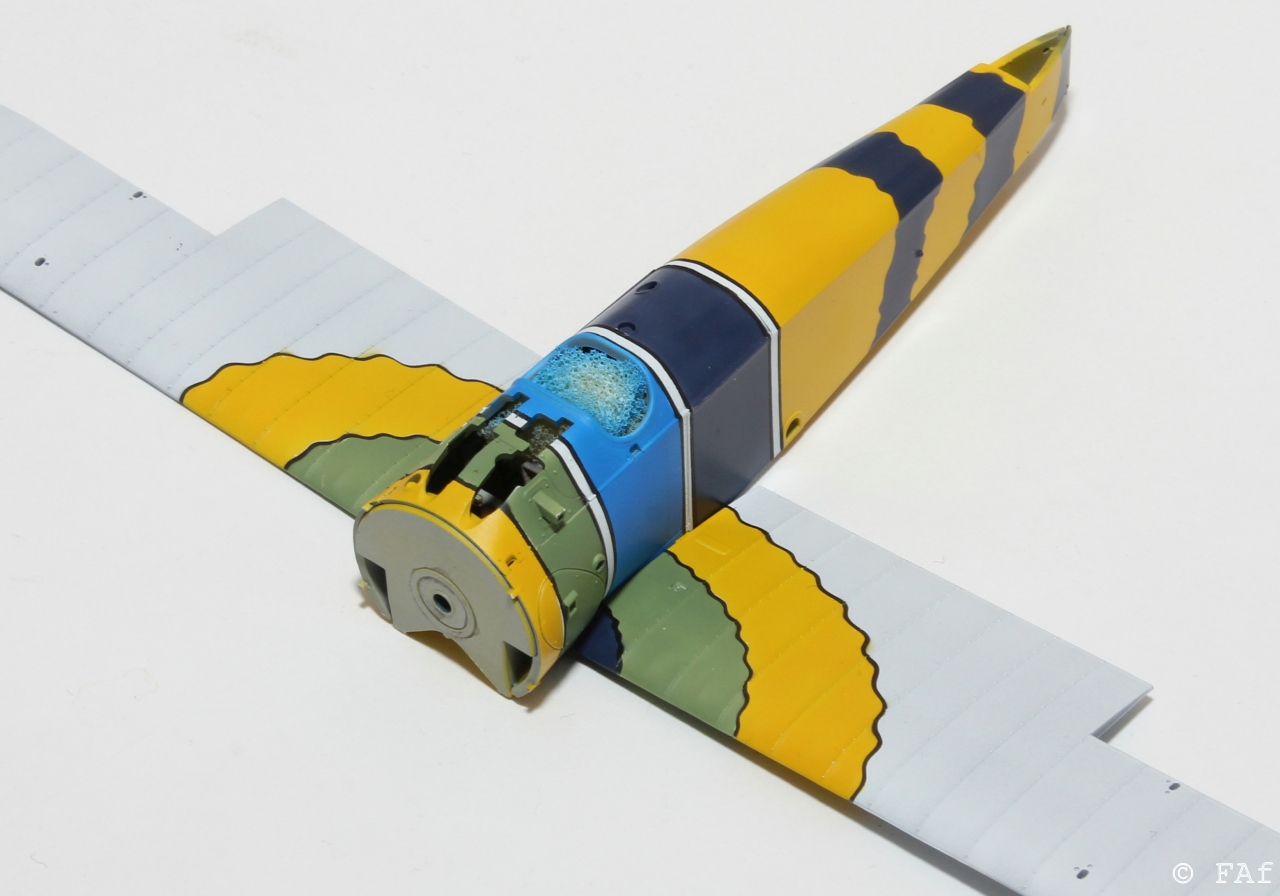
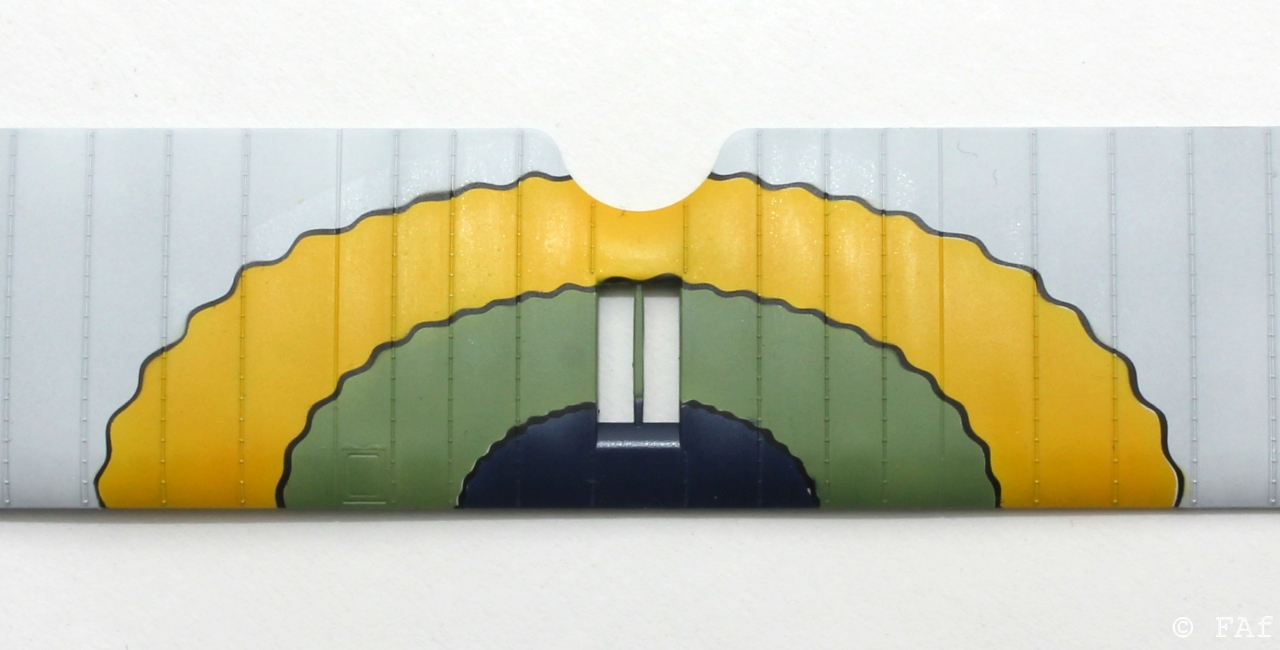
Next steps include the long black lines on the wings and the eyes on the cowl.
/Fredrik

Online Davos522

  • Hero Member
  • *****
  • Posts: 797
Re: Colourful Camel, Eduard 1/48
« Reply #1 on: March 10, 2024, 12:17:09 AM »
Wow! An incredibly complex job, this is going to be fun to follow along with. It looks great so far.

Dutch

Offline PrzemoL

  • Hero Member
  • *****
  • Posts: 4892
  • There was Eru... and he made first the Ainur...
    • Przemysław Litewka
Re: Colourful Camel, Eduard 1/48
« Reply #2 on: March 10, 2024, 12:18:44 AM »
Oh my! What an entry!
Ash nazg durbatuluk, ash nazg gimbatul,
Ash nazg thrakatuluk, agh burzum-ishi krimpatul.

Offline djuggie

  • Full Member
  • ***
  • Posts: 144
Re: Colourful Camel, Eduard 1/48
« Reply #3 on: March 10, 2024, 08:34:50 AM »
One of my favorite Camel color schemes.  You are doing an excellent job on it.  Keep up the good work.

Dennis

Offline NigelR

  • Hero Member
  • *****
  • Posts: 661
Re: Colourful Camel, Eduard 1/48
« Reply #4 on: March 10, 2024, 07:07:07 PM »
That's incredible masking work, the result looks fantastic.

Offline FAf

  • Hero Member
  • *****
  • Posts: 1077
Re: Colourful Camel, Eduard 1/48
« Reply #5 on: March 11, 2024, 04:27:59 AM »
Thanks! Masking is quite rewarding when it goes well, and slightly frustrating when the results aren't exactly what you hoped for...

Todays many hours were mainly spent on placing tape on the upperside of the wings. Spraying black took just a few minutes. I'm kind of pleased with the results, but I wasn't as good at spraying black perpendicular to the topside this time so the result isn't perfect. But for the time being I might go with this and just try and touch up a few extra problematic spots.


/F

Offline Edo

  • Hero Member
  • *****
  • Posts: 707
Re: Colourful Camel, Eduard 1/48
« Reply #6 on: March 11, 2024, 04:50:09 PM »
unbelivable!
what a colour scheme!

ciao
edo

Offline AngryJazz

  • Sr. Member
  • ****
  • Posts: 268
Re: Colourful Camel, Eduard 1/48
« Reply #7 on: March 11, 2024, 06:43:07 PM »
Wow what an amazing scheme! Really impressed with your work!

Did you make the masks yourself with a cricut machine?
//Ben

Offline NigelR

  • Hero Member
  • *****
  • Posts: 661
Re: Colourful Camel, Eduard 1/48
« Reply #8 on: March 11, 2024, 07:17:27 PM »
I would have cheated and used black decal strips! But I think this looks great and your masking efforts were rewarded.....

Offline FAf

  • Hero Member
  • *****
  • Posts: 1077
Re: Colourful Camel, Eduard 1/48
« Reply #9 on: March 17, 2024, 10:51:59 PM »
Thanks Edo, AngryJazz and Nigel!

Nigel - I'm not really sure using black decal strips could be seen as cheating... imagine trying to get rather long and thin decal strips placed accurately about 80 times. But it could have been an option and you don't have to kick yourself for sloppy masking leading to overspray.

AngryJazz - Yes, I made the masks myself. But I have a Silhouette Cameo 2, which is basically the same thing I suppose.


OK, giving yourself a bit of distance timewise is a good idea. With a little bit of touching up and looking at the result a little bit later I came to the conclusion that the result was good enough and that it was worth using the same method for all the other stripes. So, no re-paint of the wings. But sometimes you have to re-do things... I had assumed that the "feather" on the horisontal stabiliser would be the same as on the main wings, just scaled differently, but that was wrong so I stripped the paintjob and produced new masks and re-did the painting.


Apart from that, things have been moving forward. I have mainly done a lot of masking, but apart from that I had to paint the eyes.


Almost everything is painted now - todays goal is to paint the roundels and fix the "Ruston Lincoln" decal that should sit between the eyes. I might look at the masking necessary for painting the propeller, as well.


/F

Offline NigelR

  • Hero Member
  • *****
  • Posts: 661
Re: Colourful Camel, Eduard 1/48
« Reply #10 on: March 18, 2024, 06:04:18 AM »
Wow, beautiful, precise work. Nice progress.

Offline FAf

  • Hero Member
  • *****
  • Posts: 1077
Re: Colourful Camel, Eduard 1/48
« Reply #11 on: March 22, 2024, 07:55:01 AM »
Further steps accomplished. The first and in a sense the easiest was to paint all of the roundels. I skipped the vinyl masks this time and cut the masks using Tamiya masking sheets instead. Given the rather three dimensional ribs on the wings, it is a bit difficult to get the vinyl to settle down in between. The Tamiya tape variant works much better a time like this.


I always paint my planes in this order, leaving the markings until the end. This time it would have been a better idea to start with the roundels and then hide them under a mask while painting the rest. That way I wouldn't have had to try and cover the black lines using white paint. But, it turned out fine anyway.


There are some decals needed as well. The serial number and "Ruston Lincoln" were fairly straight forward.


The roundels with their white centres a little bit more difficult. A long time ago I created decals using a white backed decal sheet. I thought then that the white showed quite well in any cuts you made to the decals, so this time I tried spraying white on a clear decal film before printing the red and blue with a laser printer. When coating with Microscale Liquid Decalfilm I realised that spraying it might be a good idea if you've used paint on the decal. You can see some white shades on the upper right decal.


Then there's the question of getting the actual roundels out as well. I thought I could use my machine to do that as well, but it was far too difficult to align things for a good enough cut. After a bit of thinking it occured to me that I could punch them out. Just align the oversized decal by eye and whack it. It's a good idea to add a little more liquid decalfilm after the whack. I'm pleased with the result, just seven more struts to go...


Offline NigelR

  • Hero Member
  • *****
  • Posts: 661
Re: Colourful Camel, Eduard 1/48
« Reply #12 on: March 22, 2024, 09:01:49 PM »
More masking.....oh goody  :o ;) Great work, and I love your attention to detail on the decals. This is going to look stunning when done.

I have great trouble using punches to align with circular decals, I have found a Japanese leather punch to be a useful piece of kit. But it looks like you are doing a great job with the punches.

Offline KiwiZac

  • Global Moderator
  • Hero Member
  • *****
  • Posts: 2634
    • My Linktree
Re: Colourful Camel, Eduard 1/48
« Reply #13 on: March 23, 2024, 12:03:12 PM »
Just beautiful work. This will be spectacular!
Zac in NZ

Offline FAf

  • Hero Member
  • *****
  • Posts: 1077
Re: Colourful Camel, Eduard 1/48
« Reply #14 on: April 04, 2024, 05:23:25 PM »
Thanks Nigel and Zac!

More masking.....oh goody  :o ;) Great work, and I love your attention to detail on the decals. This is going to look stunning when done.

I have great trouble using punches to align with circular decals, I have found a Japanese leather punch to be a useful piece of kit. But it looks like you are doing a great job with the punches.

With my punch set I can place the decal and then turn the punch around and align it optically before punching. It works, meaning it produces ok results, but it's usually not perfectly centred. The bigger problem is that punching with this kind of punch tends to rupture the edges, the leather punch might be better there?!

I'm not sure I told you, but I have a deadline to meet and it's about a week and a half away. I think I will be able to meet it, given that I got the top wing in place yesterday. Apart from that milestone I've completed a range of smaller steps: fuel pump, small white background roundles painted on the propeller and Ruston decals placed, copper eyelets installed on the top wing, lower wings installed and lots of nylon threads installed in preparation for the rigging.


Rigging the tailplane doesn't require eyelets, you just run the monofilament from fuselage to fuselage via horisontal and vertical stabilisers. Attachment points are Resin Turnbuckles RAF late type from Gaspatch Models.


And the attached top wing. No massive problems, but there's always quite a bit of anxiety involved in the operation. Next up rigging and then it's pretty much finished...

/F