ARCHER RESIN RAISED DECALSFROM - ARCHER FINE TRANSFERSFIRST LOOK REVIEW BY DES DELATORREArcher Fine Decals produce a good range of raised decals which are suitable for many applications. They are cast resin on a clear decal film, I also reviewd the Generic placards which are black on brass and are of the dry press on type.
The sample pack arrived in a very strudy carboard box which prevented any damage to the contents, shipping labels were clearly marked.
The sample pack included one card each of the following items;
Resin Rivets/Screws - .008"(20mm) .011"(28mm) .014"(36mm) diameter various scales - product No. AR88001
Resin Tape and Stitching - 1:32 scale WW1 Rib Tapes and Stitching - Product No. AR88044
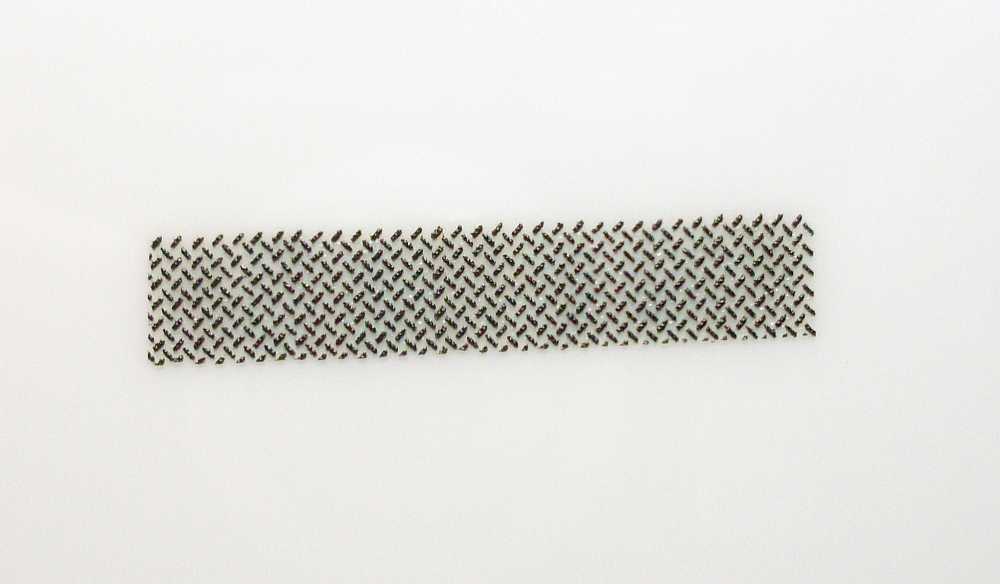
Resin Armor Treadplate - Generic US Treadplate Pattern - various scales - Product No. AR88008
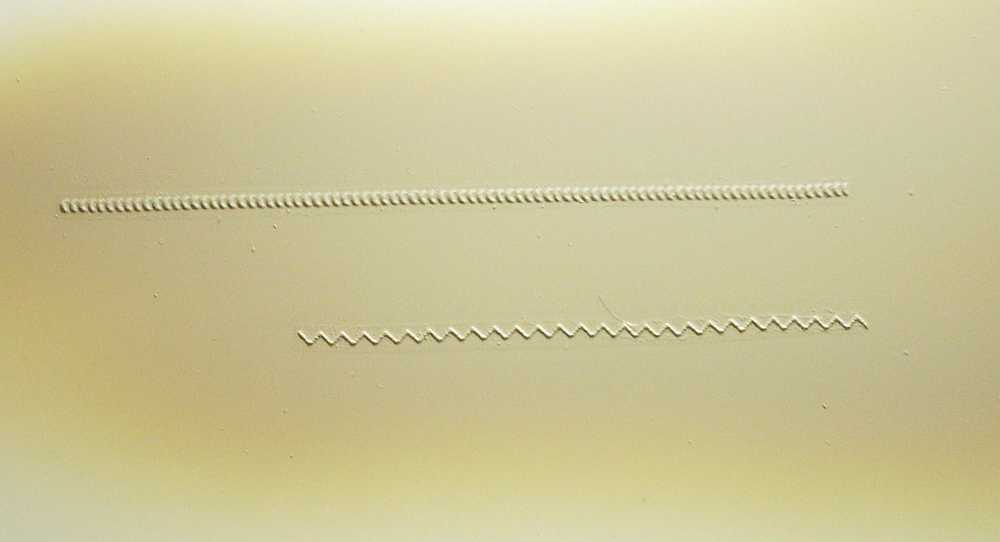
Resin WW1 Stitching - WW1 Stitching in 1:32 and 1:48 scale - Product No. AR 88004
Resin Tape and Stitching - WW1 Rib Tape and Stitching 1:48 scale - Product No. AR 88045
Resin Weld Beads - Perfect Weld Beads .015, .025, .030 and .040 inch wide - Product No. AR 88005
Resin Panel Lines - Raised Panel Lines Various Scales - Product No. AR 88013
Generic Placards - Black on Brass Dry Press On - Product No. AR35210X
Each card is enclosed within a plastic bag protected by a stiff card backing, instructions are also included with each pack. A stapled on label gives the name of the item, product number, price, the back of the label states the guarantee and gives contact details.


Opening each packet revealed very well cast and detailed resin on a clear decal film. The instruction are very easy to understand and include a link to a video tutorial which is very comprehensive and informative, well worth watching for anyone using these products for the first time.

For review purposes I will be selecting and applying items from the cards and fixing them to a sheet of white styrene sheet. There will be no preparation to the styrene sheet apart from washing in warm soapy water to remove and oil or grease residue. I cut strips off the card using a pair of scissors as recommended by Archer, try to cut as close as possible the the resin casting. A good sharp pair of scissors are needed to give a nice clean cut.
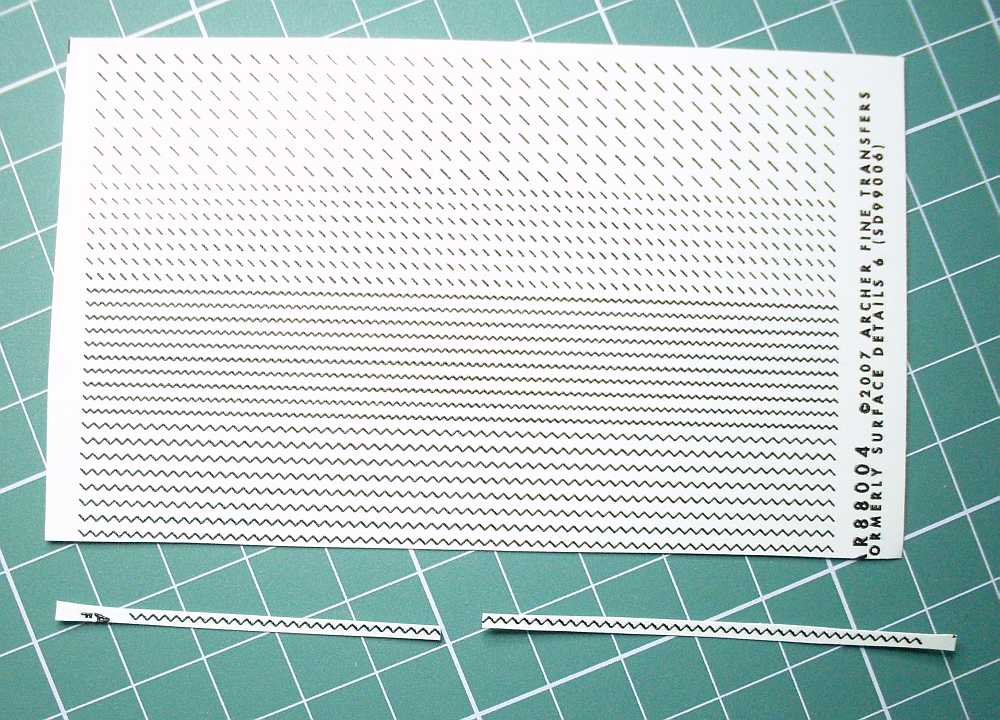
I cut my decal in half for ease of handling. Cut through the decal film with a sharp knife, I used my scalpel, make sure you do not cut through the paper backing. The small section left is used for holding the decal for the next process, I used a pair of self locking tweezers to hold the decal but any type of self locking tool would perform the same job'
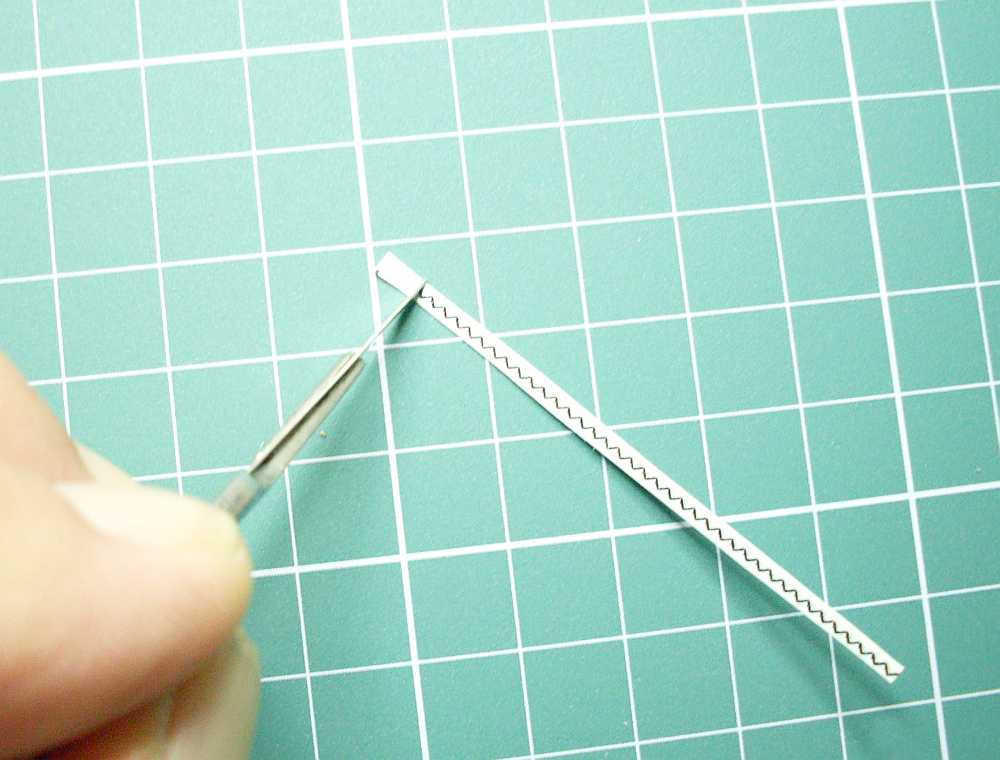

Turn the decal over and using a soft paint brush and clean warm water moisten the back of the decal. Allow the water to penetrate for at least 45 seconds before proceeding to the next step.
Using the clamp to hold the decal position the decal and hold with a flat piece of timber, a cuticle pusher is a useful item for this purpose. Slowly pull the clamp away from the decal allowing the resin and decal to sit on the surface, try to keep a straight as possible


Once the decal is in place, pat it gently with a paper tissue to remove any excess water. Paint over the decal with a decal setting solution, I used Mr Mark Softer but Micro Sol would be ideal for this process. Allow the decal solution to react with the decal then pat it down with the paper tissue. Lock the decal in position by using a hair dryer. The decal will be firmly in place and can be handled but care should be taken not to touch the decal with any sharp or hard objects.


Below is a combination of the decals fixed to the styrene sheet, included here is the Armor Treadplate. All the decals adhered very well but keeping them dead straight is a little difficult, practice at this will make perfect straight lines.


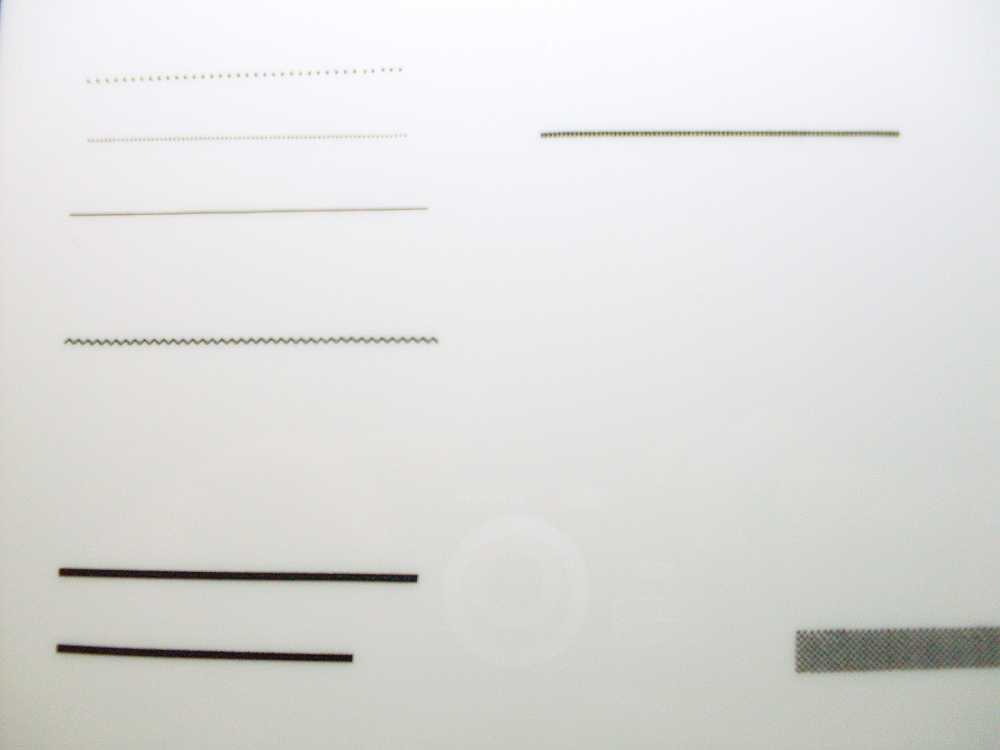
I decided to use the rib tapes on an old wing I had, the rib tapes are applied in exactly the same method as described above, they stick to the plastic surface quite well. As can be seen in the photos, the tapes have a nice textured surface but in my opinion are a just a little too thick, it would depend on the type of aircraft if these rib tapes are warranted.


These photos show the painted rib tapes, the photos clearly shows the thickness of these tapes, they are a little too pronounced but overall give a very good appearance of the original rib tapes.


I applied a coat of paint over all the decals to give a general idea of what the finished product looks like, As can be seen, they have excellent raised properties, the rivets stand out really well as does the stitching. The weld bead is a very good representation of a proper weld bead and these can be bent around shapes to give the item a welded appearance. Because these decals are designed to be used under paint, silvering of the decals is not important. The Armor treadplate decal is extremely well done and shows up well under a layer of paint, this would work well for aircraft wing walkways.


I next used some of the Generic Placards, these are of the dry press on type. I cut each transfer from the plasic card and positioned them onto the styrene sheet, using the flat end of the cuticle pusher I gently rubbed over the placard, the plastic covering will come away very easily leaving the placard in place, very easy to use and the placard adheres extremely well. I placed two of these on an old beat up engine I had in my spares box just to show how well they look on an actual object.


 POSITIVES
These products have a wide range of applications and it would be up to the modelers imagination to adapt them to their own particular situation. They are extemely well cast and are easy to apply, once fixed in position the raised surfaces are clearly visible. They appear to be very robust and can withstand a bit of rough handling, not hard sharp objects though.
PRICEEach card I received was marked at $17.95 with the Generic Placards marked at $9.95
STOCKISTAvailable direct from Archer Fine Transfers email address
[email protected]LINKSwww.archertransfers.comCONCLUSIONThese are excelent products and modelers will find many applications to enhance their models. The raised panel lines and rivets are not a common thing found on WW1 aircraft, but there are situations where rivets can be used around the engine cowlings. Builders of dioramas especially on scratch built vehicles will find the rivets very useful. The stitching is brilliant, these can be used on the fuselage or wings and will make any WW1 model aircraft come to life. Rib tapes are not used on all aircraft but for those that do these rib tapes would be very useful. Normal decal rib tapes are very thin but these resin tapes have plenty of thickness and texture to give an excellent appearance. The placards could quite easily be used on any engine or in the cockpit, even though they are US the lettering is too small to be read so they would be suitable for any aeroplane.
I highly recommend these products as I see great potential in the WW1 aircraft model field.
Thanks to Archer Fine Transfers for providing the review samples.

