I'm returning to WW1 subjects with this Meng Fokker DR.1. I'll be doing the red one 'cause everybody has to do one, right?
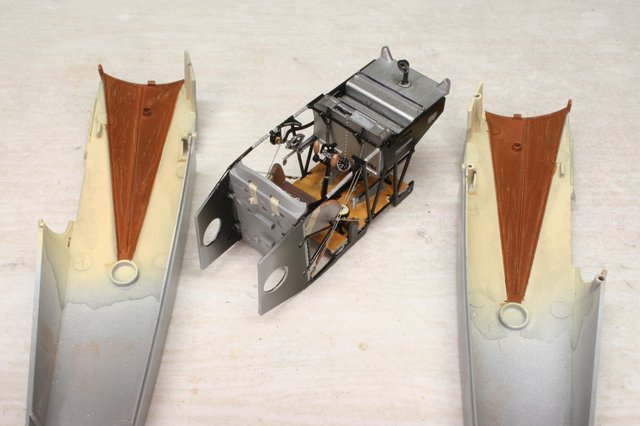
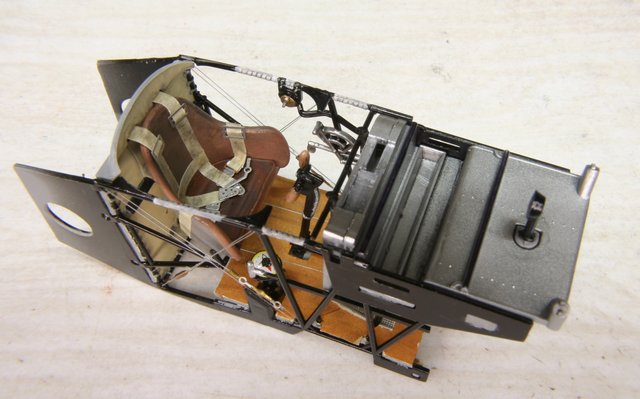
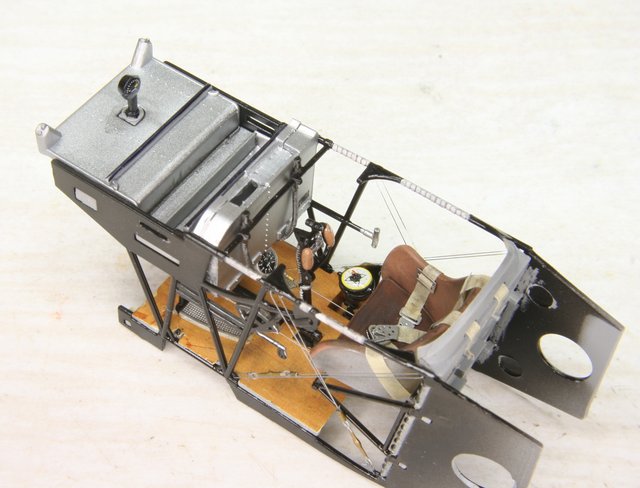
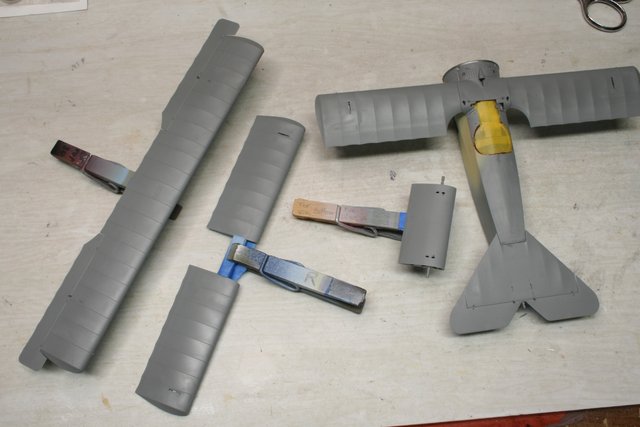
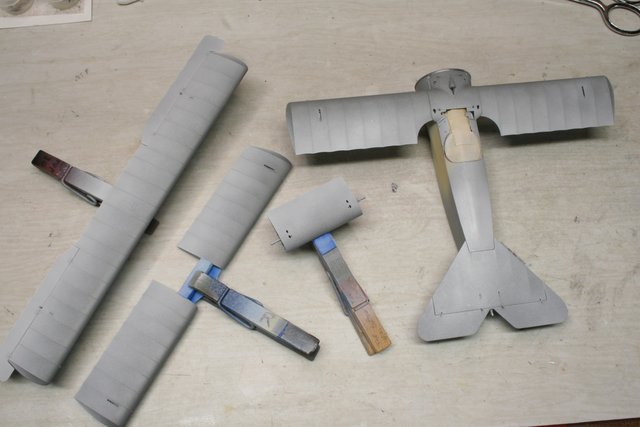
I have completed the interior as the pictures below show, and currently working on the overall paint job.
I have not been particularly impressed with the molding here. The detail is very good, but my kit has some misaligned mold halves and warped fuse halves, along with the usual warped wings and broken fuse panel on the middle wing.
I guess I got a 3rd shift kit.
So, interior pics below depict 425/17 as I have read about, with a black frame and dark red-brown ply panels on the sides. I don't have detail pics of the interior, so I went with what I could find, tending to leave detail out instead of including something the real plane didn't have.
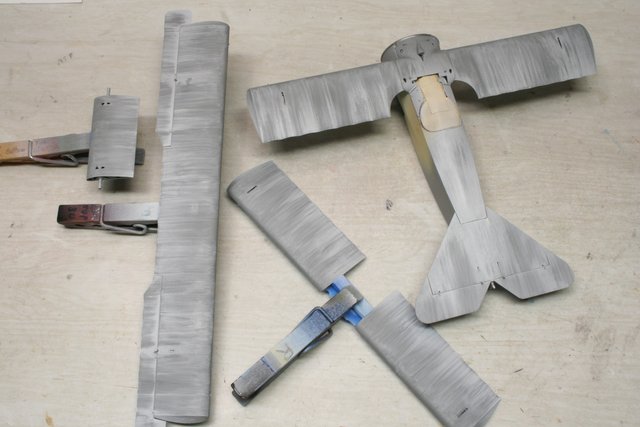
So, moving on to the overall paint. I didn't want to just paint on broad panels of pure red, so I devised a method of streaking that will just barely show through the red due to the color's translucience. I did a test piece and it came out okay, so I forged ahead.
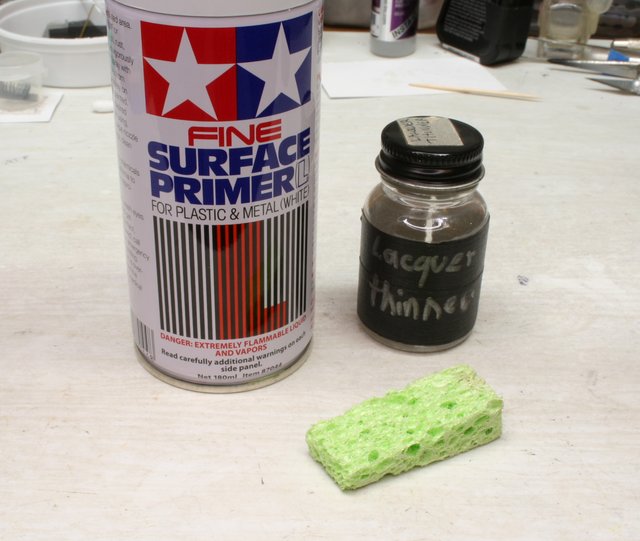
I call this technique 'sponge streaking'. It entails painting the gray plastic with a white lacquer based primer, then wiping off the primer using a sponge dipped in lacquer thinner to create streaking. This method dries fast and allows painting the top coat in just a couple of hours if desired.
The starting point: Materials needed - Tamiya white lacquer in the spray can, lacquer thinner, and a cellulose sponge.
Bare gray plastic
Then, spray thin coats of the white primer. Here, I set down a heavier coating on the rear edges of the wings, leaving a lighter coating on the leading edges.
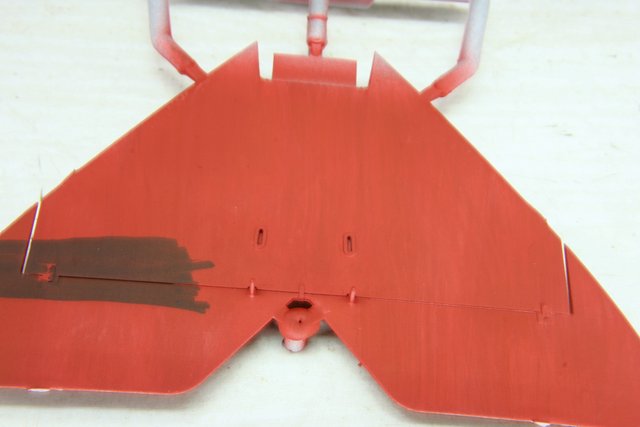
After drying a while, dipped the sponge in some lacquer thinner and brushed it across the wing multiple times until I got the streaking effect I wanted. I found it best to wipe from the leading edge all the way to the trailing edge without stopping.
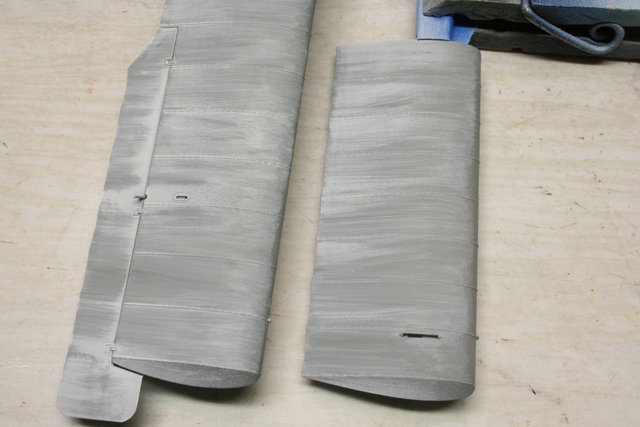
This is where I'm at currently.
My test pieces:

The white balance is off, so the red color looks very orange in the pics, but the color is a brick red.
I think this method has some promise if one wanted to create a standard Fokker streaking finish. If an acrylic light blue was painted first, then a light layer of dark green lacquer, followed by the sponge treatment, it should create the streaking seen here. Saving this idea for the future.

