I've been wanting to do a plane that has a lot of wood grain, so an Albie was a natural choice. I couldn't decide what livery to do, so I have decided to depict one that just came from the factory, without unit markings.
The Roden Albatros D.III is my victim here.

I have collected a few aftermarket items over the recent years - HGW seatbelts, wood grain decals, and nail lines, Tom's Modelworks P/E, and Lukasz from Taurus Models was kind enough to include some rocker arms and valve springs as freebies in a previous order that included an ignition switch. The arms and springs are for a BMW engine, but they certainly look better than the Roden moldings. So, my model may not be 100% accurate, but it will look better than OOB.
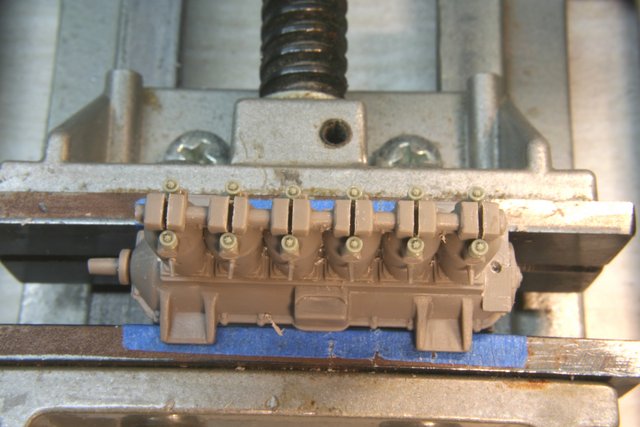
I started on the engine.
Here, I have drilled holes for the valve springs.

And installation.

I also revised the cooling water piping to the cylinders. The kit engine looks like its a Merc IIIa, where this plane has the III. I didn't take any pictures of this modification specifically, but its visible in the last picture. I still have some plumbing to do to connect it up. The water pipe from the radiator looks to be going to the wrong place as well. It should go to the water pump intake, not into the crankcase.
Next, I tackled the rocker arms. I cut off the molded ones and decided to do this the easy way. I found a saw that cut a kerf at just the right width for the rocker arms to mount into.
I CA'ed the arms in place. I plan to cover the tops of the valve covers with painted aluminum tape to hide the slots.
I decided to try to include the slotted nuts that hold the intake manifold to the cylinders. I first took some soft wire and bent it around a drill bit of the appropriate size to make the rings. This worked well, but the rings did not have the slots in them, used to tighten the rings up. I was on the right track, but needed to go further.

This took some thought as to how to make them. I noticed that some pliers have parallel slotted grips and thought I could use this as a stamp to imprint some soft wire with notches. I cut some soft wire into short lengths, placed the opened pliers on top of the wire, and struck it with a hammer. If the pliers were not positioned correctly, one end of the wire was too flattened and the other end not imprinted enough. After a few attempts and some practice, I could get some useable pieces of wire. If I hit the pliers with a hammer with too much force, it flattened the wire too much.
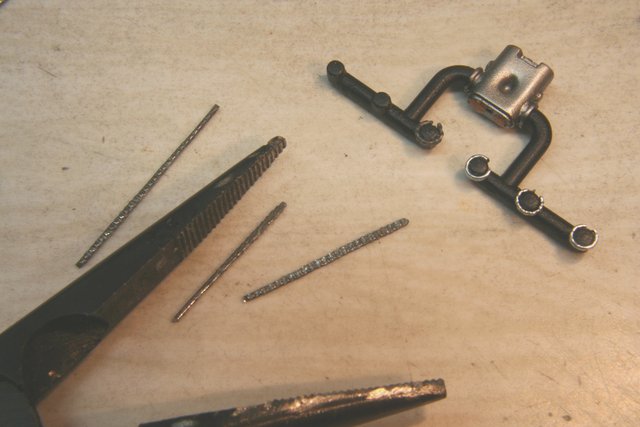
This worked out close enough.

I then made the ignition wires. The spark plugs needed some help, so I cut off the molded ones and glued in some simulated bolts, turned around so the long end was out. With a little painting, this also worked okay.
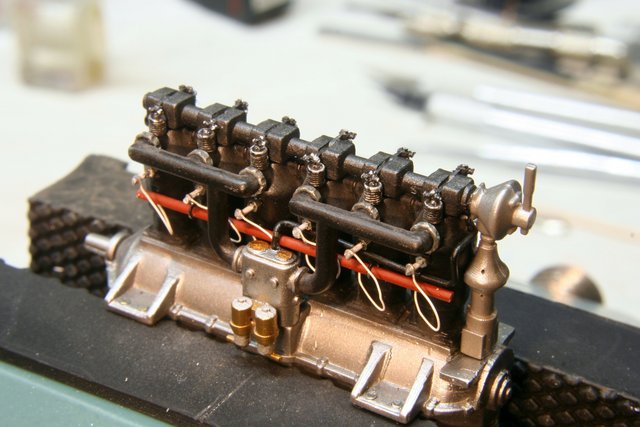
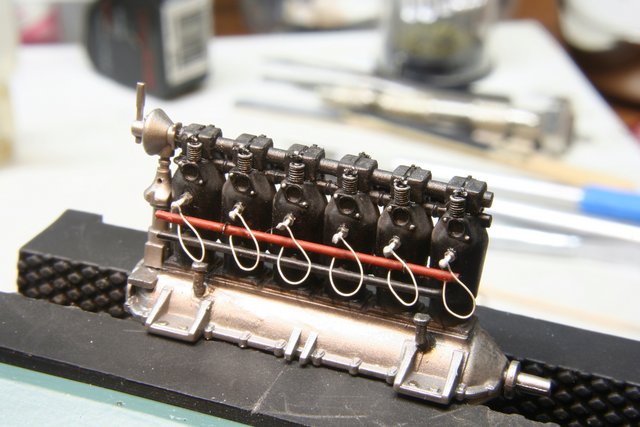
So this is where I am at the moment. Still working on the magnetos. What I have done may not be 100% accurate, but its an upgrade from the kit parts.
Thanks for looking.

