Author Topic: Tutorial - making a seat cushion from Milliput  (Read 1690 times)

Offline kensar

  • Hero Member
  • *****
  • Posts: 2505
  • Reshaping the world - one piece at a time.
Tutorial - making a seat cushion from Milliput
« on: August 09, 2021, 07:40:15 PM »
This tutorial explains a technique for making a seat cushion using Milliput epoxy putty.  Many WW1 planes had seat cushions and not all kits include them.  Even if one is included in a kit, it can usually be improved upon.
I will be making a cushion for a 1/32 Roden Albatros D.III.  This kit included a somewhat simple cushion, which would not fit without some modification.


Here are some items needed to get started.  This is not all the items that will be needed.  Not shown is monofilament and the painting and finishing materials, as well as a few tools.
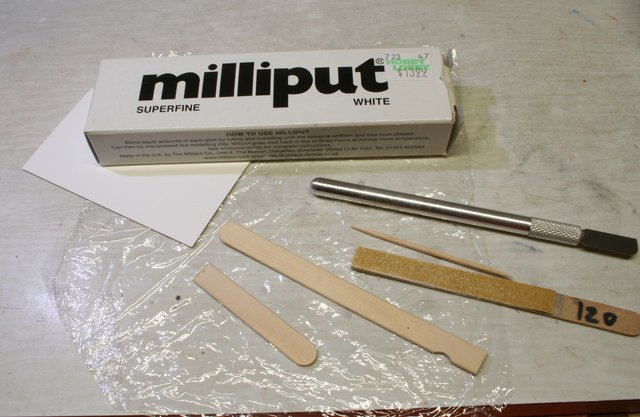


Items: 
Milliput epoxy putty
popsicle sticks
a smooth handled knife to be used as a rolling pin
toothpick
paper business card
clear plastic wrap like Saran wrap
sanding sticks - I use a 120 grit and a 320 grit

I start by making a pattern that fits loosely in the seat.  There may be about a millimeter or just less, of a gap between the pattern and the back of the seat.


Next, mix a quantity of Milliput.  I work on top of a piece of plastic wrap to keep the work surface clean and to be able to move the cushion from the workspace for curing.  Place two popsicle sticks adjacent to the Milliput.  The thickness of the sticks will determine the thickness of the cushion.
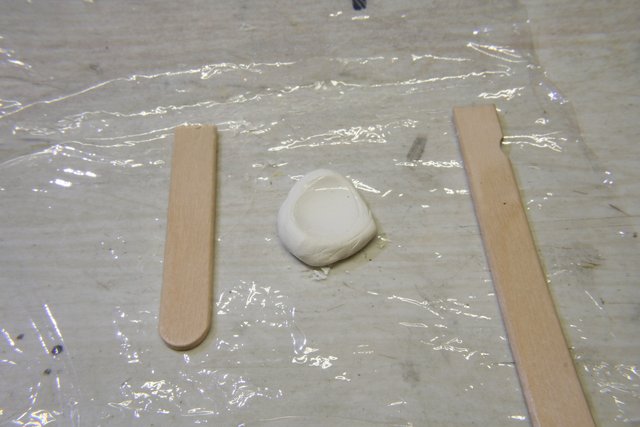


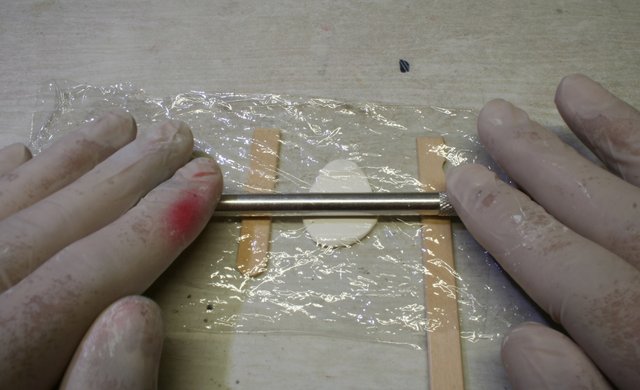
Cover the top of the Milliput with a layer of plastic wrap and roll it out with the knife handle, or some other smooth round object.


Place the business card paper pattern on top of the wrap and press it down into the Milliput using the knife handle.
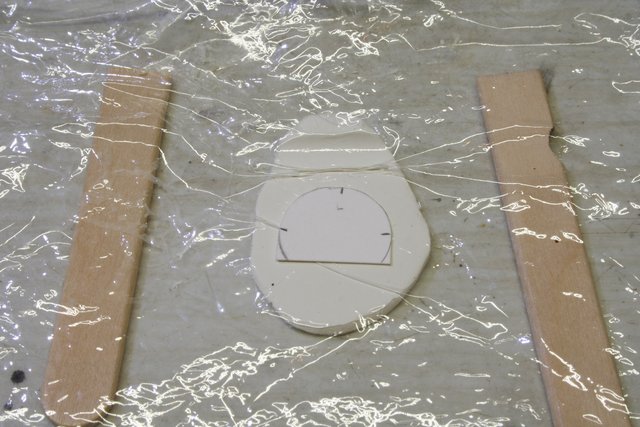


Now, lift the plastic wrap carefully and lay it back down on the Milliput.  When the impressions for the upholstery buttons are made, the top layer of wrap needs to have a little 'give' to it.  If the Milliput is very sticky, I wet/dampen it with some water.

Next, use the toothpick to make impressions in the cushion where you want the buttons to be located.  I have found that the first few impressions may be pulled back out somewhat as more impressions are made due to the top layer of plastic wrap being tightened.  If you don't like where the impressions are, you can ball up the Milliput and start again.

Here, I have lifted up the plastic wrap layer, but I usually don't do that at this point.  My button locations are off by a little, but I'll proceed.
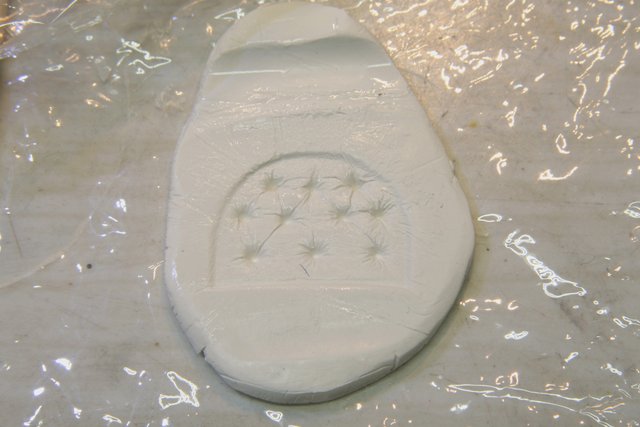

Now, let the Milliput cure at least overnight.


Offline kensar

  • Hero Member
  • *****
  • Posts: 2505
  • Reshaping the world - one piece at a time.
Re: Tutorial - making a seat cushion from Milliput
« Reply #1 on: August 09, 2021, 07:53:08 PM »
After curing, I trim the excess Milliput from the cushion using scissors.


Then sand the remaining excess away, leaving a small lip around the outside edges.  I use the 120 grit sandpaper to make quick work of it, then use the 320 grit paper to finish it off.  Now is a good time to test fit the cushion.


Then next item is the upholstery buttons.  These are made with nylon monofilament.  I use 0.007" monofilament, but larger could be used.  First, I drill holes in the cushion at the button locations.  I use a #80 (0.013") drill usually.


Make the buttons by heating the end of a piece of monofilament.  The end will shrink back and ball up.


Glue them into the cushion using superglue.  This view is the back of the cushion.


When the glue is set, trim off the excess monofilament using a knife.
Then paint and weather, and its done!


I hope this tutorial is helpful.  I think the results are very realistic and will enhance any cockpit.

Offline macsporran

  • Hero Member
  • *****
  • Posts: 1668
Re: Tutorial - making a seat cushion from Milliput
« Reply #2 on: August 09, 2021, 08:27:10 PM »
That is a masterful tutorial Ken, thank you .
My previous efforts have been terrible - trying to add a stretched sprue bead round edge of set for example. I will try your method on next build. Again, much appreciated.

Perhaos worth adding here is the photograph I took in the 90s of the seat and cushion from Georg Noth's Albatros D.III D796/17 (yellow polka dots on green fuselage), which the curator of the East Fortune Museum of Flight outside Edinburgh got out of storage for me to photograph sitting on the grass. Ken's milliput seat represents this superbly.
Sandy

Offline Manni

  • Hero Member
  • *****
  • Posts: 1768
    • Der Militärmodellbauer
Re: Tutorial - making a seat cushion from Milliput
« Reply #3 on: August 09, 2021, 09:39:36 PM »
Great tutorial, I wouldd not figure out the idea with the plastic wrap to create the folds on the cusion.
Bye,
Manni
"Ich hab' da mal was vorbereitet.": Jean Pütz
"Warum noch mehr Bausätze?!?": meine Frau

Offline RAGIII

  • Hero Member
  • *****
  • Posts: 18843
Re: Tutorial - making a seat cushion from Milliput
« Reply #4 on: August 09, 2021, 11:28:23 PM »
Excellent tutorial Ken. Easy to follow and great results. I will give it a try on My next build!
RAGIII
"A man has to know his limitations": Harry Callahan

"Don't slop it on" Lynda Geisler

Offline Rookie

  • Hero Member
  • *****
  • Posts: 927
  • No guts, no glory...
Re: Tutorial - making a seat cushion from Milliput
« Reply #5 on: August 09, 2021, 11:34:08 PM »
Thank you for this great tutorial Ken!

The process is very well explained. I have to make one in a while and I have been thinking over how to do it, and well your method is what I will use.


For the buttons this is what I came up with before I saw your method of heating the end of a piece of monofilament.


Brass brads with 1mm rounded head:


0.33mm rod with a blob of slow CA:


Willem

Offline kensar

  • Hero Member
  • *****
  • Posts: 2505
  • Reshaping the world - one piece at a time.
Re: Tutorial - making a seat cushion from Milliput
« Reply #6 on: August 10, 2021, 12:27:02 AM »
I hope others will give this a try and possibly find an even easier/quicker method.

Willem, I think the monofilament would be easier to cut off the excess length.  If the excess length needs to be cut off before gluing into the cushion, it would be difficult to cut very short lengths of metal.

Sandy, I've tried to glue a small wire around the edges of a cushion before and found it ridiculously hard to do.

Thanks, everyone.

Offline Rookie

  • Hero Member
  • *****
  • Posts: 927
  • No guts, no glory...
Re: Tutorial - making a seat cushion from Milliput
« Reply #7 on: August 10, 2021, 12:33:18 AM »
Quote
Willem, I think the monofilament would be easier to cut off the excess length.  If the excess length needs to be cut off before gluing into the cushion, it would be difficult to cut very short lengths of metal.

I hadn't thought of that...  :-[

Offline O_Pablo

  • Newbie
  • *
  • Posts: 35
Re: Tutorial - making a seat cushion from Milliput
« Reply #8 on: August 10, 2021, 04:59:22 AM »
You can also use BGA Balls - usually used by electronics for repair.
https://www.ebay.com/sch/i.html?_from=R40&_trksid=p2380057.m570.l1313&_nkw=bga+ball&_sacat=0
Additionally, since these balls come in various sizes from 0.2 to 1 mm, they can be used for reproduction, e.g. riveting.
https://www.youtube.com/watch?v=cXG0o7WxPKg

Regards
Paul

Offline ColonelKrypton

  • Jr. Member
  • **
  • Posts: 85
Re: Tutorial - making a seat cushion from Milliput
« Reply #9 on: August 10, 2021, 06:25:14 AM »
What a fabulous idea. 

I have tried a number of things like toothpicks and needles to make the various folds and wrinkles but never quite succeeded. Covering with the plastic wrap and working from there looks like it may just be the technique I was looking for.

Also, I use the various small and tiny model railroad detail bit like Tichy Trains 0.5mm ( 0.020" ) round head rivets for things like rivets and here might be useful for the buttons in a suitable size - knock of a bit of the round head and I will get a button.

here is an example of the Tich Train rivets:

https://www.hobbylinc.com/tichy-train-040-dia-rivets-96-ho-scale-model-train-part-8075

Another thought, how about using the heads of straight pins?  Look for extra fine satin straight pins. These have a shaft diamenter of around 0.5 to 0.7mm and the heads may just be about the right size. Of course would require cutting a metal pin when fitting but may just work a treat.

I will have to give the monofilament technique a try - looks simple enough, cheap, and produces the right result.

BGA balls might work too. Something else to look for if you are adventurous would be nail art micro / mini Caviar beads. These can be found as small as 0.4mm and other larger sizes. Fiddly to use however as you will need good tweezers to handle the wee round bits.

cheers, Graham

Offline WD

  • Hero Member
  • *****
  • Posts: 1104
Re: Tutorial - making a seat cushion from Milliput
« Reply #10 on: September 19, 2021, 05:29:57 AM »
This is so great, thank you so very much. Like others here, I've tried to do folds, creases, buttons with little success, but now I have the formula.  ;D 8)

WD

Offline Edo

  • Hero Member
  • *****
  • Posts: 707
Re: Tutorial - making a seat cushion from Milliput
« Reply #11 on: September 19, 2021, 04:42:41 PM »
hey Ken,
I use a similar method of yours but not with such a cleaver addition as leaving a milliput lip around the cushion or making the buttons in monofilsment.... so, thank you my friend i will certainly use your method in the future!
ciao
edo

Offline pepperman42

  • Hero Member
  • *****
  • Posts: 4437
  • Sergeant, my brown pants.......
Re: Tutorial - making a seat cushion from Milliput
« Reply #12 on: September 19, 2021, 11:23:07 PM »
Excellent, straight forward process. Thanks for this!!

Steve