Author Topic: 1/72 Grahame-White Type X Charabanc  (Read 5018 times)

Offline lone modeller

  • Hero Member
  • *****
  • Posts: 5300
Re: 1/72 Grahame-White Type X Charabanc
« Reply #15 on: February 15, 2021, 10:38:52 PM »
Evening All,

Thanks Alexis, Rick, Ken, Frank, Lance and Ian for the very generous and kind comments - I really appreciate them.

I have being painting a great deal lately, including the struts and undercarriage legs (there are a lot of them!) - Revell semi-matt 382 tan for the wood, and then a pale blue (mix of Humbrol matt blue (25) and white) for the reinforcing bands. That alone took quite a lot of time.


Of course the above is just a small number of the pieces - there are very many more as will be shown on the model later.

I have also painted the engine and made the exhaust and carburettor parts.


The exhaust was very large: from photographs it seems to have been designed to quieten the engine so that when the aircraft was flown low over the crowds a Klaxon could be sounded! (The klaxon is very clear in some early photos; later it was removed and replaced by a long step on the port side of the nacelle). I will fix the exhaust and fuel pipes after I have fixed the engine mounting in the rear of the nacelle. The frame on which the engine was mounted was made from plastic strip and has been painted and rigged.


The seats I am using are from the Barracuda Studios 1/72 wicker seats in resin:


I had previously used one of their 1/32 scale seats and it was of the highest quality. These are no different - there are two seats per pack and they are easily removed from the casting blocks with a razor saw. The texture on them is beautifully represented. I made some simple cushions from one of the card headers and painted these to represent slightly worn covers:


They will be barely visiible and in this scale it is very difficult, (at least for me), to represent nice neat buttoned seat cushions! There are five of these - 4 for the passengers and one for the pilot.

Finally I have painted all of the wings, tail unit and fuselage with a mixture of white and Humbrol CDL (103), acrylics: - about 6 coats all of which had been thinned and applied with a hairy stick. Prior to fixing the engine in the rear of the nacelle I made and inserted a pertol and oil tank. I am not sure how accurate this is because I cannot see either of these in the photographs. On RFC aircraft the oil tank was mounted on the side of the engine beneath the exhaust pipe, but on this machine the exhaust was so large I cannot see where the tank could have been mounted, and on the only photo I have found of the starboard side of the aircraft showing the engine, there is no sign of an oil tank at all. Photos of the aircraft taken later in its career show that a gravity tank was mounted under the top wing, but this is absent in early photos and as I am trying to represent the machine in its early phase I have assumed that the tank was in front of the engine in the nacelle.


Finally I have rigged the interior of the nacelle with rolled copper wire before I add the seats:


There is till quite a lot to do before I can start mounting the top wing, but I have realised that this machine was a highly modified Maurice Farman MF 7 Longhorn, not an original design. That means that I can follow closely the build sequence for the Longhorn that I scratch built several years ago which will save me having to think too much about what to do and when!

Thanks for looking.

Stephen.

Offline RAGIII

  • Hero Member
  • *****
  • Posts: 18793
Re: 1/72 Grahame-White Type X Charabanc
« Reply #16 on: February 15, 2021, 11:34:09 PM »
Outstanding work as always Stephen! I Love your CDL color and the interior, seats, etc. are Fantastic! Looking forward to the Next Update  8)
RAGIII
"A man has to know his limitations": Harry Callahan

"Don't slop it on" Lynda Geisler

Offline lcarroll

  • Administrator
  • Hero Member
  • ******
  • Posts: 8547
Re: 1/72 Grahame-White Type X Charabanc
« Reply #17 on: February 16, 2021, 12:12:44 AM »
    Another great start Stephen, and again a new subject to learn of. Those Barracuda seats are a wonderful little addition, I didn't realize they were available in 1:72 as well. In my experience they are the top of the A/M scale of quality and add a lot to a model.
    Discovering it's genesis related to the Longhorn you built will indeed simplify the construction details, nice work on research there! Looking forward to following along on this new journey as always with your Builds.
Cheers,
Lance
« Last Edit: February 16, 2021, 03:35:43 AM by lcarroll »

Offline Alexis

  • Hero Member
  • *****
  • Posts: 7947
  • Love the self
Re: 1/72 Grahame-White Type X Charabanc
« Reply #18 on: February 16, 2021, 12:36:53 AM »
Excellent jump on constructing and painting the parts Stephen , really like the engine  :)


Alexis
Hurra ! , Ich Leben Noch
Body and life is a vessel we use to travel the planet . Femininity is the gift , The miracle comes from what we do with it .

Offline lone modeller

  • Hero Member
  • *****
  • Posts: 5300
Re: 1/72 Grahame-White Type X Charabanc
« Reply #19 on: February 22, 2021, 08:44:47 PM »
Evening All,

Thanks Rick, Lance and Alexis for dropping by and leaving the encouraging comments. I deduced that this was a veriant of the Longhorn because the general arrangement of the airframe is very similar, down to the undercarriage, strut arrangements and overhangs on the upper wing. These appear to me to be variations on a basic theme rather than a completely new design.

The booms and tail units were fixed to the wings using my standard method for True Scale Real Aeroplanes. I file a groove in the wing surfaces with a round file and check that the boom, (florists wire in this case), sits well and is aligned with the plans. Small slots were cut in the leading edges of the tail planes - again the plans were used to get the correct locations. I used epxoy resin for attachment because this gave me wriggle time but begins to harden fairly quickly so that the chances of movement while curing are much reduced. My standard jig No 2 was used to support the structures while they cured. Leading edges were laid over the plans to achieve correct alignments and plastic card to support parts while the epoxy cured.

The lower wing:


The paint pot helped to keep the horizontal position of the tail unit - the curvature of the tail surfaces is quite marked and this extra support was an unexpected requirement.

The upper wing had a slightly more complex jig:


After the epoxy had cured over 24 hours the two sub-assemblies could be compared for alignments:


The engine sub-assembly was fitted into the rear of the nacelle, after I had added a small fuel and oil tank. I have not found any photographs of this part of the machine so what I have done is pure guesswork: I am not even certain how the engine frame was attached to the airframe, but as it will all be under the wing nobody is going to be able to take a very close look. Anyway, sometimes one has to use modeller's license! Contemporary photographs of this part of the aeroplane showed that the rear of the engine frame really did stand clear of the trailing edge of the wing:


Now the real test awaits: mounting the top wing to the lower and putting in the struts and starting the rigging. I will photograph the different stages and post them next time.

Thanks for looking.

Stephen.

Offline William Adair

  • Sr. Member
  • ****
  • Posts: 271
Re: 1/72 Grahame-White Type X Charabanc
« Reply #20 on: February 22, 2021, 09:01:49 PM »
Looking good!  I did a real double-take there when I saw the number of seats inside!

Offline RAGIII

  • Hero Member
  • *****
  • Posts: 18793
Re: 1/72 Grahame-White Type X Charabanc
« Reply #21 on: February 22, 2021, 10:47:58 PM »
Terrific progress Stephen. Your wing alignment jigs are the best ! As always I am amazed at the results of your work!
RAGIII
"A man has to know his limitations": Harry Callahan

"Don't slop it on" Lynda Geisler

Offline kensar

  • Hero Member
  • *****
  • Posts: 2503
  • Reshaping the world - one piece at a time.
Re: 1/72 Grahame-White Type X Charabanc
« Reply #22 on: February 22, 2021, 11:26:55 PM »
Great work, Stephen.  This is turning out very well.  Nicely detailed.

Offline Alexis

  • Hero Member
  • *****
  • Posts: 7947
  • Love the self
Re: 1/72 Grahame-White Type X Charabanc
« Reply #23 on: February 23, 2021, 01:06:55 AM »
Great work, Stephen.  This is turning out very well.  Nicely detailed.

Second this , well done so far Stephen !

Alexis
Hurra ! , Ich Leben Noch
Body and life is a vessel we use to travel the planet . Femininity is the gift , The miracle comes from what we do with it .

Bughunter

  • Guest
Re: 1/72 Grahame-White Type X Charabanc
« Reply #24 on: February 24, 2021, 07:06:51 AM »
Looks already like a passenger plane ;)
The seats are a very nice addition!

Cheers,
Frank

Offline Early Bird Fan

  • Sr. Member
  • ****
  • Posts: 261
Re: 1/72 Grahame-White Type X Charabanc
« Reply #25 on: February 24, 2021, 03:50:24 PM »
up to your usual standard Stephen and those seats look great, i might have to get me some of those

Offline RLWP

  • Hero Member
  • *****
  • Posts: 1494
  • Bodger
Re: 1/72 Grahame-White Type X Charabanc
« Reply #26 on: February 24, 2021, 10:46:23 PM »
I say, what larks!

Will you be running flights around the aerodrome?

Richard
Hendon for flying - the fastest way to the ground!

Offline lone modeller

  • Hero Member
  • *****
  • Posts: 5300
Re: 1/72 Grahame-White Type X Charabanc
« Reply #27 on: March 02, 2021, 07:57:27 AM »
Evening All,

Thanks William, Rick, Ken, Alexis, Frank, EBF, and Richard for leaving your very kind comments. Richard: I will not be taking any flights around the aerodrome at the moment because the pilot's seat dropped out the other day and I have still to put it back in - it can wait until I have nearly finished now! After that I might consider giving you a lift - for a suitable fee!!

Putting wings on biplanes is, I know, one of the features that deters many modellers from building them. Rigging is another deterrent for some, so in this post I will try to reveal some of the (dirty) secrets that I use to build multi-bay biplanes. On this aircraft the struts were at 90 degrees to the wings so mounting them is a straightforward process, provided that they are put in carefully using the following simple procedure:

1. I cemented the 4 centre struts to the lower wing - two in each side of the nacelle;
2. I cemented the two centre struts to the tail unit;
3. while these struts were still setting and therefore able to be moved I laid the upper wing sub-assembly on the bench and put small drops of cement into the locating holes in the underside of the wing and tail unit;
4. I gently lowered the lower wing sub-assembly on to the upper wing adjusting the struts as necessary to fit into the holes on the wing and tail unit;
5. I adjusted the assemblies so that the lower wing assembly was exactly over the top wing and then held the lot in position with a standard Mk 1 jig:


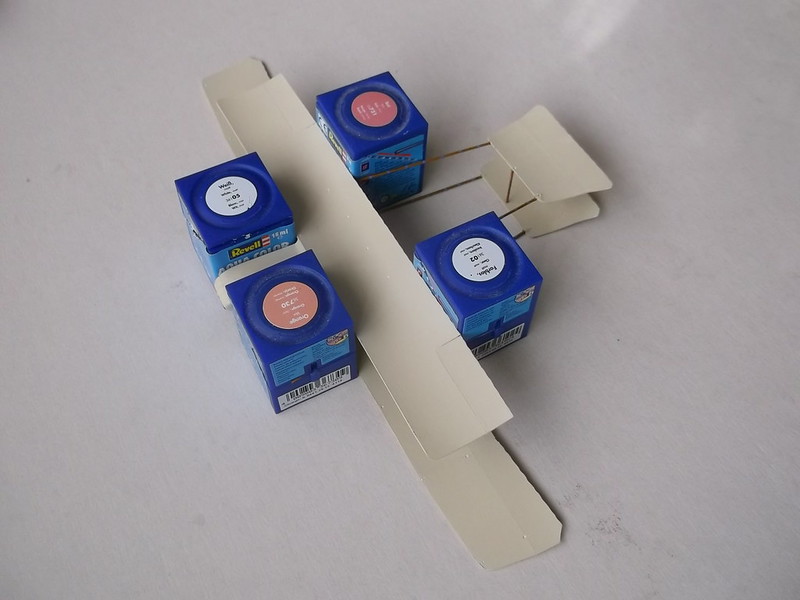
Provided that the wings and booms are correctly aligned this jig will work well because it keeps the leading edges of the wings parallel and square and supports the tail unit at the same time. I left this overnight to dry out thoroughly. In the morning I could carefully invert the assembly and handle it without fear that it would fall apart:


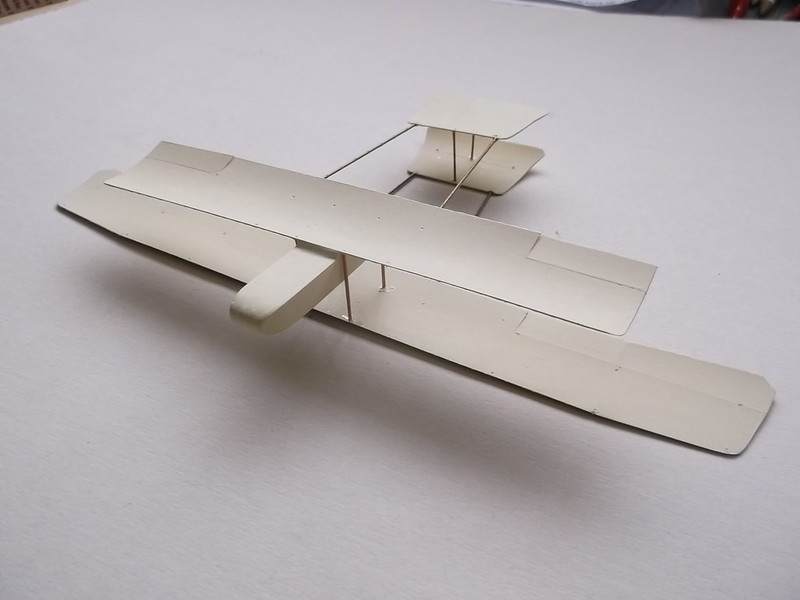
Clearly this is not the strongest of assemblies, so to help stabilize it I added the outer wing struts. I put drops of cement on to the ends of the struts and gently push them into place making sure that they are in line with the other struts and are vertical when viewed from the front. A little weight was put on top of the wing to ensure that the joints are held together while the cement sets:


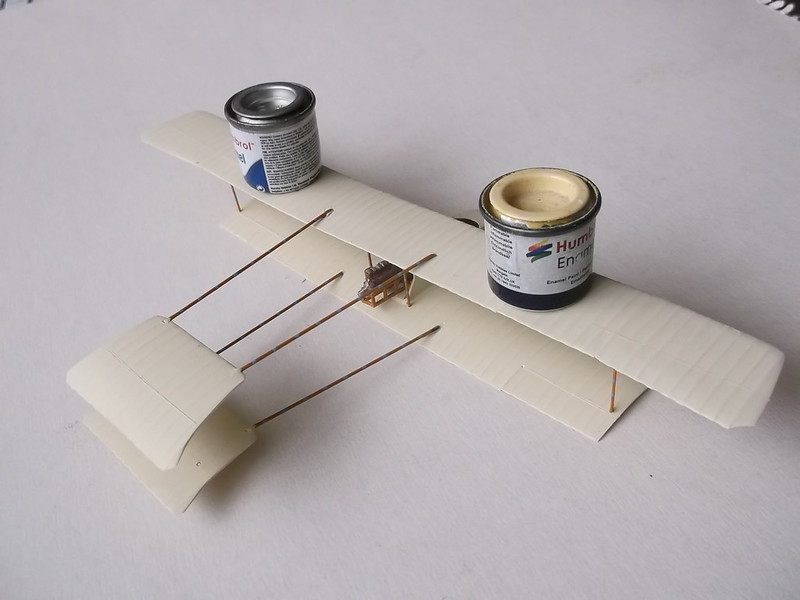
With the wings secure I put the front struts into the tail unit because that helped to stabilize the rear of the assembly while I added the radiator. This was cut form 60 thou card and scoured to represent the grille. It was suspended on wires between the rear inner wing struts just in front of the engine - I used thin copper wire which I CA'd to the sides of the radiator and bent the wires so that I could CA the ends to the srtuts. I wanted as much space as I could have while doing this - hence the remaining wing struts were left off until this task was completed. The water pipes were made from rod with the outlet from the engine to radiator cemented to the top of the engine and the lower pipe extended to the water pump on the front end of the engine. Unfortunately I was unable to get good pictures of this assembly because I cannot get the camera into the tiny space and have enough light to see things properly:


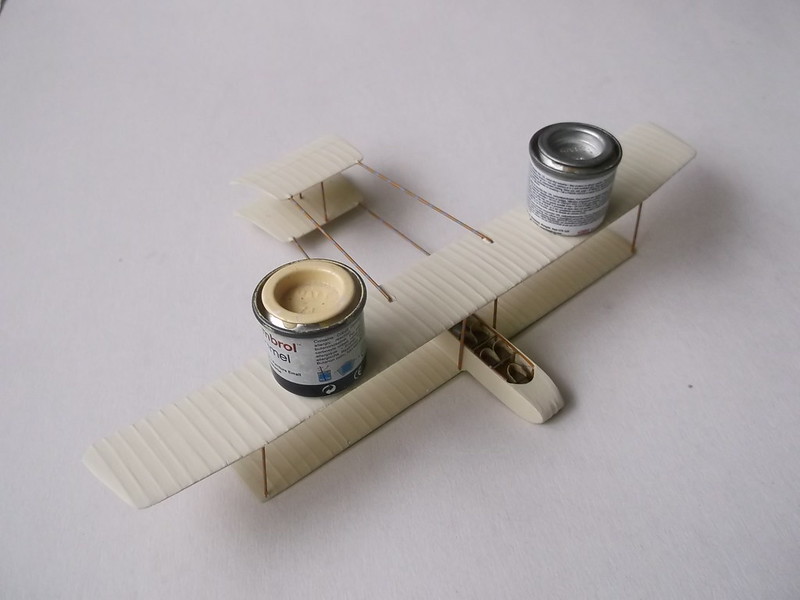
Having put the radiator in place I rigged the centre struts and front bays of the tail as these will be difficult to reach later:


Rigging with rolled copper wire is easy. The length of wire needed is measured directly from the model by using a pair of dividers. The wire is measured with the dividers and a length cut from the spool. This is rolled between a piece of brass strip and a block of wood which had been sanded flat. The wire is held against the model to check it for length: I usually cut the wire a fraction too long before rolling it out so that I can trim it if necessary. If the wire is too long I use my Mk 1 eyeball and experience to judge how much needs to be removed. I place a small drop of CA on the model in the two places where the ends of the wire are to be attached and gently place the wire on to the model. With a little practice this can be a fairly quick and easy method.

Next I added all of the remaining struts on the wings and tail unit, and rigged fore-aft between the wing struts, the rear of the wing struts and the remainder of the tail.


There is still much rigging left to attach, but with these areas done I do not have to worry about access and knocking small pieces off later. Most of what has been attached is unlikely to be damaged when I add the remaining sub-assemblies and details.

Thanks for looking.

Stephen.

Bughunter

  • Guest
Re: 1/72 Grahame-White Type X Charabanc
« Reply #28 on: March 02, 2021, 08:07:58 AM »
A big jump forward - with a biplane and rigging lines!

and then held the lot in position with a standard Mk 1 jig

Stephen, now I'm especially excited to see what the Mk 2, 3 and especially number 4 jigs look like! ;D

Cheers,
Frank

Offline Alexis

  • Hero Member
  • *****
  • Posts: 7947
  • Love the self
Re: 1/72 Grahame-White Type X Charabanc
« Reply #29 on: March 02, 2021, 12:03:09 PM »
Stephen ,

Wonderful progress !


Alexis
Hurra ! , Ich Leben Noch
Body and life is a vessel we use to travel the planet . Femininity is the gift , The miracle comes from what we do with it .