Author Topic: Hobbycraft 1/32nd Fokker DR.I  (Read 2020 times)

Offline mgunns

  • Hero Member
  • *****
  • Posts: 2255
Hobbycraft 1/32nd Fokker DR.I
« on: November 17, 2020, 12:00:54 PM »
Okay:  I got this kit from Rick Geisler awhile back when he was trying to raise some money for other kits.  I had had this kit but because the Roden was better, I offed it on ebay.  However, for the low low price that Rick was offering it for I couldn't pass it up, plus it would be neat to see how it compares to a Roden kit, of which I had recently finished.
The Kit:


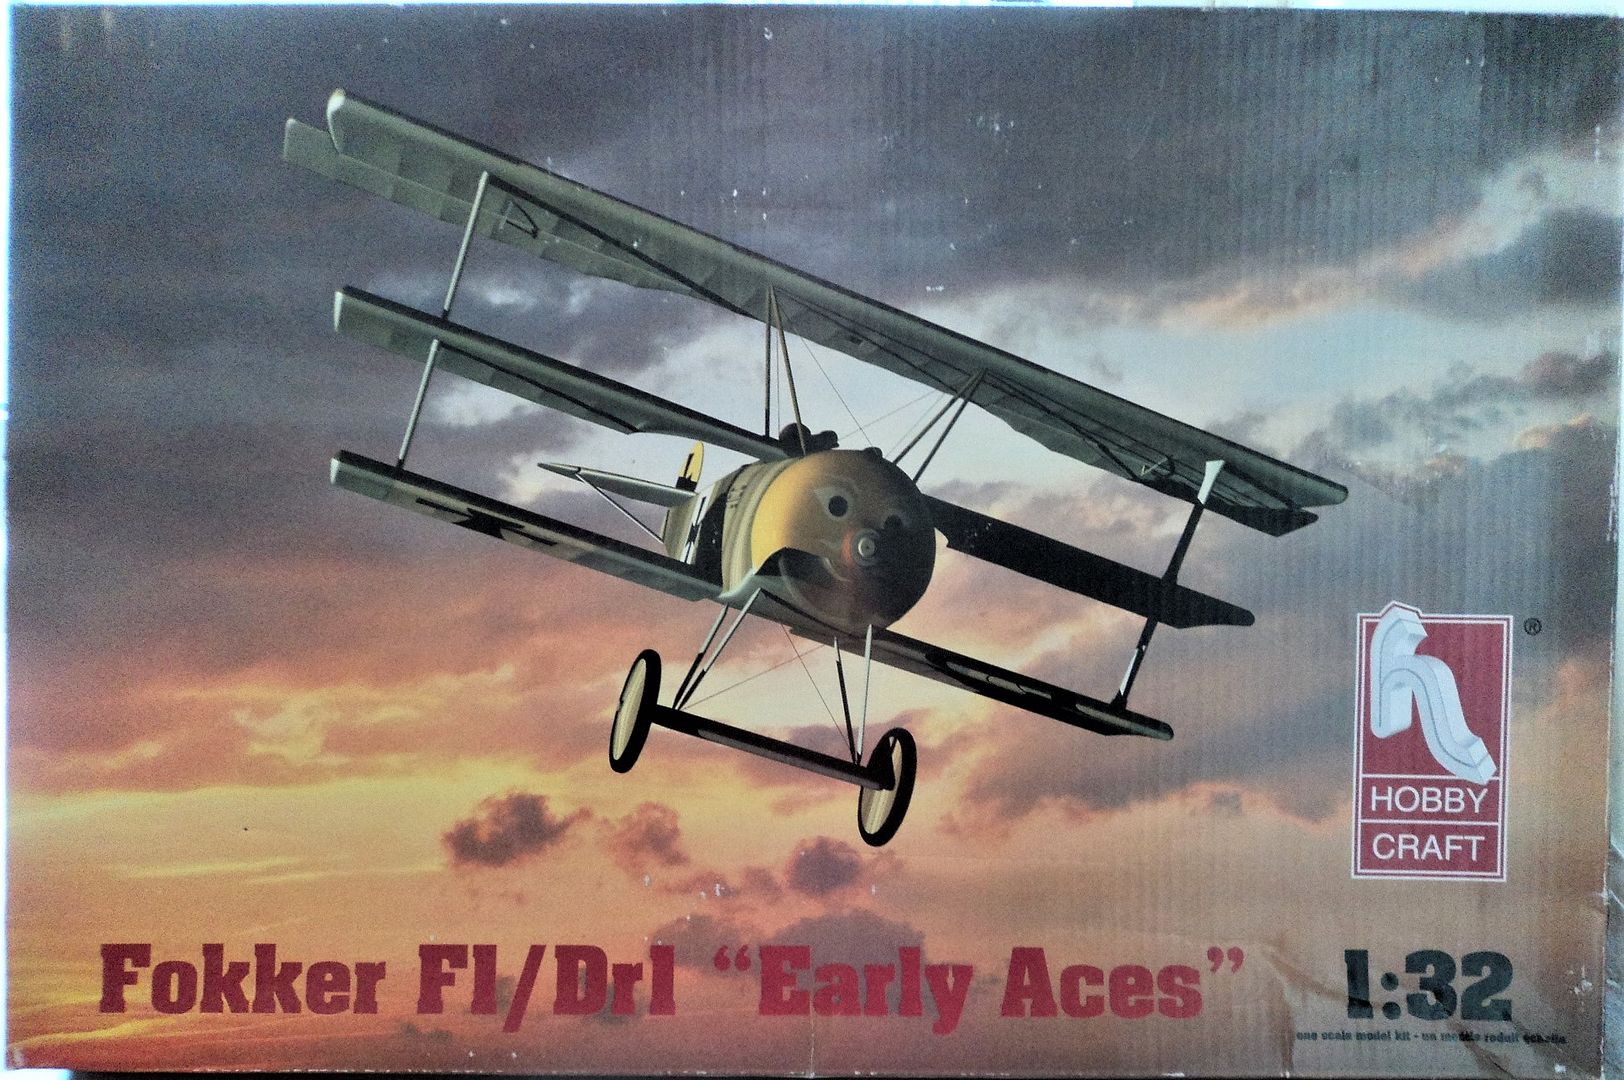
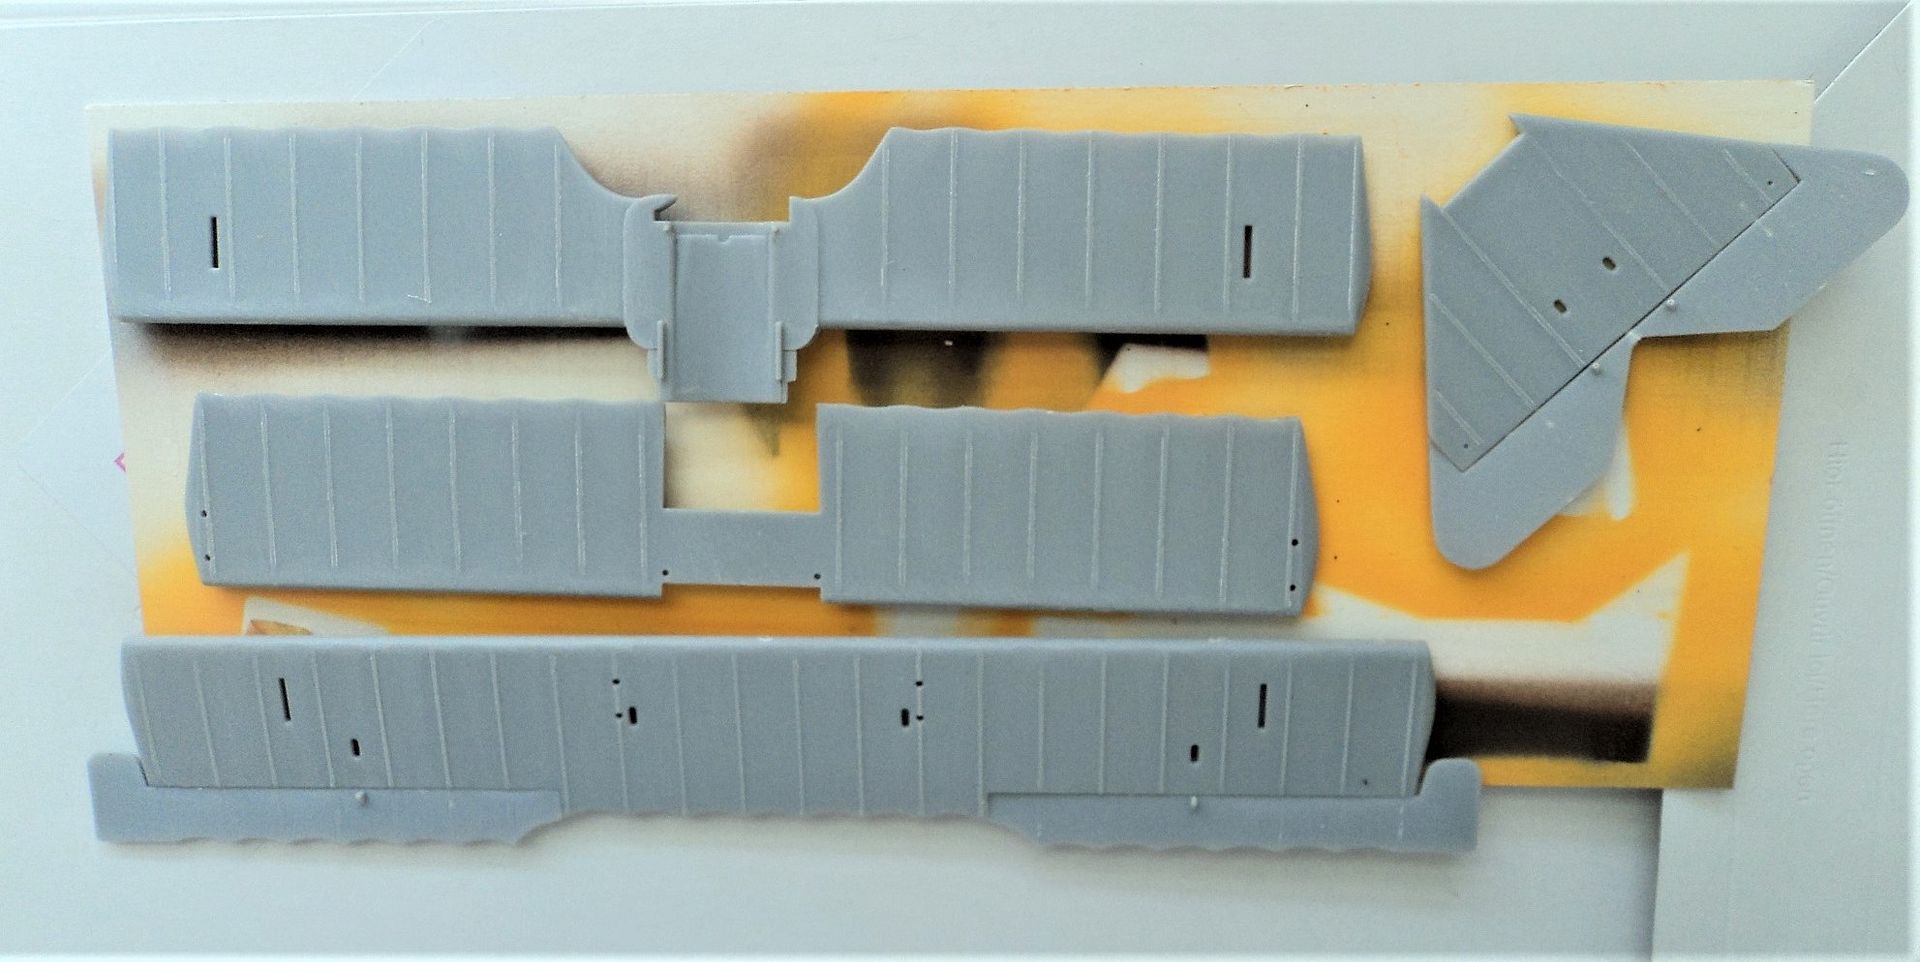
First off one noticed the over exaggerated wing ribs to include the ribs on the ailerons and elevator, the engine isn't too well detailed and is actually incorrectly molded, but, who cares, this was going to be out of the box.  And so it was.


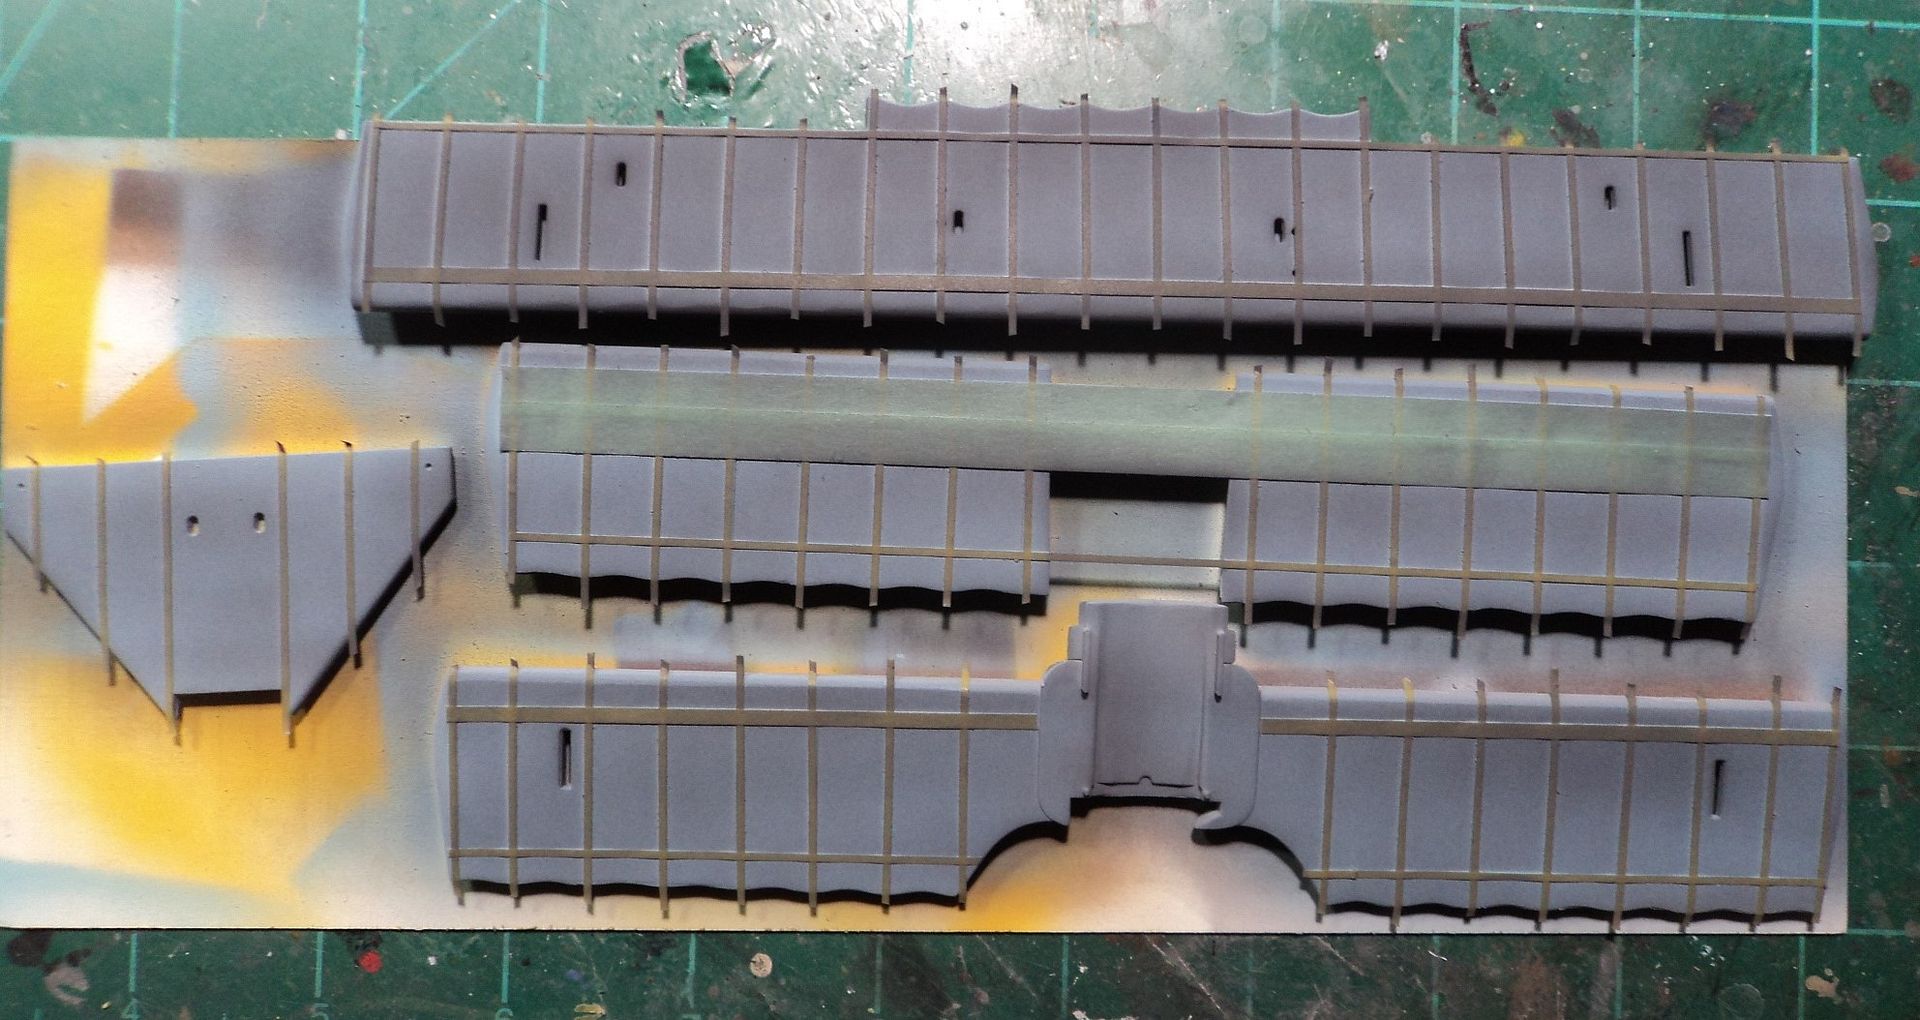
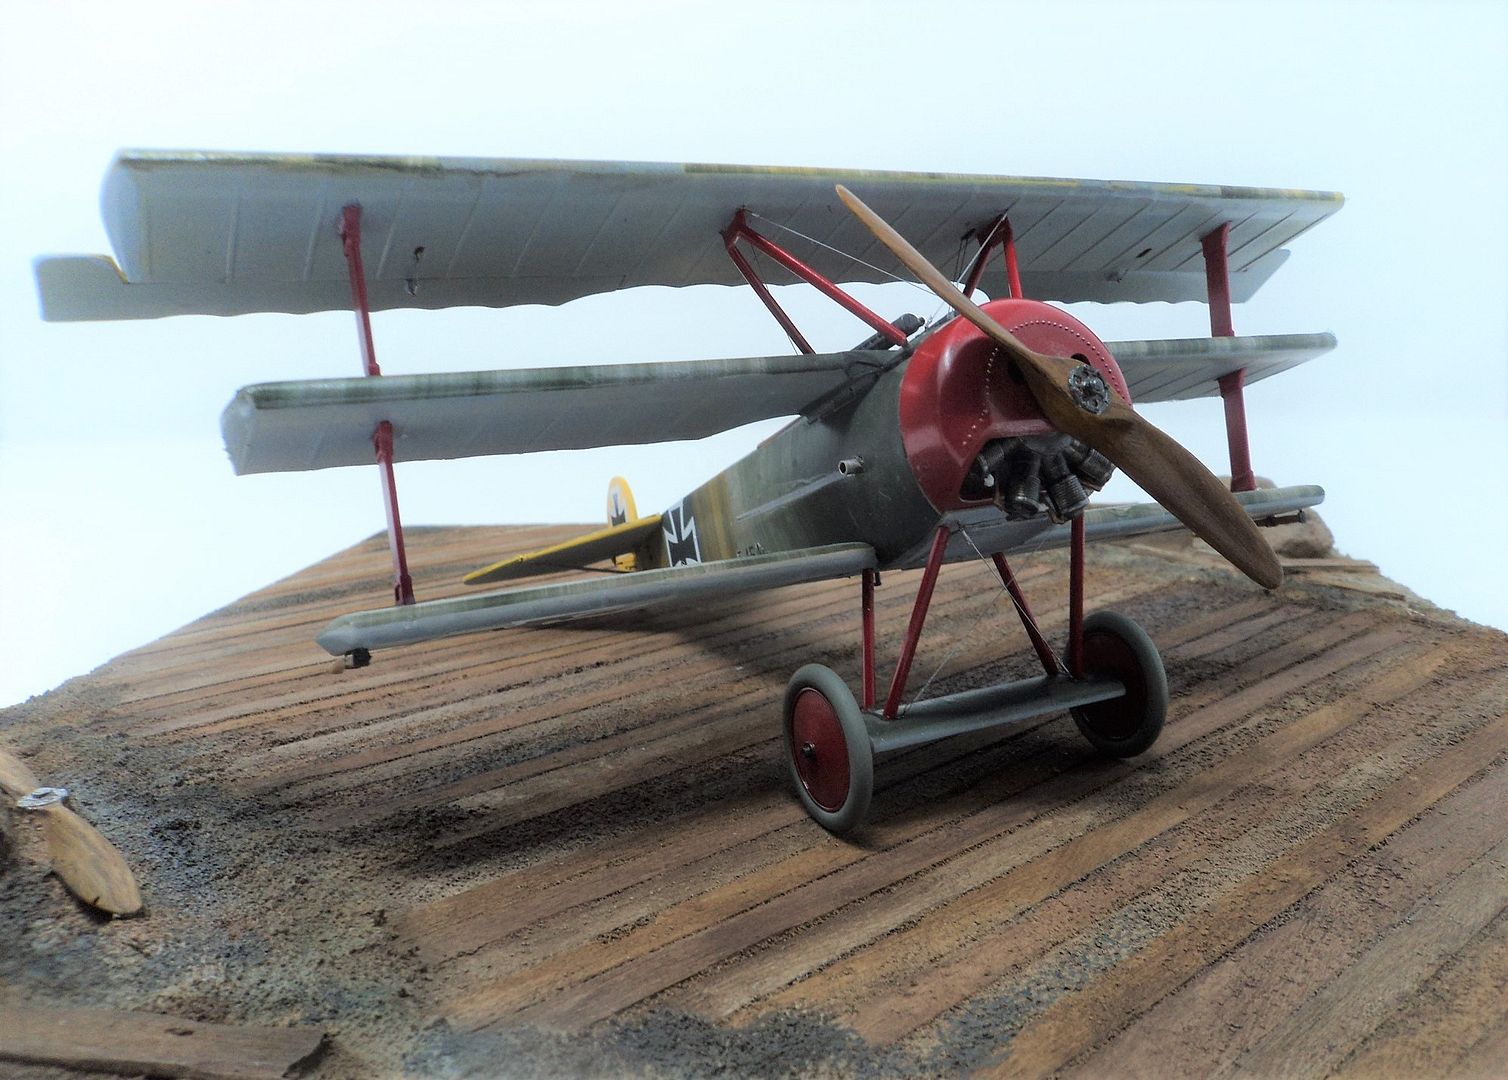
I won't go into the nuts and bolts of what I did as it wasn't much.  I will let the images tell the story.  Although I did sand down the ribs, shaded and painted the undersides of the wings and tail, I added seat belts to the stock seat, added some rigging, as the interior detail is quite sparse.


The seat belts I used are the new Kitsworld Decal Seat belts.  Sort of a novel idea but not the easiest to work with and I have read that they aren't accurate.  But; I used them as I wanted to try them out.


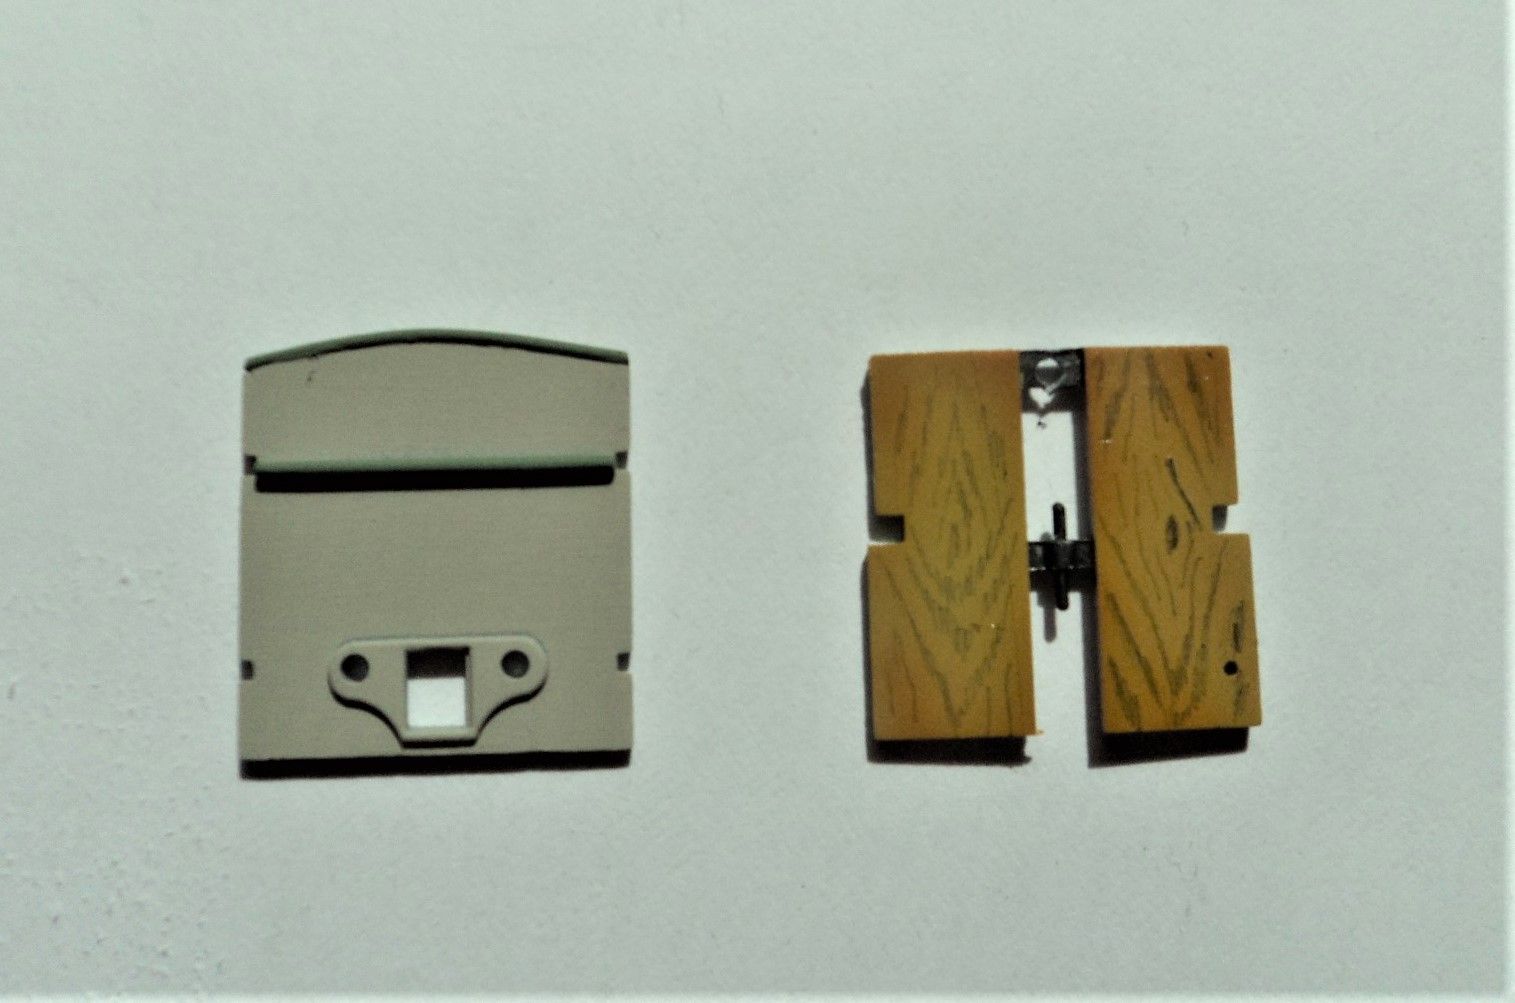
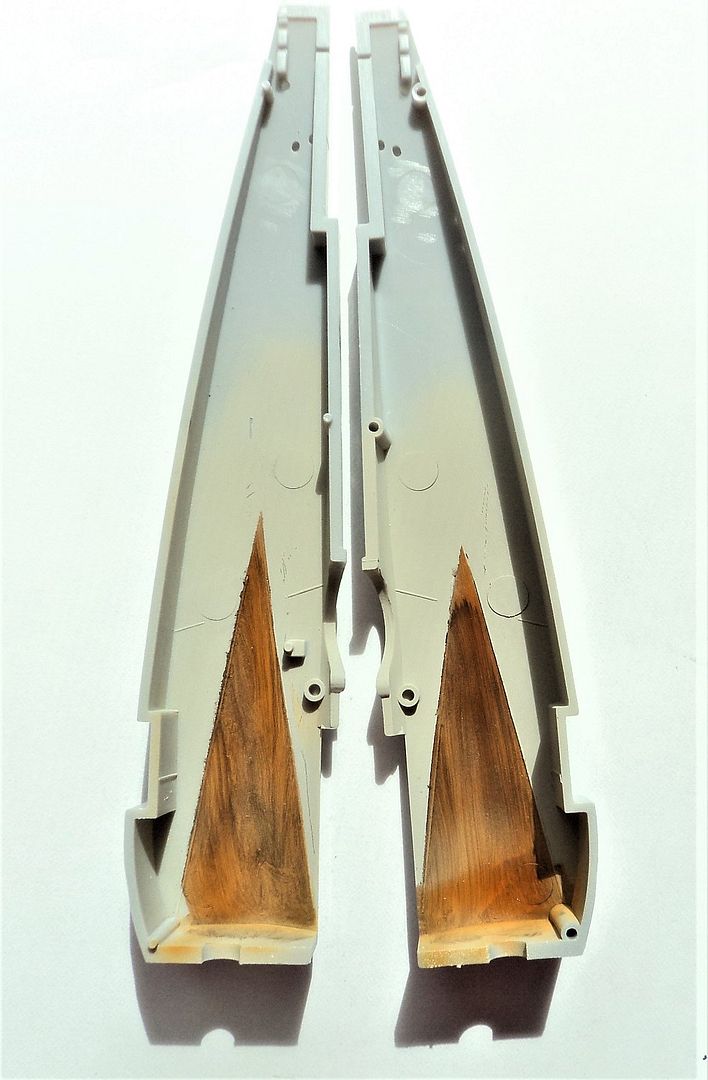
I did some interior painting and on the floor board I painted Tamiya Deck Tan, drew in the wood grain with a pencil and covered with a mix of Clear orange and yellow. 


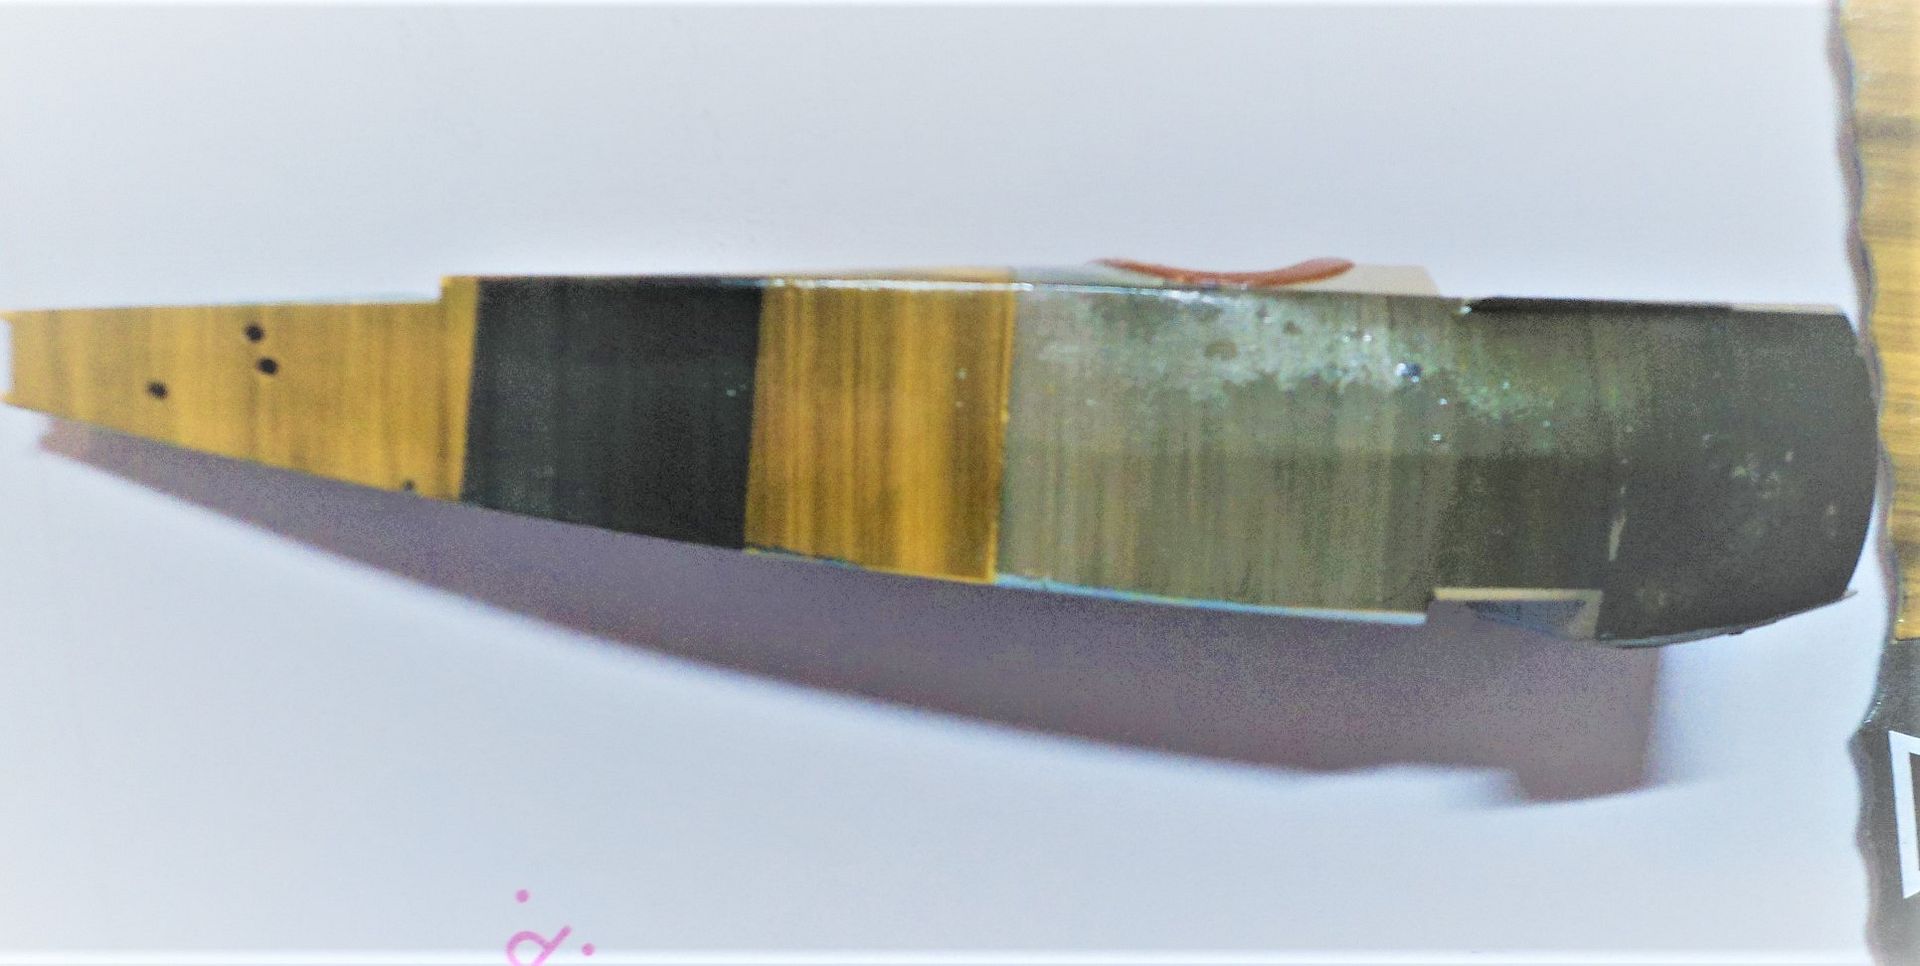
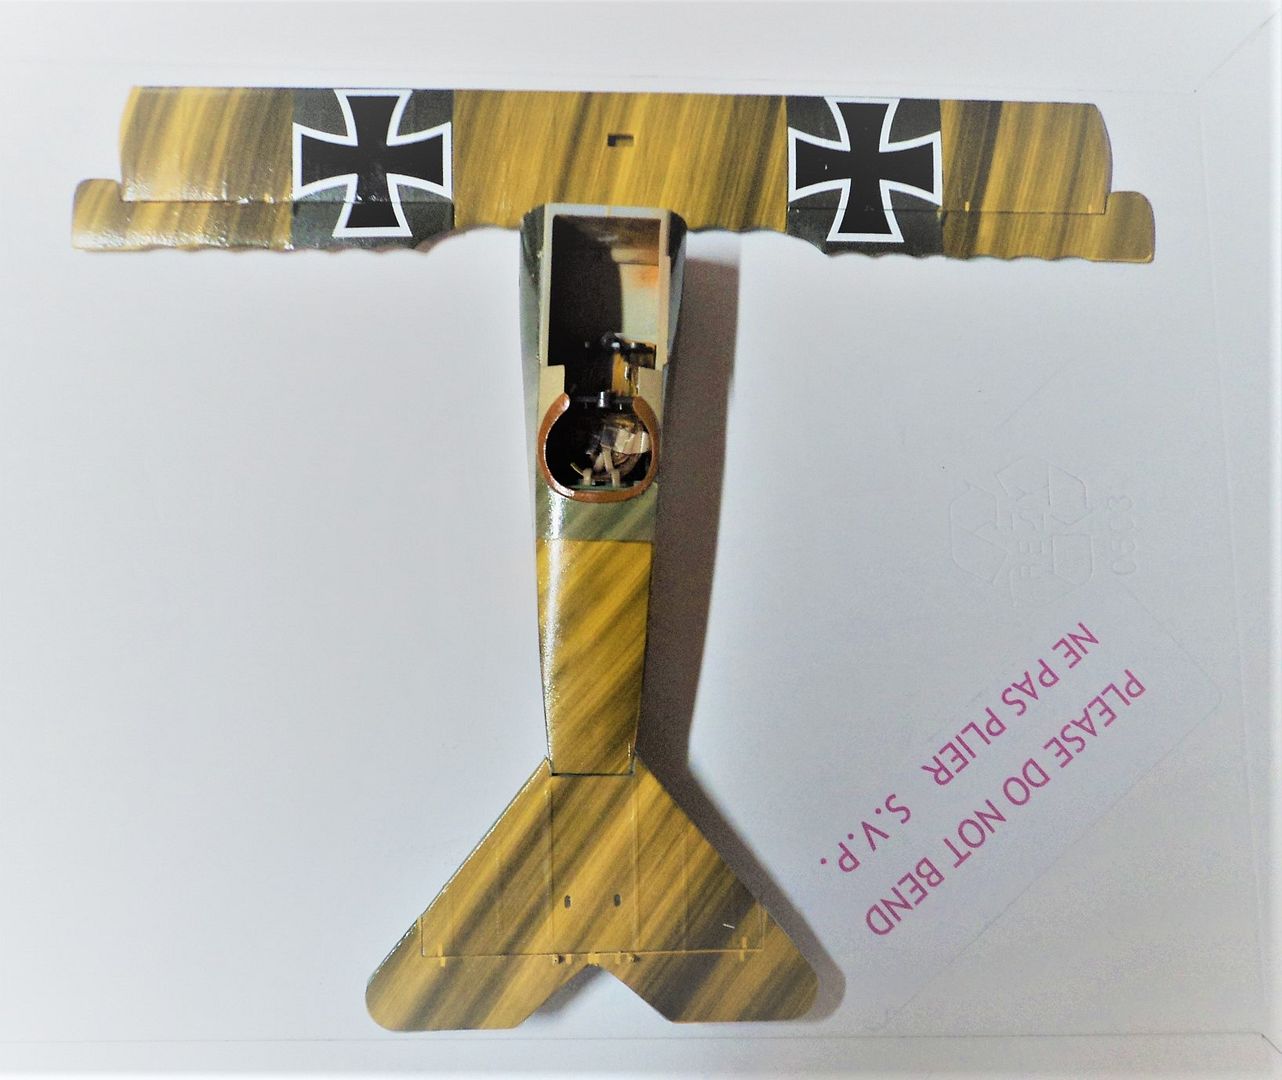
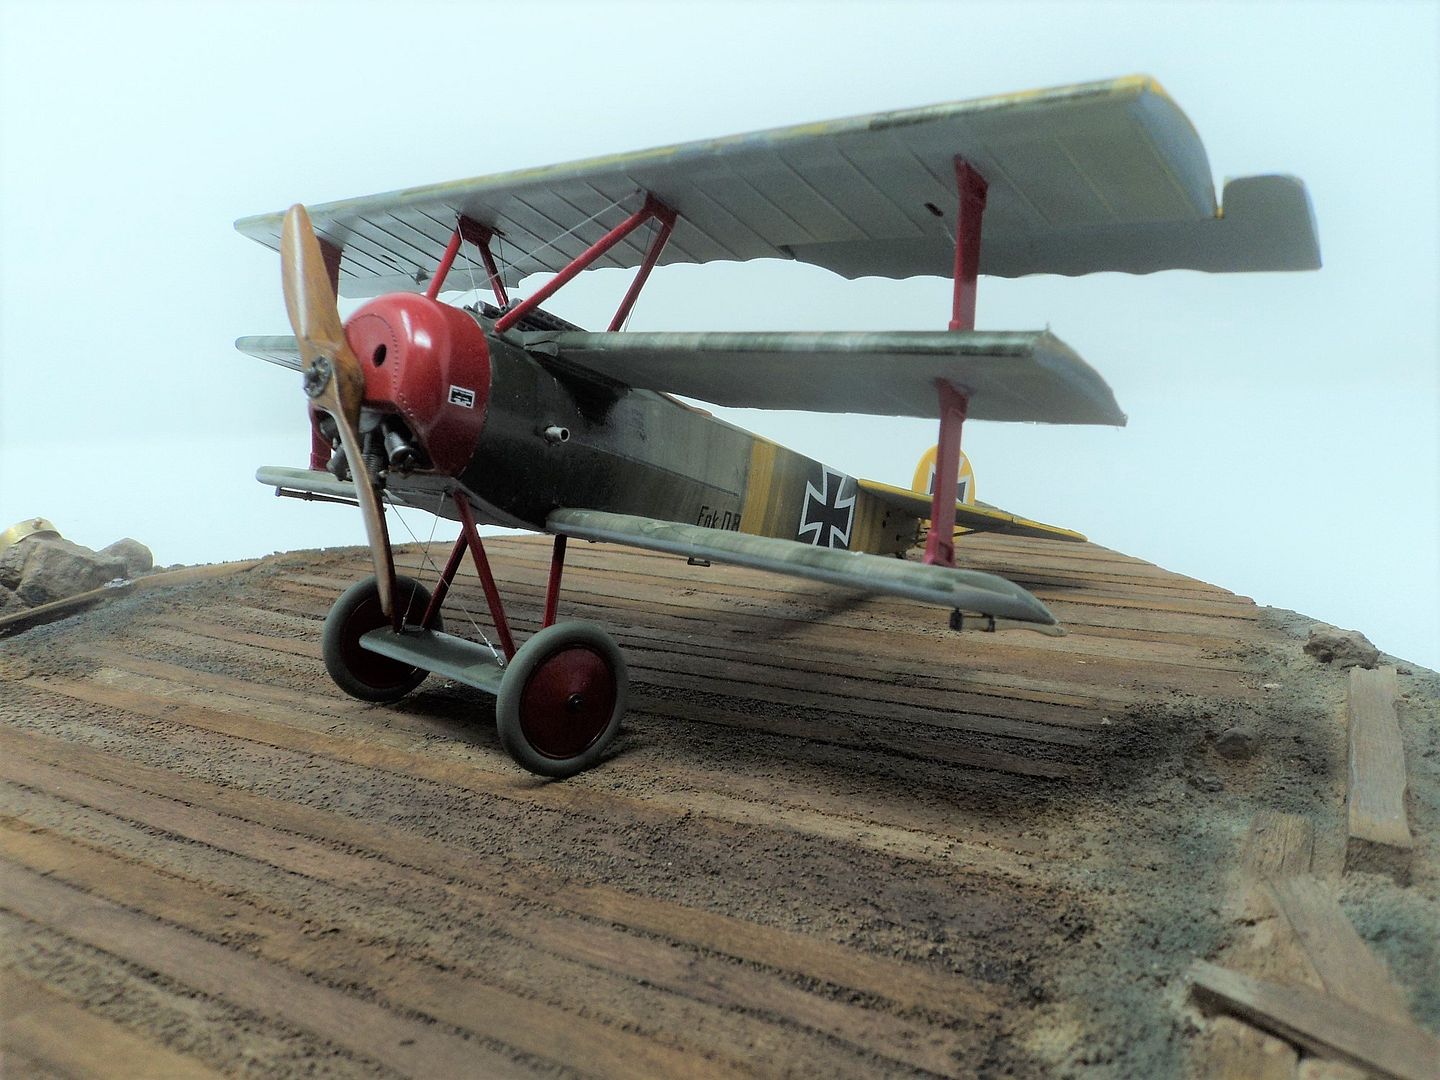
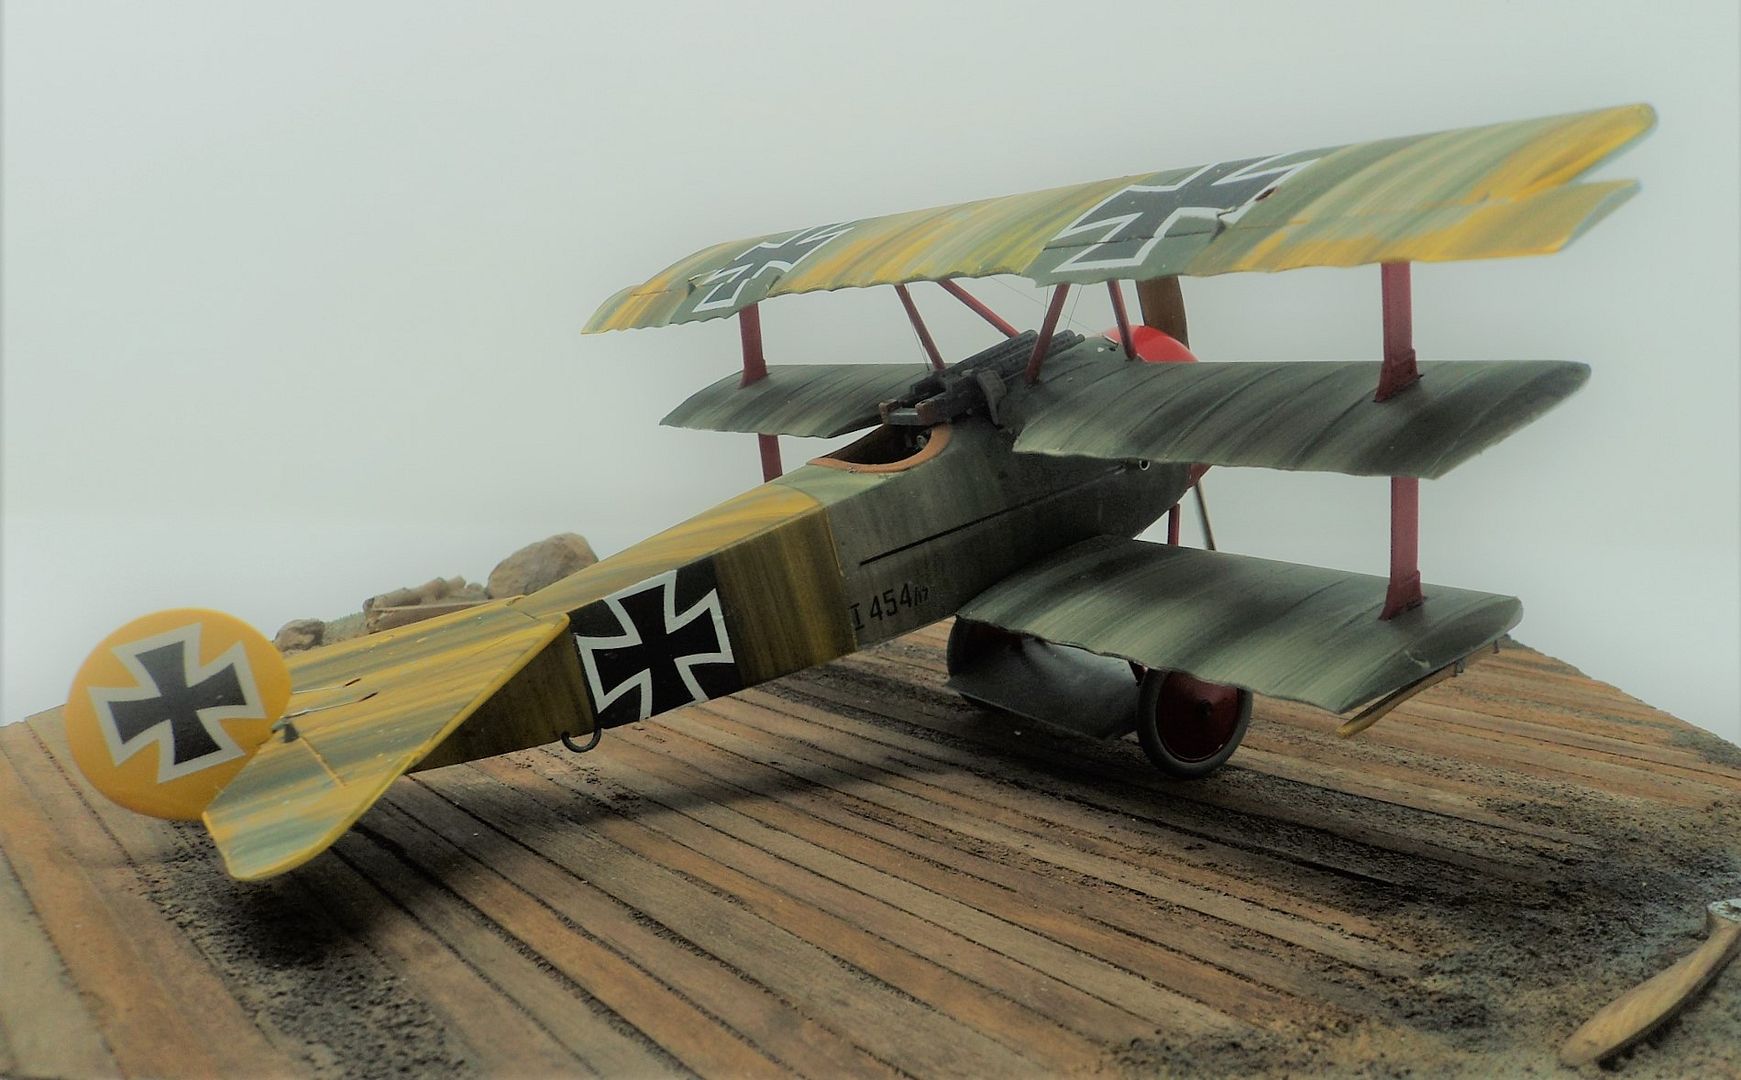
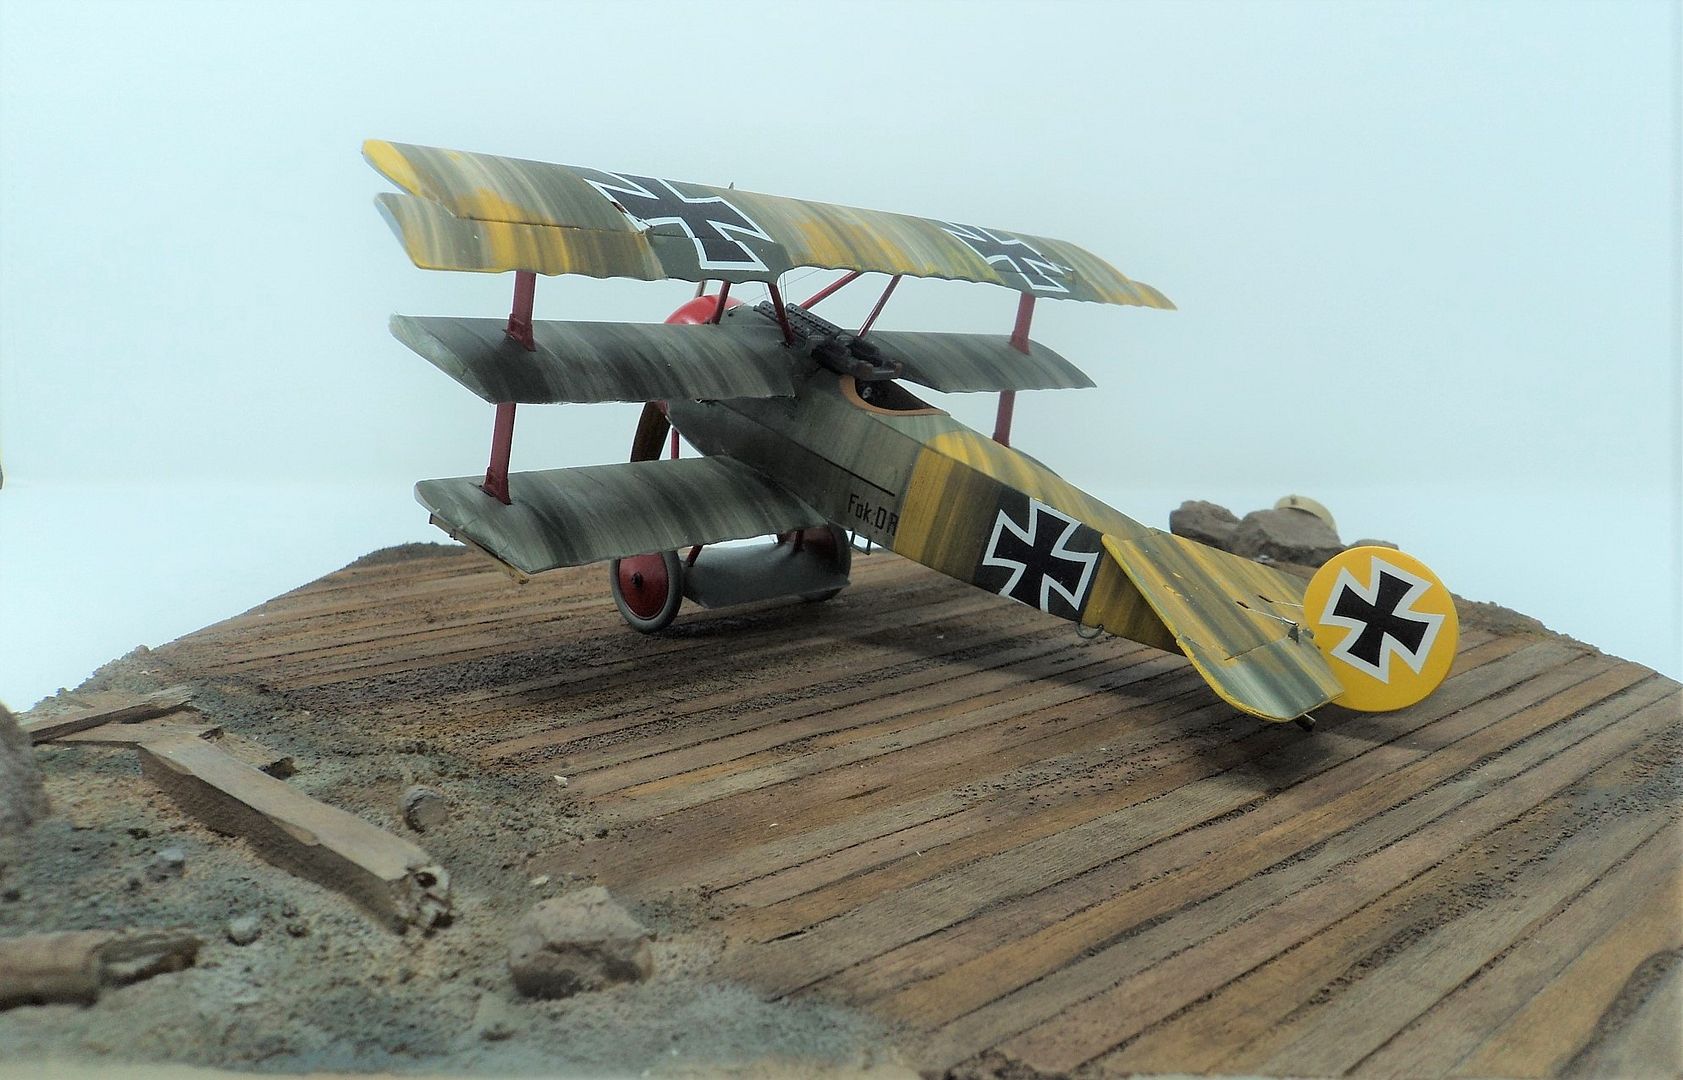
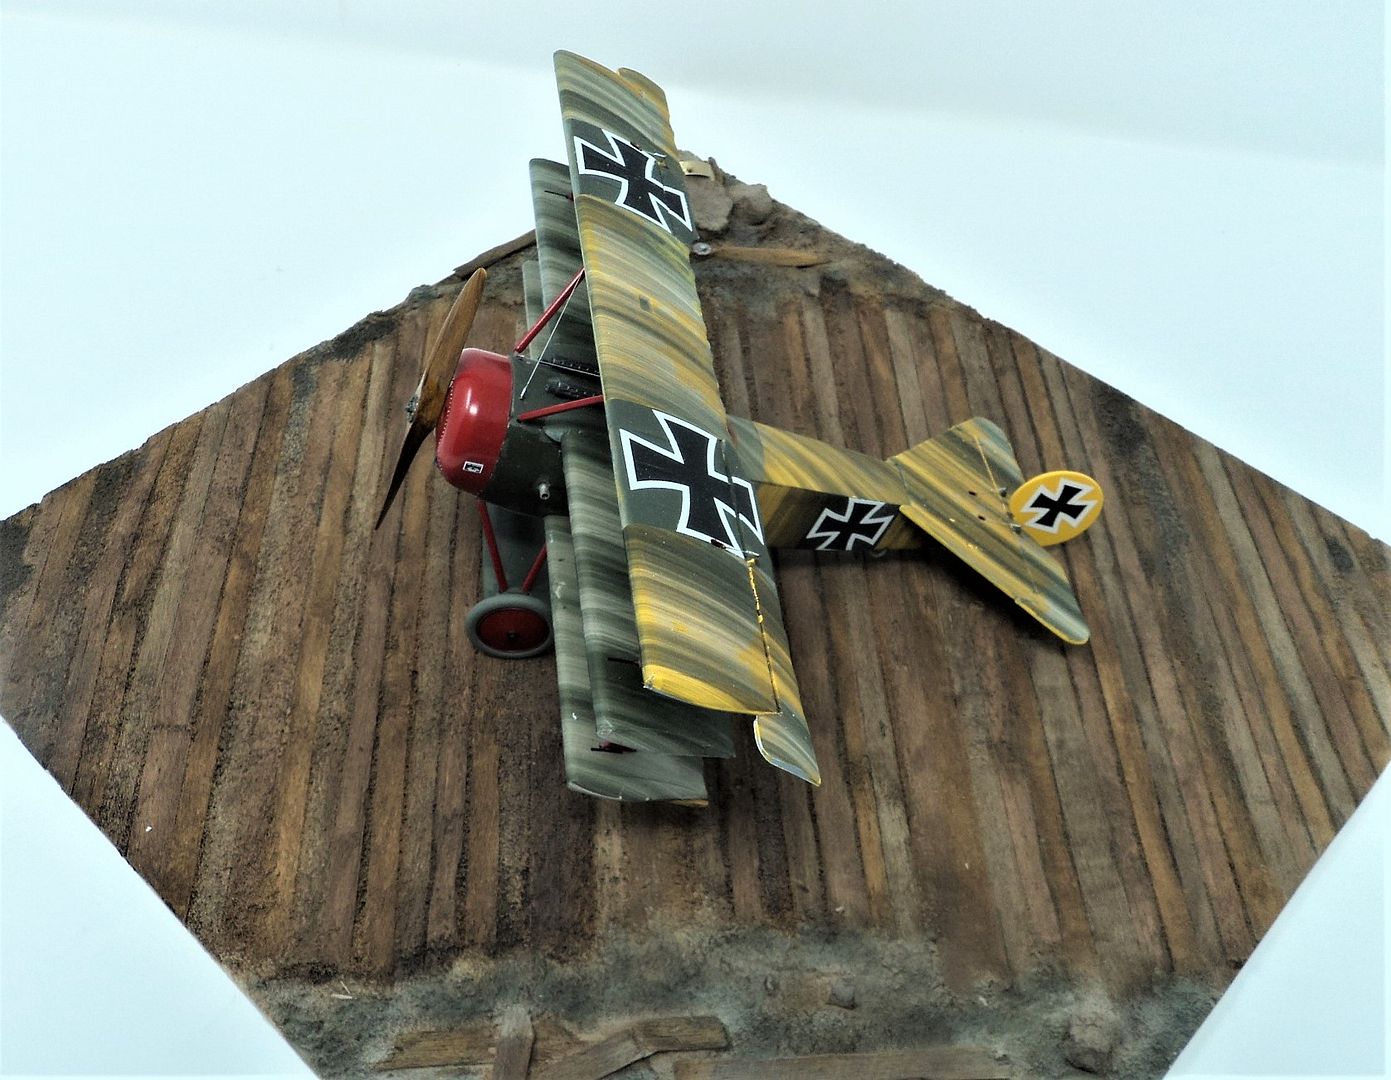
My intent was to use the markings for Lothar Von Richthofen's DR.i.  The Cutting edge sheet instructions showed a solid yellow wing, aft fuselage and tail.  So I went with that.


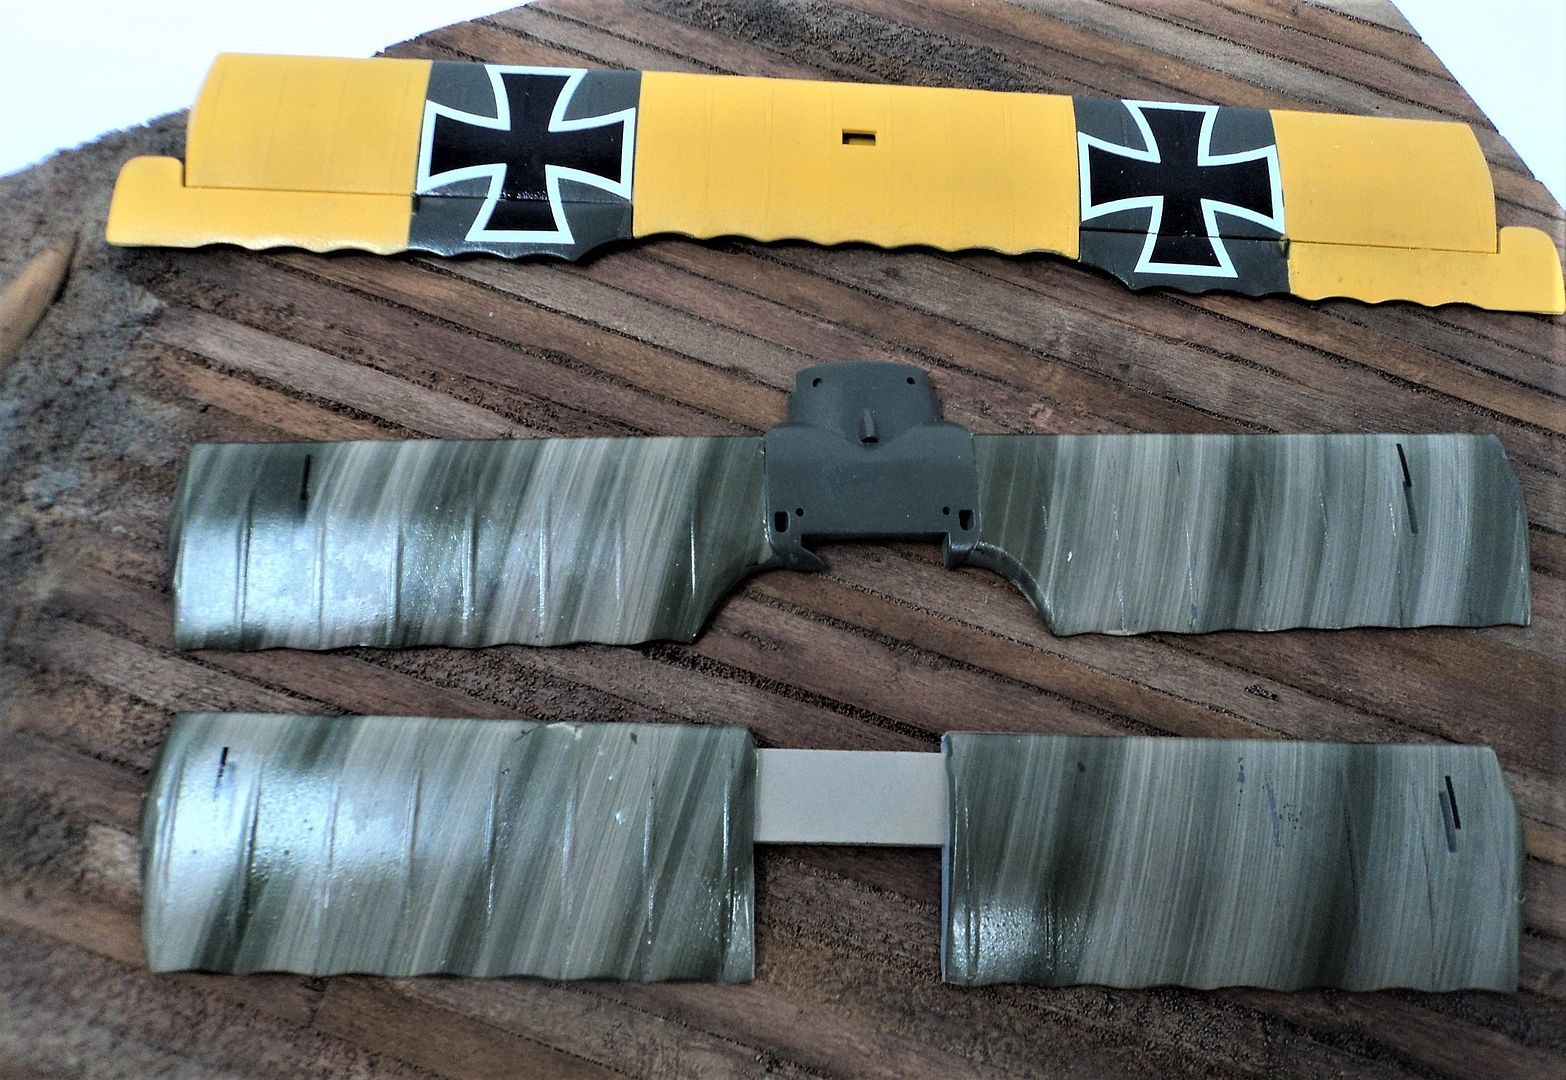
However, I was informed by Lance Carroll and Gary Barling that the yellow was a thin coat and that the streaking could be seen through the yellow.  As I was using Aviatic Streaking decals to see how they fit on a non Roden Kit, (some trimming required but not much) I put the streaking decals over the yellow areas.

Not bad.  Were I to do it again, I would paint the yellow over the streaking to reduce the effect, but this was just trying new techniques as my skills had rusted a bit doing WWII Bombers, I wasn't displeased.


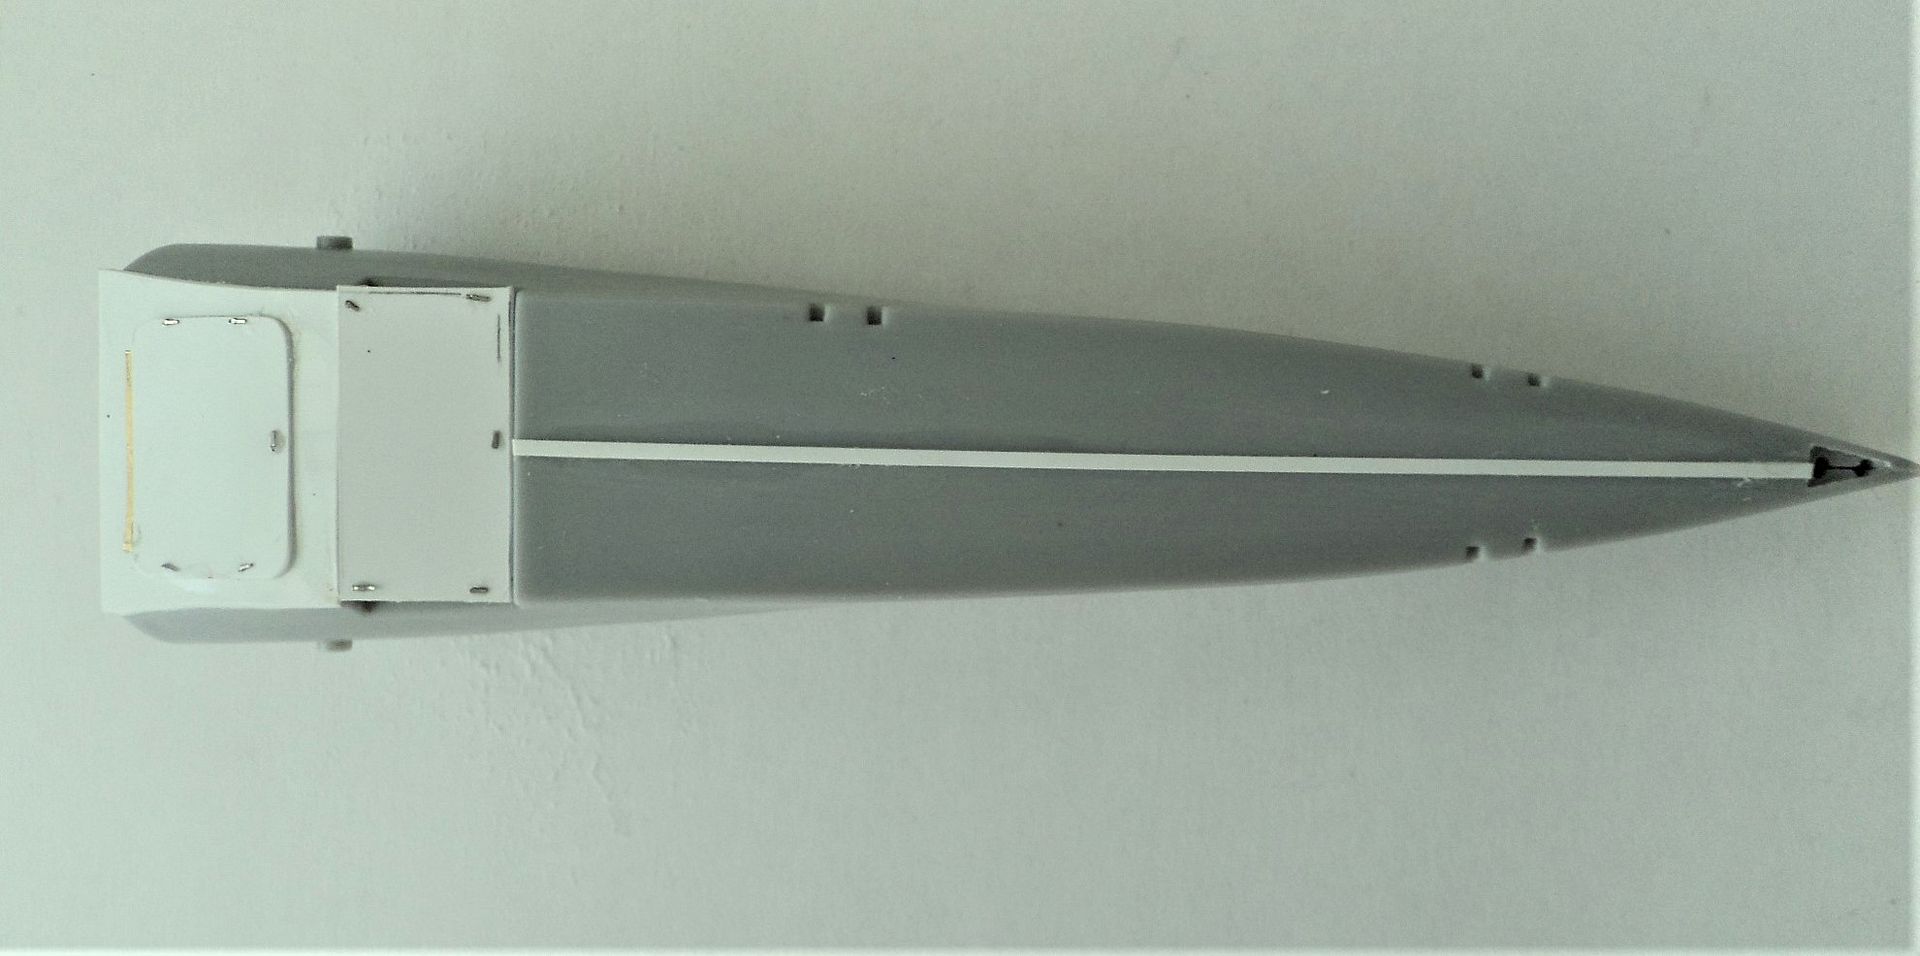
For the underside engine access door, I used sheet plastic and pieces of PE for the latches and hinge to perk up that area of the kit, plus it hides the seam without the infernal sanding.  The kit did not provide the support struts for the tail, so I used some evergreen rod for that assembly.


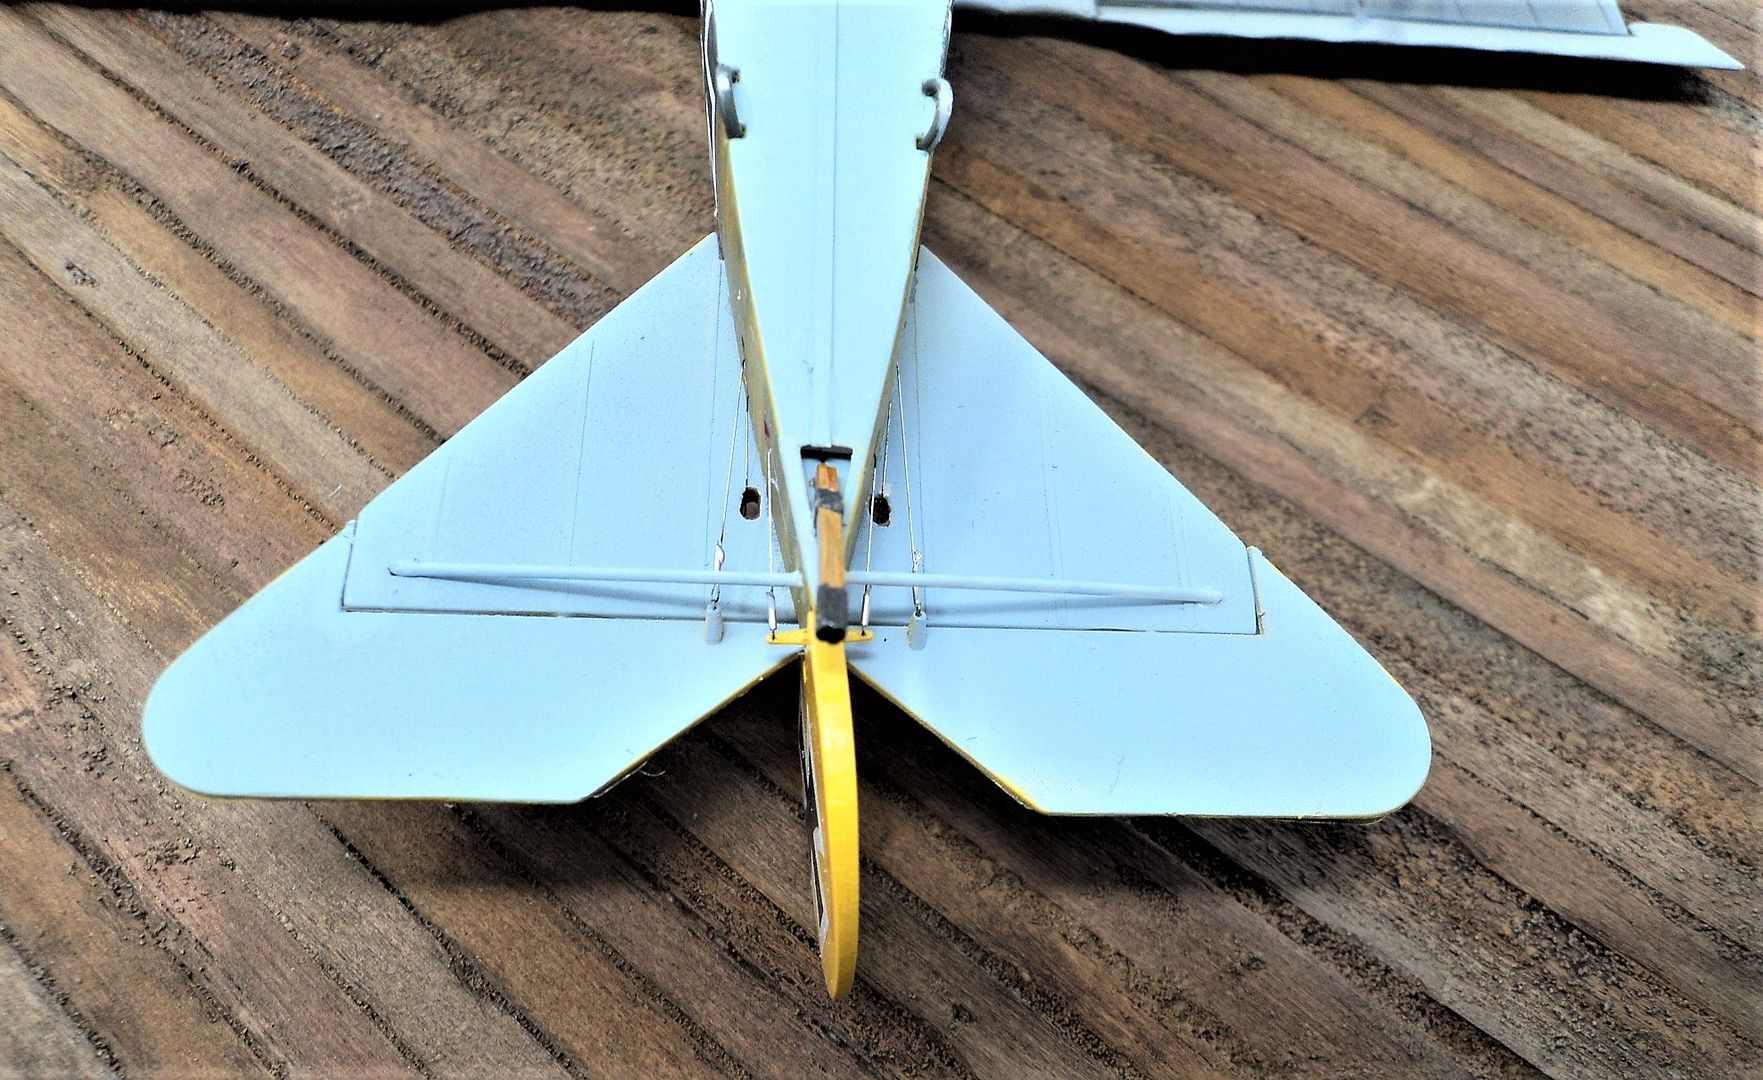
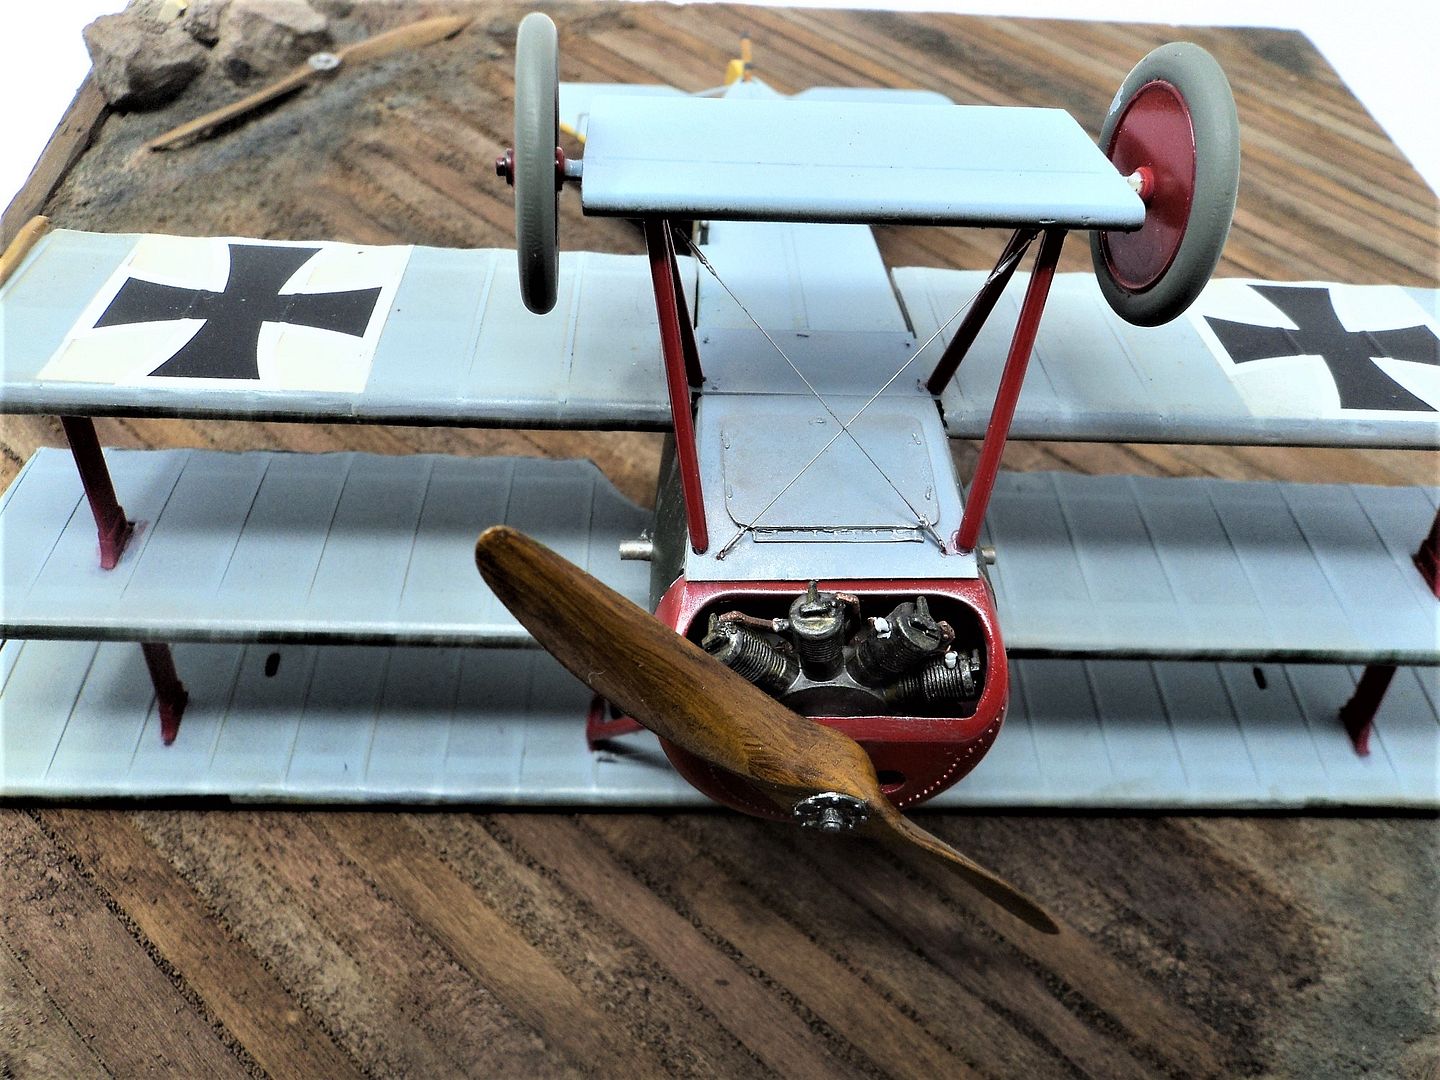
Assembly pretty much followed the instructions.  The engine mounting system was designed by an engineer with a sense of humor as it couldn't have been designed any more difficult: I pinned the rudder, ailerons and elevator, painted the struts and cowling red, and wrapped it up with minimal rigging using Bob's Buckles tubes and eyelets, Modelkasten .06 stretch rigging and Maxima fishing line for the under carriage for strength.

So that's the Hobby Craft DR.I in a nutshell.  I Used the Cutting edge sheet that contained markings for LVR, I used Kit decals for same and Aviatic Streaking decals for the Roden DR.i.


A special thanks and tip 'O the hat to Rick Geisler for the super deal on the kit.  Thanks Rick.


Mark

We few, we happy few.....

Offline lcarroll

  • Administrator
  • Hero Member
  • ******
  • Posts: 8554
Re: Hobbycraft 1/32nd Fokker DR.I
« Reply #1 on: November 17, 2020, 12:41:13 PM »
Mark,
   Despite the limitations of this Kit you've done a very nice job and then some! I like the effect you produced with the streaked decals over the yellow, it all blends together very well. I'm sure you'll find the Meng Kit a bit more "user friendly" then this offering and as we've discussed before, the Roden Kit is a pretty good product as well. I hope to get my streaking done imminently and will be using your suggested method on this scheme, a thinned down yellow over spray over the streaked finish. It will be interesting to compare the two.
   Great lead in back to the WW.I venue after your diversion into the realm of WW.II "Heavies", welcome back!
Cheers,
Lance

Offline RAGIII

  • Hero Member
  • *****
  • Posts: 18844
Re: Hobbycraft 1/32nd Fokker DR.I
« Reply #2 on: November 17, 2020, 01:00:37 PM »
You have done an impressive Job on that Old VERY Basic kit! I am happy to see it built. Like Lance, I find the effect blends together nicely. Well Done. Now I have to return the favor and build that SSWDIII you virtually gave to me.
RAGIII
"A man has to know his limitations": Harry Callahan

"Don't slop it on" Lynda Geisler

Offline mgunns

  • Hero Member
  • *****
  • Posts: 2255
Re: Hobbycraft 1/32nd Fokker DR.I
« Reply #3 on: November 17, 2020, 09:51:15 PM »
Mark,
   Despite the limitations of this Kit you've done a very nice job and then some! I like the effect you produced with the streaked decals over the yellow, it all blends together very well. I'm sure you'll find the Meng Kit a bit more "user friendly" then this offering and as we've discussed before, the Roden Kit is a pretty good product as well. I hope to get my streaking done imminently and will be using your suggested method on this scheme, a thinned down yellow over spray over the streaked finish. It will be interesting to compare the two.
   Great lead in back to the WW.I venue after your diversion into the realm of WW.II "Heavies", welcome back!
Cheers,
Lance

Thanks Lance:  I appreciate you looking in and your compliments on the kit.  Much appreciated.  The WWII Heavies still beckon at times, but for now I am enjoying this side of the modeling "House".
Mark

We few, we happy few.....

Offline mgunns

  • Hero Member
  • *****
  • Posts: 2255
Re: Hobbycraft 1/32nd Fokker DR.I
« Reply #4 on: November 17, 2020, 09:53:47 PM »
You have done an impressive Job on that Old VERY Basic kit! I am happy to see it built. Like Lance, I find the effect blends together nicely. Well Done. Now I have to return the favor and build that SSWDIII you virtually gave to me.
RAGIII

Thanks again Rick:  So.........that's where the SSWDIII went!  I couldn't remember where it went for some reason.  That must have been when I began my WWII Bombing frenzy.  I am sure that too will turn out outstanding in true RAGIII Fashion.
Mark

We few, we happy few.....

Offline Alexis

  • Hero Member
  • *****
  • Posts: 7947
  • Love the self
Re: Hobbycraft 1/32nd Fokker DR.I
« Reply #5 on: November 17, 2020, 11:17:38 PM »
Hi Mark ,

The effect with the streaking decal over laid does work very well actually . I do agree that a little mist of yellow over top would really tie it in even more , but she looks awesome now ! Very well done sir  :) I do have to ask about the front under carriage struts , too me they seem backwards ?


Terri
Hurra ! , Ich Leben Noch
Body and life is a vessel we use to travel the planet . Femininity is the gift , The miracle comes from what we do with it .

Offline mgunns

  • Hero Member
  • *****
  • Posts: 2255
Re: Hobbycraft 1/32nd Fokker DR.I
« Reply #6 on: November 18, 2020, 11:09:01 AM »
Hi Mark ,

The effect with the streaking decal over laid does work very well actually . I do agree that a little mist of yellow over top would really tie it in even more , but she looks awesome now ! Very well done sir  :) I do have to ask about the front under carriage struts , too me they seem backwards ?


Terri
Hi Terri:

It's the kit parts are off.  I looked at my other DR.I's and those on the forum.  The short ones to the back the long to the front, the problem with the HC kit is the short ones are too short. 
I agree, a misting would have tied it in better, but...lessons learned.
Thanks for checking it out and leaving your compleiments and comments, much appreciated.
Mark

We few, we happy few.....

Offline GazzaS

  • Hero Member
  • *****
  • Posts: 1193
Re: Hobbycraft 1/32nd Fokker DR.I
« Reply #7 on: November 18, 2020, 01:16:47 PM »
Nicely done!
There are only two states to be in:  Queensland and blotto.

Offline Monty

  • Hero Member
  • *****
  • Posts: 1643
Re: Hobbycraft 1/32nd Fokker DR.I
« Reply #8 on: November 19, 2020, 01:28:28 AM »
Well done, Mark! A stunning result from a less-than-stellar kit! I do like your colour interpretations and your streaking effects, they work for me! We need to rescue these old kits! Regards, Marc.

Offline mgunns

  • Hero Member
  • *****
  • Posts: 2255
Re: Hobbycraft 1/32nd Fokker DR.I
« Reply #9 on: November 19, 2020, 12:54:47 PM »
Thanks Monty and Gaza for looking and your appreciated comments.  Not being to well detailed or accurate, it was a fun build and I was able to try out things and expand my skills on a kit that would benefit from it.  I agree, some of these old kits, not too accurate or detailed are fun to work with and can turn out pretty decent, considering what they are.
Mark

We few, we happy few.....

Offline Early Bird Fan

  • Sr. Member
  • ****
  • Posts: 261
Re: Hobbycraft 1/32nd Fokker DR.I
« Reply #10 on: November 19, 2020, 06:04:41 PM »
that's a very tidy looking build and a very striking colour scheme, great job all round

Offline kensar

  • Hero Member
  • *****
  • Posts: 2505
  • Reshaping the world - one piece at a time.
Re: Hobbycraft 1/32nd Fokker DR.I
« Reply #11 on: November 19, 2020, 10:53:15 PM »
Very nice work, Mark.  It can be very enjoyable and satisfying to take a dog of a kit and make something nice from it.  And your build is nice!

Offline Alexis

  • Hero Member
  • *****
  • Posts: 7947
  • Love the self
Re: Hobbycraft 1/32nd Fokker DR.I
« Reply #12 on: November 20, 2020, 12:04:36 AM »
Thanks for the reply Mark , I wasn't aware that the undercarriage struts are short in the rear with the kit parts . I was thinking and I know I have made the mistake before ....gluing the struts wrong  ::)


Terri
Hurra ! , Ich Leben Noch
Body and life is a vessel we use to travel the planet . Femininity is the gift , The miracle comes from what we do with it .

Offline mgunns

  • Hero Member
  • *****
  • Posts: 2255
Re: Hobbycraft 1/32nd Fokker DR.I
« Reply #13 on: November 20, 2020, 09:34:31 AM »
Thanks for the reply Mark , I wasn't aware that the undercarriage struts are short in the rear with the kit parts . I was thinking and I know I have made the mistake before ....gluing the struts wrong  ::)


Terri

Hi Terri:
Yes, that is easy to do with this kit.  After your comment I scoped it out pretty good and if the undercarriage struts were the other it would really look dumb.  I made the mistake on my first Roden DR.I by using the cabane struts for the undercarriage and vice versa, and couldn't figure out why the cabane struts wouldn't line up with the upper wing.  Now I know why.  After all these years!
Mark

We few, we happy few.....

Offline mgunns

  • Hero Member
  • *****
  • Posts: 2255
Re: Hobbycraft 1/32nd Fokker DR.I
« Reply #14 on: November 20, 2020, 09:37:43 AM »
Thanks EBF and Kensar for looking in and your comments.  Much appreciated.
Mark

We few, we happy few.....