« on: May 23, 2020, 11:36:19 AM »
Roden 1/48 scale Be12b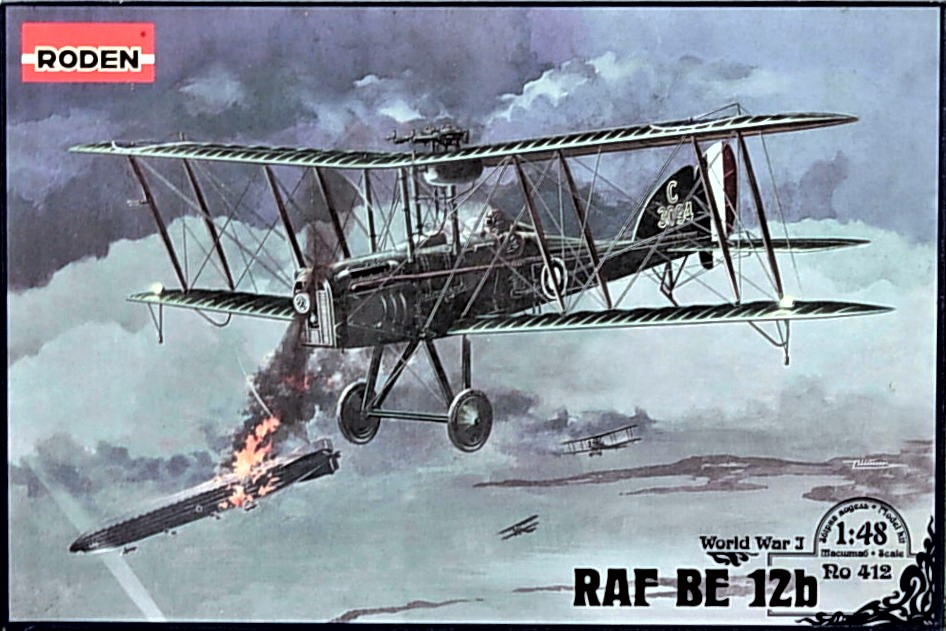 Reviewed by Brad Cancian
Item: Ro 412
scale: 1/48
Price: Varies - $US29.99 in USA, $A42 in Australia. Available through hobby retailers worldwide.
Review kit kindly provided by Roden at http://www.roden.eu
I’ll admit, I’ve always had a bit of a soft spot for the BE12b. It is an aircraft that looks like a BE2c and an SE5a had a baby, and this isn’t that far from the truth.
The BE12b was a variant of the BE12, which in turn was a single seat variant of the BE2c reconnaissance and bomber aircraft, fitted with the 12-cylinder RAF4a engine (as opposed to the BE2c’s 8-cylinder RAF1a). In 1915, when the BE12 was conceived, the British were in the midst of the Fokker Scourge and needed fighter aircraft, and fast. Single seaters were seen as the fighters of the future. Thus, the BE12 was born. The BE12 could utilise largely unmodified BE2c design and components, which meant minimal disruption or production issues. The BE12 made its combat debut in France in August 1916, and was hopelessly outclassed. Given it was derived from one of the most stable and docile aircraft around at the time, it is of no surprise that even with a more powerful engine, its performance as a dogfighter was never going to be anything short of horrible. It entered service just as the higher performance German Halberstadt and Albatros fighters were beginning to appear. Needless to say, its time in combat was short.
The BE12 was quickly followed by the BE12a, which was the same aircraft but fitted with BE2e uneven-span wings and smaller BE2e tail feathers. Again, performance as a fighter was marginal, and these aircraft were largely relegated to the Middle Eastern theatre of operations, and training squadrons.
The BE12b was the last variant of the BE12, fitted with BE2c style wings, but retaining the BE2e horizontal stabiliser, and fitted with a 200hp Hispano-Suiza engine, much like the forthcoming SE5a. The stability and docile handling characteristics of the BE12b made this aircraft a good choice as a night fighter. Numerous delays associated with shortages of the Hisso engine meant that deliveries of the BE12b only started in late 1917, already after the significant German night bombing and zeppelin threat was subsiding. Around 150 BE12b’s were manufactured, and production ended in February 1918. The aircraft served in Numbers 37, 50, 51, 75, 76, 77 and 78 Home Defence squadrons, and Number 189 Night Training squadron. The aircraft was only marginally successful as a night fighter, and was also used occasionally in anti-submarine duties. At the end of the war, there were still some 115 BE12bs in service with the Home Defence squadrons.
THE KIT
The kit was released way back in 2006, so this is hardly a ground breaking review! The kit comes in the standard ‘smaller’ (30cm x 20cm x 4.5cm) box, often used for 1/48 fighters from this manufacturer (which is interesting when compared to the BE2c kit, which comes in a larger box, even though both aircraft are the same size, give or take). The box is marked “skill level 4”, whatever that may mean!
The Plastic:
For those that have built either Roden’s BE2c or their Hisso SE5a, you will see some old familiar friends.
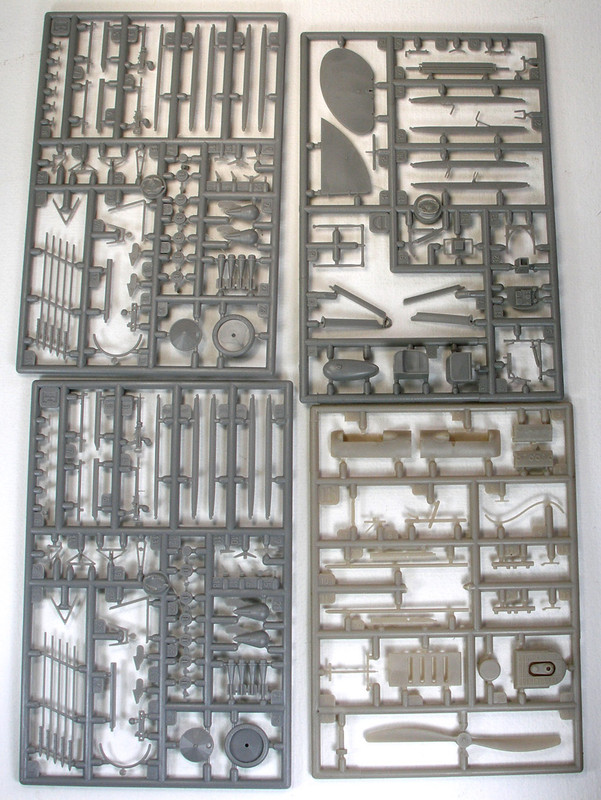
There are 159 parts in the box (including 7 clear acetate parts on one sheet) spread across six sprues, though many of these parts are not used. The plastic is the standard Roden matte dark grey fare. This plastic, whilst not ‘soft’, is certainly not hard either. It can best be described as “slightly soft and flexible”, which means that it is easy to sand, but can also be easy to bend and break. The plastic has a very fine grain to it, but holds fine detail very well, with details being relatively sharp yet subtle. Roden’s wings, for example, are still some of the best in the business, with subtle peaks and valleys, and no over-sized wing ribs or giant rib tapes to deal with. The control surfaces are deeply recessed, which will make repositioning them a breeze, if desired. The mouldings are clean, with minimal flash, and sprue gates are suitably small. Bravo, Roden!
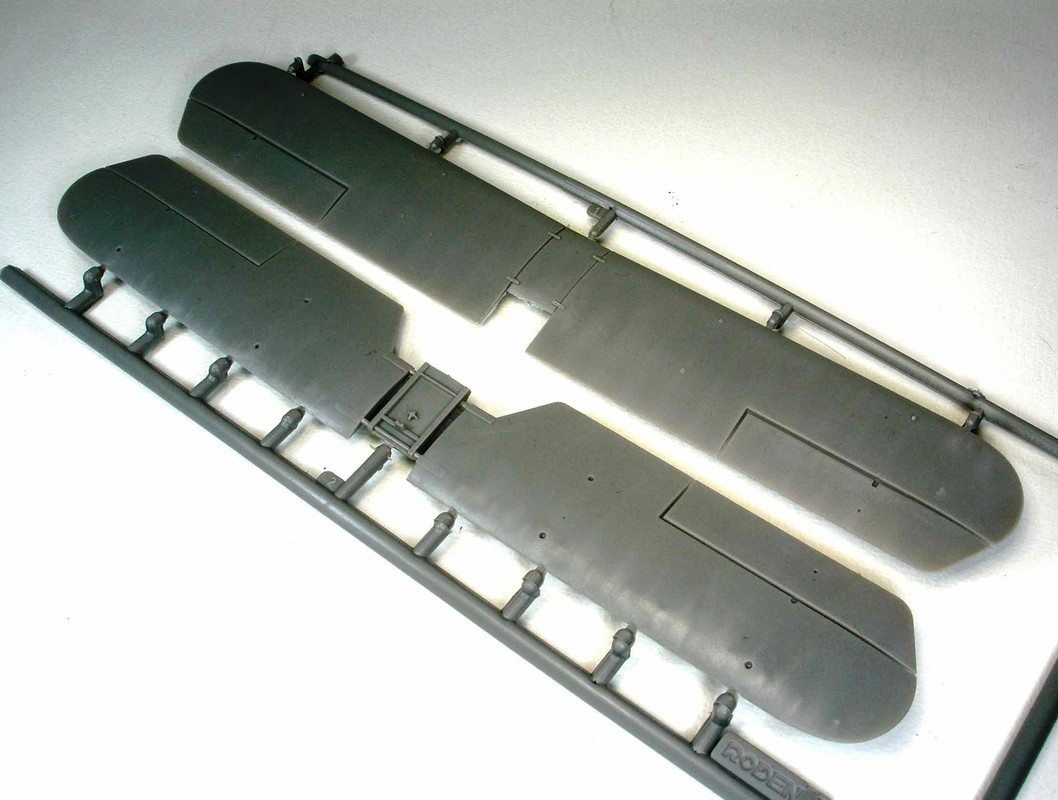
The first sprue (marked sprue F) contains the upper and lower wings, which are the same as those from the BE2c kit. Both are moulded as single pieces, with the correct dihedral. Roden is to be commended for doing this, as it makes alignment of these pieces a breeze.
Sprue D is also from the Roden BE2c. It contains struts, vertical stabiliser, instrument panel, fuel tank, undercarriage struts, and various other components. These are finely moulded, however, part 7 (one of the undercarriage struts) was broken, missing the piece that wraps around the axle. I am not sure if this is because it got broken in transport at some point, or it was just short-shot. In any case, this is a tad annoying, but something that should be able to be fixed with some plastic and wire.
The kit contains two Sprue E’s, again from the BE2c. These contain more struts, bombs, guns, Lewis drums, and wheels. Also included are rockets, which are not used for the BE12b. One thing I have always admired is the way Roden does their British wheels – the central wheel cover is separate (which is great for painting), is cleanly faceted, and looks gorgeous. The tyres also have “Palmer Cord Aero Tyre” cleanly moulded around the sidewall. Wonderful. Roden’s Lewis guns and drums are also fantastic, and look very nice under a coat of paint and some delicate dry brushing. There are some fine parts here which have large sprue gates relative to their size – some of these will need some care to remove and clean up. Some may be better replaced by styrene rod.
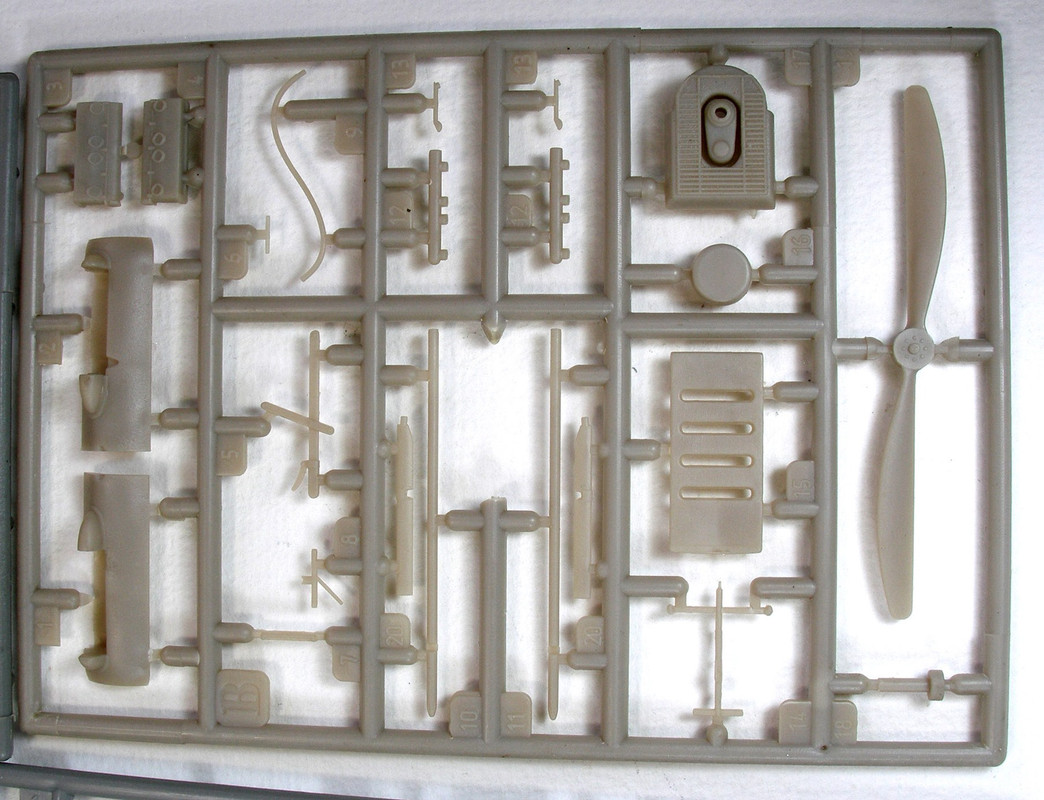
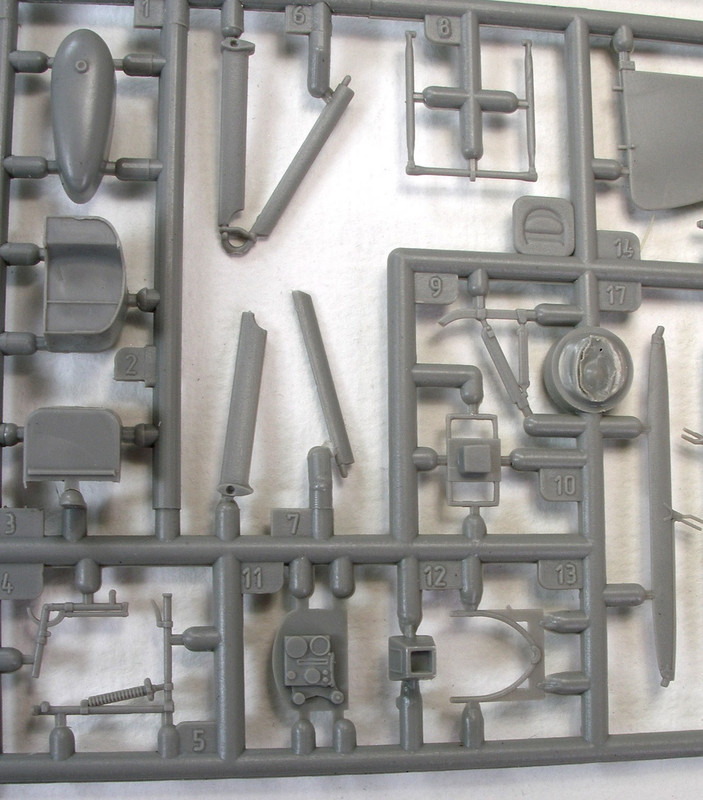
Sprue B may look at first glance that it is from the Roden 1/48 Hisso SE5a, but it is not (though it obviously borrows from many of the same master parts). This sprue is unique to the BE12b kit, and contains the upper engine panels and front radiator, cylinder casing, as well as the propeller, exhaust pipes, and some unique BE12b parts. Unlike their SE5a kit, the under-nose panel has the elongated vents hollowed out, which is a very nice touch. The only down-side with this sprue is that the propeller hub detail and radiator detail is a little soft, but this is nothing too worrisome.
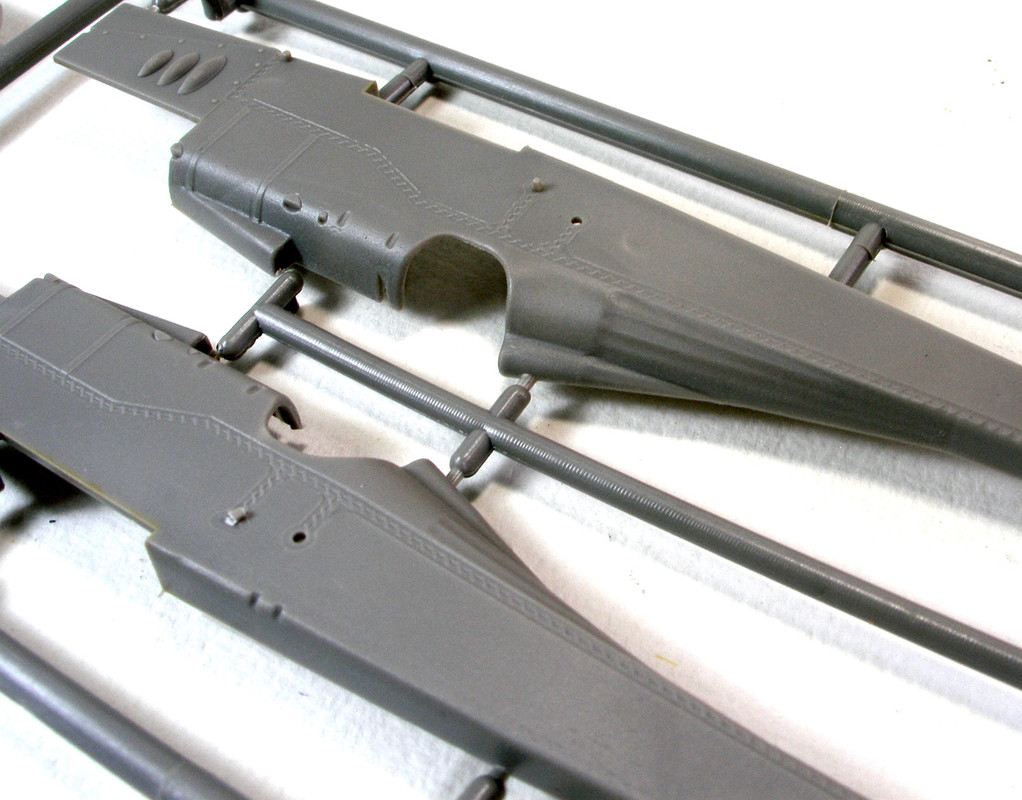
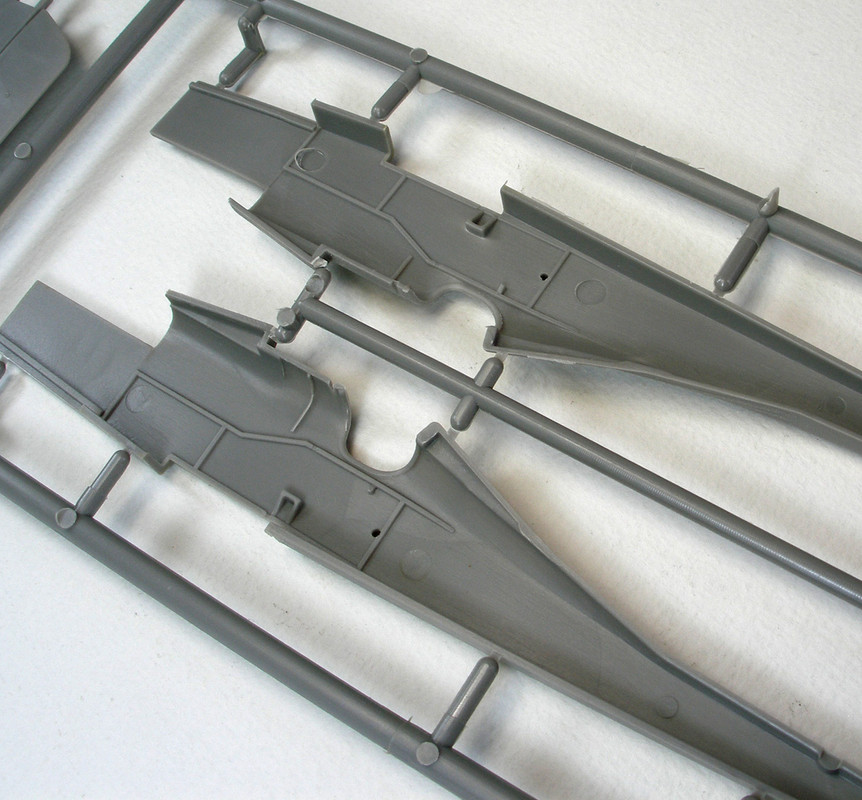
The final sprue contains more unique BE12b parts, namely the fuselage, horizontal stabiliser (more about these later), Holt landing flares, navigation lights and wingtip skids. Again, moulding here is clean and nicely done. There are some mould release pins on the inside of the fuselage halves. Some Roden kits have these pins smack-bang in the middle of the cockpit opening, but not here; these ones should be largely hidden, which is nice. The other thing that this kit has avoided is corresponding sink holes on the other side of the fuselage to the mould release pins. Again, these are not present here; another bonus.
Instructions:
Instructions come in an 8 page black and white leaflet, which contains a history of the aircraft in three languages,
A sprue layout diagram, 14 pictorial steps detailing construction, a rigging diagram, and a painting diagram. Paint callouts are in Humbrol numbers only. These are fairly standard Roden fare and shouldn’t prove too difficult to follow. The rigging instruction will require careful study however to make sure all of the rigging wires are accounted for; the BE12 series being quite rigging intensive.
Markings and Decals:
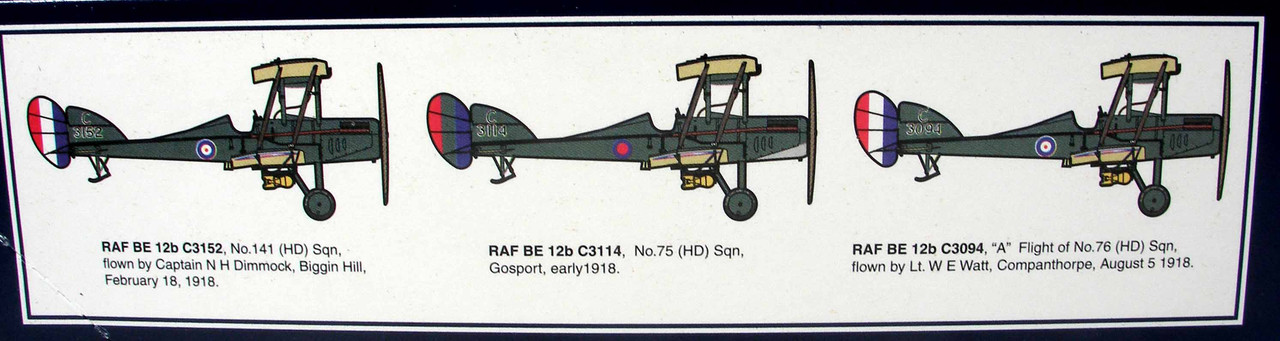
Three markings options are included in the kit:
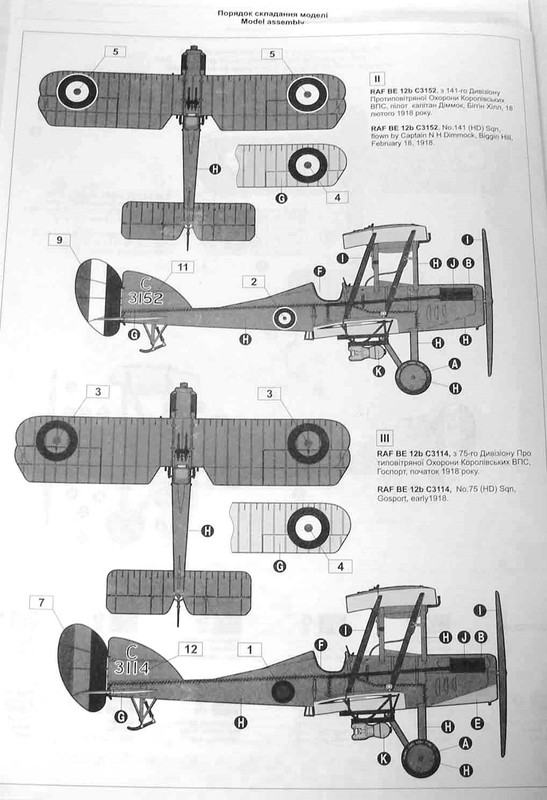
• C3152, No.141 Home Defence Squadron, flown by Captain N H Dimmock, Biggin Hill, February 18, 1918.
• C3114, No.75 Home Defence Squadron, Gosport, early 1918.
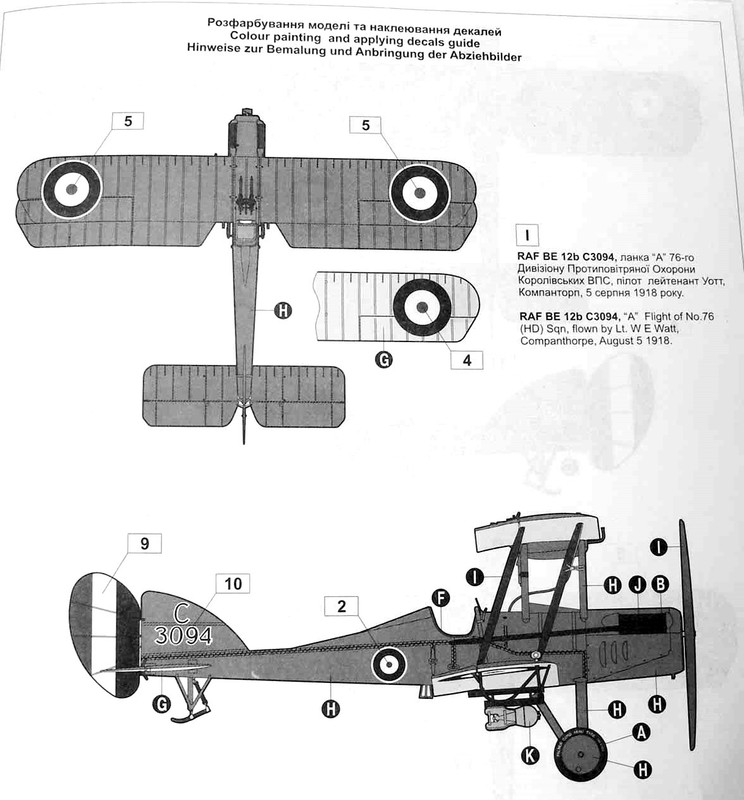
• C3094, “A” Flight, No.76 Home Defence Squadron, flown by Lieutenant W E Watt, Companthorpe, August 5, 1918.
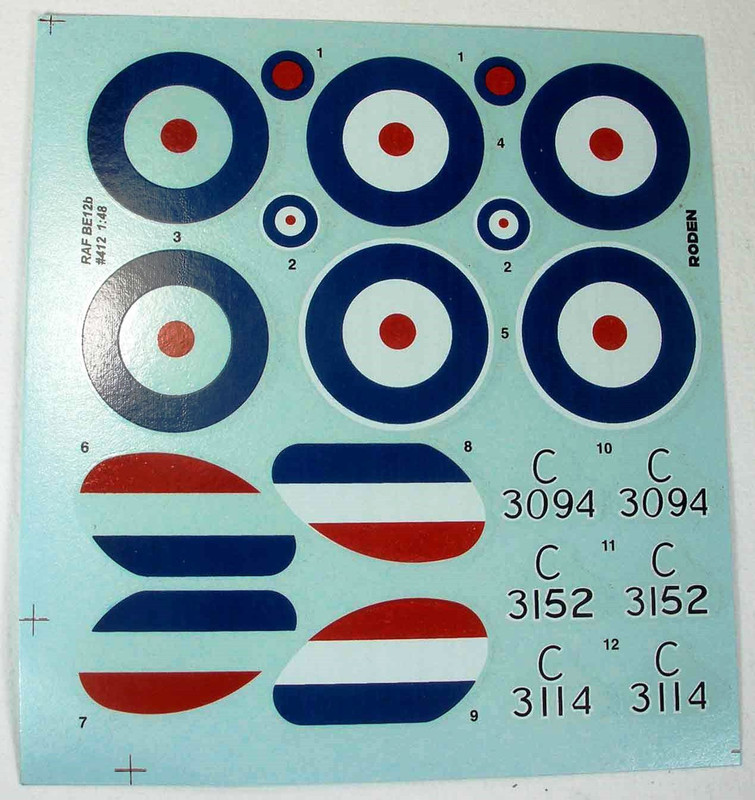
BE12bs were rather boring when it came to their markings (PC10 and clear doped linen, predominantly), so Roden have not done a bad job at trying to pick some slightly different markings, mostly. This is true mainly for C3144, which sports night fighting national markings and aluminium lower cheek panels. Unfortunately, the instructions don’t have full underside views so it is hard to say whether or not these aluminium panels extended to the chin panel.
The decals themselves are nice and glossy, perhaps just slightly on the thicker side, but with good colour and colour density. The decals are largely well registered, with the white outlined serial numbers showing just a hint of misalignment. A better option would have been to print these as separate black and white numbers, allowing the modeller to play with the alignment, but the kit serials are still eminently usable.
Accuracy:
My primary reference regarding accuracy was Windsock Datafile 66 “RAF BE12/a/b” by J M Bruce. This datafile is excellent and is a ‘must’ when building this kit.
In comparing the kit to the datafile drawings, the kit looks notably oversize. Scratching my head, I looked at the dimensions in the datafile and determined that the datafile drawings are under scale by about 2%; they are closer to 1/49 scale. So, in assessing accuracy of dimension, I had to ‘eyeball’ some aspects. The datafile mentions a span of 37 feet, which in 1/48 scale, comes out to just under 23.5cm. The kit wings are about 2mm too long, but appear good in chord. Wing tip shape looks about right too. There should be a notch in the rear of the centre section in the upper wing to accommodate the gun mounting, but this is easy to add.
Fuselage dimensions look good, though the cockpit opening is not the correct shape; it is not long enough, and the front edge curves up rather than being straight. The turtle deck ribbing looks gorgeous, but care needs to be taken when assembling to not lose this. The large half-moon shaped vents on the forward fuselage are good in shape, but are not hollowed out in any way; this will be obvious in any forward viewing aspect. For those wanting more accuracy, these vents may need to be removed and replaced with formed plastic. The nose radiator looks good but is simplified; one could perhaps look to substitute one with a more detailed Eduard version, designed for their SE5a kit. The propeller is also an interesting thing; it is quite large compared to the datafile drawings, but I think the datafile got it wrong here. The datafile shows a small SE5a sized prop in its drawings, but comparison against photographs shows a larger prop, closer to what Roden has included in their kit. The other thing to consider when building this kit is the underside of the nose; the accurately depicted large hollowed vents are great, but there is no engine in the kit; these prominent holes will look into nothingness. You could consider painting the inside of the forward fuselage black and hope no one notices, or you could consider building the bottom of an engine and some engine mounts to fill the void.
Cockpit detail is relatively complete, but there is room for improvement. The interior does have some frame detail, but it is not completely accurate; some additional framing plus some rigging will be required. Some aspects of the interior (stick, rudder pedals) are added to the lower wing part before slotting into the joined fuselage halves, so watch for alignment here. The seat is a rather plain affair with no cushion or seatbelts. There is no throttle or other sidewall fixtures, and no wooden panel behind and above the pilot seat, so you’ll need to scratch build these or add these yourself from the spares box.
Also, interestingly, some photographs of the BE12b show a curved belly fairing under the belly of the aircraft, immediately aft of the chin panel, between the undercarriage legs. I have no idea what this fairing was for, and it is not in the kit. It looks remarkably like the ‘dart box’ photographed on page 34 of the datafile (fitted to a standard BE12), but even then, J M Bruce had no idea what it was really for. It is possible that these were intended to drop darts on zeppelins, but this seems like an ambitious (and fruitless) task… It is only present on some machines, so check your references and scratch build as appropriate.
Speaking of armament, the kit instructs you to fit bomb racks and the larger bombs to the machine. The BE12b was a night fighter, so carrying bombs seems unlikely to have been something the BE12b needed to do. Before you throw them away, however, the datafile does contain three photographs on pg 32 of a ‘bombed up’ BE12b, fitted with the aforementioned bombs, described as being for anti-submarine purposes. It is a 77SQN (HD) aircraft according to J M Bruce, but the serial is obscured. I’d suggest checking references before fitting these.
Without dry fitting the struts and upper wing (a nigh on impossible prospect), it is hard to say if these are the correct length or provide for the right stagger. Looking at online builds, it looks about right.
Now the kicker – the tail plane. Roden have used the master from the BE2c kit for the tail plane on the BE12b. Unfortunately, this is rather inaccurate. The BE12b utilised BE2e tail planes, not BE2c tailplanes. The BE2c tailplane is wider in chord and square shaped, whereas the BE12b tailplane has a far narrower chord, slightly smaller in span, and have sharply raked tips. This will need some surgery to correct, however, thankfully, it should be relatively simple. The easiest way to do this is to remove the relevant amount from the leading edge of the stabiliser, as the elevators chord aft of the elevator hinge line is about right, trim the span around ~2mm, and trim the tips to the right angle. Smooth off the trimmed areas and all should be ok. It’s not much work, but it is befuddling why Roden did this, especially when you consider the stabilisers are on one of the unique BE12b sprues…!
Fit:
Being an in-box review, I can only make brief comment on some basic dry fitting. The fuselage and lower wing seem to fit together reasonably well, with no major issues apparent. The softer Roden plastic does leave some room for bending and warping, so care will need to be taken to ensure alignment during construction. In particular, there is a very real chance that too strong a hand at rigging may lead to alignment problems; I do know of some folks that have gotten themselves into real trouble here with Roden’s BE2c.
Therefore, unless you’re rigging in a non-structural rigging material such as elastic, I would recommend you rig opposing wings at the same time to maintain alignment. Conversely, you may be able to use tension in your favour to re-align slightly out-of-straight wings with clever use of monofilament rigging or similar.
CONCLUSIONS
This is a great release by Roden; the kit contains most of what you need to build an excellent model, marred only by a broken undercarriage strut, and the significant inaccuracy associated with the horizontal tail plane. Why Roden did this when the sprue these parts are contained on are a BE12b-specific sprue I am not sure. The positive aspect to this is that it is not hugely difficult to correct. Some care will be needed in building the kit, but this is not unlike many other WW1 models out there. The marking choices are about as interesting as they can be, and Roden presents lots of nice options. Roden certainly are to be commended for tackling this obscure, yet interesting, British subject!
Our thanks to Roden for the review sample.

Logged
Owner and Administrator of ww1aircraftmodels.com and forum.ww1aircraftmodels.com

