Evening All,
Thanks Rick, Frank, Terri, Ken, Ondra and William for the kind comments: as things are going at the moment these remarks are extremely encouraging!
The Fee Dee saga continues - and continues to test my patience a little. I will not belabour you with the painting - it was a pain for a variety of reasons and took much longer than it should reasonably have done. But it is done now - in acrylics with hand painted markings. I have found that I do not have suitable letters or numerals for the serial so the rudder will remain blank and the model will represent a type rather than a specific machine.
Normally I try to take photos of the stages of putting on the top wing and struts, but again because this model has been a pain, I only took the photos when the top wing and many struts were in place. This is what happened: I fixed the booms (florists wire) to the wings before I started painting. To do this I use two-part epoxy for the wing joint and CA at the V at the rear. I use a simple method to get the angle of the boom to the wing right:
a. from the side elevation drawing I draw a line under the wing which touched the leading and trailing edges and runs to the rear;
b. on this line I measure a distance - eg 4 cm rearwards from the trailing edge of the wing (distance x);
c. I measure the vertical distance between the boom on the elevation drawing and the line which has been drawn under the wing (distance y);
d. set up a simple jig so that the boom parts are laid on a support which is distance x from the trailing edge of the wing. The height of the support will be y. The upper and lower wings need different jigs but they are quick and simple to make.
After painting I usually I fix the rudder on to the v of the bottom boom and then put two outer forward struts into the lower wing. This makes a three legged triangle which is stable if I lower the top wing on to the struts and rudder. Well I did so - only for the rudder to drop out!! I managed, just, to get the rear outer struts in place while holding the wing - don't ask how! I decided to add the middle pairs of struts while I could - and for once the plan worked - again don't ask how or why!! Finally I added the forward inner bay struts and left the b@**%!@ thing alone to dry out overnight. In the morning the top wing was rigid so I took the opportunity to take a photo before the model could fall apart:


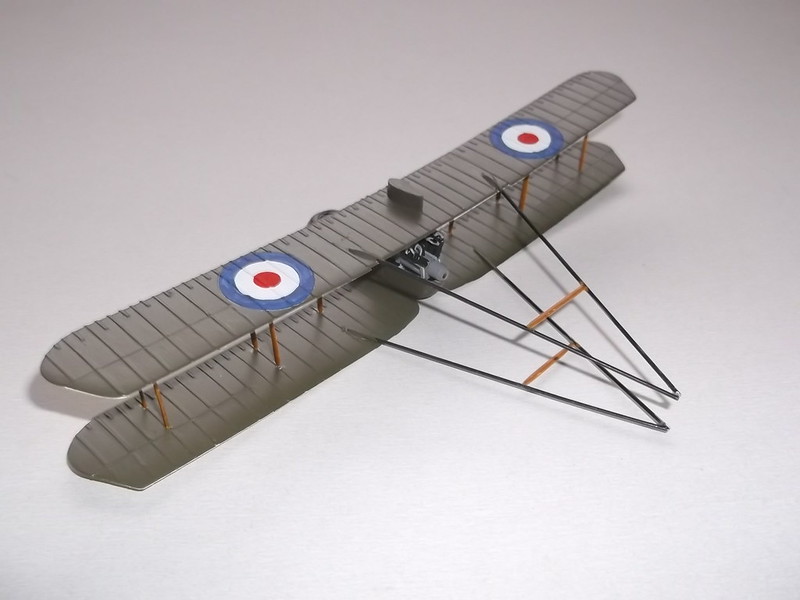
So I had a structure which was stable enough for me to be able to add the boom struts, remaining wing and cabane struts and the b@**%!@ rudder.
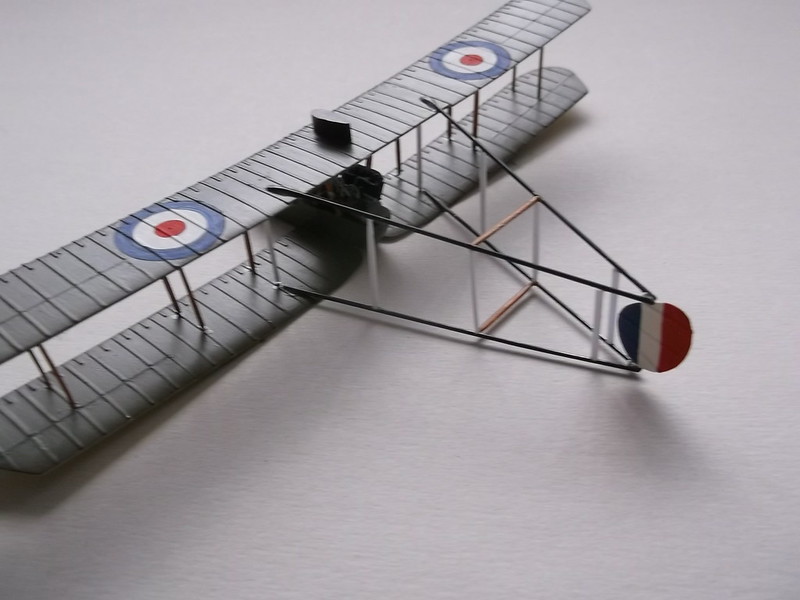


Needless to write the cabane struts were also a pain to get into place because the exhaust has got to fit around them later and so I had to keep offering the exhaust pipe to make sure that it will do so.
Next update should include the Trafford undercarriage.....
Thanks for looking.
Stephen.

