Author Topic: WNW Pfalz D.XII  (Read 14287 times)

Offline davec

  • Full Member
  • ***
  • Posts: 179
Re: WNW Pfalz D.XII
« Reply #30 on: September 04, 2017, 11:06:45 PM »
Ed - thanks - I'll post some more pictures tonight. I plan to do a little more work before the long weekend ends.  I've painted the areas visible through the lozenge decals (access hatches, strut attachments), and sprayed some gloss where the fuselage decals are going.  I was careless pulling some of the masking tape off the wings and flexed one of the wing root joints making a visible thin crack along the seam.  Need to use more glue next time.  Will touch that area up and start applying the decals.

RAGIII- I liked the acrylic glue. I won't use it first line because of the significantly longer drying time than alpha-c.  I will use it for hard to place parts where the long drying time is helpful, and for the detail master wires, where the superglue adhesion was weird. It dried clear, and was tacky enough that the wires didn't move while the glue dried.

Borsos - would appreciate your (and anyone else's) thoughts re preshading here.  I was not going to do it.  On some planes like the Fokker EIII I just finished, the painted canvas appears partially translucent and the preshading is really important.  I looked at Pfalz pictures in the datafile book and museum photos on the internet.  I saw the one at the Museum of Flight in Seattle last summer.  The lozenges look like opaque paint - I didn't see any tonal variation between ribs, so was going for a mostly uniform finish.

Thanks!

Dave

Offline mgunns

  • Hero Member
  • *****
  • Posts: 2255
Re: WNW Pfalz D.XII
« Reply #31 on: September 05, 2017, 12:19:59 PM »
It's good to see you making progress on this model, it isn't one of the more popular kits out there, but a very neat model none the less.  As to preshading, do your thing, it's your model and it certainly won't detract from the overall appearance of it.  This aircraft had some really neat color schemes.  I want to do another one in the markings at the Australian War Memorial, which I saw and actually touched, in 1979.  Quite an experience.  Keep up the good work and keep us posted.  You have an appreciative audience.
Mark

We few, we happy few.....

Offline Borsos

  • Hero Member
  • *****
  • Posts: 3324
Re: WNW Pfalz D.XII
« Reply #32 on: September 05, 2017, 07:47:40 PM »
Dear Dave,
regarding the preshading question that's another of these many questions I think where there can't be a definite answer  -  and that's quite fine.... It always depends on your individual taste. I have seen many replicas covered in Tarnstoff that actually look quite opaque seen from the upper side and standing on the ground. When they were up in the air the light came through the printed canvas and the ribs were clearly visible. I think (and again: that's just my personal philosophy mainly based on what I like in this hobby) there are two reasons for shaded ribs: 1) Planes in service quickly accumulated dirt (Oil, fuel, dust, mud,...) and were frequently washed (yes, washed - brushed with water and soap) by the ground personnel. When you clean a wing, you brush over the ribs that become lighter, the sacking canvas between staying darker (dirtier). 2) It looks just fine  :) . Accentuated ribs make a scale model look better (in my taste!) That's all ;) . So if 1) is not interesting for you ( yes these planes often had only weeks at the front before being crashed/shot down, no time for weathering) and 2) you prefer clean wings, then don't preshade (or postshade). Depending on your personal taste. That's the reason I think why AVIATTIC offers Tarnstoff on white Decal film (no shading) and clear decal film (preshading possible).
Kind regards
Borsos
"Deux armées aux prises, c'est une grande armée qui se suicide."
Barbusse.
"Ein Berg in Deutschland kann doch einen Berg in Frankreich nicht beleidigen. Oder ein Fluß oder ein Wald oder ein Weizenfeld."
Remarque.

Offline aliluke

  • Hero Member
  • *****
  • Posts: 510
Re: WNW Pfalz D.XII
« Reply #33 on: September 05, 2017, 07:48:41 PM »
That looks really sharp and clean to me Dave. Everyone one knows that the photos show what the eye can hardly see and your photos portray none of those unseeable faults as far as i can tell.

Since I'm next moving on to the lozenge decals on the DVII I'll await your experiments  ;). Weathering and shading are thoughts for my next model at the moment. I'm inclined to keep both very light and subtle having respect to scale.

I'm intrigued about your support rig for the plane - what is that? It looks ideal.

Thanks,
Alistair
It ain't a hobby if you have to hurry.

Offline davec

  • Full Member
  • ***
  • Posts: 179
Re: WNW Pfalz D.XII
« Reply #34 on: September 05, 2017, 09:41:23 PM »
Hi Mark and Borsos,

Thanks for the thoughts about preshading.  I think on this one I'm going to go without and see how it turns out.  I'm into light weathering (a major shift for me from no weathering).  I have a few more models with lozenge decals on the shelf, and if I'm not happy with the effect on this one, will try preshading the next.

Alistair

The stand is from Tamiya

https://www.tamiyausa.com/items/paints-finishes-60/airbrushes-accessories-57000/spray-work-painting-stand-set-74522

So far it has been pretty helpful.  Only issue is that the plane is not fixed to the stand, so it can slide while being worked on.  I don't have any of the fancier stands or jigs that people use on this site, but some of them look like they hold the model more securely.

I didn't post any more pictures.  It looks the same as before with some touch up to the silver grey and spots of black and grey on the wings where the decals don't cover.  Will be applying the lozenges next.  Plan is to put the rigging anchor loops on after the decals.  On my last plane I put them on prior to painting (no lozenges) so they were the same color as the wings and fuselage.  I have some black wire, so hopefully they will look OK.

Dave

Offline davec

  • Full Member
  • ***
  • Posts: 179
Re: WNW Pfalz D.XII
« Reply #35 on: September 11, 2017, 11:27:37 AM »
I’ve started applying the lozenge decals, which is another on the long list of things that I haven’t tried before.  I prepared the wings with white alclad primer, which I covered with alclad clear coat. Areas visible between the decals (access hatches, strut attachments) were picked out in the appropriate colors.

I have been running into some problems with the decals, and am looking for suggestions.  I will post the question separately as the answers might be useful to other people, and it may be easier to find with the search function if anyone in the future is looking:

http://forum.ww1aircraftmodels.com/index.php?topic=8875.0

Anyways, lower wing lozenges applied:


Offline RAGIII

  • Hero Member
  • *****
  • Posts: 18847
Re: WNW Pfalz D.XII
« Reply #36 on: September 11, 2017, 10:53:46 PM »
I put one suggestion on the supplied link. Now I could be wrong here but to me it looks as though the primer coat was bubbly and transferred to the decals. The good news is that it is really only very noticeable on the VERY LARGE images in Macro.
RAGIII
"A man has to know his limitations": Harry Callahan

"Don't slop it on" Lynda Geisler

Offline davec

  • Full Member
  • ***
  • Posts: 179
Re: WNW Pfalz D.XII
« Reply #37 on: September 12, 2017, 12:21:38 PM »
RAGIII - Many thanks for your response here and to the primary post about my decal problem.  Agree that it fortunately isn't as obvious as it could have been, and I'm hoping the clear flat will tone it down even more. However, would like to avoid the problem, especially on the more visible upper wing surfaces, and really appreciate the suggestions in your other post.

When you say "primer coat was bubbly and transferred to the decals" do you mean you think I had bubbles in my primer, or bubbles between the primer and decal?

thanks!

Dave

Offline RAGIII

  • Hero Member
  • *****
  • Posts: 18847
Re: WNW Pfalz D.XII
« Reply #38 on: September 12, 2017, 11:03:39 PM »
RAGIII - Many thanks for your response here and to the primary post about my decal problem.  Agree that it fortunately isn't as obvious as it could have been, and I'm hoping the clear flat will tone it down even more. However, would like to avoid the problem, especially on the more visible upper wing surfaces, and really appreciate the suggestions in your other post.

When you say "primer coat was bubbly and transferred to the decals" do you mean you think I had bubbles in my primer, or bubbles between the primer and decal?

thanks!

Dave

I was saying that it looked to me as though the "Actual Paint may have been bubbly? Hard to tell even in the large format!
RAGIII
"A man has to know his limitations": Harry Callahan

"Don't slop it on" Lynda Geisler

Offline aliluke

  • Hero Member
  • *****
  • Posts: 510
Re: WNW Pfalz D.XII
« Reply #39 on: September 13, 2017, 07:08:38 PM »
Hi Dave
A trick I have tried for surface finishing prior to decals going on is to polish the surface with a glasses (spectacles) cleaning cloth. I just use the cloth with no other additives and rub it really hard. Matt finishes come up gloss and all the dust and lint gets gone. I also use it, gently, to expel decal bubbles and wrinkles during application. They are easy and cheap to get and last.

It seems to work so far but I haven't got to the bigger lozenge decals yet - that's for this weekend...and here is hoping - a new venture for me too.

Cheers,
Alistair
It ain't a hobby if you have to hurry.

Offline davec

  • Full Member
  • ***
  • Posts: 179
Re: WNW Pfalz D.XII
« Reply #40 on: September 17, 2017, 11:03:47 PM »
RAGIII- Lots of problems with my airbrushing, but I'm pretty comfortable that bubbles aren't one of them.  I'm working on the others - getting gloss finishes to lay down glossy, dust control, etc.

Alistair - I will try a polishing cloth.  I did some rubbing out of areas with fine sandpaper where some lint got in the primer, but this was remote from applying the decals.  I can try the polishing cloth right before to make sure there isn't any dust on the surface.  I have been using compressed air, but there might be stuff that it isn't blowing off.

Looking forward to seeing your decals.

thanks!

Dave

Offline RAGIII

  • Hero Member
  • *****
  • Posts: 18847
Re: WNW Pfalz D.XII
« Reply #41 on: September 18, 2017, 01:17:06 AM »
RAGIII- Lots of problems with my airbrushing, but I'm pretty comfortable that bubbles aren't one of them.  I'm working on the others - getting gloss finishes to lay down glossy, dust control, etc.


Dave

Dave,
No insult or criticism was intended. Obviously it was a misinterpretation on my part looking at the enlarged Macro photo. My apologies.
RAGIII
"A man has to know his limitations": Harry Callahan

"Don't slop it on" Lynda Geisler

Offline davec

  • Full Member
  • ***
  • Posts: 179
Re: WNW Pfalz D.XII
« Reply #42 on: September 18, 2017, 03:22:34 AM »
RAGIII- I am so sorry if the tone of my response was different than intended- I'm trying to get better at posting, and was attempting to be humorous (my wife tells me that I should not try to be funny).  I did not take any offense, and am open to any criticism that makes my work better.  I have really appreciated your comments- they have been tremendously helpful.  I have probably been more frustrated by trying to get the results I want out of my airbrush than anything else I have tried (except for my recent decal issues).  I just got back from another road trip, and am anxious to try out some of the things you and others have suggested when I put the decals on the upper wings, where they will be more visible. 
 
Please don't stop making your suggestions- I'm trying to get my work to the level of yours and others here, and won't be able to get there without your help.

Best,

Dave

Offline davec

  • Full Member
  • ***
  • Posts: 179
Re: WNW Pfalz D.XII
« Reply #43 on: September 22, 2017, 08:17:47 AM »
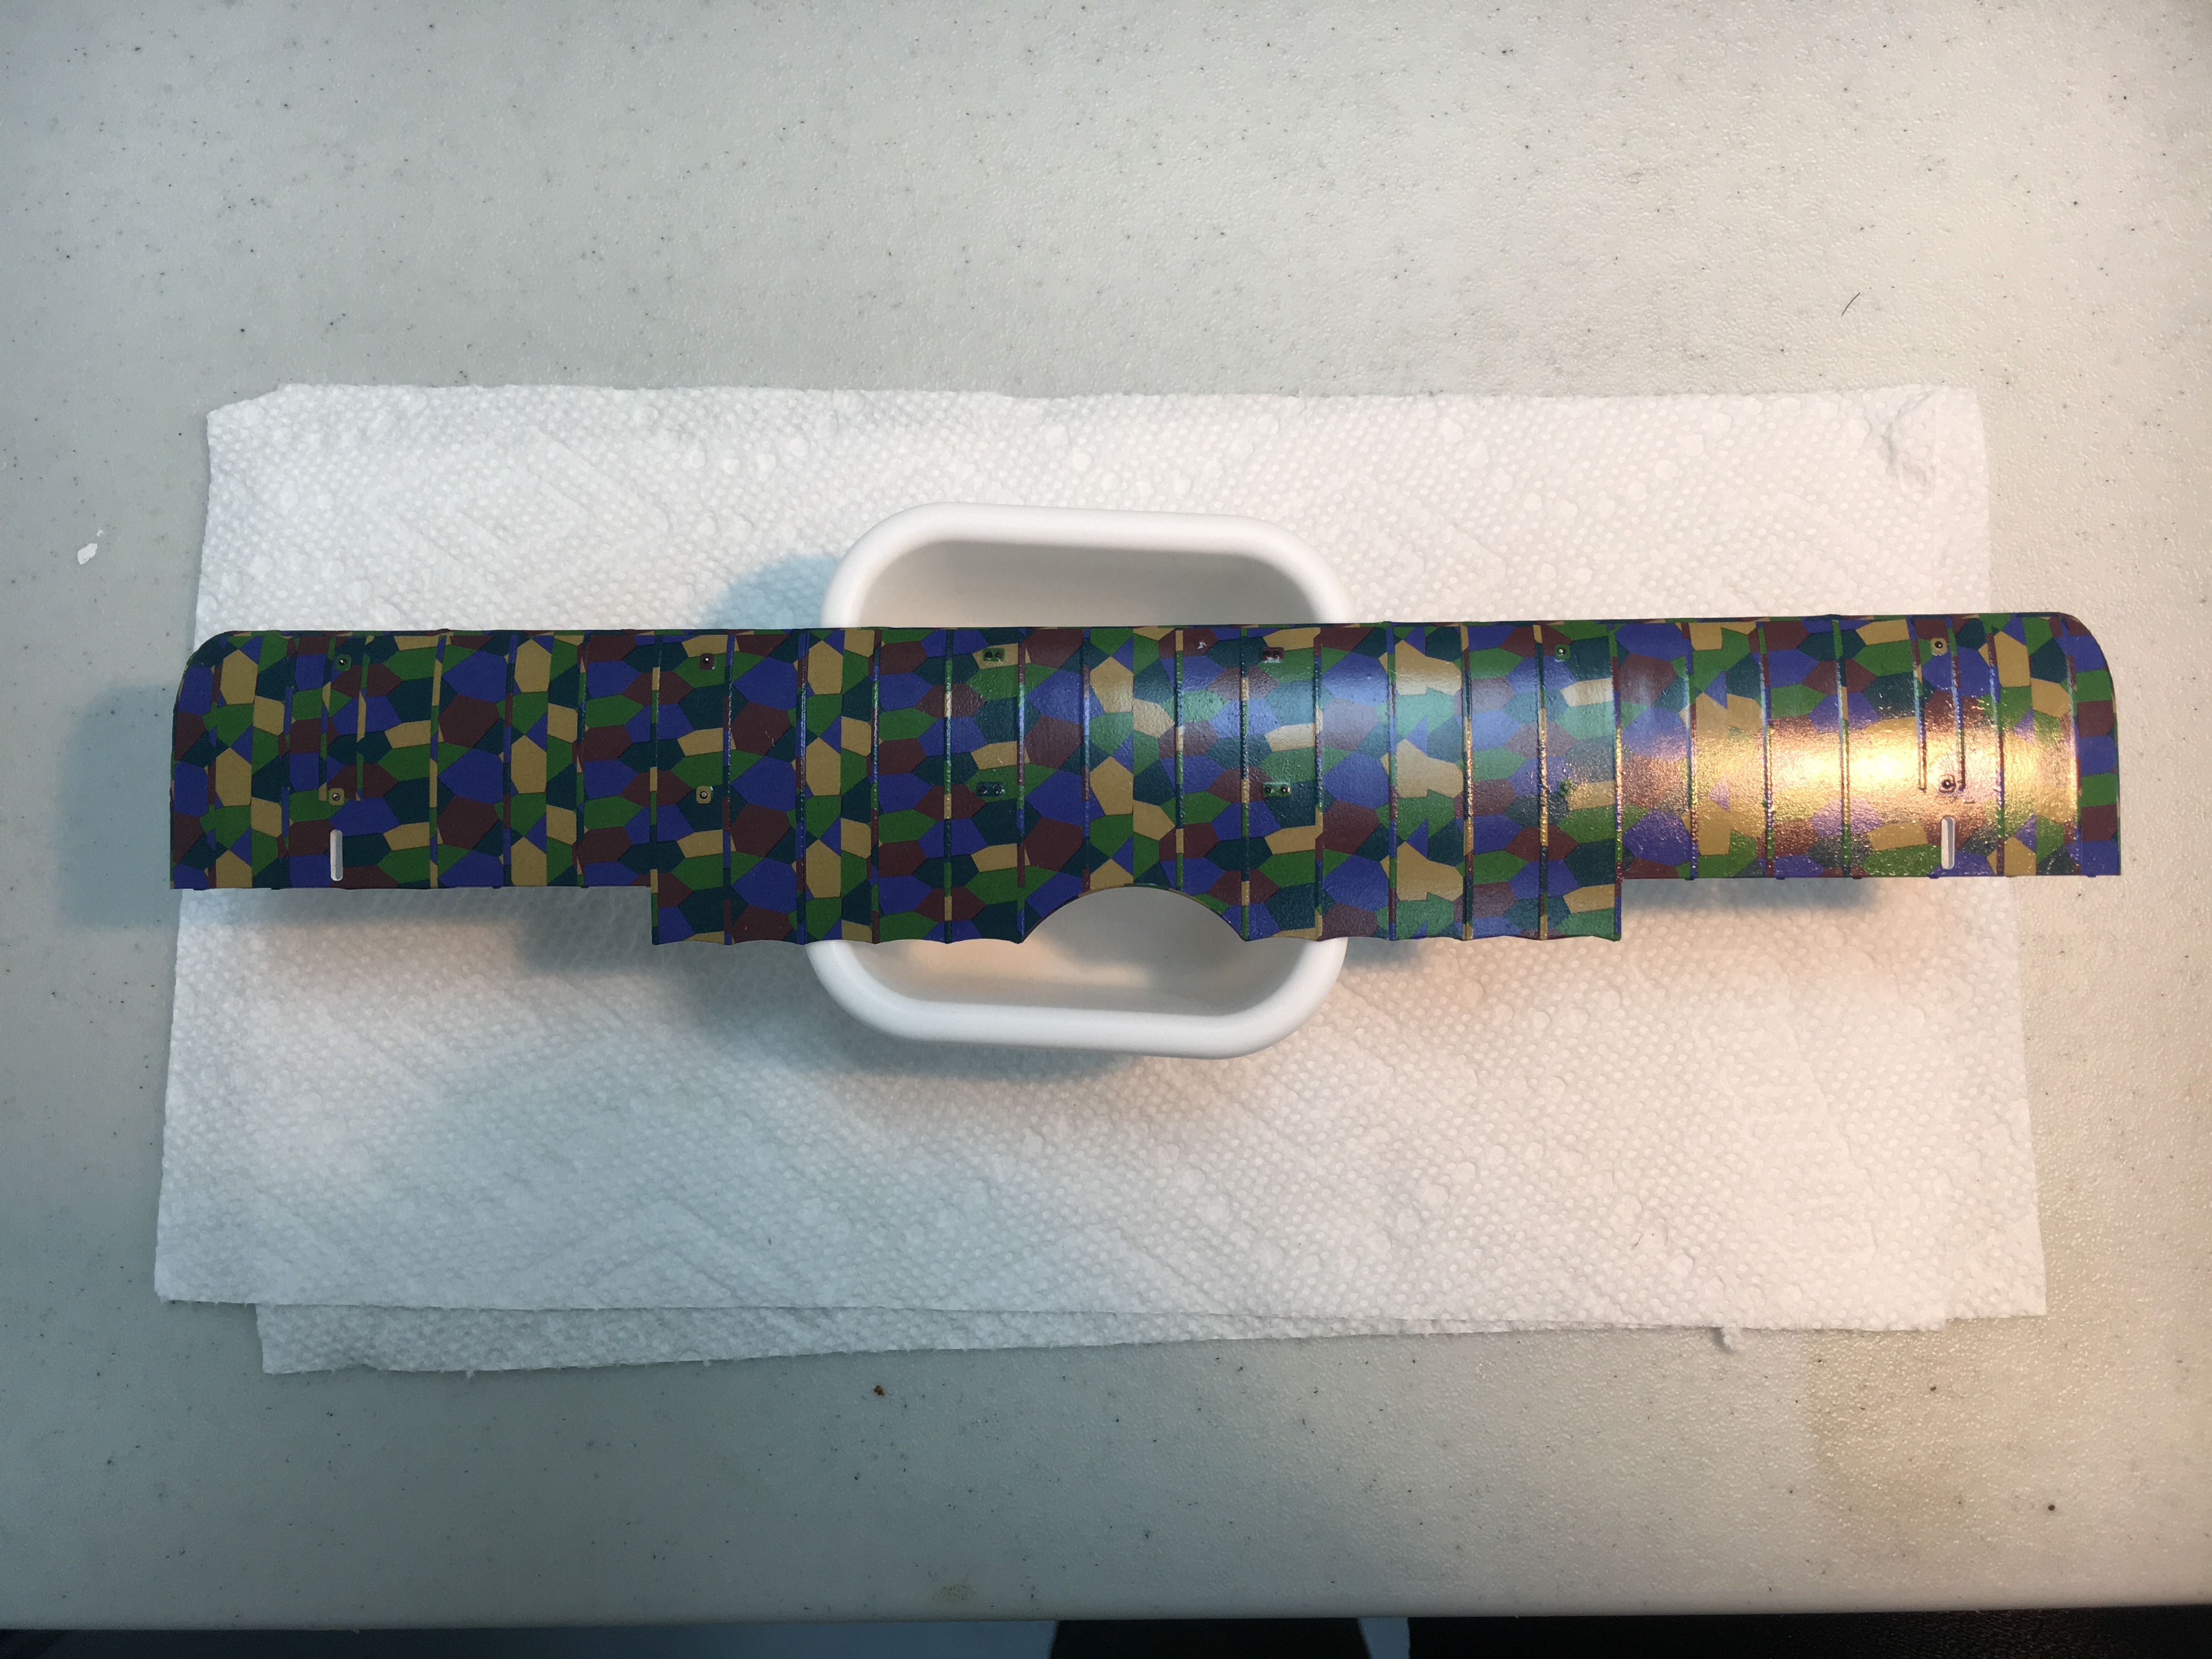
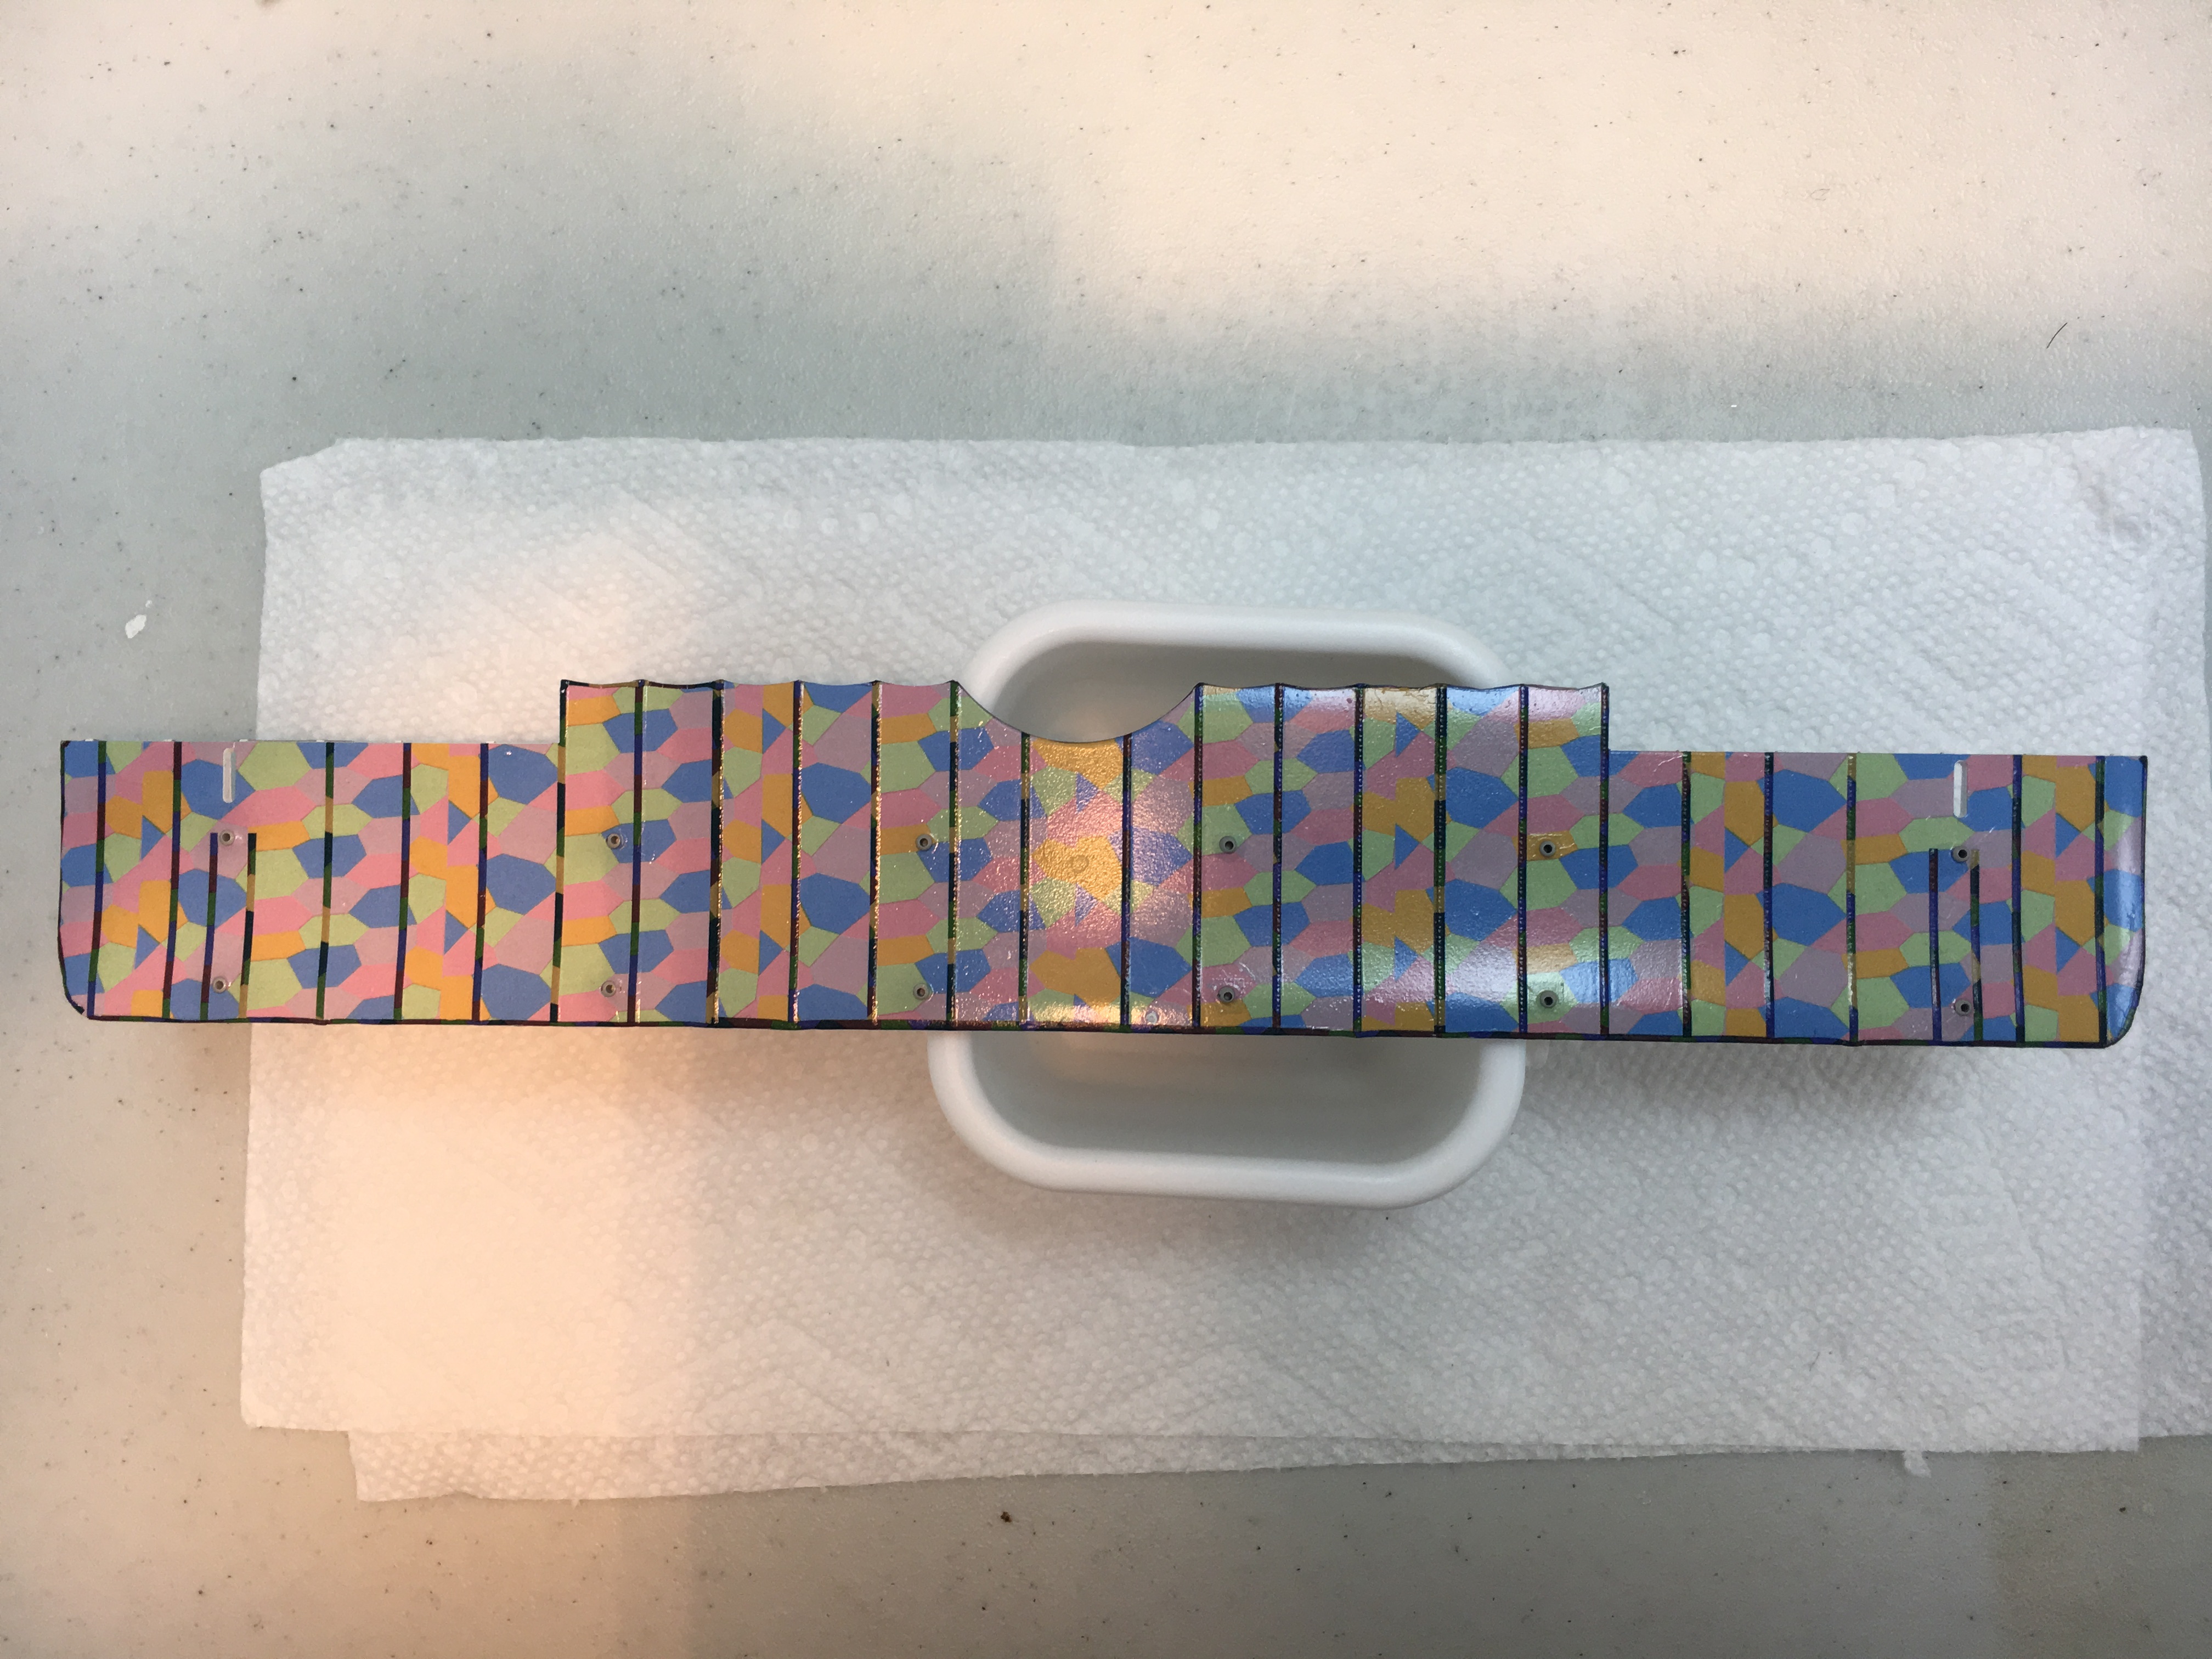
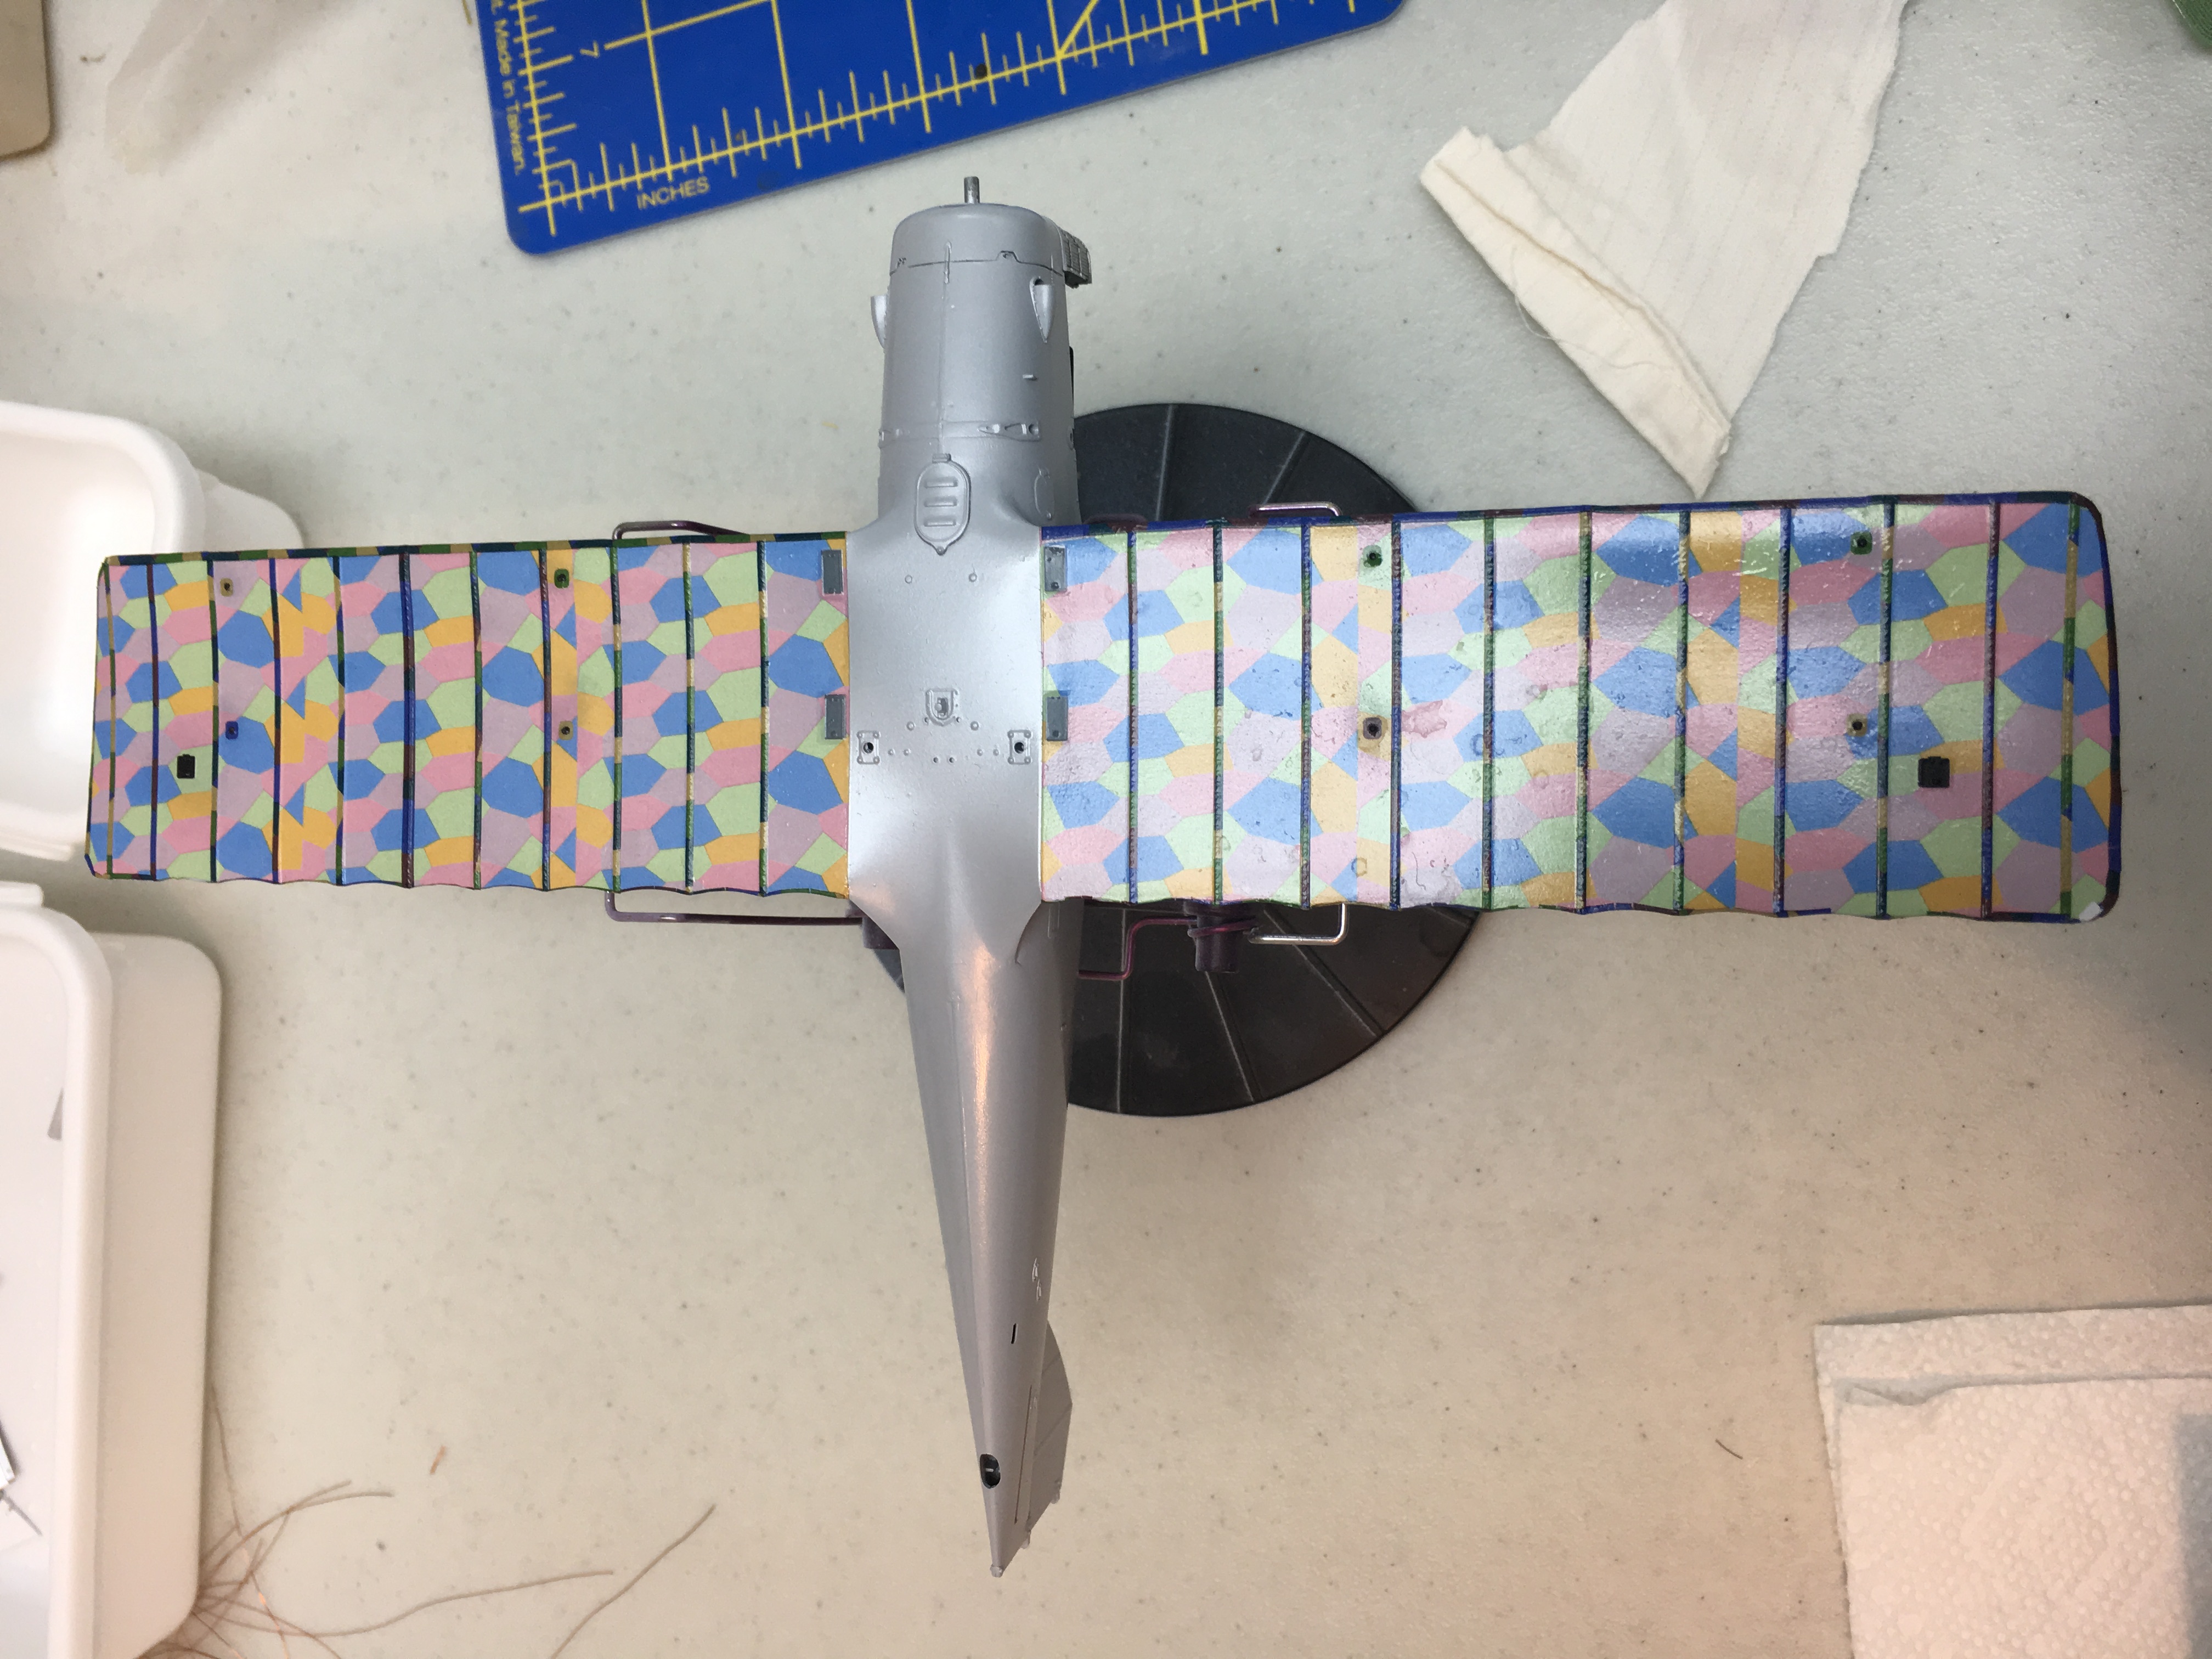
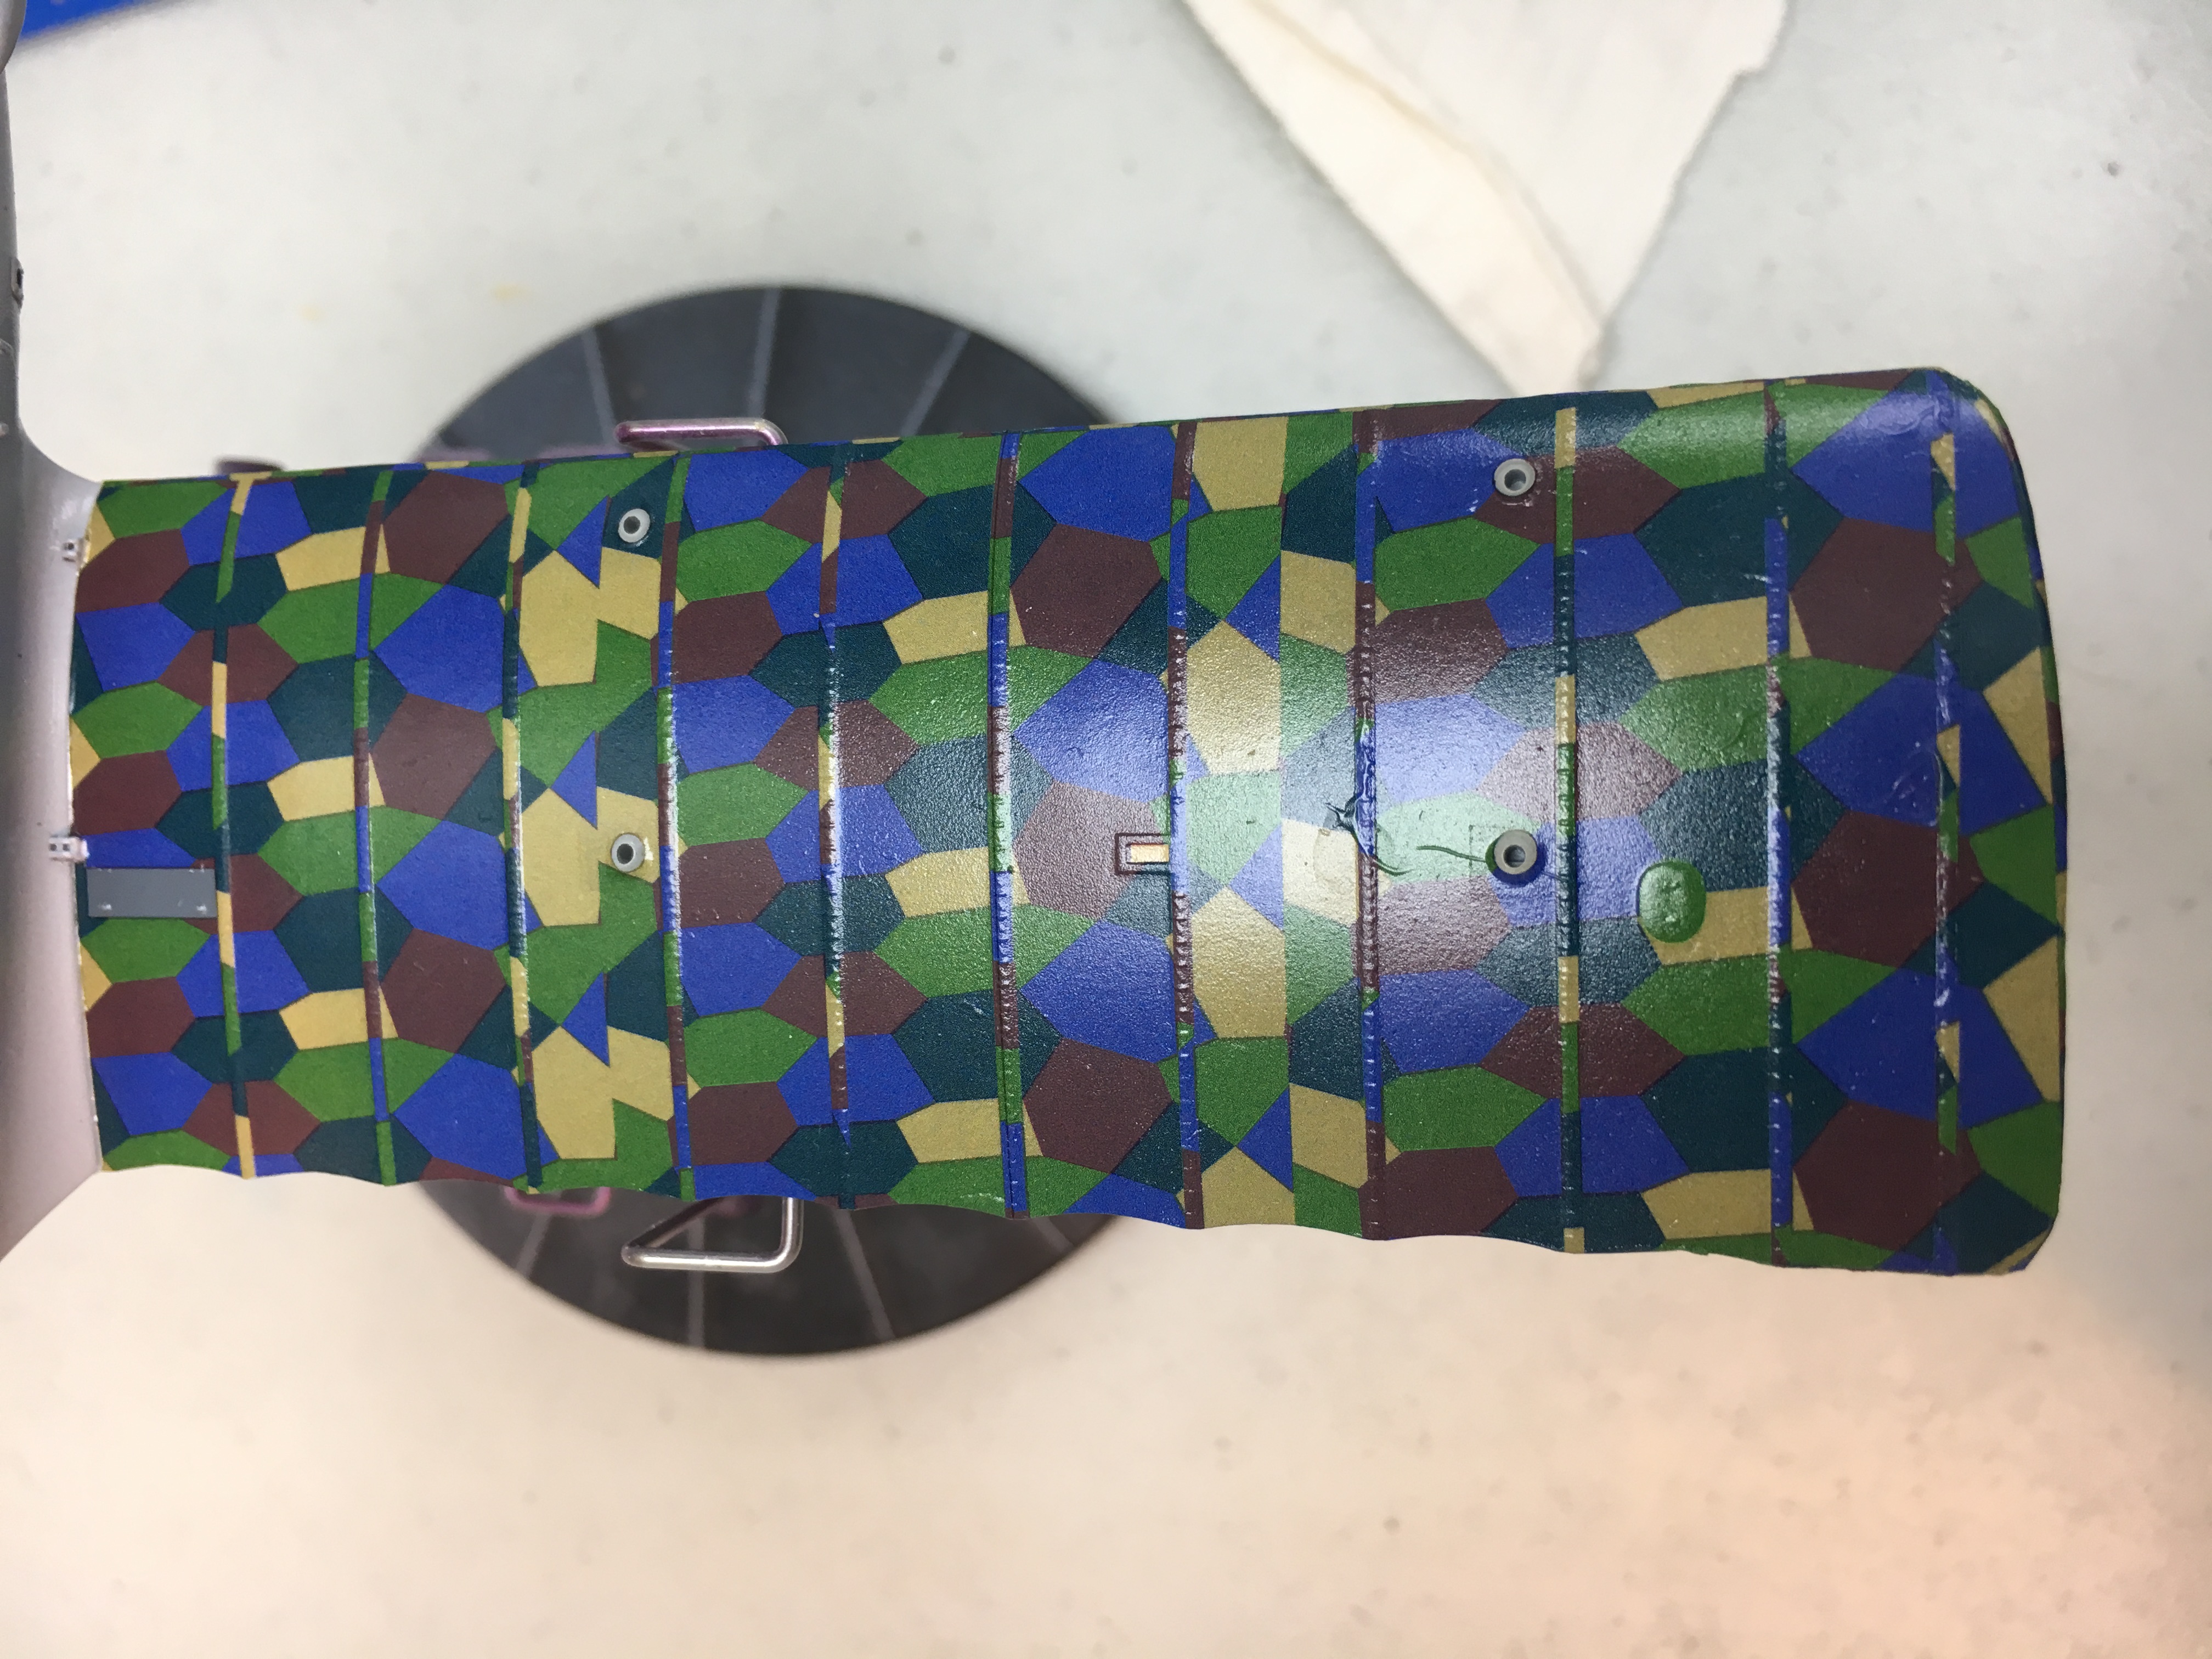
Made some progress and almost finished the lozenges.    I took the pictures before going to work this morning. I was in a little bit of a rush, so the lighting isn’t great.  I’m working overnight and wanted to have them in case I had some quiet time to post.  I haven’t done any clean up yet. The upper surfaces need some bubbles popped and microsol applied to get the decals to settle down.


I’m pleased because the before cleanup pictures of the upper wings look better than the lower surfaces after clean up.

I’m appreciative to the suggestions people made- they were really helpful.    RAGIII was correct that surface prep was a big problem.  When I sprayed the wings, there were two issues.  First, I had tried my new Iwata RG3 airbrush, which in youtube videos looks great at painting large surfaces like wings and ship hulls.  My transition from practicing on cardboard to spraying my model didn’t work so well.  Definitely need some more practice.  I finished with the eclipse I usually use, and got better results.  I also had issues with lint from some quilting that was going on in the workshop.  I thought I had rubbed it all out, but didn’t start with coarse enough sandpaper.  I started with 1000 or 1200, which smoothed it out but didn’t level it.  On the top surfaces, I started with 4-600.  I smoothed out mostly between the ribs, but didn’t want to take out the detail. I tried polishing and compressing the air and water from under the decal with a clean cloth, which also helped a lot.   Also learned some about aligning the decals.  I was using the strut holes, and should have focused more on the overlap on the leading and trailing edges.  Anyways, it has been a learning experience, and the last decal went on worlds better than the first.  Next model will be much better.

I’m getting ready to put on the crosses over the decals.  When you apply decal over decal, do you reapply gloss, or is the decal surface adequately glossy to prevent silvering?

Some more decals and rigging anchors next.  Also getting ready to put primer on the last 20 or so parts. 

Thanks!!

Dave


Offline davec

  • Full Member
  • ***
  • Posts: 179
Re: WNW Pfalz D.XII
« Reply #44 on: October 12, 2017, 08:24:54 PM »
I’ve done more decaling and assembled some more parts. It’s been slow with a few minutes at a time between work and travel.  I also needed start a project for a workshop I’ll be going to at the upcoming Nautical Research Guild meeting in a couple weeks.

The decals are going on better, particularly on the fuselage where the alclad primer and drooling bulldog paint airbrushed really well.  Not seen in the pictures are the rest of the parts, which are painted, and 60 wire loops for the rigging, which turn out to be a great thing to work on after working overnight.


I can’t help being amazed at the WNW kit engineering and how well everything goes together.  Despite things I’m wasn’t happy about (issues with decals above, and never got the red paint coating the way I wanted despite stripping and repainting the wheels twice), the overall effect looks OK.  I was sorry to put the cowl panels on- one of the things I was really happy with was the engine, which is now mostly covered. 


I’m also thinking about weathering. My preferences is light to no weathering.  I tried a little on the engine with a panel wash and some oil and grime.  Right now with all the gloss for decals it looks a little toy-like.  I’m hoping that a clear flat coat will make that go away.  I got some books on weathering, but they seem to be written by people who build armor and are into heavy weathering.  If I weather it, I would aim for what it looked after a couple flights, not months in the field and multiple repairs.  It’s a beautiful airplane with attractive colored paint, and I don’t want to lose that.