Author Topic: WNW SE.5a Phoenix Project  (Read 11380 times)

Offline GAJouette

  • Hero Member
  • *****
  • Posts: 3579
  • " Beware of the Spanish Inquisition"
Re: WNW SE.5a Phoenix Project
« Reply #15 on: November 02, 2012, 11:15:27 PM »
   Mark,
Great to see this project resurrected again my old friend. As always truly an outstanding and very informative thread. Keep up the excellent work.
Highest Regards,
Gregory Jouette
" What Me Worry"

Offline mgunns

  • Hero Member
  • *****
  • Posts: 2255
Re: WNW SE.5a Phoenix Project
« Reply #16 on: November 03, 2012, 12:42:13 AM »
It's coming along nicely Mark. One question though. Aren't you a little concerned about the strength of your control horns once you've cut and glued them back together again? They're delicate to start with and my concern would be in applying tension to the control lines for fear of snapping them. 

Hi Chris:

I won't be applying that much tension to these lines.  I am thinking of using EZ line on the elevator control horns just for that purpose.  I was going to use the Eduard PE ones, but as I was folding it, it launched not to be found.

Thanks for stopping by.

Best

Mark
Mark

We few, we happy few.....

Offline mgunns

  • Hero Member
  • *****
  • Posts: 2255
Re: WNW SE.5a Phoenix Project
« Reply #17 on: November 04, 2012, 11:45:11 AM »
Greetings folks:

Okay, here is the scheme I am going to do:

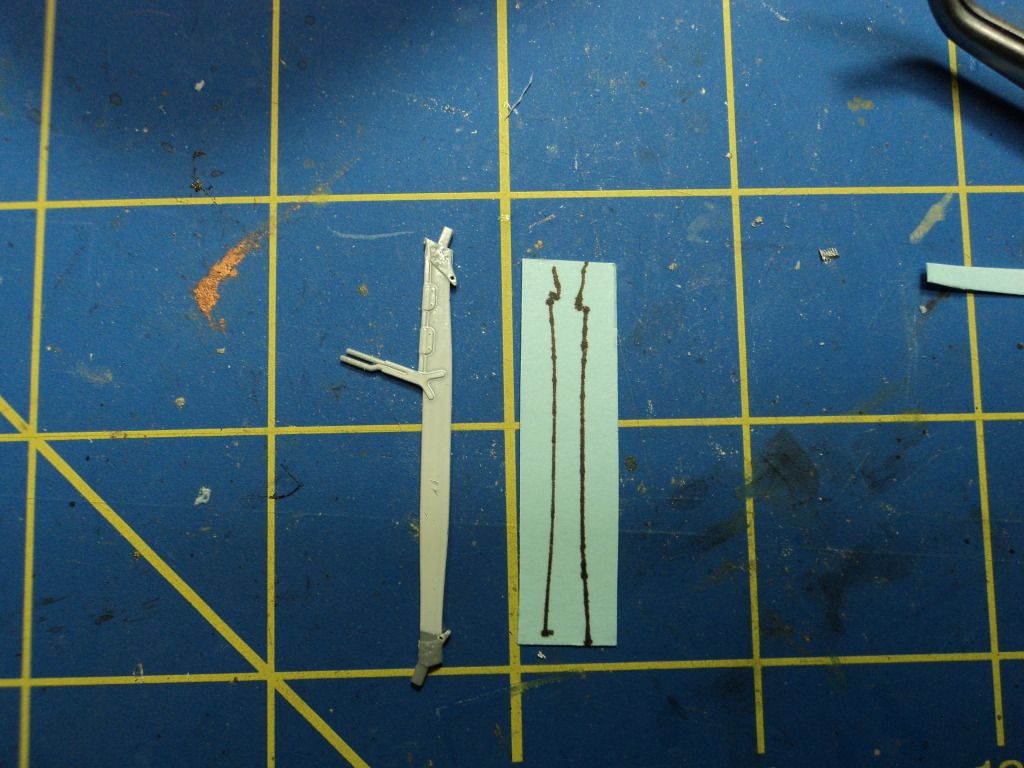
WNW provides the white and black marking for the struts as a decal but it isn't fitted for the strut, so I outlined both sides of the strut on the decal and cut out the two sides and applied the decals as two pieces one on each side.

and the finished product.
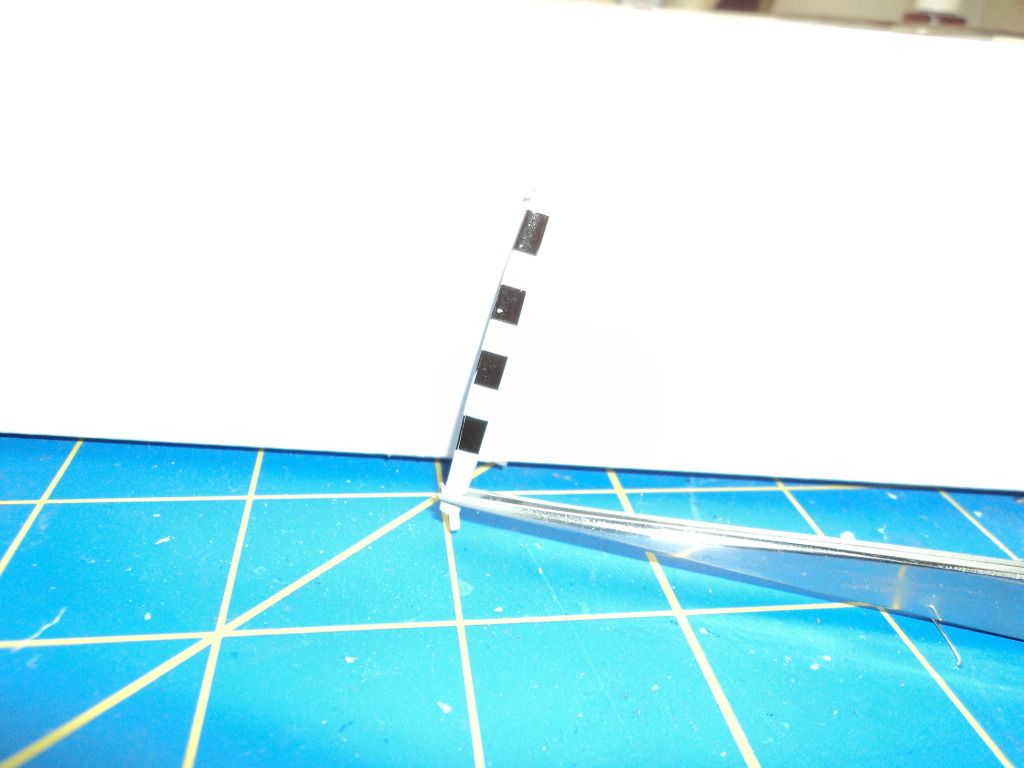
Pretty spiffy.

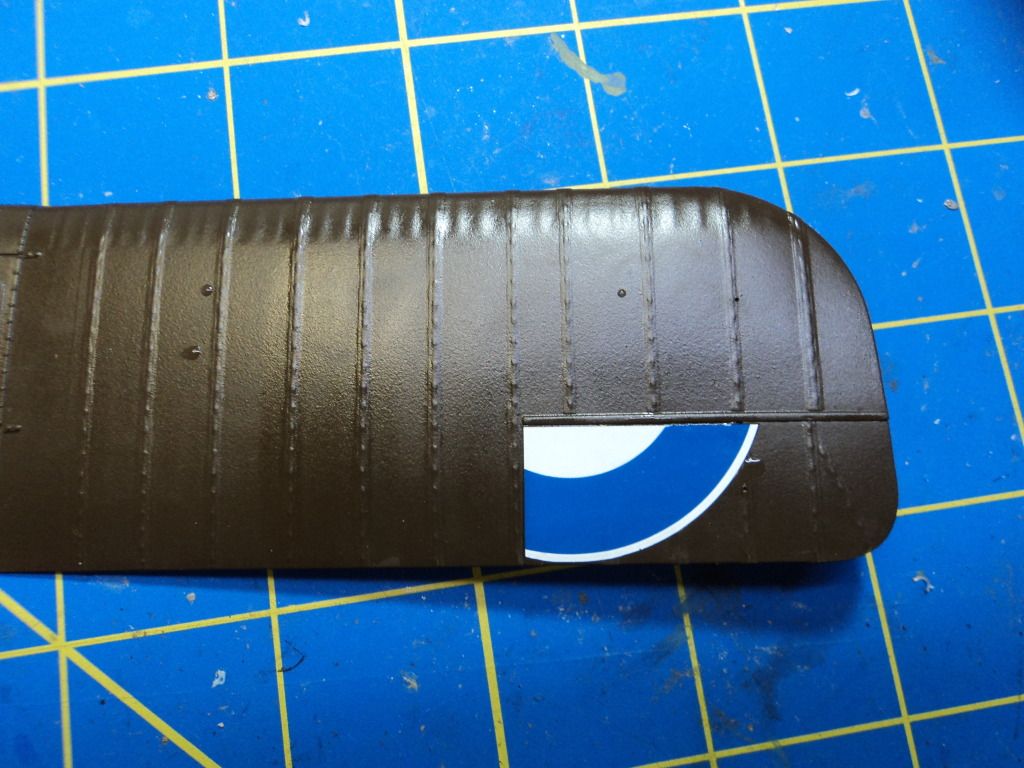
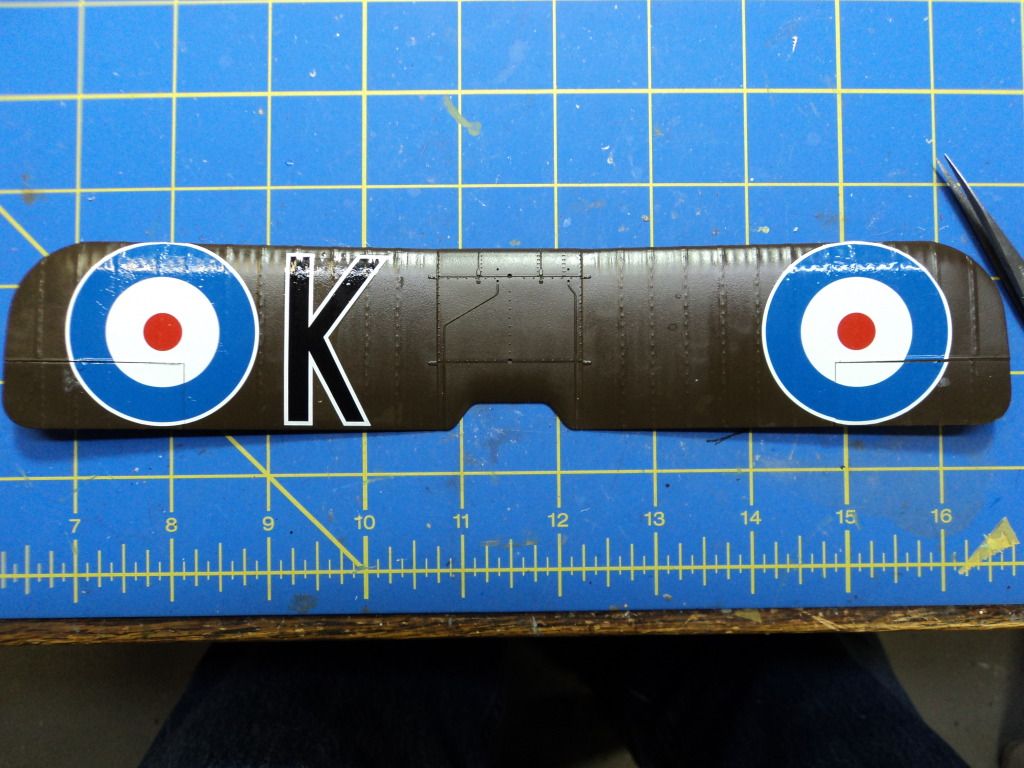
I then proceeded to decal the upper wing.  I had a problem with the Sopwith Pup as I used the main roundel first and then tried to line up the aeleron and had a bit of a problem with that, so this time, I started on the aeleron, figuring it would be easier to line up the cockade on the aeleron.

As an aside, the modeler should not fix any of the under upper wing sub assemblies until the wing is painted and decaled.  They could very easily be broken off.  The exception being the inspection port lenses for the pulleys.

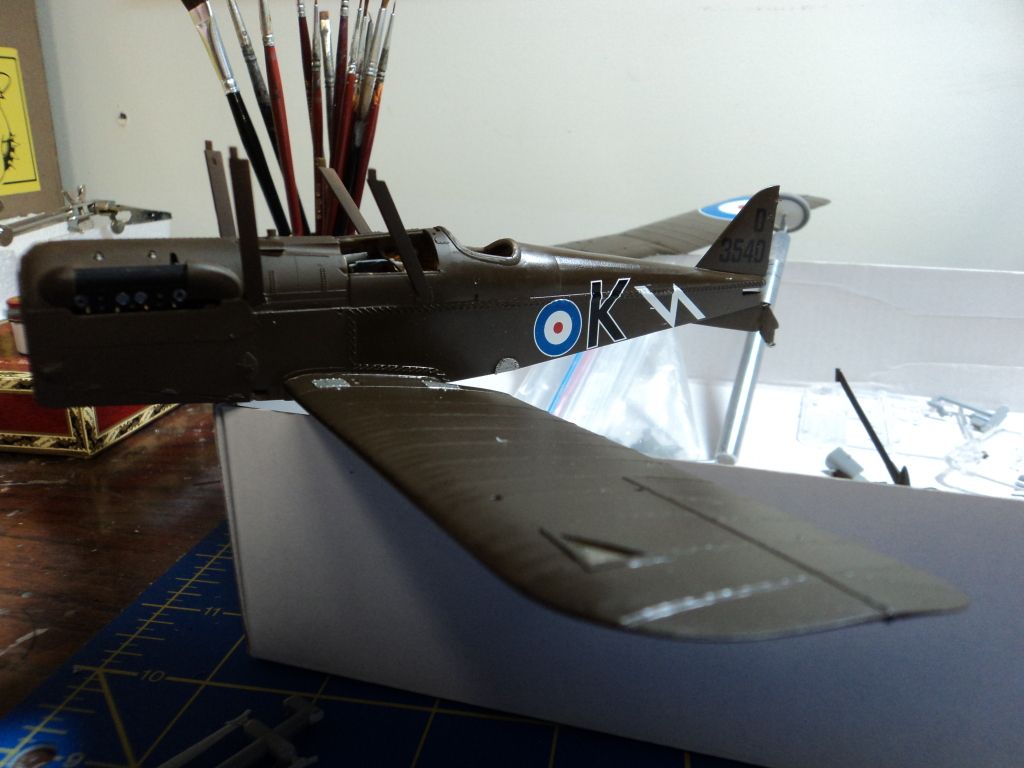
The port side of the fuselage.

From here it is finish up the decals, install the eyelets for rigging, finish the sub assemblies and rig and viola a finished model. 

Stay tuned for more exciting news as the Phoenix rises from the ashes.

Mark
Mark

We few, we happy few.....

Offline coyotemagic

  • Hero Member
  • *****
  • Posts: 7710
  • "Here's to not buggering it up." -Winston Chuchill
    • My Models
Re: WNW SE.5a Phoenix Project
« Reply #18 on: November 04, 2012, 02:04:23 PM »
Aren't you glad you decided to bring her back to life, Mark?  I can sense your excitement with this build and I can fully understand it.  She's well on her way to becoming a show stopper.  You can be really proud of this one, buddy.
Cheers,
Bud
"All men dream: but not equally. Those who dream in the dark recesses of the night awake in the day to find all was vanity. But the dreamers of day are dangerous men, for they may act their dreams with open eyes, and make it possible." -T. E. Lawrence

Offline mgunns

  • Hero Member
  • *****
  • Posts: 2255
Re: WNW SE.5a Phoenix Project
« Reply #19 on: November 05, 2012, 12:19:56 AM »
Aren't you glad you decided to bring her back to life, Mark?  I can sense your excitement with this build and I can fully understand it.  She's well on her way to becoming a show stopper.  You can be really proud of this one, buddy.
Cheers,
Bud
Hello Bud:

I am indeed!  I was really frustrated with this kit when I was building it 4 years ago, but now it is moving right along.  I almost tossed it, well I did, I had to pull it out of the trash after I had gotten hold of my senses.  With WNW now selling parts trees, I had to do it.  I did do another one right after I melted this one, sort of get back on the horse and almost gave up on it, but; I persevered.  I would not recommend this kit for a first time venture into the 1/32nd scale side of WWI modeling.  The PUP would be my recommendation.  This is a complex kit that requires a lot of patience and pre-assembly planning.
Thanks for checking it out and your encouragement.

Best

Mark
Mark

We few, we happy few.....

Offline Des

  • Administrator
  • Hero Member
  • ******
  • Posts: 9325
    • ww1aircraftmodels.com
Re: WNW SE.5a Phoenix Project
« Reply #20 on: November 05, 2012, 07:29:48 PM »
Excellent progress indeed Mark, she is really starting to look the part now, your decal application is perfect, I'm looking forward to seeing the top wing fitted.

Des.
Late Founder of ww1aircraftmodels.com and forum.ww1aircraftmodels.com

Offline mgunns

  • Hero Member
  • *****
  • Posts: 2255
Re: WNW SE.5a Phoenix Project
« Reply #21 on: November 05, 2012, 09:36:46 PM »
Greetings all:

Thanks Des, I had to put the top wing on for dry fit purposes and took some photos.  I like the striped struts and the markings of this version.

I also painted the prop wrapping Tamiya Dark Sea Grey

And lastly in this update,  due to rushing a bit and ease of painting purposes I fixed the elevators to the tail surfaces before fixing the control horns, so I split them and cemented them in place.  I used MEK and they are in firmly.

I am home from work today due to a septic back up; >:( (fun) so I should make some good progress whilst I await the pumper and enjoy a day off.
Thanks for stopping by

Best

Mark
Mark

We few, we happy few.....

Offline Adam

  • Hero Member
  • *****
  • Posts: 647
Re: WNW SE.5a Phoenix Project
« Reply #22 on: November 05, 2012, 11:48:35 PM »
I think, that the worst job is behind you if struts fits to the upper wing  ;D

looking forward to see rigging  ;D

Adam.

Offline mgunns

  • Hero Member
  • *****
  • Posts: 2255
Re: WNW SE.5a Phoenix Project
« Reply #23 on: November 09, 2012, 09:50:49 AM »
Okay folks:  Here is another installment of my Phoenix project.

I have the wings almost totally rigged.  I left the landing gear, the tail, rudder, exhausts, aileron control horns, and the two little "things" that go on the upper wing off for ease of rigging.  I prerigged the upper wing and taped all the loose threads until needed.  I started on the cabane struts.  Then the front cross bracing working my way into the wing bays. 

Leaving the items mentioned made it so much easier.
I then rigged the struts having pre rigged them on upper portions

and the landing gear

Now on to the forward flying wires.
Stay tuned.
Mark

We few, we happy few.....

Offline pepperman42

  • Hero Member
  • *****
  • Posts: 4507
  • Sergeant, my brown pants.......
Re: WNW SE.5a Phoenix Project
« Reply #24 on: November 09, 2012, 11:17:41 AM »
This has really come together nicely. What a great save and the stripes really sharpen up the paint scheme.

Steve

Offline Whiteknuckles

  • Hero Member
  • *****
  • Posts: 1335
Re: WNW SE.5a Phoenix Project
« Reply #25 on: November 09, 2012, 07:57:21 PM »
She's looking good Mark.

Andrew
Eternal Apprentice

Offline Adam

  • Hero Member
  • *****
  • Posts: 647
Re: WNW SE.5a Phoenix Project
« Reply #26 on: November 09, 2012, 09:30:32 PM »
Mark yours method seems easy and good. I newer made rigging in 32 scale. My next project in this scale is Nieuport 24 Bis and there I try yours method.
Adam.

Offline Des

  • Administrator
  • Hero Member
  • ******
  • Posts: 9325
    • ww1aircraftmodels.com
Re: WNW SE.5a Phoenix Project
« Reply #27 on: November 09, 2012, 09:46:09 PM »
Excellent progress Mark, she is really starting to look the part now, your rigging so far is very nicely done, I like the black and white stripes on the struts.

Des.
Late Founder of ww1aircraftmodels.com and forum.ww1aircraftmodels.com

Offline mgunns

  • Hero Member
  • *****
  • Posts: 2255
Re: WNW SE.5a Phoenix Project
« Reply #28 on: November 10, 2012, 03:30:53 AM »
Mark yours method seems easy and good. I newer made rigging in 32 scale. My next project in this scale is Nieuport 24 Bis and there I try yours method.
Adam.

Thanks Adam.  The Niepourt 24 Bis will be an easy model to rig.  I would highly recommend getting the eyelets and tubes from Bob Booth of "Bob's Buckles".  It saves a lot of time and work, also I used what's called "Invisible thread" I don't know what the size is, but it works nicely.  If you pre rig the top wing and then tape the loose ends so they aren't in the way, and use one string at a time, it avoids a lot of confusion.
Good luck Adam

Best

Mark
Mark

We few, we happy few.....

Offline mgunns

  • Hero Member
  • *****
  • Posts: 2255
Re: WNW SE.5a Phoenix Project
« Reply #29 on: November 10, 2012, 04:30:08 AM »
Excellent progress Mark, she is really starting to look the part now, your rigging so far is very nicely done, I like the black and white stripes on the struts.

Des.
Thanks Des:

This is a tough bird to rig but I am managing.  I like the striped struts as well.  It really sets it off.  I should have it finished this evening, I was able to work on it this morning as my insomnia has kicked in again.

Best

Mark
Mark

We few, we happy few.....