Evening All,
First my apologies to those of you who left such positive comments for not answering earlier, life has not been quiet recently and I have also been trying to get somewhere with this project!
Thanks to Ryan, Andreas, Jeroen, Manni and Rick: I really appreciate your positive remarks, especially when things do not always go according to plan!
Ryan: do give scratch building a try - it really is not as difficult as it looks - it just takes longer than a conventional kit and you certainly have the necessary skills.
Manni: yes my aim is to show the viewer what how these aircraft were constructed as many people are only aware of the external shapes and may not appreciate the complex structures that they really were.
First, as noted in the previous post, this is a model with a steep learning curve, so I will get the mistakes out of the way. I had been a bit concerned about the wing which I reported on in the last post, and decided that I would reject it after all as the curvature on the underside was not sufficient, and the tip was flat rather than curved. I had still to mould the lower wing so I decided to have another go at moulding a new set of wing sections for both the upper and lower wings. When I tried to do this before I found that I could not get a clean pair of mouldings, and I was going to try to use a vacform machine to make some new ones. However after giving the problem some thought, (my brain can accomplish such feats when I am not being distracted by other things....), I decided that I would have another try using my Kitchen Method (ie my gas-grill), on the grounds that a vacform machine is too sophisticated for the average modeller, i.e. me. I considered that the cause of the problem was that as these are relatively large mouldings, (they are the largest that I have attempted to date), I was not heating the plastic sheet and former enough, and the male mould was also not hot enough. In particular the male mould was probably cooling the plastic sheet sufficiently to prevent it from bending easily. Consequently I placed the male mould face up on the floor of the grill so that it was warming while I heated the plastic sheet. This I heated by holding the former at twice the normal distance from the gas flame i.e. approx 4inches (10cm) with the plastic facing away from the flame. This meant that the plastic did not curl and bubble while the wood former absorbed much more heat. Heating took two minutes and when I withdrew the former and mould to make the pressing I managed to get a good set of mouldings almost first time every time: actually I had to make 6 attempts to get 4 usable parts. Before I had made 10 attempts to get only 4 usable parts. I will describe in the next post the manufacture of the new wing halves as I am currently in the process of making them.
I also needed a new nacelle half as also explained in the last post, so I modified the existing male mould and made a new nacelle half at the same time as the wing sections. The cockpit openings and various holes for spars, struts, oil tank, rudder bar, etc were drilled or cut out and the new part painted. Before this I had been experimenting with the idea of using real metal for the upper decking and underside of the nacelle. Vickers Gunbus nacelles consisted of a steel tube frame covered with aluminium on the top, bottom and nose, and fabric sides, so I cut the ends off an old beer can and the split it down the middle:
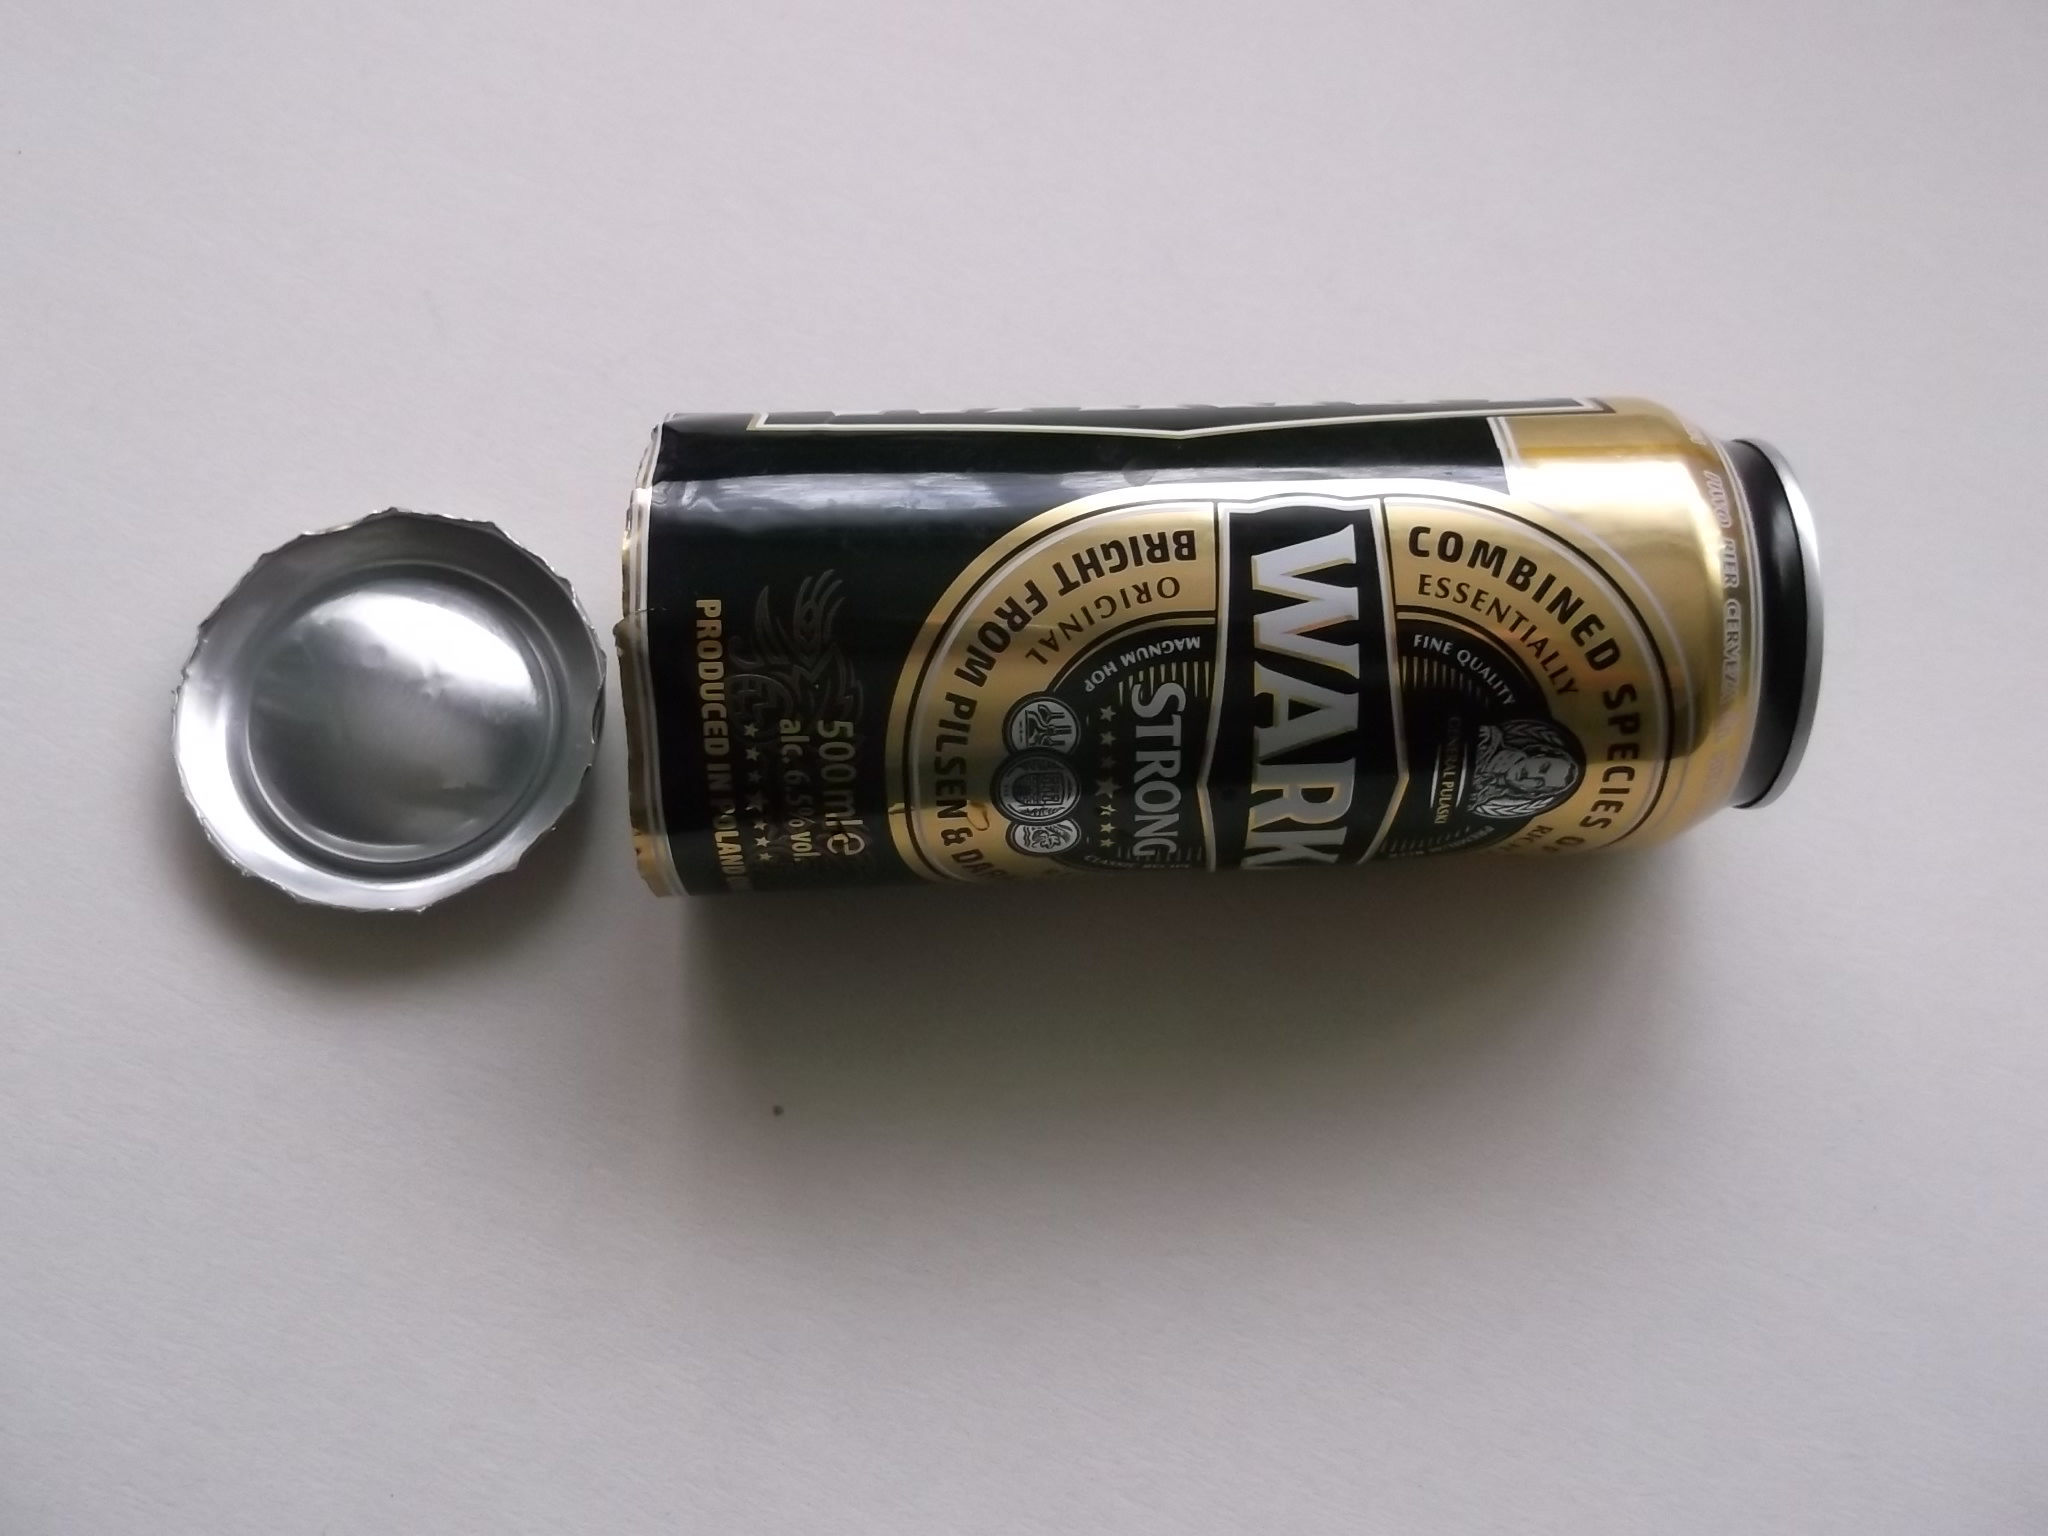

Suitably sized and shaped pieces were cut from the can after the printed logos had been removed,
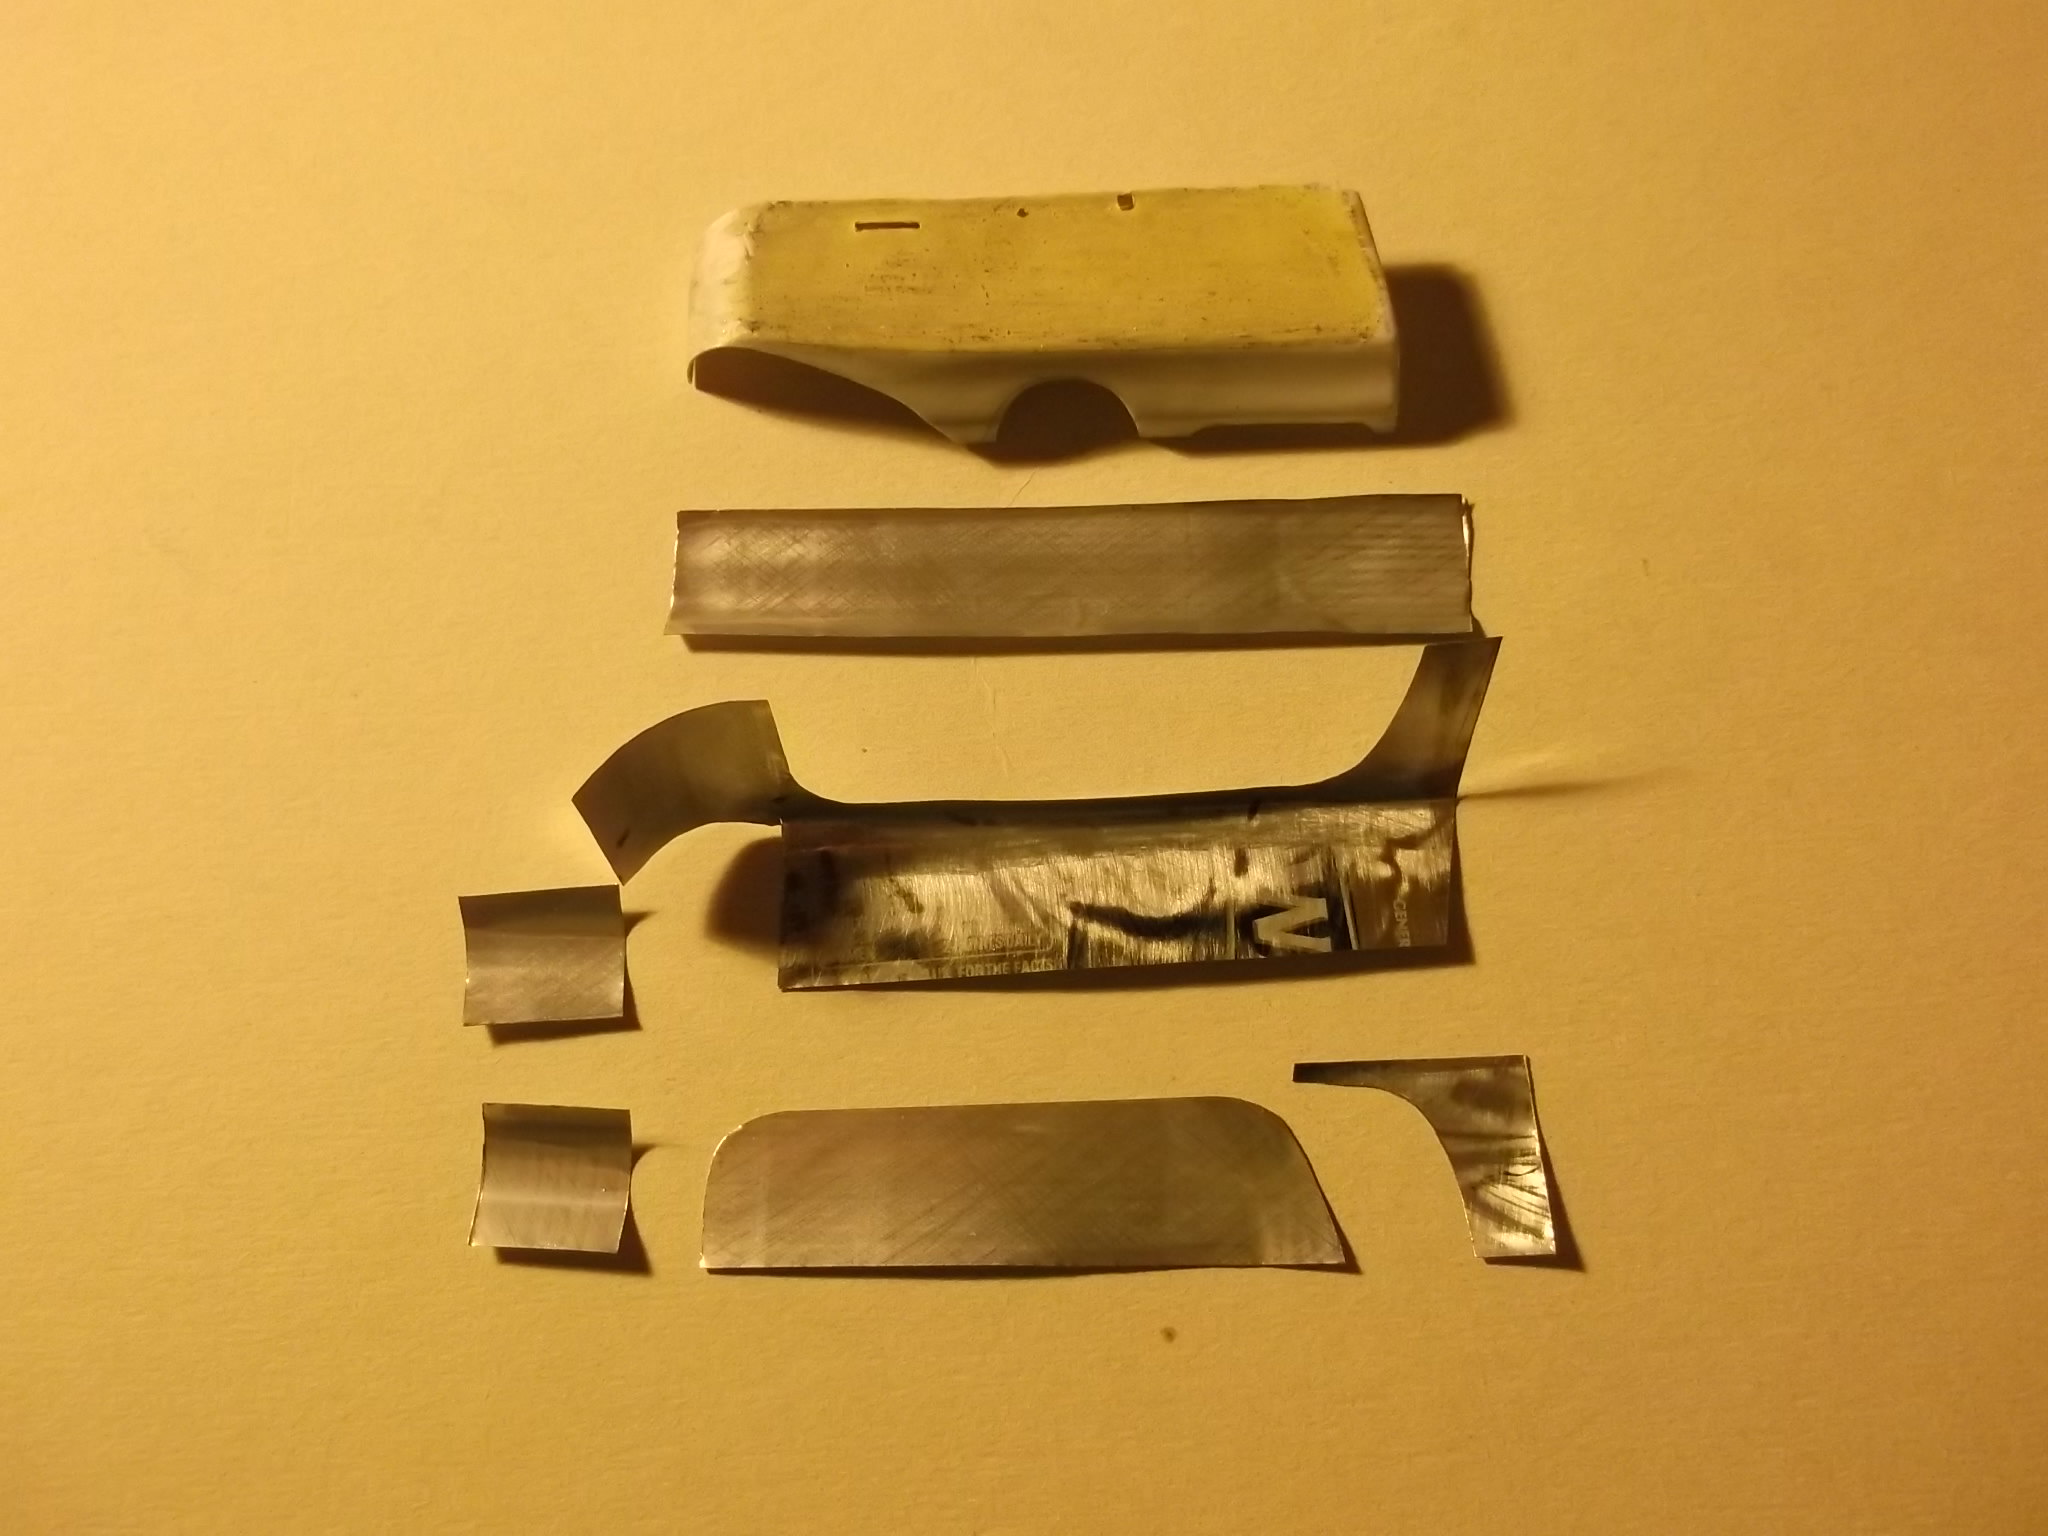
and I then tried to attach these to the old nacelle half which I was discarding because it was the wrong size and shape. It was at this point that I found that my good idea was not so good after all. I could not shape the pieces around the nose without causing creases in the metal. In addition the junction between the edges of the metal and the plastic which represents the fabric sides was much too proud. Finally the pieces around the nose also had horribly large and out-of-scale joints and I could not think of a way of making these less prominent. End of another good idea!
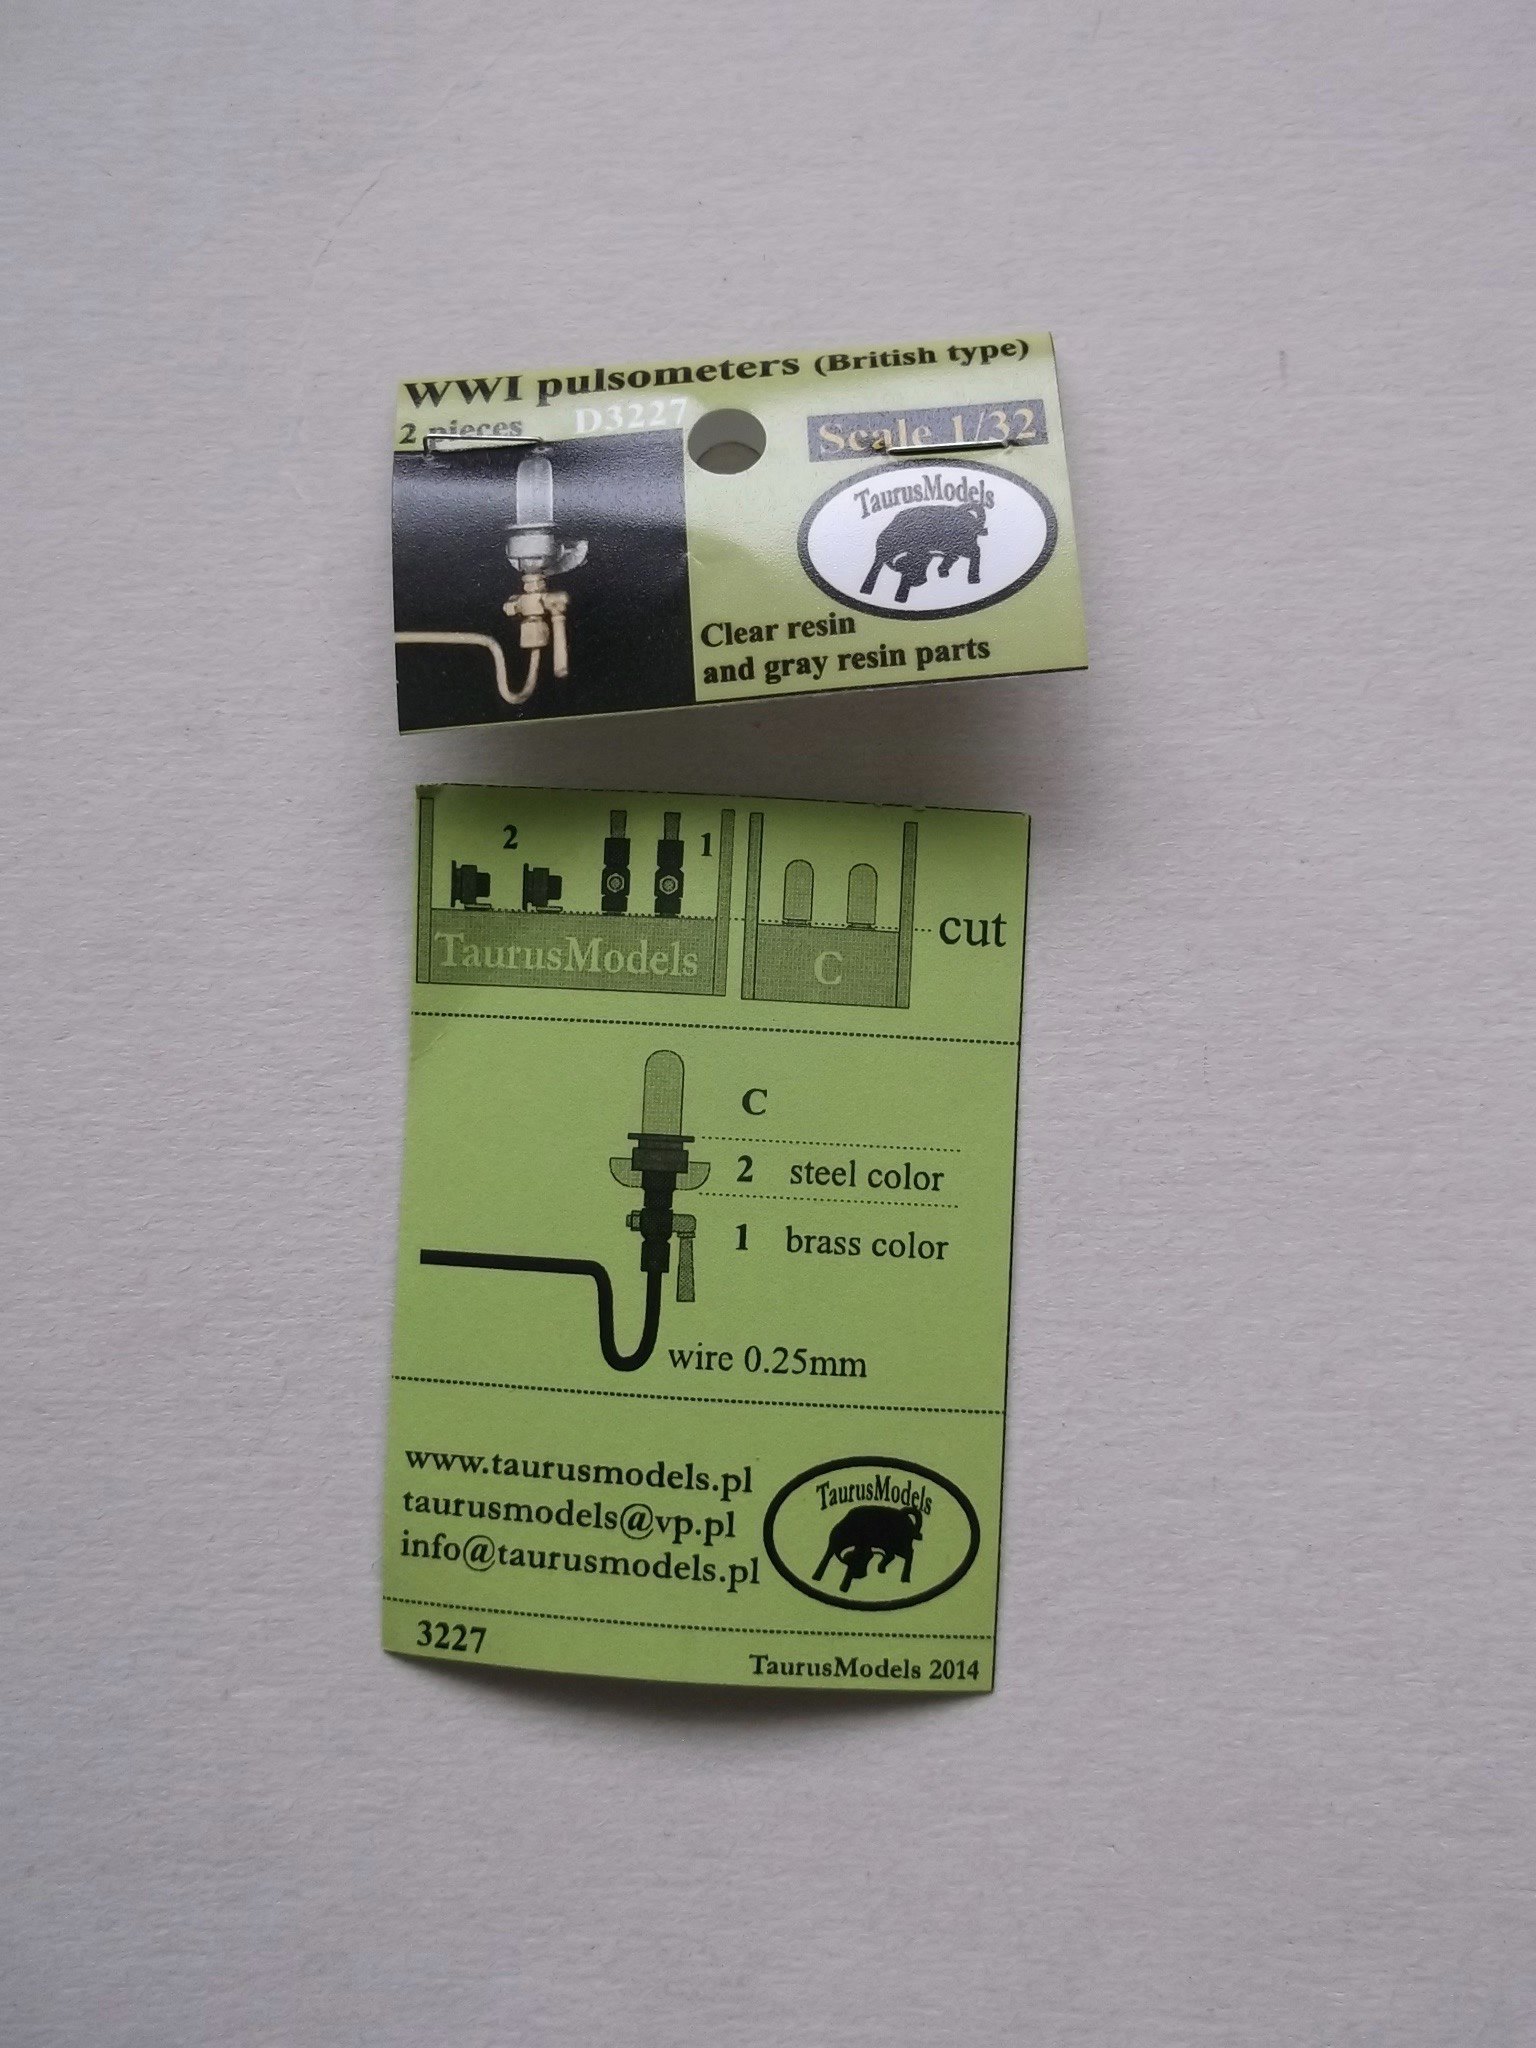
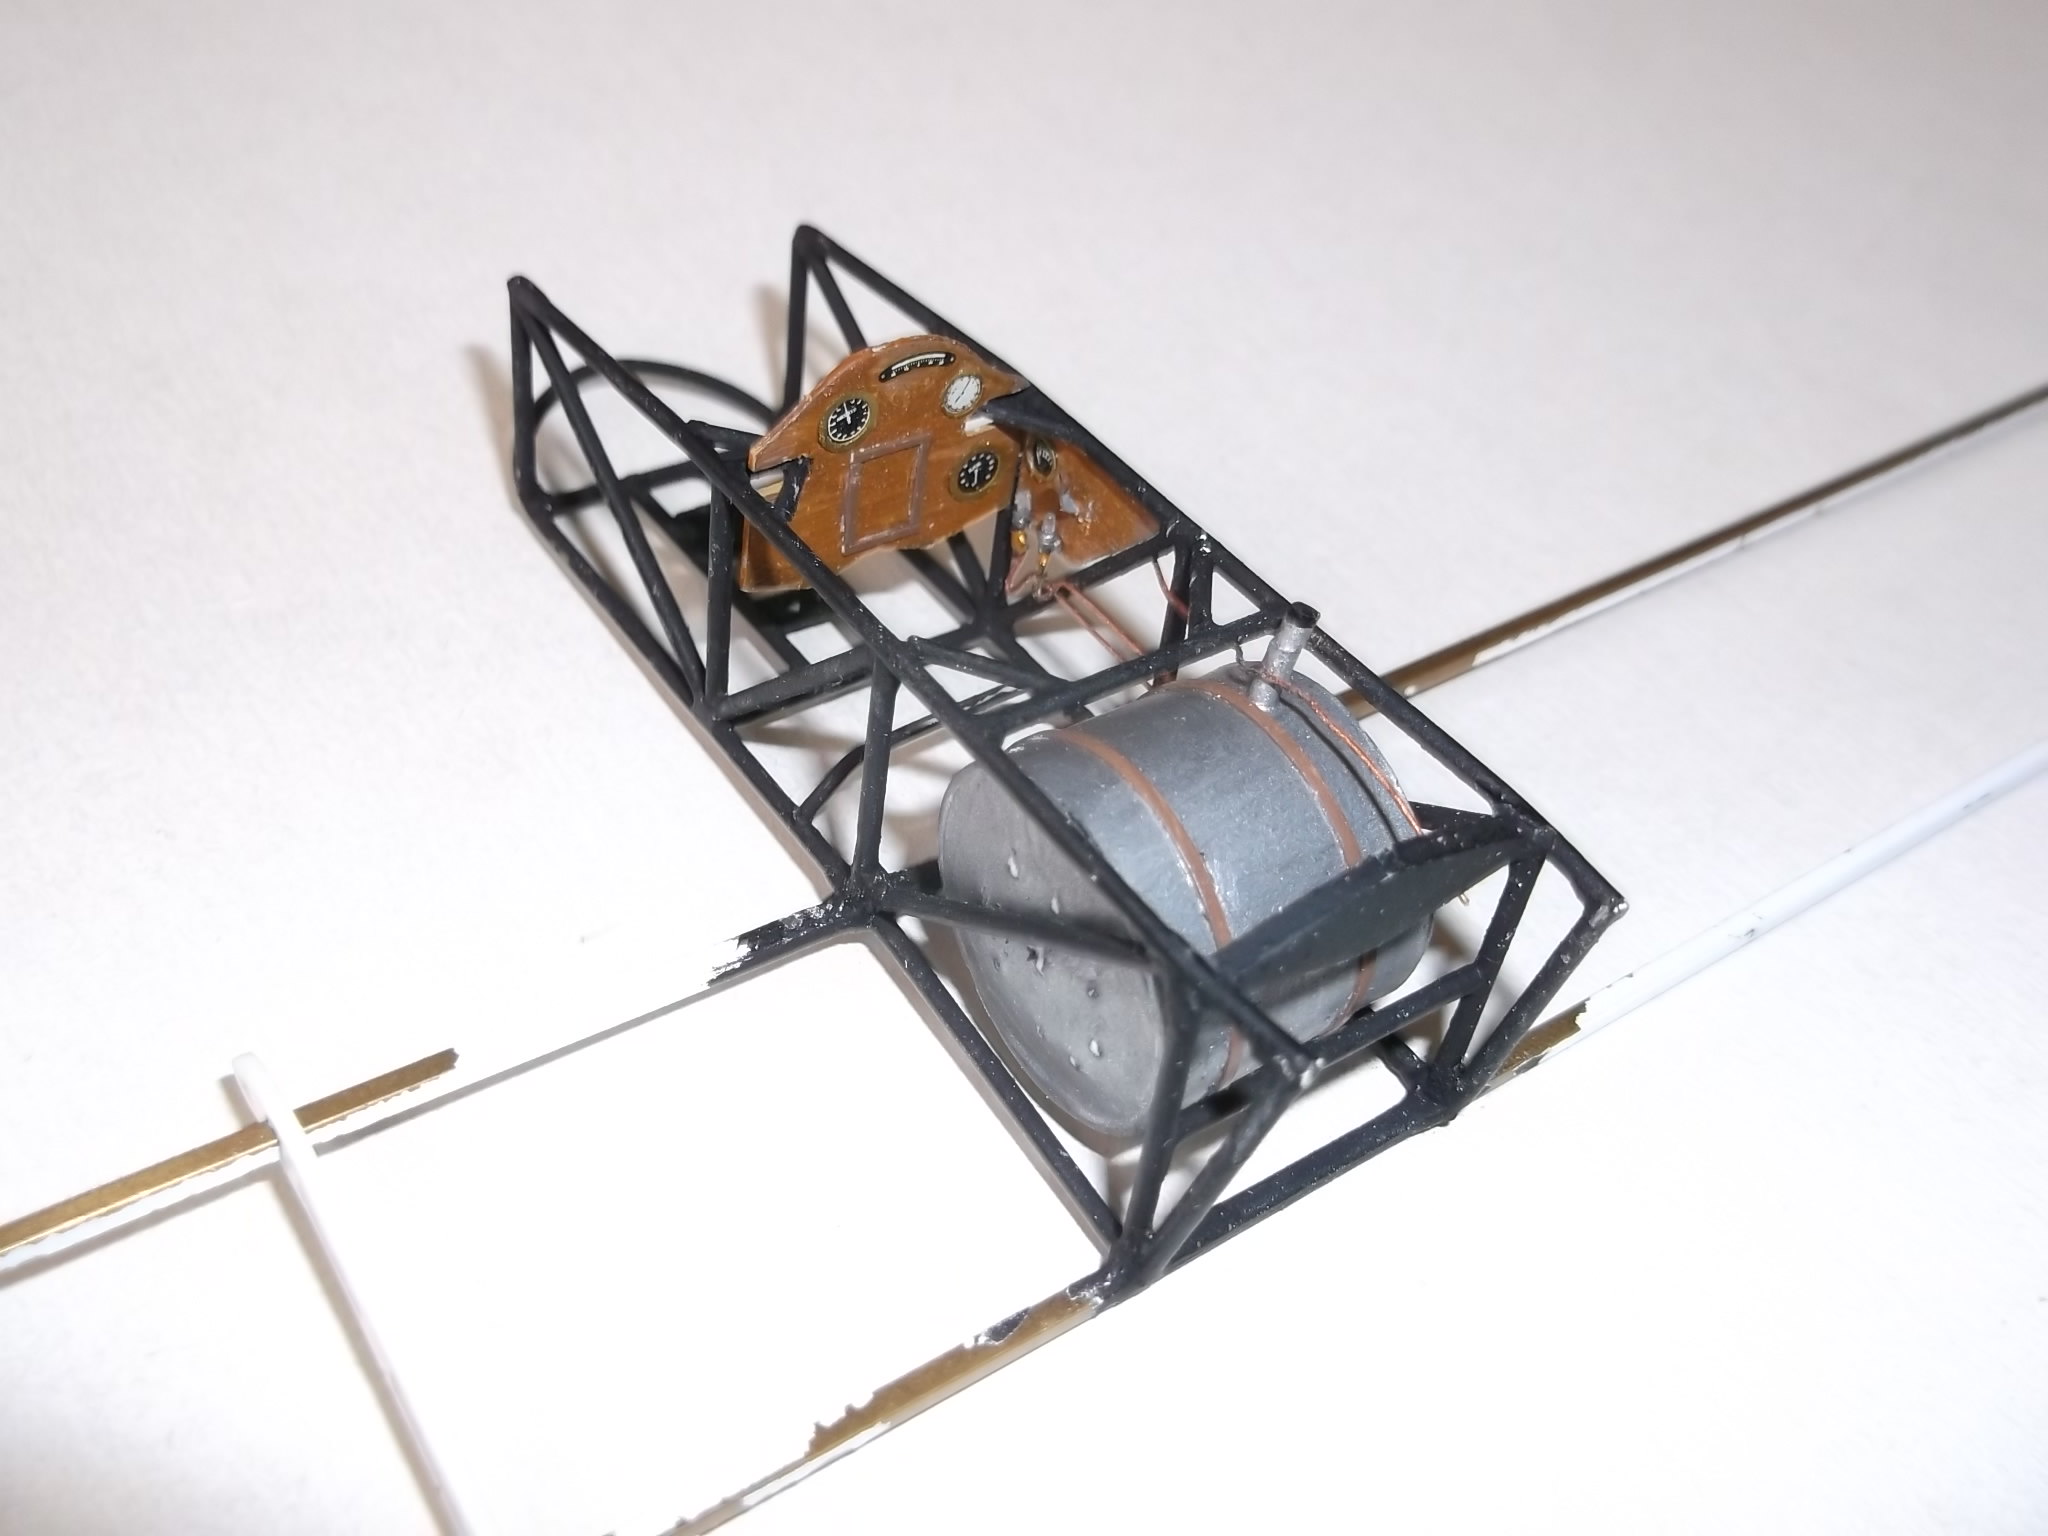
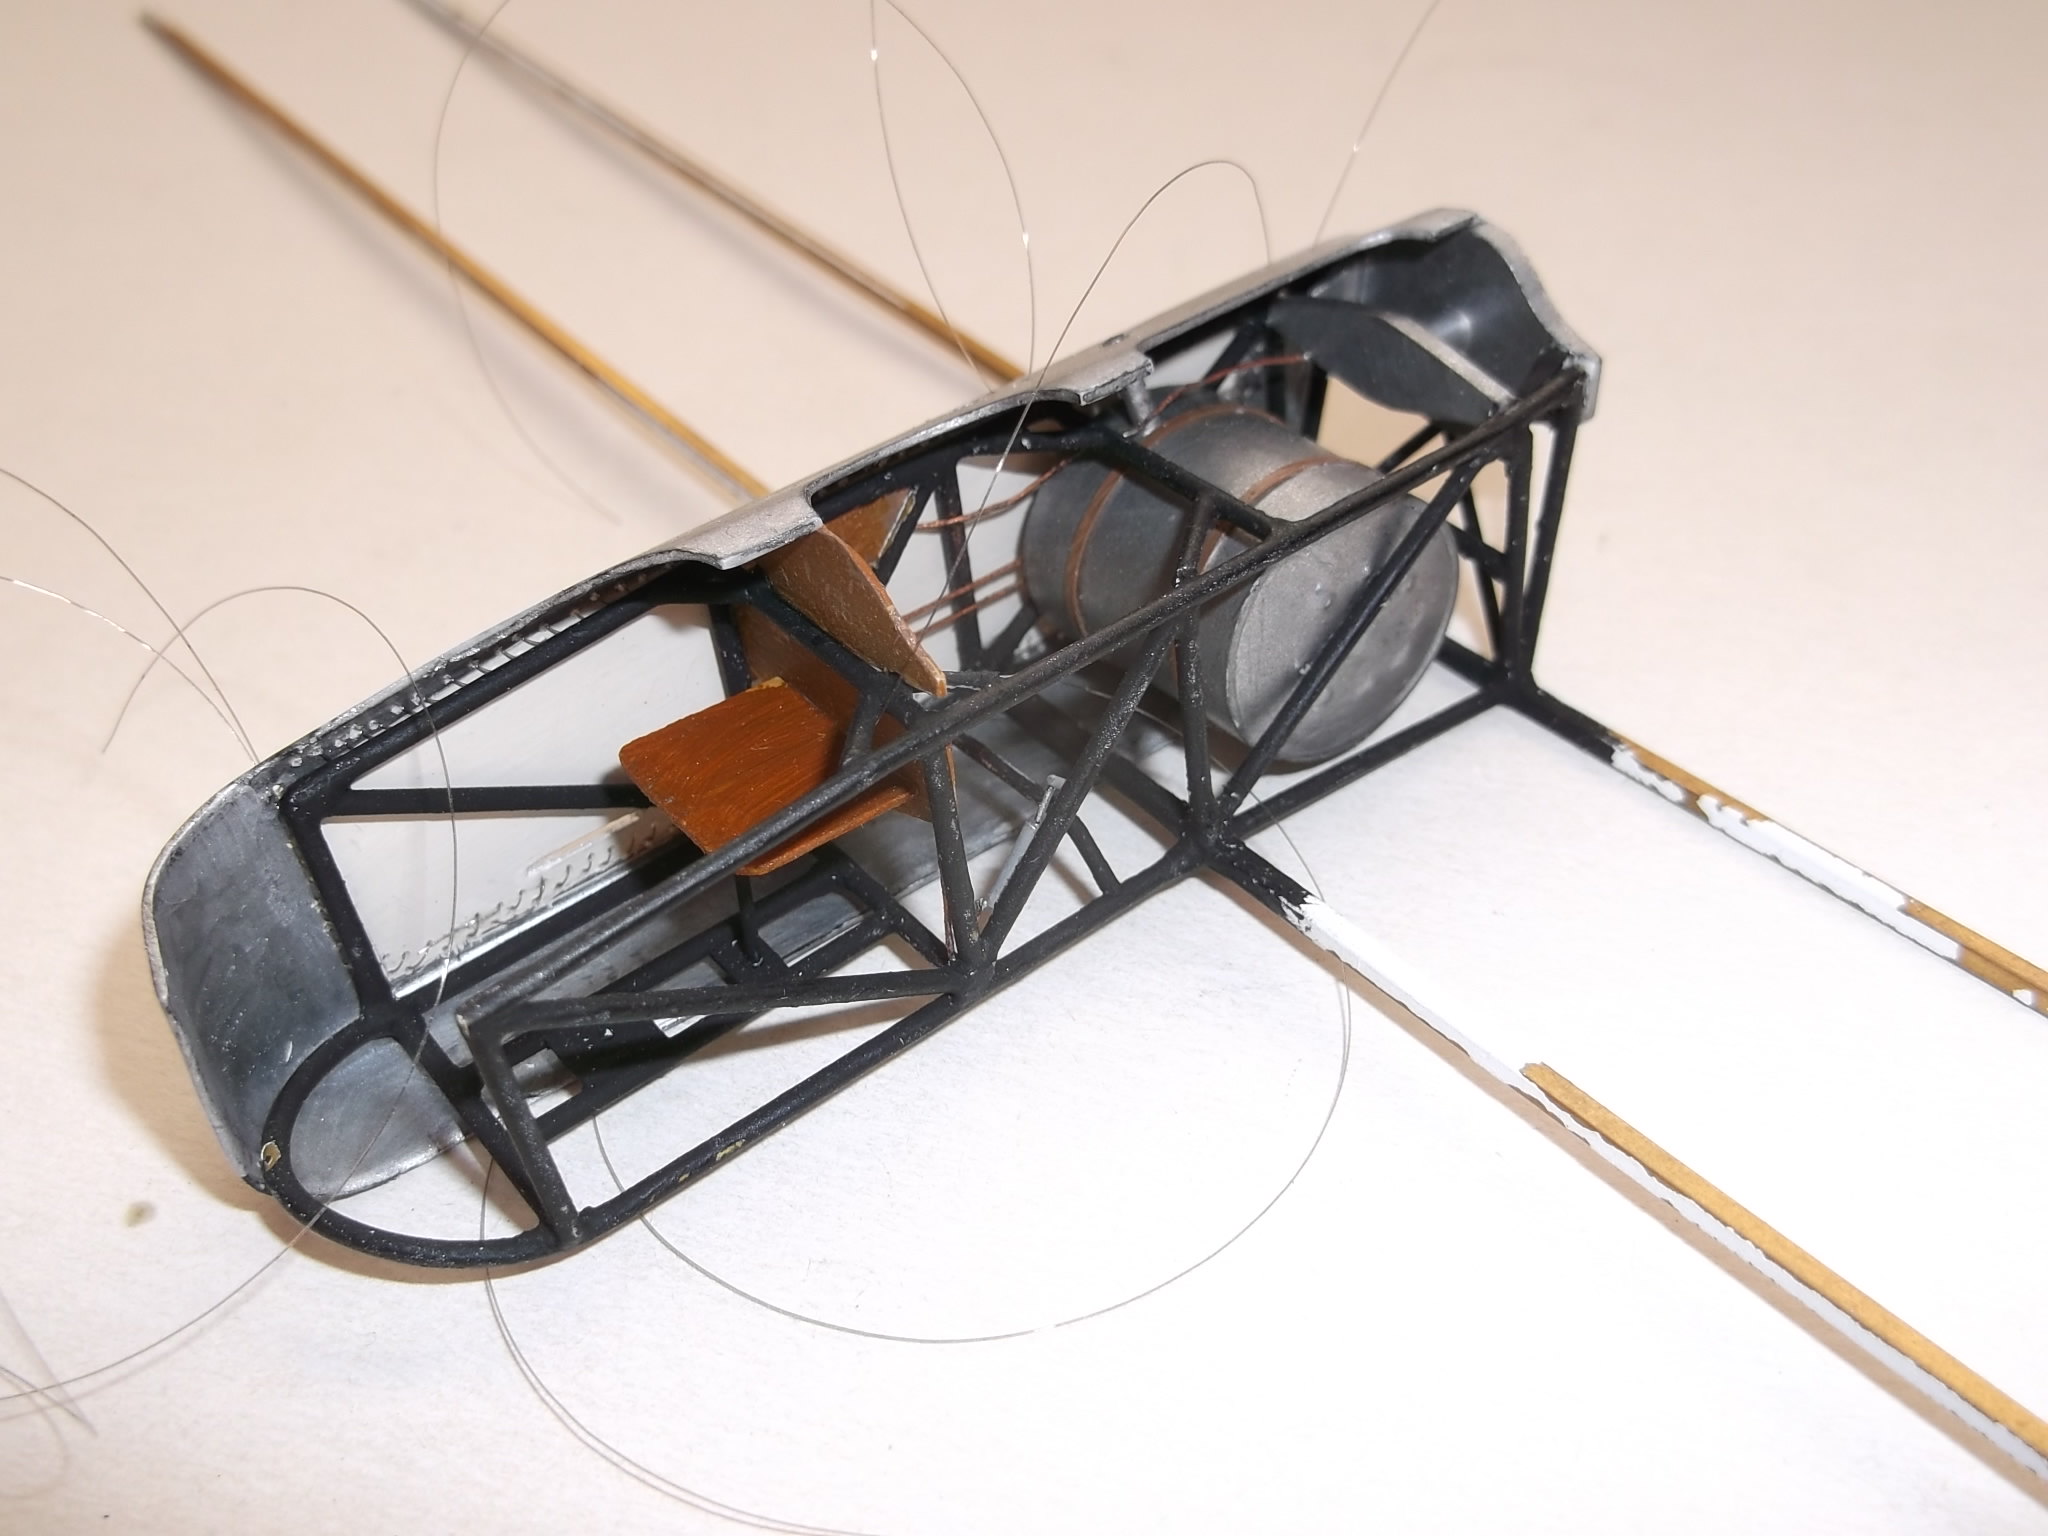
Many of the interior details of the nacelle had to be fitted before I could put on the nacelle side, so I added the fuel tank behind, and instrument panel in front of, the pilot, and the starboard wood side panel as this will be set against the solid nacelle half. This panel has the oil pulsometers (pumps), which were an aftermarket part from Taurus Models. They are very small but very finely detailed and I am glad that I have not had to try to make them from scratch.
These were fixed to the panel before I attached the latter to the fuselage frame, and then I added two lengths of wire painted a copper colour from the pulsometers to the sides of the fuel tank where they disappear. In reality these would have been connected to the oil tank and then the inlet to the engine crankcase, but I cannot find any drawings or photos of this section of the aircraft, and anyway they would probably not be visible after the nacelle side is in place, so I am not bothering. I did add a fuel line which runs from the hand pump on the port side of the nacelle frame via the front of the instrument panel and behind the starboard side panel, over the top of the fuel tank to the engine - this would be seen when the nacelle half is in place. There is also a frame member behind the fuel tank - I think that it supports the end of the engine crankshaft:
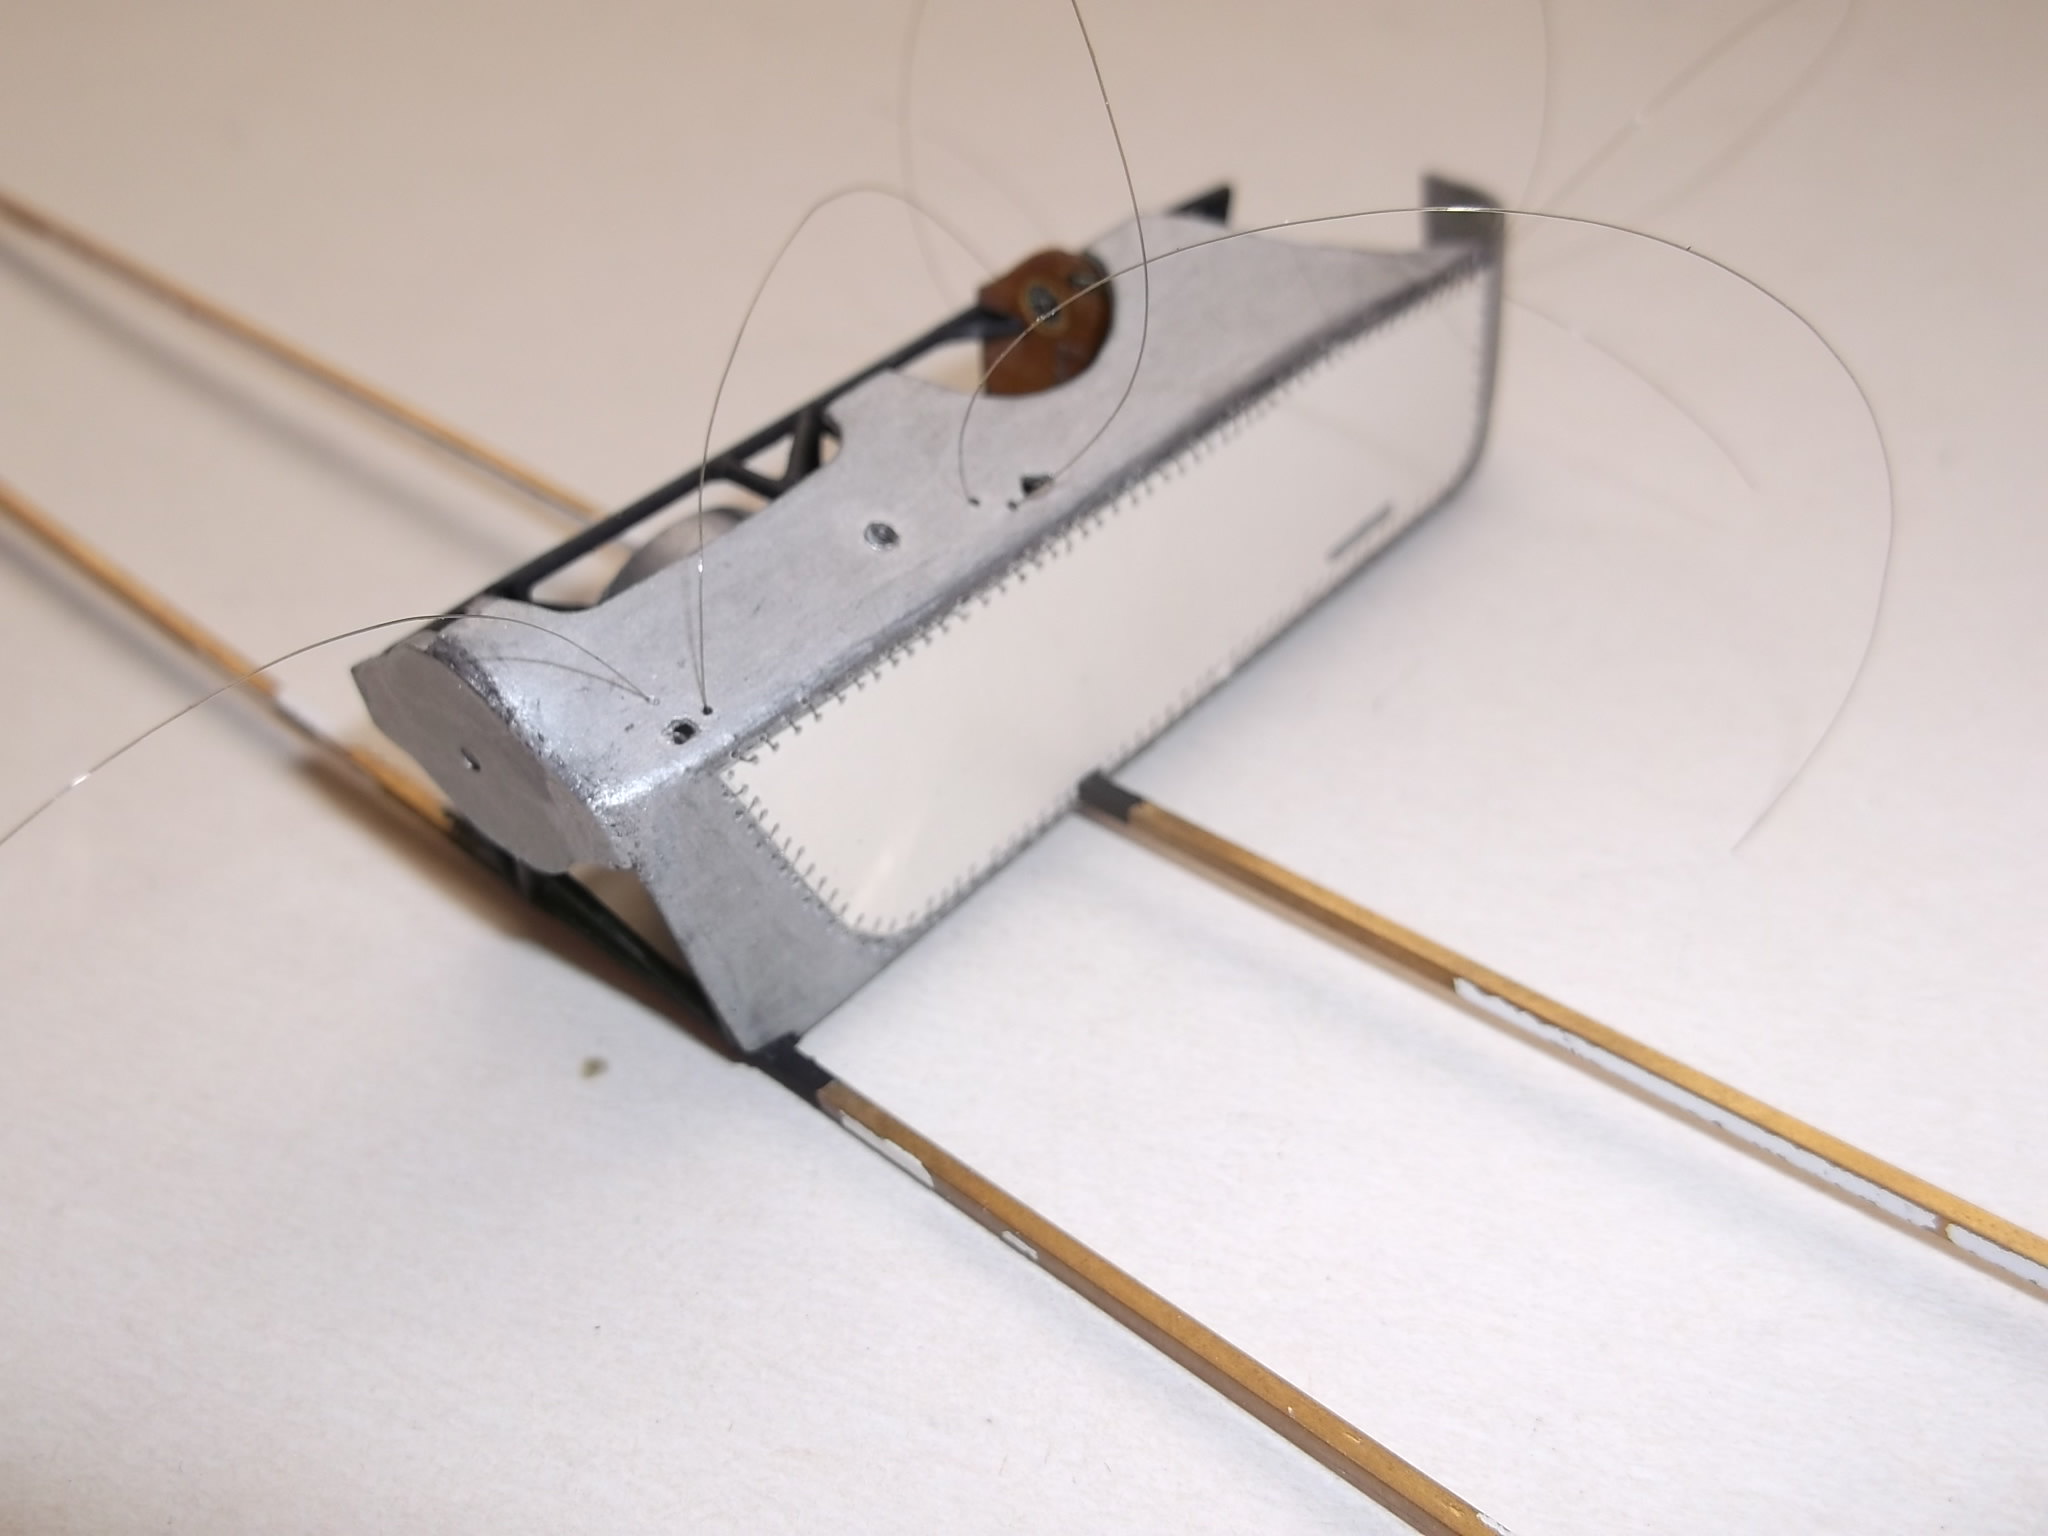
Next part was the new nacelle half. I decided that although I could not use metal I would represent the stitching between the metal and fabric parts with real thread, so I drilled two lines of holes, starting at the top rear:
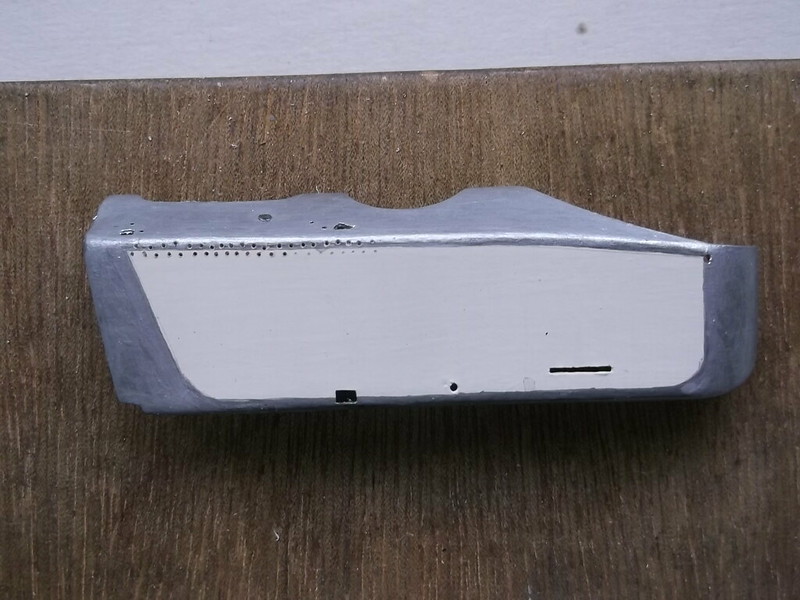
and working my way round the whole unit. After three laborious sessions I had this:
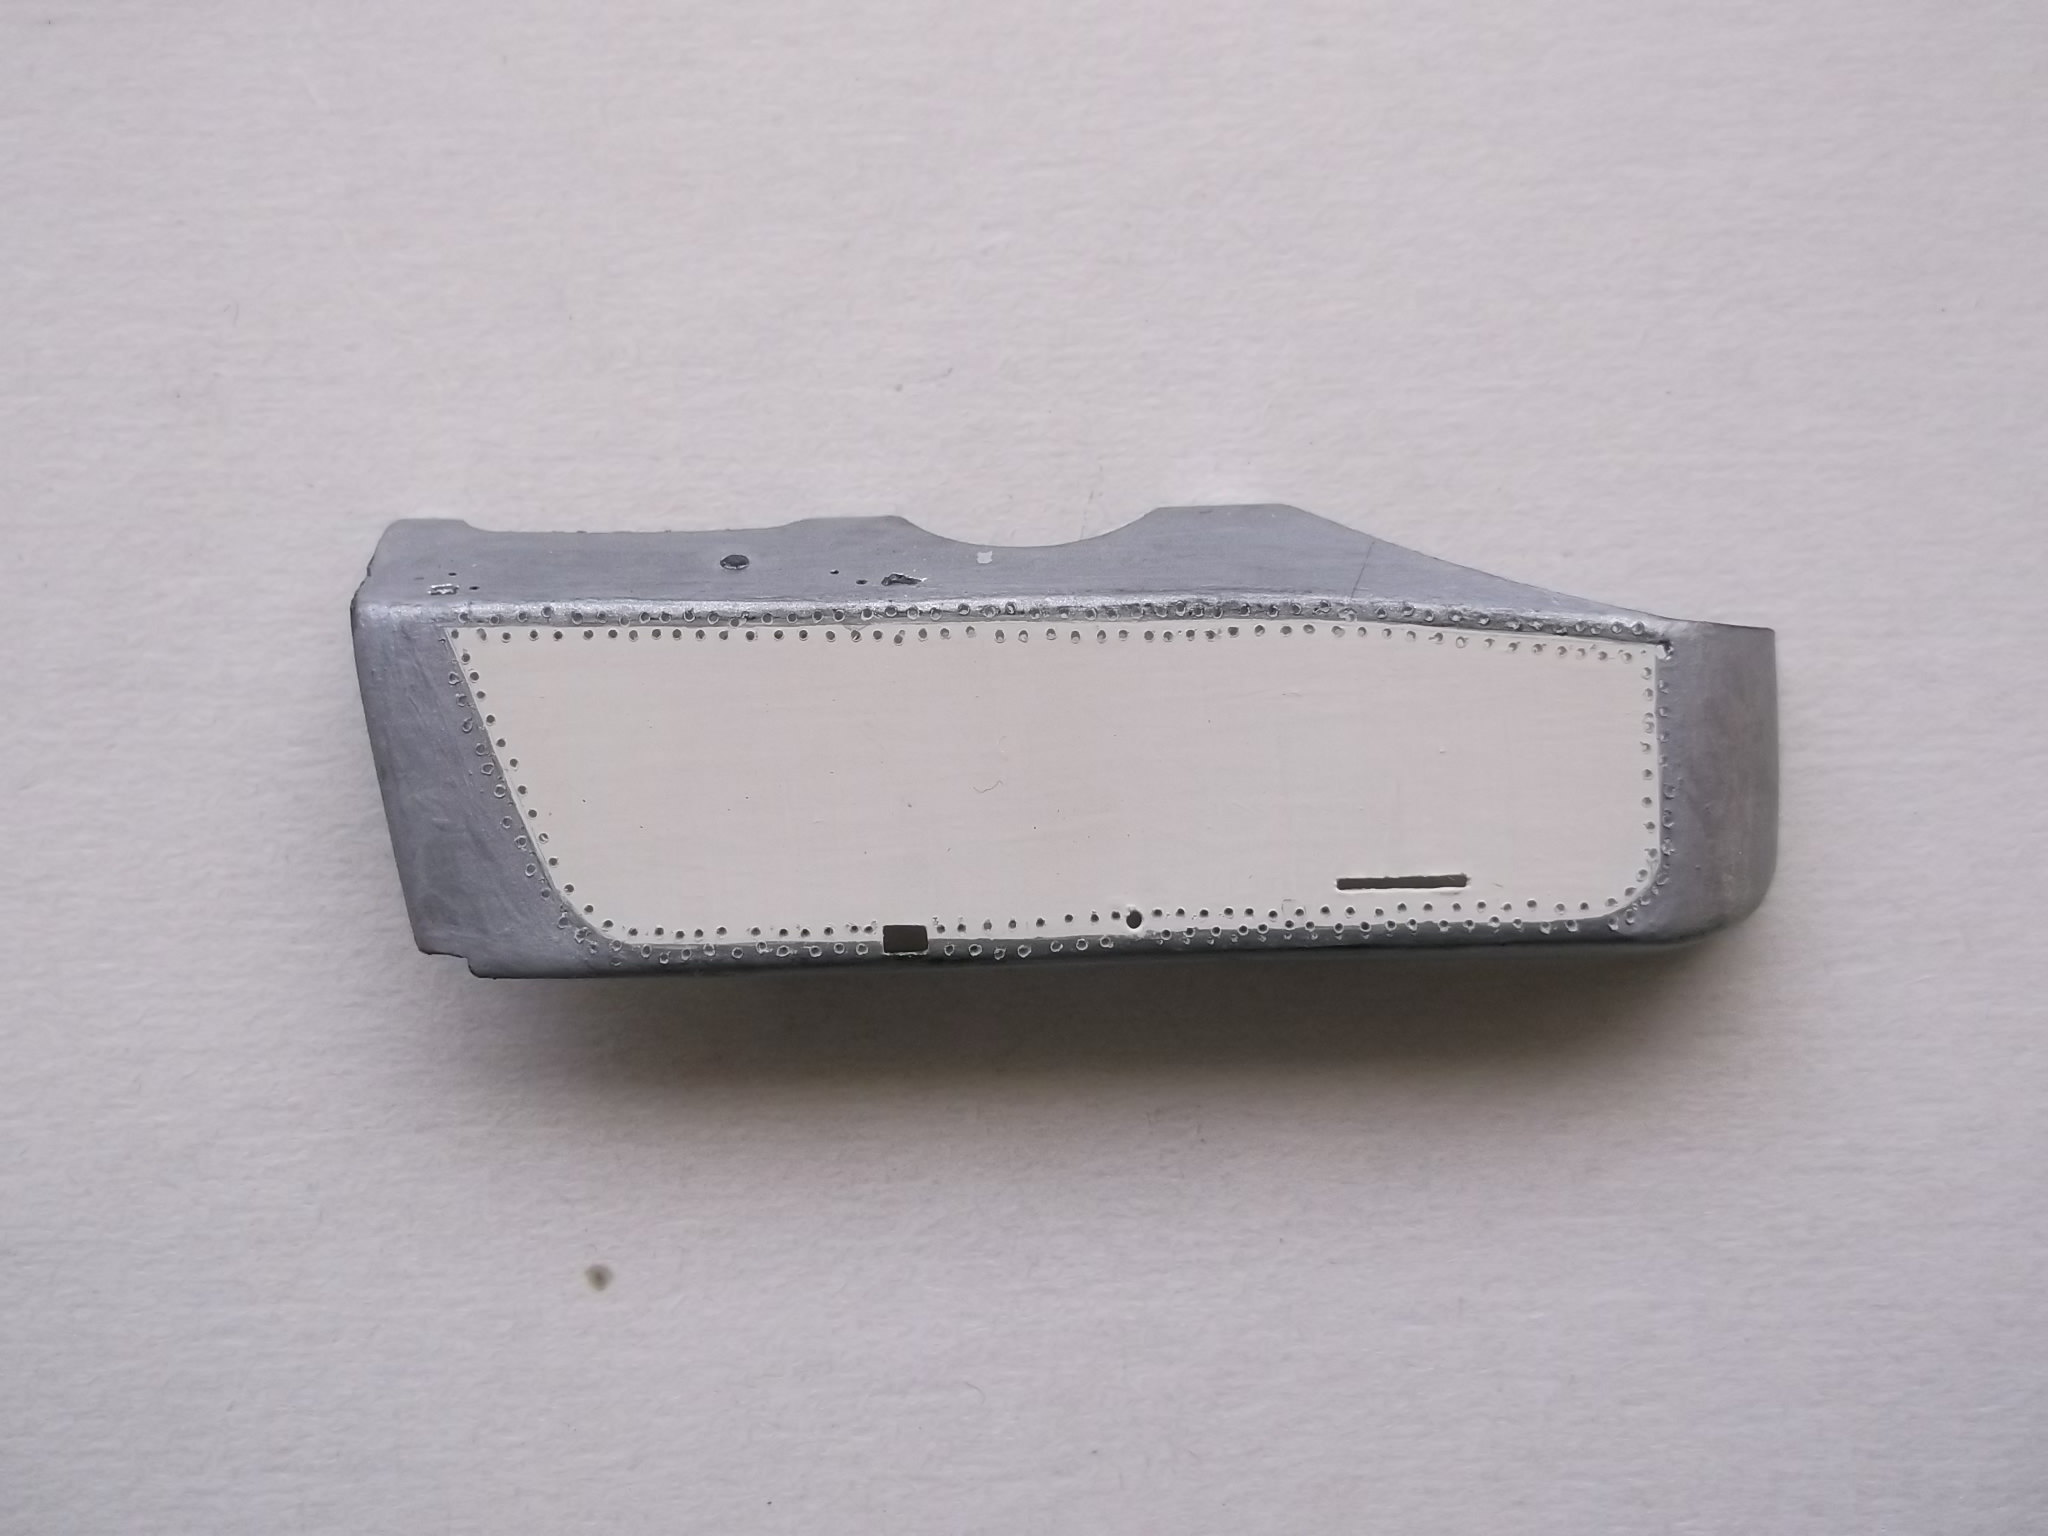
and before anyone comments that the holes are not exactly the same distance apart and in dead straight lines, I can assure you that they were not so on the actual machines either, as photos show! I also drilled the holes for the rigging which will be attached to the fuselage frame later. Then the sewing began.... and after two more laborious sessions I had this:
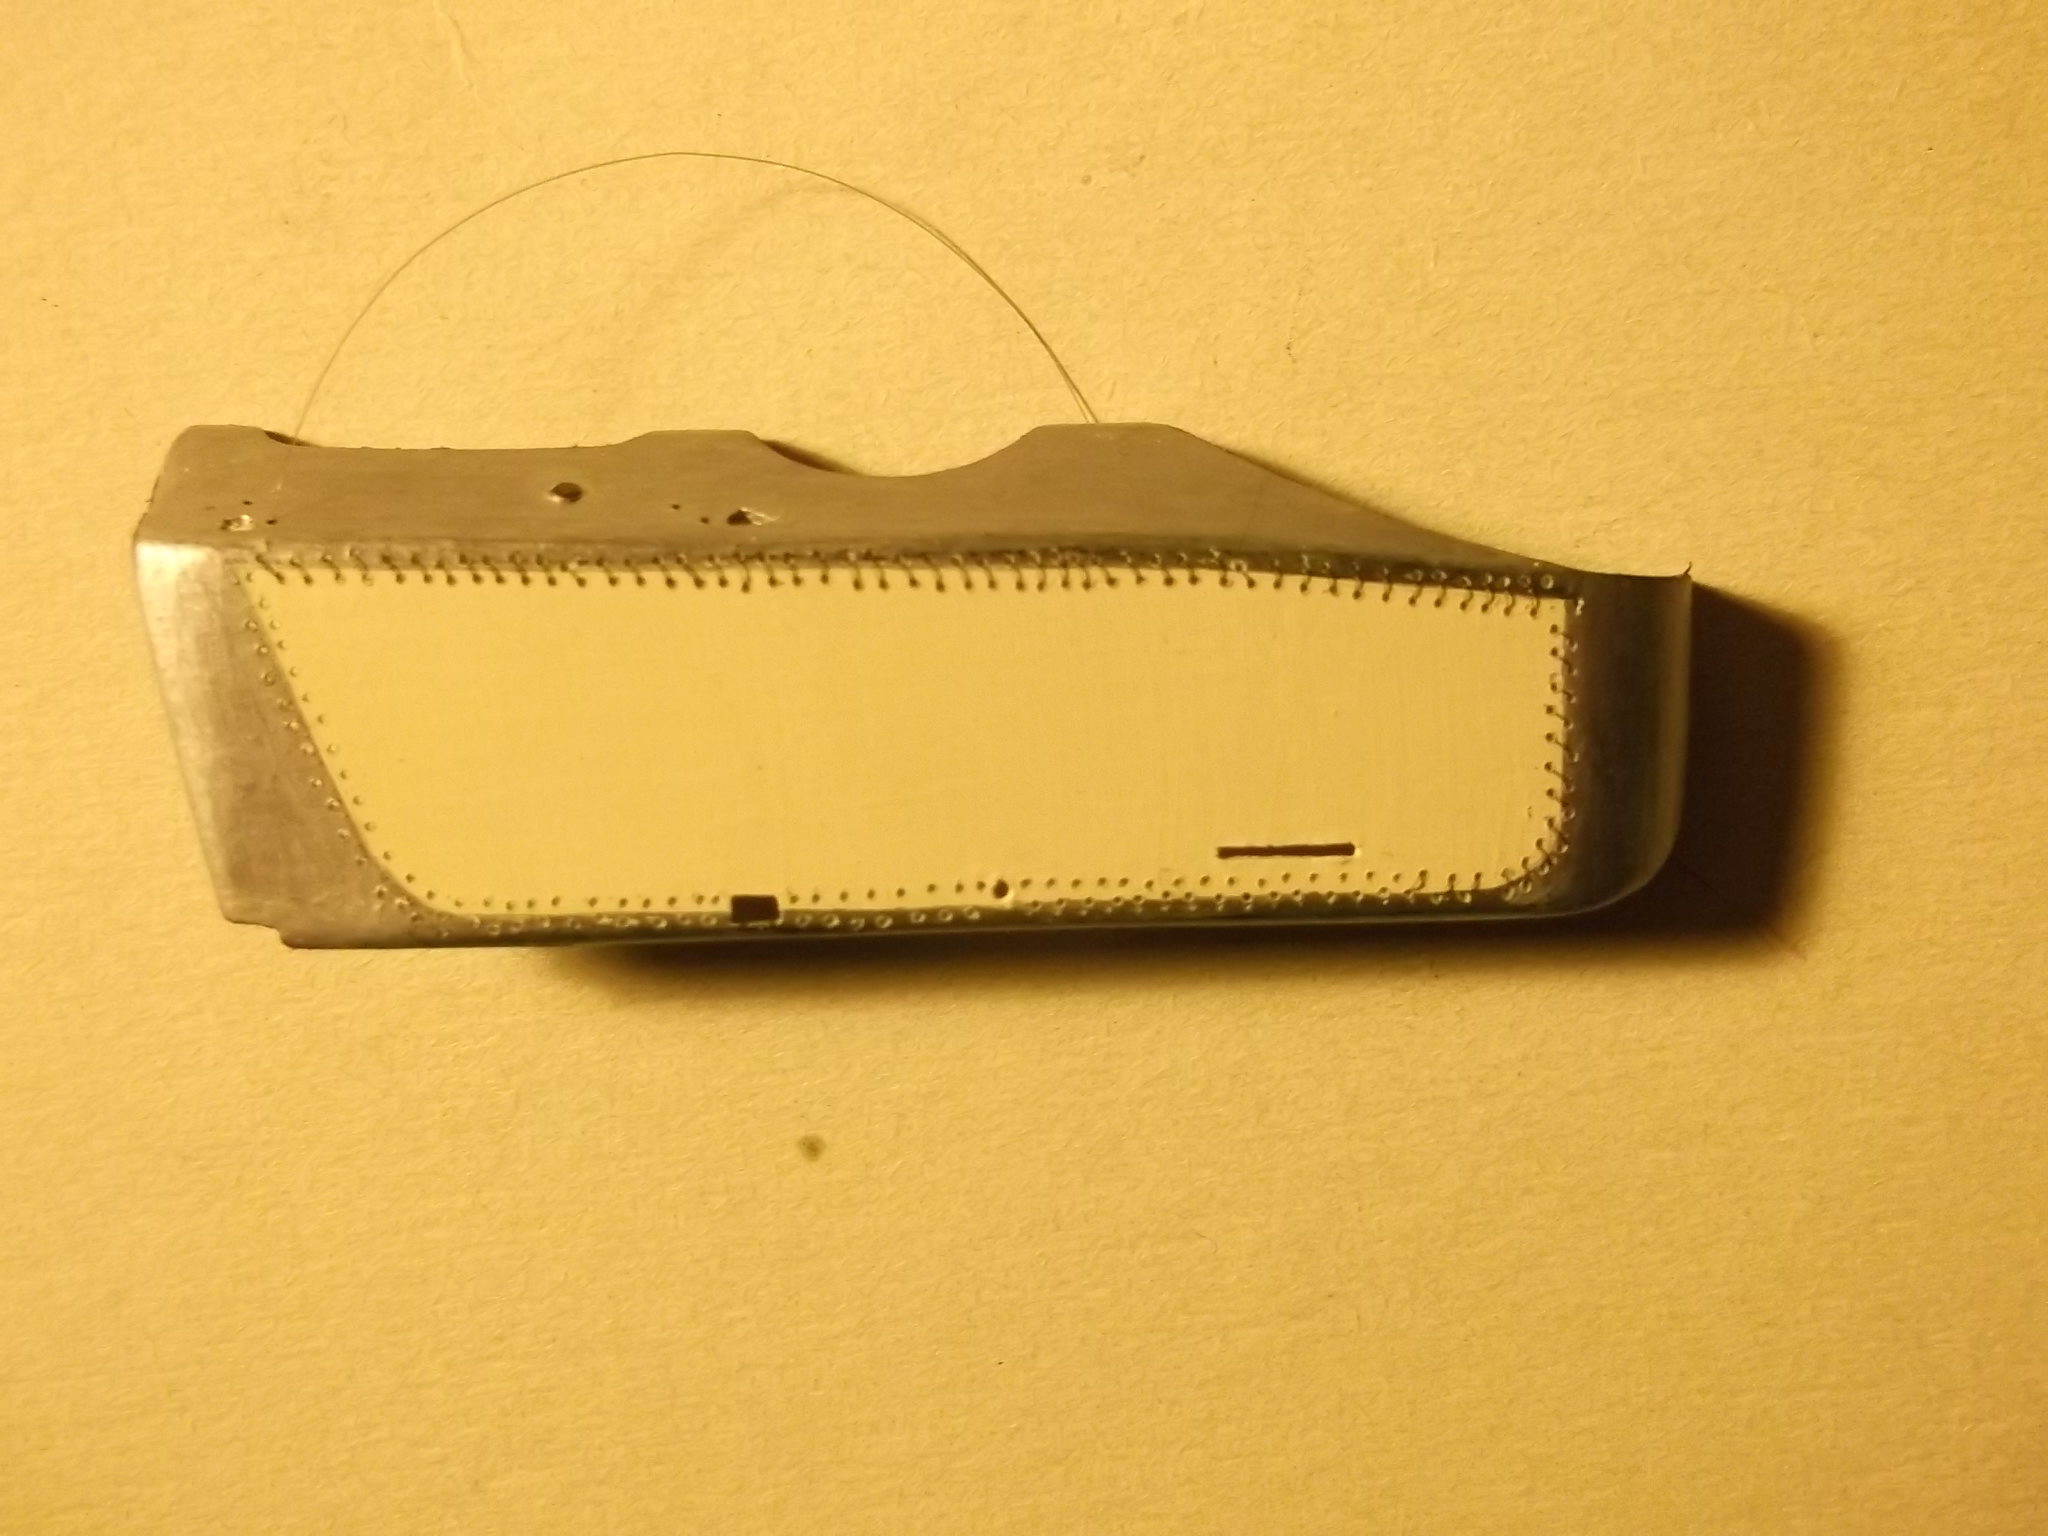
But as the old proverb says: "patience is a virtue....." and if you have enough of it, and the time, you will get this:
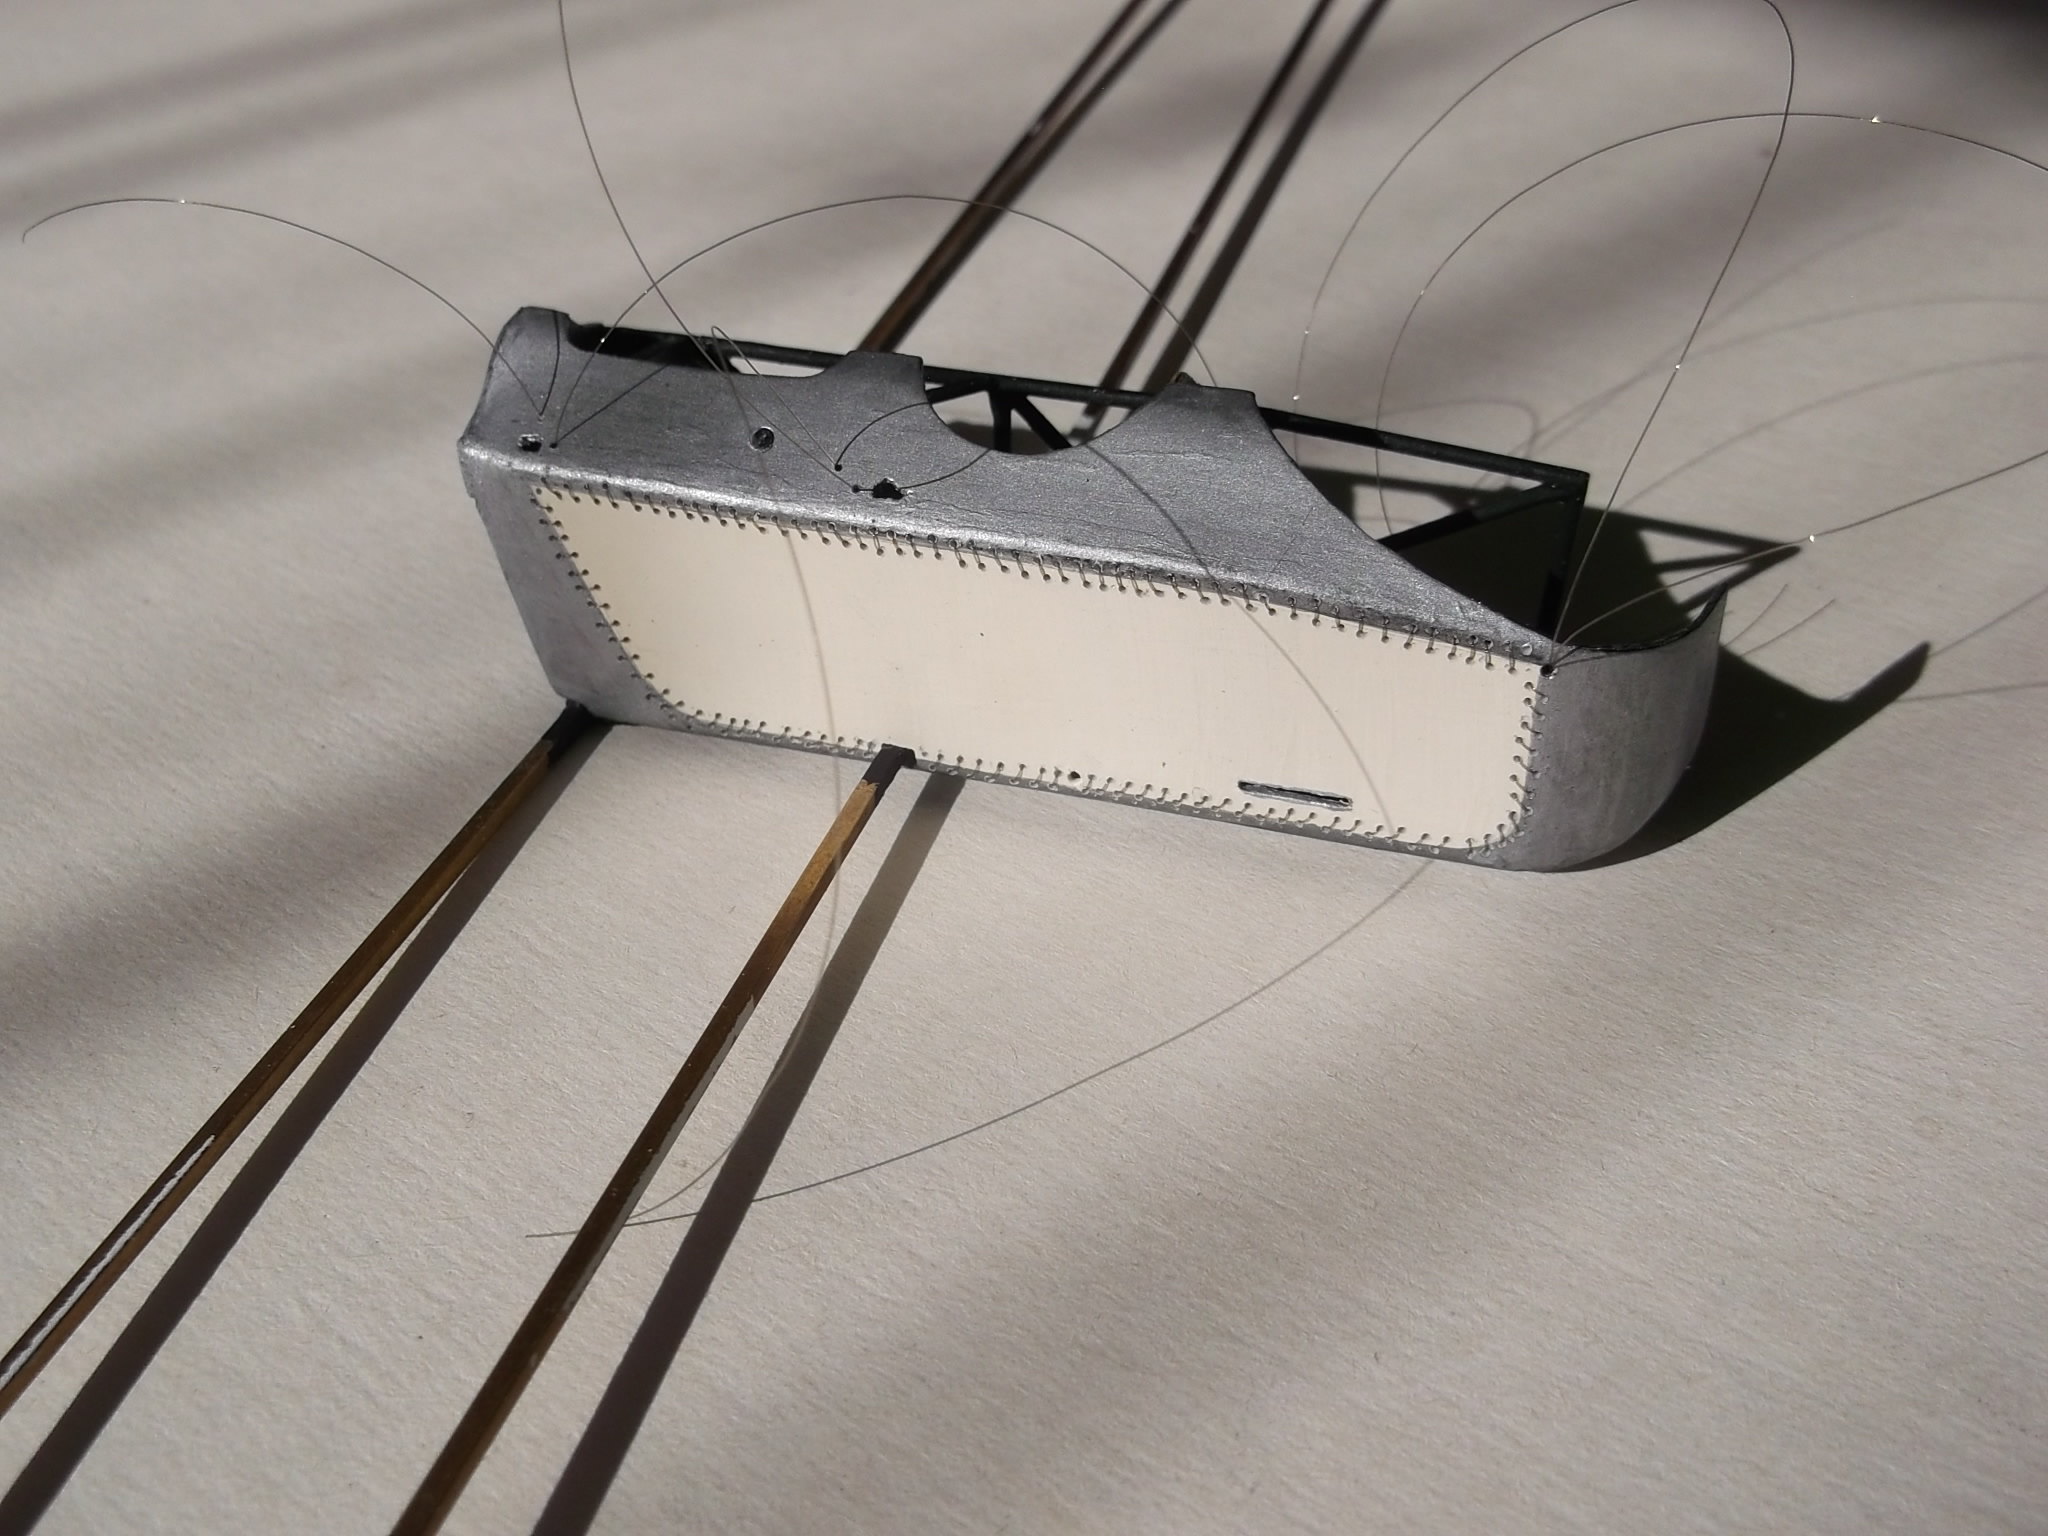
The nacelle half has been permanently attached to the frame. Now I could add the observers seat in the front:
and the engine firewall to the rear:
Well if you have got this far, thanks for looking.
Stephen.

