Author Topic: Another Felixstowe F.2a Build  (Read 15972 times)

Offline RAGIII

  • Hero Member
  • *****
  • Posts: 19694
Re: Another Felixstowe F.2a Build
« Reply #45 on: April 29, 2018, 12:53:53 AM »
All is coming together nicely to say the least. The radio would be a great addition but looks as though it will require a lot of scratch building! Best of Luck should you choose to do the open door  8)
RAGIII
"A man has to know his limitations": Harry Callahan

"Don't slop it on" Lynda Geisler

Offline krow113

  • Sr. Member
  • ****
  • Posts: 458
Re: Another Felixstowe F.2a Build
« Reply #46 on: April 29, 2018, 02:30:18 AM »
No worries.
Here is a 120mm B 17 pilot , the goggles are at least 40 applications of the Humbrol clear , as you can see a convex profile is possible!


Your fuel tanks are looking way better.

Offline GazzaS

  • Hero Member
  • *****
  • Posts: 1193
Re: Another Felixstowe F.2a Build
« Reply #47 on: April 29, 2018, 11:08:46 AM »
The radio looks cool...  but making one...ugh.  The rest of your interior looks great!
There are only two states to be in:  Queensland and blotto.

Offline Scottypos

  • Newbie
  • *
  • Posts: 21
Re: Another Felixstowe F.2a Build
« Reply #48 on: May 02, 2018, 11:53:37 AM »
Hi all,

  Hey GazzaS and RAGIII, I'll take that as a challenge. I really like the radio and that blank table is crying for something. I'll mess with it a little and see what I can come up with. If it doesn't work out, it'll end up being a couple maps and a pencil.
 
  Hey krow, 40 applications? I suppose you had to wait for each coat to dry? Are we talking a month and a half? Well, it was worth the wait, those goggles look awesome! Me? I'm not that patient.

  Well my decal upholstery for the leather seats didn't turn out. These decals are a little odd in that you're supposed to paint a light color under them because the decals are see through. Since I painted a dark color, you can't see the texture of the decal and it all turned out to be one color. So I'm going to try and clean them up and just paint and weather them. Look upon my shame in pictures...


  Did a little dry fitting. I'm worried about how all this is going to fit together, and I have an idea about how not to cover all the work I'm doing on the interior, so I wanted too check and see if it'll work. Looks like everything is going to come together well. I wanted to check this little area because of a picture in the instructions...


  The center section strut in the picture extends through the fabric down to the spar in the interior. seeing this in the picture, I was worried that the one on the model didn't do this so I wanted to check it. I was surprised to find...


  ...it does! Once again WNW has done an excellent job of research and recreation. This is going to help me with my plan to blow the top fabric off the fuselage and expose the interior. I'm still working out the details of just how I'm going to do this, but this is one step closer.

thanks for peeping and I hope the rest of your week is a good one. 

Offline Scottypos

  • Newbie
  • *
  • Posts: 21
Re: Another Felixstowe F.2a Build
« Reply #49 on: May 06, 2018, 11:51:41 AM »
Happy Saturday everyone!

  After moving my daughter back home from college for the summer this morning I managed to squeeze in a couple hours of model building this afternoon. woop woop!

  Just for fun, here's an idea of all the paints I've been using so far on this beast. I'm sure there'll be more to come....


  Don't let my son's hairy legs distract you

  I started by messing with the fuel, excuse me, petrol tanks a little more. I've nearly got the lines completely erased. This last coat should do it...


  After that I decided I should start working on the inside of the hull. I wanted to continue the dark wood along the bottom. Since I plan on opening up the hull on top, I'd better get this painting done. I still can't get over how stark yellow the first layer of oil paint looks. It makes it hard to believe it'll ever look like dark wood when this layer goes down...


  But after the darker coat goes down, it instantly starts to look better...


  I run a stiff brush over this to add the "deep" grain, and then dip a wide fan brush into the dark oil paint and do some detail grain work and general clean up...


  Then it goes into the box to dry for a week or so. After that, I'll hit it with a protective coat of semigloss, and then comes the dark black washes to help represent the sealer they may have used in the bottom of the hull. I want to get caught up to what I've done in the bottom of the interior assembly before I continue to darken everything up further.

  Next I decided to take the plunge into the waterproof wireless cabinet. It may be an omen, but while trying to pry the cabinet out, I snapped off one of the rudder pedals...curses...


  Despite the damage, I think I'm off to a good start though. I think my scratch built cabinet turned out kinda nice...


  Now filling it with some radio equipment will be a challenge, but I think I've found a cheat that'll make it easy. There's some really nice color shots of WWI radio equipment on the Net. I'll grab a few choice shots, drop them into Photo Shop, and clean them up, shrink them down and print them out. I'll take those and glue them onto some polystyrene blocks, and pop some little round bits to represent the dials and knobs. Stick a few wires in here and there, and hopefully I'll have some better than half ass representations of early radio equipment. Wish me luck.

Cheers 


Offline RAGIII

  • Hero Member
  • *****
  • Posts: 19694
Re: Another Felixstowe F.2a Build
« Reply #50 on: May 07, 2018, 06:42:27 AM »
Excellent work on the wood. The radio compartment is going to look awesome!
RAGIII
"A man has to know his limitations": Harry Callahan

"Don't slop it on" Lynda Geisler

Offline GazzaS

  • Hero Member
  • *****
  • Posts: 1193
Re: Another Felixstowe F.2a Build
« Reply #51 on: May 07, 2018, 06:43:59 AM »
Ya, gotta say that wood looks nice!  Cool idea with the radios!

GAz
There are only two states to be in:  Queensland and blotto.

Offline Scottypos

  • Newbie
  • *
  • Posts: 21
Re: Another Felixstowe F.2a Build
« Reply #52 on: May 09, 2018, 12:43:18 PM »
Thanks Gaz and RAGIII,

  I'm glad you like how my wood work is coming along. It's a bit of a shame that I'll be covering most of this with black washes to make it look like the waterproofing that's supposed to be in the bottom of the boat.
  I've been toying with how I'll recreate the radios. I'm thinking the idea of printing out the faces of the various bits of equipment may just work. Here's a few pictures I grabbed from the net and straightened out in Photoshop...


  Now if I can just get them to print out at a decent resolution, they may just be usable, but I plan to play a lot more. Maybe I can find some betterer pictures to use.

ya all be sure to enjoy the rest of your week.

Offline Manni

  • Hero Member
  • *****
  • Posts: 1768
    • Der Militärmodellbauer
Re: Another Felixstowe F.2a Build
« Reply #53 on: May 09, 2018, 02:50:58 PM »
Great work! And thank you for the pictures of the instruments. They will be helpfull for me when I build mine (sometime).
Bye,
Manni
"Ich hab' da mal was vorbereitet.": Jean Pütz
"Warum noch mehr Bausätze?!?": meine Frau

Offline PrzemoL

  • Hero Member
  • *****
  • Posts: 5349
  • There was Eru... and he made first the Ainur...
    • Przemysław Litewka
Re: Another Felixstowe F.2a Build
« Reply #54 on: May 10, 2018, 02:20:38 AM »
Truly great work! Watching with great interest!
Ash nazg durbatuluk, ash nazg gimbatul,
Ash nazg thrakatuluk, agh burzum-ishi krimpatul.

Offline Scottypos

  • Newbie
  • *
  • Posts: 21
Re: Another Felixstowe F.2a Build
« Reply #55 on: May 14, 2018, 08:51:58 AM »
Hello everyone on this special day. just think, if it wasn't for mama, we wouldn't all be here chatting about the stuff we love. Thanks Mom!

  Well despite having to wait hand and foot on all the moms of the world, I did get some hobby time in. Today's festivities began with further work on the radio cabinet. It was back to Photo Shop to see if I can figure out how to get the pictures small enough to fit into the cabinet. After getting the size right, I put them together and started messing around with the controls to see if I can sharpen them up and make them print nicely. Weeeeelllll, the results are ok, I think. I'd like to have better sharpness, but I'm not a Photo Shop expert. So here are the pictures, three different ways...


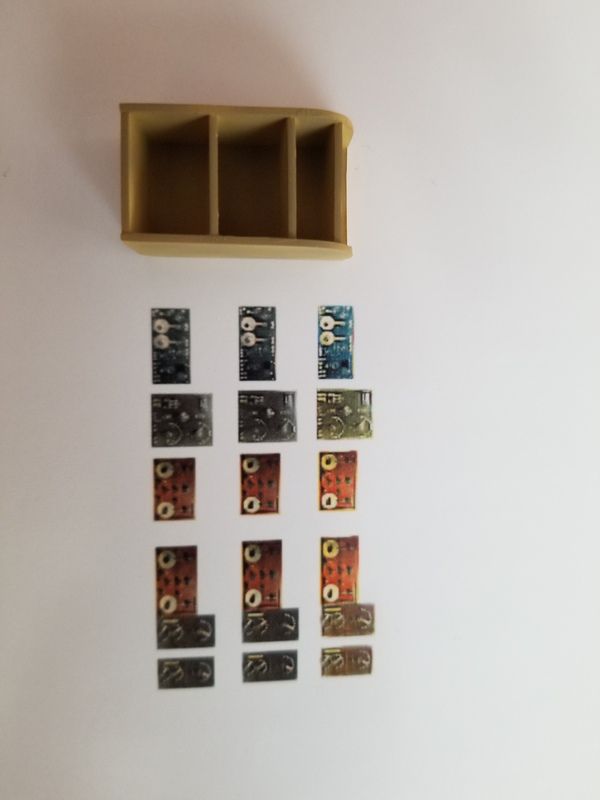
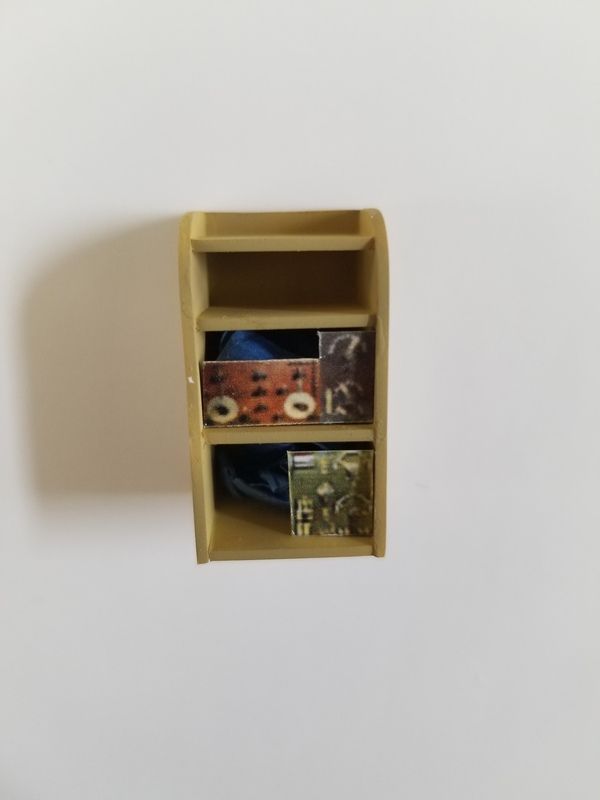
  I'd call it legible, but I'm thinking under some of the expert photography I've seen, it won't hold up, but to the naked eye, especially my old worn out eye, it'll do. So I cut them out and stuck them in to see how they look. Think I'll go with it...


  So moving forward, it was time to start finishing the cabinet with a coat of paint. Not thinking ahead, I didn't have any place to hold it during painting so I messed up the bottom shelf. I'll repaint it when the others dry.


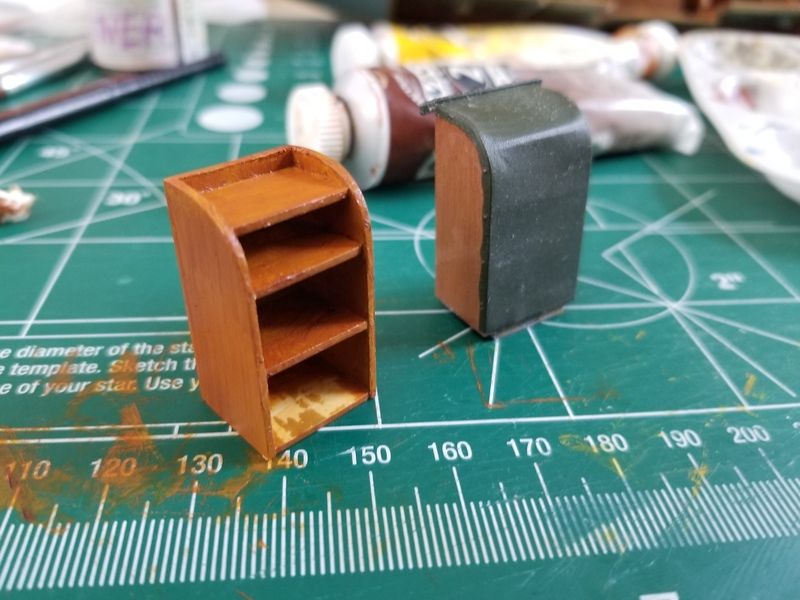
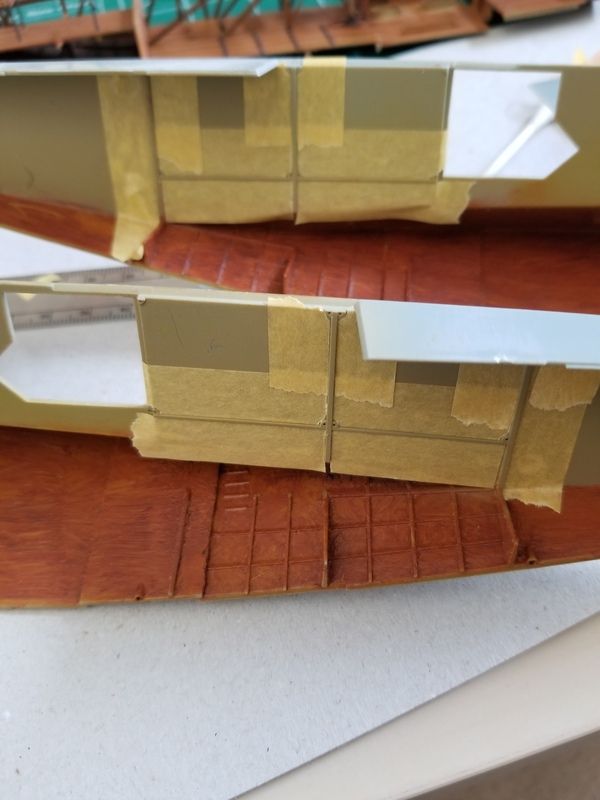
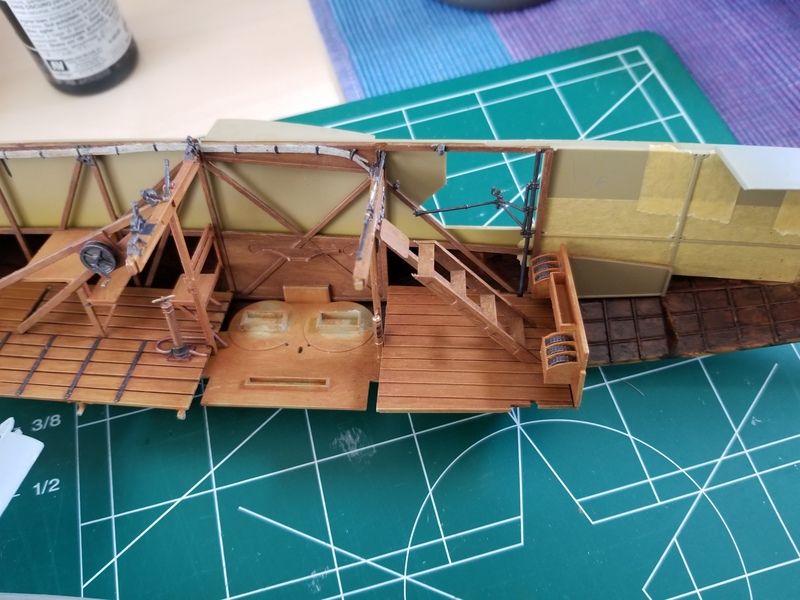
  Next, I thought I'd start playing with the plywood decals to see how they'd look. Honestly, I'm not too happy. My base coat is too dark. I want the plywood to retain the original color of the decals as they are on the sheet. It just didn't occur to me that the sheet's color is white, so with a tan background, most of the grain detail is rather hidden, and the whole thing looks too dark.


Even with the dark framing over it there's little or no contrast and the panels look dull.


  I'm going to do it over with a white background for sure. Naturally I couldn't make that decision before masking the framework in the back. I'll have to rip out the tape to repaint  I'll be wearing my dunce cap the rest of the day.


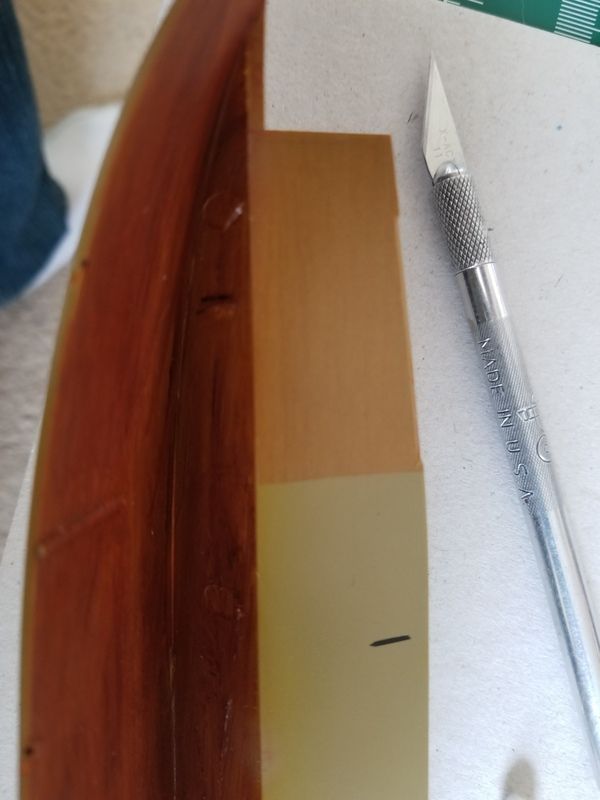
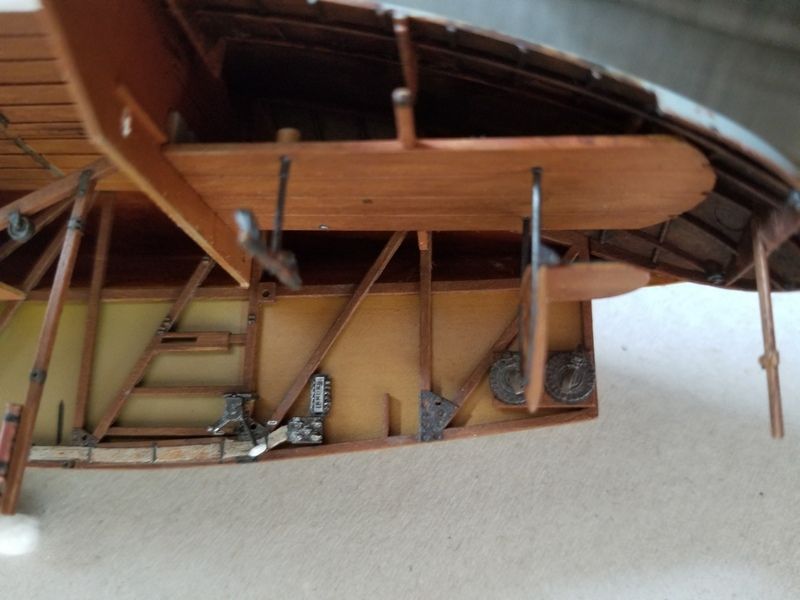
  To make up a little for this goof I hit the bottom of the hull with a black wash in an effort to actually move forward with the build, rather than just creating more work for myself. It's going to be a big masking job to repaint all the tan, white.


  So guys, let me know if you'd like a copy of the final radio picture file. I have it in JPG and PSD for you Photo Shop types. Just send me an email address and I'll pop it right over to you. You should be able to print it right out or take it over to the pros who likely have a much better printer.

Take care and don't forget to tell mama how awesome she is on her special day.

Offline mgunns

  • Hero Member
  • *****
  • Posts: 2255
Re: Another Felixstowe F.2a Build
« Reply #56 on: May 14, 2018, 01:52:18 PM »
This is coming along nicely, sadly, most if not all of your interior effort will be hidden from any view.  I like your radio faces.  Gives it a nice look of authenticity and great idea and I like it.
Mark

We few, we happy few.....

Offline gbrivio

  • Hero Member
  • *****
  • Posts: 1682
Re: Another Felixstowe F.2a Build
« Reply #57 on: May 14, 2018, 03:01:29 PM »
How much work, and excellent work indeed. I like your idea for the radios.
Ciao
Giuseppe

Offline Scottypos

  • Newbie
  • *
  • Posts: 21
Re: Another Felixstowe F.2a Build
« Reply #58 on: May 22, 2018, 12:48:28 PM »
Hello all you happy people!

  Welcome to another episode of, "Lets See If This Guy Can Screw Up An Expensive Model", and I'm your host, that guy.

  The boss wouldn't let me get in much model madness this weekend, probably because of my covert trip to the hobby shop during the week last week. I was on the hunt for some gloss white so I could redo the plywood. After about an hour of drooling I left the shop proud of myself for not buying another model. I promised myself not to get another one until this one is done. Yeah, we'll see how long that lasts.
  I did find something interesting in a tube. Vallejo makes a new-ish tube of acrylic putty and I like it because it don't stink and you can thin it with water...


  I was thinking I could use it to finish up the fine lines left on the petrol tanks. I liked working with the stuff. I tried it right out of the tube, and I thinned it with some water, and it worked great both ways. I've used similar stuff before to make water for my little boat models.


  I've never tried to sand the stuff I had before, mostly because it doesn't dry very hard, but the Vallejo stuff dries rock solid. However once I started sanding the stuff, it was behaving...weird. Under the brunt of my sanding sticks, they just seemed to polish the putty and eventually start to chip off. I added some to the horizontal tank to see how it worked with the lines since you can't see them on the finished model. For some reason the putty popped out of the cracks but wouldn't come off of the flat parts. I'm beginning to think I didn't let it dry enough, but it had been drying for a few hours.


  I also got another little bottle of newness, some of the Microscale Krystal Klear for the gauges. I was surprised to find a bottle of thick, gooey, stringy, gluey, stuff that's a lot like Elmers glue. There's no way to glop this stuff onto the tiny gauges, so I thinned it with a little water...


  I think it turned out ok. Maybe a second coat is in order. They are really hard to see in this picture, but they aren't dry anyway.


  So after playing with some new model chemistry it was time to get to work on the less hobby side of my weekend. But before I go I just had to mess with the engines a little. Jeez I love these engines!


Thanks for tuning in and I hope you all have a fabulous week.

Offline RAGIII

  • Hero Member
  • *****
  • Posts: 19694
Re: Another Felixstowe F.2a Build
« Reply #59 on: May 23, 2018, 01:10:03 AM »
Terrific update! The details are coming out nicely Looking forward to more!
RAGIII
"A man has to know his limitations": Harry Callahan

"Don't slop it on" Lynda Geisler