Author Topic: 'El Sonora' in 1/72  (Read 16677 times)

Offline Old Man

  • Hero Member
  • *****
  • Posts: 600
Re: 'El Sonora' in 1/72
« Reply #45 on: August 02, 2017, 08:37:21 AM »
A very convincing pair of wings there. I especially like your use of tape for the ribs rather than plastic strip which can take a good deal of sanding down. The spans of these early machines were large: as you write they were basically wings with an engine held together with lots of wire and a few sticks - which makes them a challenge to model.

Stephen.

Thanks, Steve.

The tape is useful stuff, if you can get ahold of it. I am still coasting on what I bought from my old local shop before it closed. Looking around, I am not seeing on the web for sale the plain masking tape strips, but there are color strips in 1/64 on offer. White and dark brown seem like they might be useful. The lengths are only 120' per roll, and I don't know what they are made of. Still, probably worth risking a few bucks to find out. The masking tape strip can be sanded, once under primer, and I have used the 'leveling up' technique with it (sanding down after primer till I see just the tape) on other projects.

Using Future before primer is new for me, and seems to help fix the stuff in place. Primer did not do that well, and in fact I suspect it may have attacked the adhesive. It it lifts off, a little CA gel will get it back down again.

I gave off using plastic strip because I often found it lifting off as I sanded it down thinner. This may owe to my not using solvent glues to fix it down, however.

I had thought of using decal film painted dark grey (I often use this for canopy framing), but ran into problems with flaking when I tried cutting very thin strips.

I find often you can get a decent 'tape' effect just scoring two parallel lines with an Exacto blade. The real thing is awfully thin.

Offline Old Man

  • Hero Member
  • *****
  • Posts: 600
Re: 'El Sonora' in 1/72
« Reply #46 on: August 02, 2017, 08:42:31 AM »
The wings are looking great OM. I try to avoid sanding the aerofoil into plastic card and simply bend the plastic to get the curve, but that's simply to avoid the huge amount of dust (or plastic shavings in the case of oversized kit wings that need thinning!)

Ian

It does make for a lot of dust, Sir. I break out the vacuum afterwards, and I have thought of moving the business onto the porch, at least in summer-time. But I really do not like working with heat, I've not had much luck with it, so I stick with sandpaper....

Offline Old Man

  • Hero Member
  • *****
  • Posts: 600
Re: 'El Sonora' in 1/72
« Reply #47 on: September 23, 2017, 06:02:27 AM »
Been working away on this, and it is at a point where some progress worth reporting has been made.

First, I painted the motor, and constructed the cradle on which it rests atop the lower wing, and contrived a radiator.


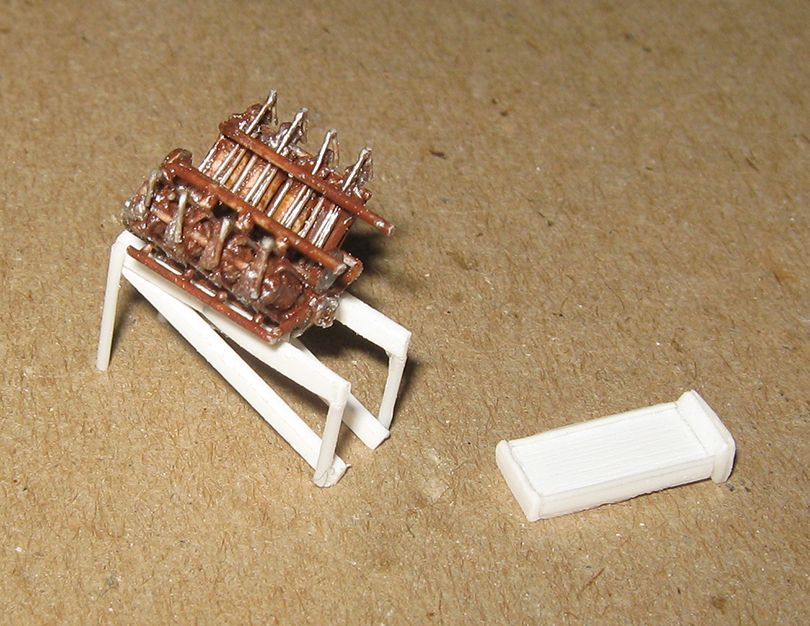
The motor was painted silver, then gone over with various rust-red and orange washes to give it a copper tone. The radiator is basically a rectangle of thick sheet, wit edges and top added from bits of rod and strip. It was painted as was the motor, but with yellow tining on the frame, for brass.

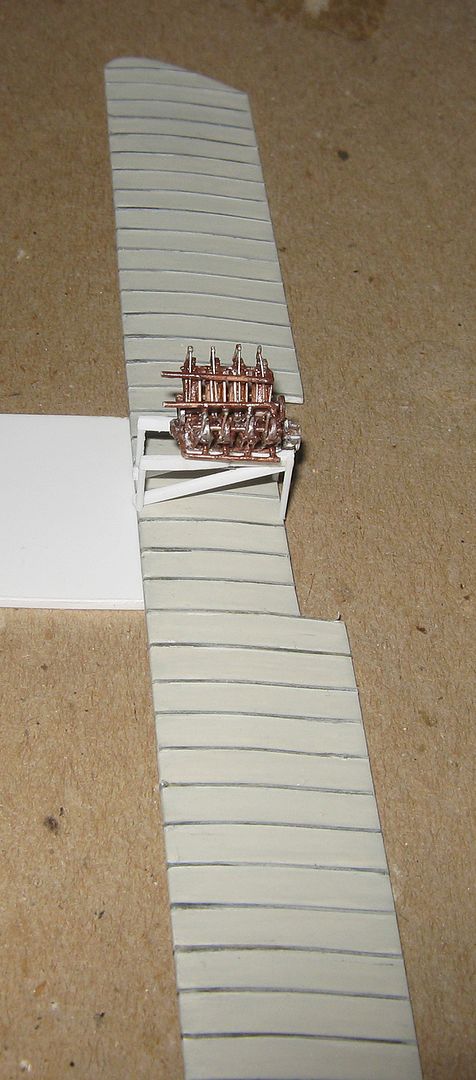
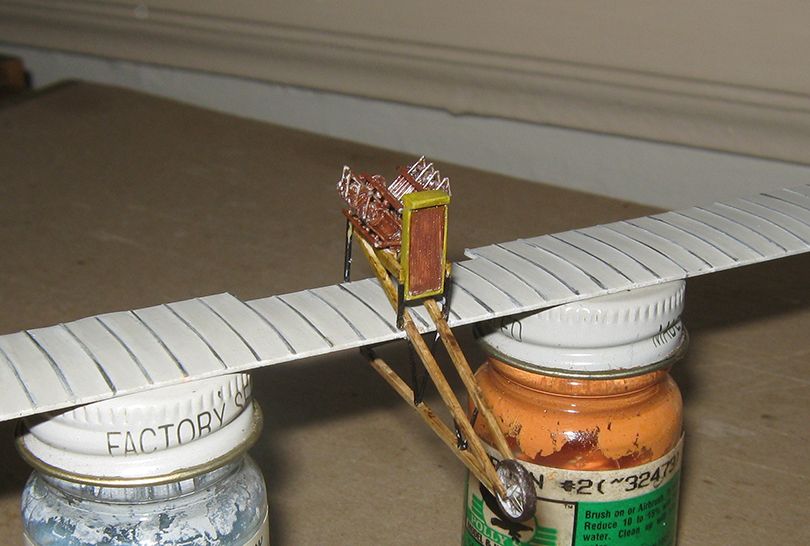
Here is the cradle and motor on the wing.


After painting the wood and metal tube elements of the cradle, I made the central girder portion of the undercarriage. I was guided by the scaled Putnam drawings of an early Curtiss, but angles and eye dictated final adjustments in length and such.

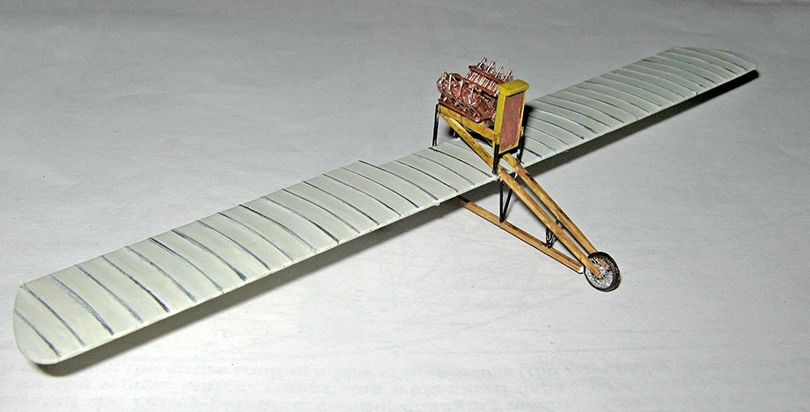
To give a sense of proportion, I tacked on a pilot figure for these next pictures, roughly where a pilot would sit, and I also slipped in the front spoke wheel (it is held in by the 'spring' of the converging structural members).


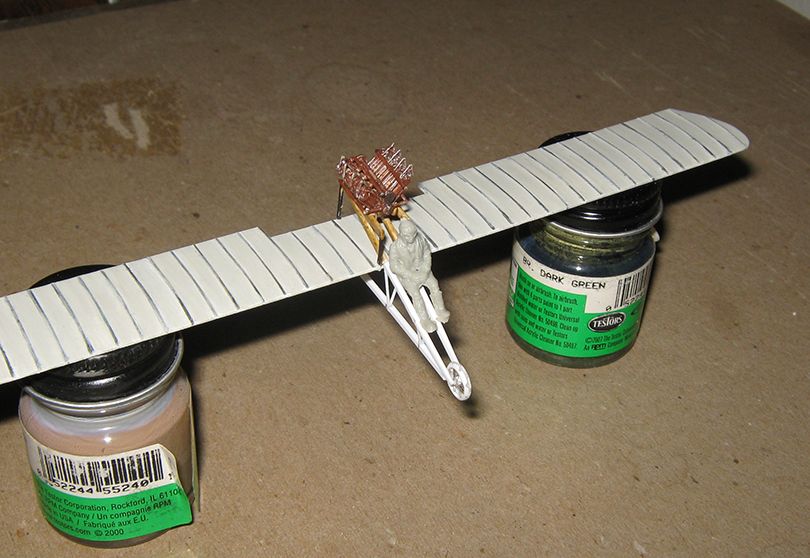
The central structural piece was over-long for handling, and trimmed back later.

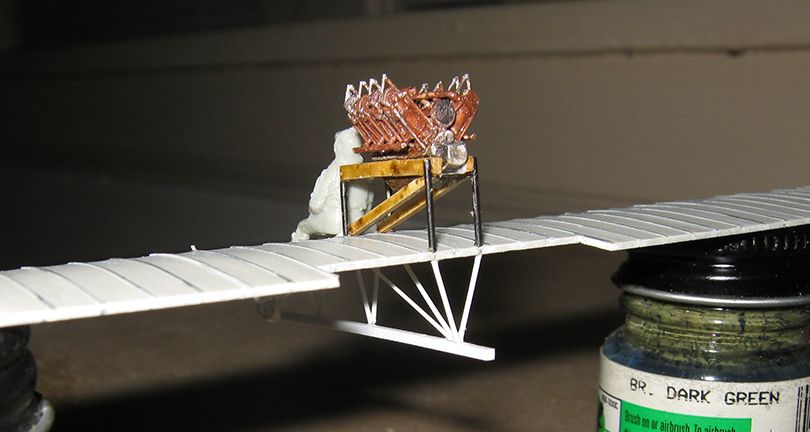
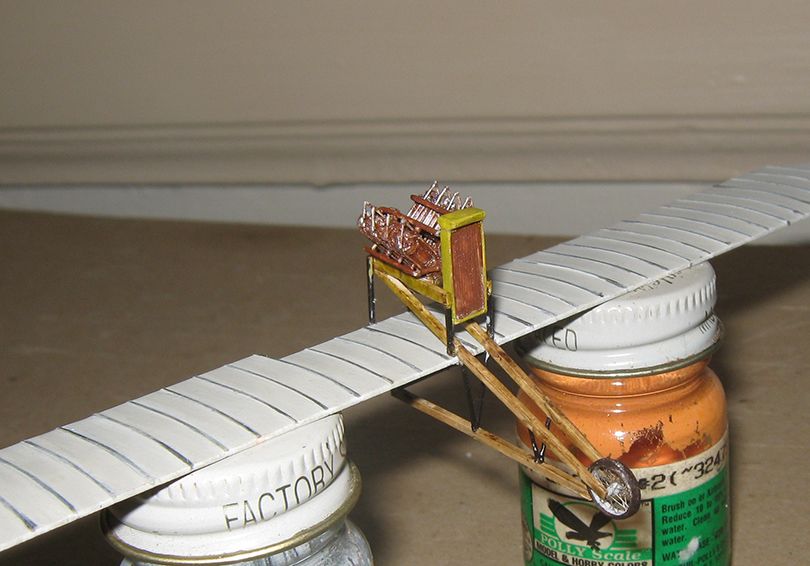
Here things are painted, and the radiator is resting approximately where it will go.


After this came the tricky bit, which I will confess I put off a while, till last night things just seemed right --- putting on the rear wheels.


The difficulty should be obvious, getting those slanting bits with the fork ends to be the right angle and length so the the entire item would sit level when the wheels were on. All this had tobe done by eye, as I have no trust-worthy drawing. The little rod leading down on the starboard 'fork' is a visual aid -- it is cut to the length I decided was right (7.5mm down from the rear win spar) for the center of the wheels, and the 'forks' set by eye to match it. A lot of fiddling ensued, among other things I had to take these off to attach the wheels within the forks, and put them back on without benefit of the sighting rod. The forks are simply bent rod, and had to be pressed by tweezers onto the wheel axle ends. Then the various bracings where attached.


The vertical forks were assembled on the model, one length of rod with a bent end for each side, and the little cross-piece put once the verticals were assembled.

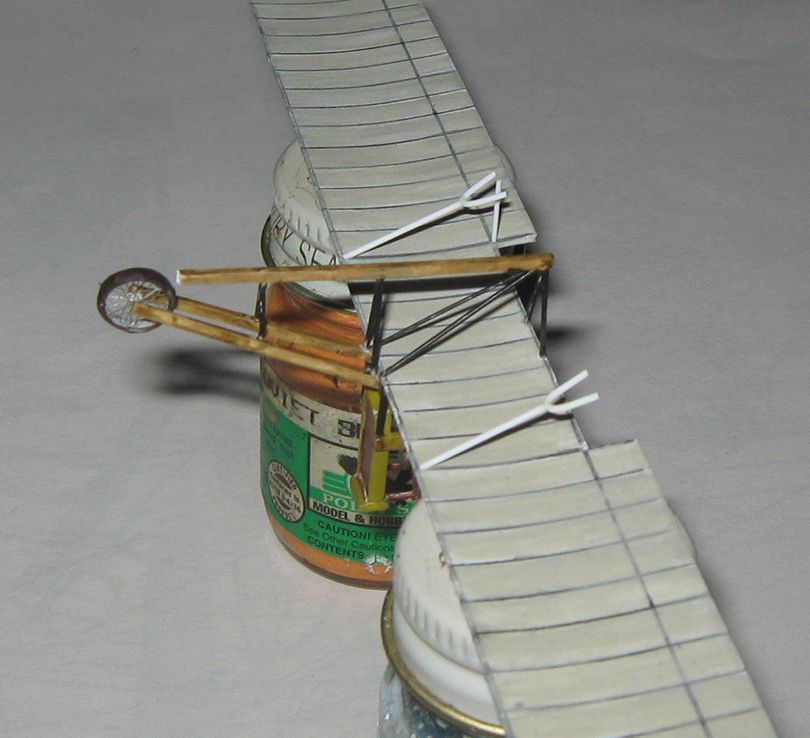
Here is a front view at this stage.


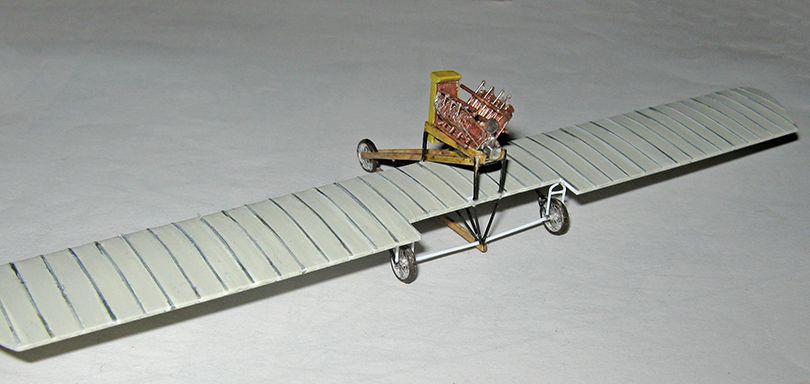
Next was putting in the final rear supports, and the 'fork' coming up to the nose wheel from the central element.


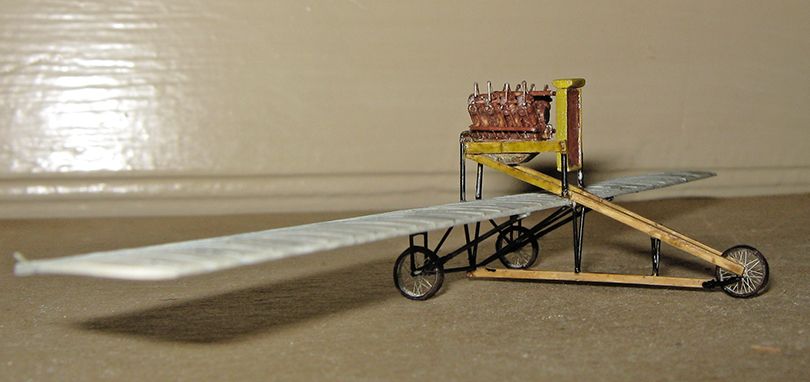
The sit strikes me as satisfactory. Now that it is up on its own three legs, the next step will be doing the engine plumbing, and the seating arrangements....
« Last Edit: September 23, 2017, 06:41:45 AM by Old Man »

Offline RLWP

  • Hero Member
  • *****
  • Posts: 1494
  • Bodger
Re: 'El Sonora' in 1/72
« Reply #48 on: September 23, 2017, 06:24:50 AM »
Progress! Hurray, hurrah!!

I wondered what was happening with this build

Richard
Hendon for flying - the fastest way to the ground!

Offline lone modeller

  • Hero Member
  • *****
  • Posts: 5300
Re: 'El Sonora' in 1/72
« Reply #49 on: September 24, 2017, 03:59:49 AM »
"The sit strikes me as satisfactory"!!!!

I thought that we Brits were supposed to be the masters of understatement! That is a mind blowing piece of scratch building. Wonderdful, just wonderful.

Stephen.

Offline boggie

  • Sr. Member
  • ****
  • Posts: 420
Re: 'El Sonora' in 1/72
« Reply #50 on: September 24, 2017, 09:31:08 AM »
Excellent undercarriage engineering Old Man!

Good to have another of your intriguing build to follow.  :) 

Offline Old Man

  • Hero Member
  • *****
  • Posts: 600
Re: 'El Sonora' in 1/72
« Reply #51 on: July 19, 2020, 08:33:02 AM »
This build is being continued in the 'corona virus lock-down' group build for stalled projects):

https://forum.ww1aircraftmodels.com/index.php?topic=11033.0

I will update this thread with major advances, but detail progress will be found there.

Offline Old Man

  • Hero Member
  • *****
  • Posts: 600
Re: 'El Sonora' in 1/72
« Reply #52 on: September 02, 2020, 05:16:56 AM »
All right, my friends.

The upper wing is on!


Everything is not quite all Sir Garnet,  but it is acceptable, and most adjustments will be minor.

I dropped the booger twice, just in my lap, mind, but that was enough to spring things, as miniscule amounts of glue are all that is employed. The second drop came as I was trying to adjust position on the last strut (of course), and that one was bad enough I popped the wing off, and made new struts, which went on without further incident. As you can see I did not rig as I went, the thing was much too wobbly with four, or even eight struts in place, to hold while doing things like incidence wires. With sixteen struts in, it can be handled with care. Painting struts, and rigging, are the next step, and this will include some minor strut adjustments, as things stiffen up with the pull of the elastic.

Once that is done something quite delicate will be needed. You may notice the radiator is off. This is because its position, relative to the forward tube supports of the motor's cradle, is too far back, and interferes with the proper forward 'cabane' structure (which two parallel tubes, with a cross-piece and triangle at the top. The lower tube supports will have to be removed and placed a bit further back, and the cradle extended a trifle where the radiator goes. I feel reasonably confident I can manage this without undue difficulty. A new, thinner radiator piece may be needed.

I may also have to redo the rear outermost interplane struts, as these support (and go through) the mid-gap ailerons. It is just behind the leading edge, mind, and a notch with white-glue filler might suffice, but a hole may prove necessary. I confess I had not considered this when assembling the wing cell, but better to have plowed ahead and got the thing into one piece when the fit was on me and my blood was up.

Hope to have more progress in a week or so, as I am back on the bench now.

Offline lone modeller

  • Hero Member
  • *****
  • Posts: 5300
Re: 'El Sonora' in 1/72
« Reply #53 on: September 03, 2020, 01:50:38 AM »
Some extremely delicate work going on there OM but with your skill and experience I am sure that you will get things right eventually. This must be one of your most complex and delicate scratch builds - only a master would even contemplate attempting this one.

Stephen.

Offline IanB

  • Hero Member
  • *****
  • Posts: 2435
Re: 'El Sonora' in 1/72
« Reply #54 on: September 03, 2020, 11:47:30 PM »
Wow, that is going to be a LOT of rigging.
Coming on nicely though, despite setbacks.

Ian

Offline Alexis

  • Hero Member
  • *****
  • Posts: 7947
  • Love the self
Re: 'El Sonora' in 1/72
« Reply #55 on: September 04, 2020, 11:55:32 PM »
That is going to be a lot of rigging , for it's scale it is a good size ! Coming along really nice so far and beautiful detail work on the engine !


Terri
Hurra ! , Ich Leben Noch
Body and life is a vessel we use to travel the planet . Femininity is the gift , The miracle comes from what we do with it .

Online RAGIII

  • Hero Member
  • *****
  • Posts: 18793
Re: 'El Sonora' in 1/72
« Reply #56 on: September 06, 2020, 04:29:20 AM »
The Model looks awesome with the upper wing mounted. The engine also looks Fantastic! Looking forward to the next update!
RAGIII
"A man has to know his limitations": Harry Callahan

"Don't slop it on" Lynda Geisler

Offline Old Man

  • Hero Member
  • *****
  • Posts: 600
Re: 'El Sonora' in 1/72
« Reply #57 on: September 09, 2020, 09:19:18 AM »
Some extremely delicate work going on there OM but with your skill and experience I am sure that you will get things right eventually. This must be one of your most complex and delicate scratch builds - only a master would even contemplate attempting this one.

Stephen.
Wow, that is going to be a LOT of rigging.
Coming on nicely though, despite setbacks.

Ian
That is going to be a lot of rigging , for it's scale it is a good size ! Coming along really nice so far and beautiful detail work on the engine !


Terri
The Model looks awesome with the upper wing mounted. The engine also looks Fantastic! Looking forward to the next update!
RAGIII

Thank you all for your kind words.

A strategic retreat has proved necessary here, but with reinforcement most of that has been retrieved. I expect much of the difficulty was that I am out of practice. My attempt at rigging this was a fiasco. I botched most attempts to attach the end of a line, and between cleaning up after failures and over handling of a quite fragile assembly, I was beginning to do harm. I stopped, and took off the wing.

I made stouter struts, and using the traces of previous attachments, put in some real locator holes, to receive a pointed end put on the struts. I took advantage of the monoplane interlude to re-position the front supports for the engine bearers

I have put in the first eight struts. The outer ones on the port wing have proved a tad longer than the rest, but this has been fixed subsequent to the pictures. Doing so benefited greatly from the greater solidity. The rigging towards the center is the most tricky, because the places you naturally want to hold to keep things steady you can't, because the fragile undercarriage is in the way. While I have not completely got the knack back, things did go easier once the inner incidence wires were in place.

At any rate, here it is as of a few hours ago...


Once the struts in place are fully rigged I will add the next bay, and then tend to the tubular bracings in the center. I think I should leave off the outermost pairs till I have the mid-gap ailerons sorted out.

Offline Alexis

  • Hero Member
  • *****
  • Posts: 7947
  • Love the self
Re: 'El Sonora' in 1/72
« Reply #58 on: September 09, 2020, 10:20:10 AM »
I guess after this build you will be known as Lord of the Struts !

Are you using steel wire for the rigging ?


Terri
Hurra ! , Ich Leben Noch
Body and life is a vessel we use to travel the planet . Femininity is the gift , The miracle comes from what we do with it .

Offline Old Man

  • Hero Member
  • *****
  • Posts: 600
Re: 'El Sonora' in 1/72
« Reply #59 on: September 10, 2020, 12:13:31 AM »
I guess after this build you will be known as Lord of the Struts !

Are you using steel wire for the rigging ?


Terri

One might hope they will be more obedient then, with such a title.....

They look a little larger than they really are in the pictures because they're still white. I do expect I can thin them down a bit once everything is in place and rigged. The plastic strip I used scales out to something a bit over a 2 x 4, which really might not be much overscale. But is about half again bigger than the first set.

I am using EZ-Line, as I have been for years. I put a teensie bit of CA gel where the end should go, wet the line with accelerator, hold its end to the glue for a slow ten count. I was used to a failure rate of about one in fifteen, on this I was getting one success for three or four tries. Since the technique and materials are the same, the difference must be me, with some reference to the delicacy of the assembly, which was difficult to hold still.

If I had stiff straight steel wire thin enough (0.005" or less) it would be an excellent option. cut to length it could be secured by white glue --- sure and invisible once dried. That wouldn't lend any strength, though, which the elastic does in some degree. Would have made this a lot easier, though --- a lot of the damage I was doing came when removing glue build-up from failed attempts.